Jenkins Pipelines
Understand the NodeJS Application
Run and Test NodeJS App on Local Machine
In this lesson, we will manually run a Node.js application on your local or virtual machine. We will explore the repository structure, review application components, execute unit tests, generate code coverage reports, and launch the application. Later, we will discuss automating these tasks using Jenkins AI.
Repository Overview
We are working with a Node.js application named Solar System. Hosted on GitHub, the repository includes the HTML frontend, core application logic (app.js and app.controller.js), and supporting files. The README provides detailed instructions for handling dependencies, running tests, measuring code coverage, and launching the app.
Before getting started, ensure you have the correct versions of Node.js and npm:
$ node --version
v8.11.3
$ npm --version
6.1.0
Install dependencies, run tests, and generate code coverage with these commands:
$ npm install
$ npm test
$ npm run coverage
Cloning the Repository
Clone the repository to your virtual machine by running the following commands in your terminal:
root@jenkins-controller-1 in ~
> git clone https://github.com/sidd-harth/solar-system-gitea.git
Cloning into 'solar-system-gitea'...
remote: Enumerating objects: 83, done.
remote: Counting objects: 100% (83/83), done.
remote: Compressing objects: 100% (69/69), done.
remote: Total 83 (delta 23), reused 67 (delta 14), pack-reused 0 (from 0)
Receiving objects: 100% (83/83), 1.71 MiB | 15.63 MiB/s, done.
Resolving deltas: 100% (23/23), done.

root@jenkins-controller-1 in ~
> cd solar-system-gitea/
Inside the directory, you'll find a package.json file that defines project metadata, dependencies (like Express, Mongoose, Mocha JUnit Reporter, and NYC for code coverage), and scripts to start the app, test, and generate coverage reports. Here is an excerpt:
{
  "name": "Solar_System",
  "version": "6.7.6",
  "author": "Siddhart Barahalikar <[email protected]>",
  "homepage": "https://www.linkedin.com/in/barahalikar-siddhart/",
  "license": "MIT",
  "scripts": {
    "start": "node app.js",
    "test": "mocha app-test.js --timeout 10000 --reporter mocha-junit-reporter --exit",
    "coverage": "nyc --reporter cobertura --reporter lcov --reporter text --reporter json-summary mocha app-test"
  },
  "nyc": {
    "check-coverage": true,
    "lines": 90
  },
  "dependencies": {
    "cors": "2.8.5",
    "express": "4.18.2",
    "mocha-junit-reporter": "2.21.1",
    "mongoose": "5.13.20",
    "nyc": "15.1.0",
    "serverless-http": "3.2.0"
  },
  "devDependencies": {
    "chai": "*",
    "chai-http": "*",
    "mocha": "*"
  }
}
Note
The application uses Mongoose for MongoDB connectivity and the serverless-http module, which enables future deployment to AWS Lambda.
Application Code Overview
app.js
The app.js file initializes the application by configuring middleware, including bodyParser for JSON parsing, static file serving, and CORS. It also establishes a connection to MongoDB using environment variables (MONGO_URI, MONGO_USERNAME, and MONGO_PASSWORD). You can provide these variables via Jenkins credentials or, for demonstration purposes, hard-code them temporarily.
Below is an excerpt from app.js:
const os = require('os');
const bodyParser = require('body-parser');
const mongoose = require('mongoose');
const express = require('express');
const cors = require('cors');
const path = require('path');
const app = express();

app.use(bodyParser.json());
app.use(express.static(path.join(__dirname, '/')));
app.use(cors());

mongoose.connect(process.env.MONGO_URI, {
    user: process.env.MONGO_USERNAME,
    pass: process.env.MONGO_PASSWORD,
    useNewUrlParser: true,
    useUnifiedTopology: true
}, function(err) {
    if (err) {
        console.log("error!! " + err);
    } else {
        // console.log("MongoDB Connection Successful");
    }
});

var Schema = mongoose.Schema;

var dataSchema = new Schema({
    name: String,
    id: Number,
    description: String,
    image: String,
    velocity: String,
    distance: String
});

var planetModel = mongoose.model('planets', dataSchema);
The business logic for database operations resides in app.controller.js, which processes and filters data based on specific requirements.
Client-Side JavaScript (client.js)
The client-side JavaScript fetches data on page load and processes user interactions. An excerpt from client.js is shown below:
console.log('We are inside client.js');

/* on page load */
window.onload = function() {
    const planet_id = document.getElementById("planetID").value;
    console.log("onLoad - Request Planet ID - " + planet_id);

    fetch("/os", {
        method: 'GET'
    })
    .then(function(res) {
        if (res.ok) {
            return res.json();
        }
        throw new Error('Request failed');
    })
    .catch(function(error) {
        console.log(error);
    })
    .then(function(data) {
        document.getElementById('hostname').innerHTML = `Pod - ${data.os}`;
    });
};

const btn = document.getElementById('submit');
if (btn) {
    btn.addEventListener('click', func);
}
Unit Tests
The file app-test.js contains unit tests for various API endpoints. The "Planets API Suite" tests, for instance, verify that the API returns correct details for specific planets via POST requests.
let mongoose = require("mongoose");
let server = require("../app");
let chai = require("chai");
let chaiHttp = require("chai-http");

// Assertion
chai.should();
chai.use(chaiHttp);

describe('Planets API Suite', () => {
    describe('Fetching Planet Details', () => {
        it('it should fetch a planet named Mercury', (done) => {
            let payload = {
                id: 1
            };
            chai.request(server)
                .post('/planet')
                .send(payload)
                .end((err, res) => {
                    res.should.have.status(200);
                    res.body.should.have.property('id').eql(1);
                    res.body.should.have.property('name').eql('Mercury');
                    done();
                });
        });

        it('it should fetch a planet named Venus', (done) => {
            // Test implementation
            done();
        });
    });
});
Containerizing with Docker
The project includes a Dockerfile to containerize the application. The Dockerfile installs dependencies, copies the source code, sets environment variables with placeholder values, exposes port 3000, and starts the application.
FROM node:18-alpine3.17

WORKDIR /usr/app

COPY package*.json /usr/app/

RUN npm install

COPY . .

ENV MONGO_URI=uriPlaceholder
ENV MONGO_USERNAME=usernamePlaceholder
ENV MONGO_PASSWORD=passwordPlaceholder

EXPOSE 3000

CMD [ "npm", "start" ]
In addition, an OpenAPI specification file is provided for dynamic application security testing:
{
  "openapi": "3.0.0",
  "info": {
    "title": "Solar System API",
    "version": "1.0"
  },
  "paths": {
    "/": {
      "get": {
        "responses": {
          "200": {
            "description": "",
            "content": {
              "text/plain": {
                "schema": {
                  "example": "Example",
                  "type": "string"
                }
              }
            }
          }
        }
      }
    },
    "/live": {
      "get": {
        "responses": {
          "200": {
            "description": ""
          }
        }
      }
    }
  }
}
Running the Application
Installing Dependencies and Running Unit Tests
After cloning the repository, navigate to the project directory and install the dependencies:
root@jenkins-controller-1 in solar-system-gitea on main via v20.16.0
> npm i
This creates a node_modules folder containing all required packages. Next, execute the unit tests:
root@jenkins-controller-1 in solar-system-gitea on main via v20.16.0
> npm test
Warning
If the MongoDB connection parameters are not set, you might encounter connection errors. For demonstration, you can temporarily hard-code the MongoDB URI, username, and password in app.js as shown below.
mongoose.connect('mongodb+srv://supercluster.d83jj.mongodb.net/superData', {
  user: 'superuser',
  pass: 'SuperPassword',
  useNewUrlParser: true,
  useUnifiedTopology: true
}, function(err) {
  if (err)
    console.log("error!! " + err);
  else
    console.log("MongoDB Connection Successful");
});
Running npm test should now execute the tests and generate a test-results.xml file with JUnit-style output.
Code Coverage
Use the following command to generate code coverage reports:
> npm run coverage
The NYC tool will run tests and check that the code coverage meets the 90% threshold specified in package.json. In this demo, the coverage may be approximately 79%, intentionally demonstrating how Jenkins can be configured to ignore such errors and proceed with subsequent pipeline stages. Coverage reports (LCOV, JSON summaries, and text output) are stored in new directories.
Example output from the coverage report:
File          | % Stmts | % Branch | % Funcs | % Lines | Uncovered Line #s
app.js       | 79.54   | 33.33    | 70      | 79.60   | 23,49-50,58,62-67
Starting the Application
To launch the application after testing, simply run:
> npm start
This command starts the server on port 3000. You will see a console message similar to:
Server successfully running on port - 3000
(node:83049) [DEP0170] DeprecationWarning: The URL mongodb+srv://... is invalid. Future versions of Node.js will throw an error.
Since the application is running on a virtual machine, access it using the machine's public IP address on port 3000.
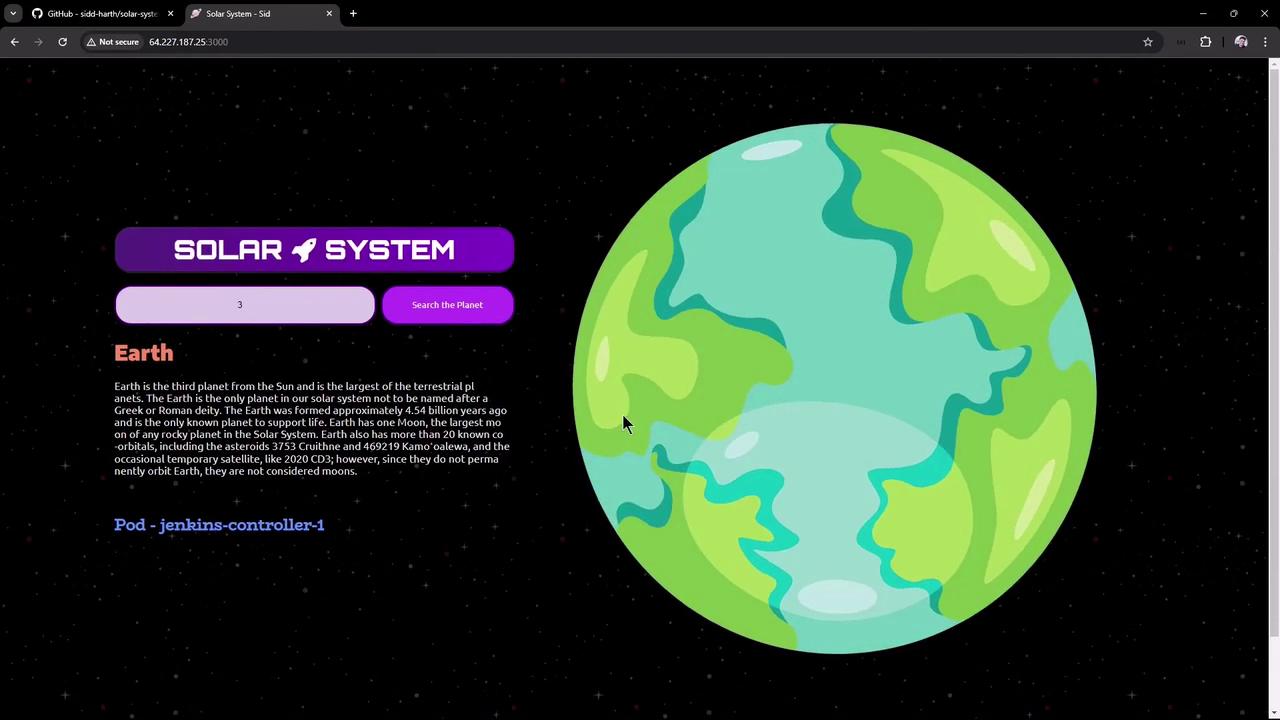
Exploring the Application
The application’s front-end is available through the index.html page, which showcases details for various planets and displays the hostname of the current machine (or pod when deployed on Kubernetes).
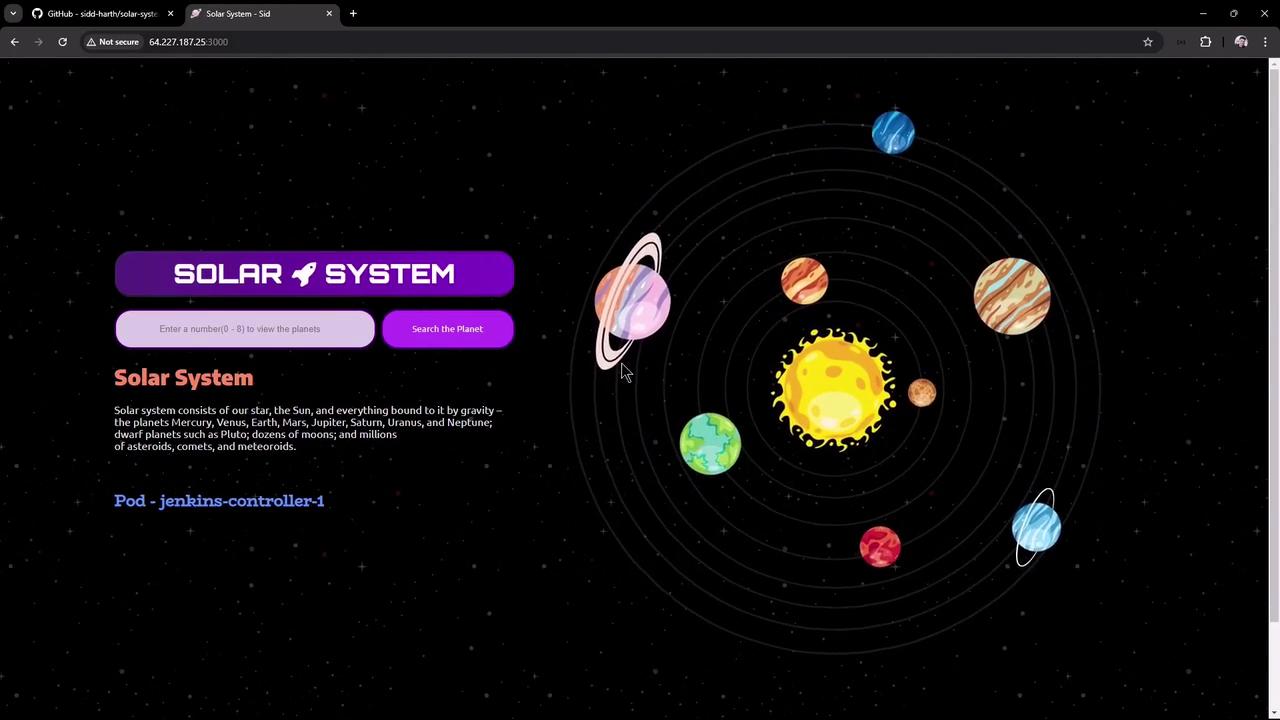
For example, you can enter a planet ID or name to view detailed information, including images and descriptions.
Additional Endpoints
The Solar System application also provides several auxiliary endpoints to evaluate its health:
| Endpoint | Description | Example Response |
|---|---|---|
| GET /os | Returns the hostname of the machine (or pod) | { "os": "jenkins-controller-1" } |
| GET /live | Returns a live status of the application | { "status": "live" } |
| GET /ready | Returns the readiness status of the application | { "status": "ready" } |
These endpoints are particularly useful for integration with orchestration platforms such as Kubernetes.
Next Steps
Future lessons will focus on automating the following processes using Jenkins pipelines:
- Installing dependencies
- Running unit tests
- Checking code coverage
- Starting the application
- Deploying to various environments
Thank you for following along in this lesson. Happy coding!
Watch Video
Watch video content