This guide explains fixing vulnerabilities and publishing HTML reports in Jenkins to maintain a secure CI/CD pipeline.
In this guide, we address how to fix detected vulnerabilities and publish HTML reports within Jenkins. Both the npm dependency audit and the OWASP Dependency-Check stages may fail if critical vulnerabilities are found. Developers should update the affected dependencies to secure versions, ensuring your CI/CD pipeline remains stable and secure.
When running the audit command, you might see output that lists critical, high, and low vulnerabilities. For example:
npm audit --audit-level=critical@babel/traverse <7.23.2>Severity: criticalBabel vulnerable to arbitrary code executionfix available via "npm audit fix"node_modules/@babel/traversebody-parser <1.20.3>Severity: highPrototype pollution vulnerable to denial-of-service via "npm audit audit"node_modules/body-parserexpress <4.19.1>Severity: lowDenial of servicenode_modules/express
Test the results locally and commit the updated changes to your Git repository to re-trigger the CI/CD pipeline.In this example, we are working on a feature branch (feature/enabling-cicd) addressing the vulnerabilities. Start by running the audit with the critical level:
npm audit --audit-level=critical
The audit output might indicate several vulnerabilities. For instance, you may see a report similar to:
node_modules/path-to-regexpsend <0.19.0>Severity: moderatesend vulnerable to template injection that can lead to XSS - https://github.com/advisories/GHSA-m6fv-jmcg-4jfgfix available via 'npm audit fix'node_modules/sendserve-static <1.16.0>Depends on vulnerable versions of sendnode_modules/serve-static8 vulnerabilities (2 moderate, 5 high, 1 critical)To address all issues, run:npm audit fix
A quick check using echo $? will return a non-zero code (1) after the audit if a critical vulnerability exists.To fix the issues, you have two options:
Run npm audit fix to automatically correct all vulnerabilities.
Update dependencies manually. For example, to fix the critical vulnerability in @babel/traverse, install version 7.23.2 or greater:
npm install @babel/traverse@7.23.2
After installation, the audit should run automatically and remove the critical issue. The updated audit output should then only list remaining moderate and high vulnerabilities. Re-run the audit to verify:
npm audit --audit-level=criticalecho $?
At this point, the changes are reflected in the updated package.json and package-lock.json files. For example, your package.json may now include:
After committing the fixes, a new build is triggered in Jenkins. Next, configure your Jenkins pipeline to publish both HTML and JUnit reports, ensuring that developers have easy access to detailed vulnerability information from the Jenkins UI.
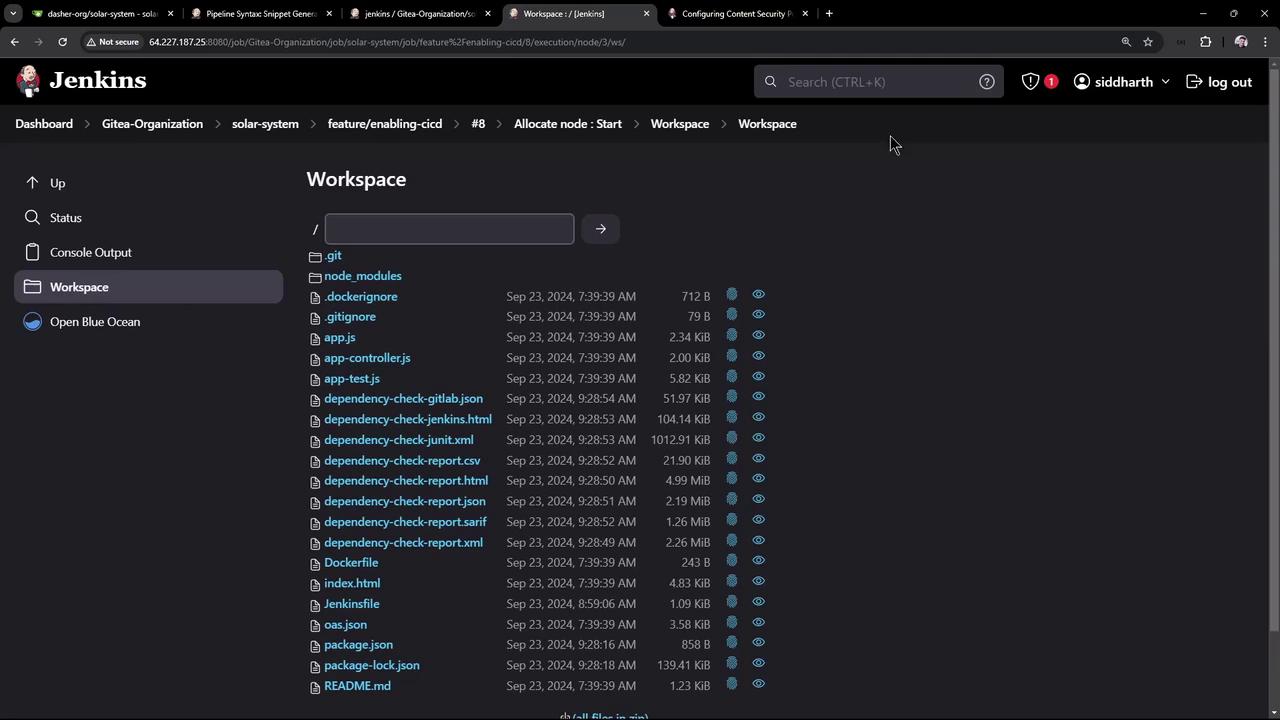
In your project workspace, locate the HTML report file (e.g., dependency-check-jenkins.html). For example, the following screenshot shows where the file is located:
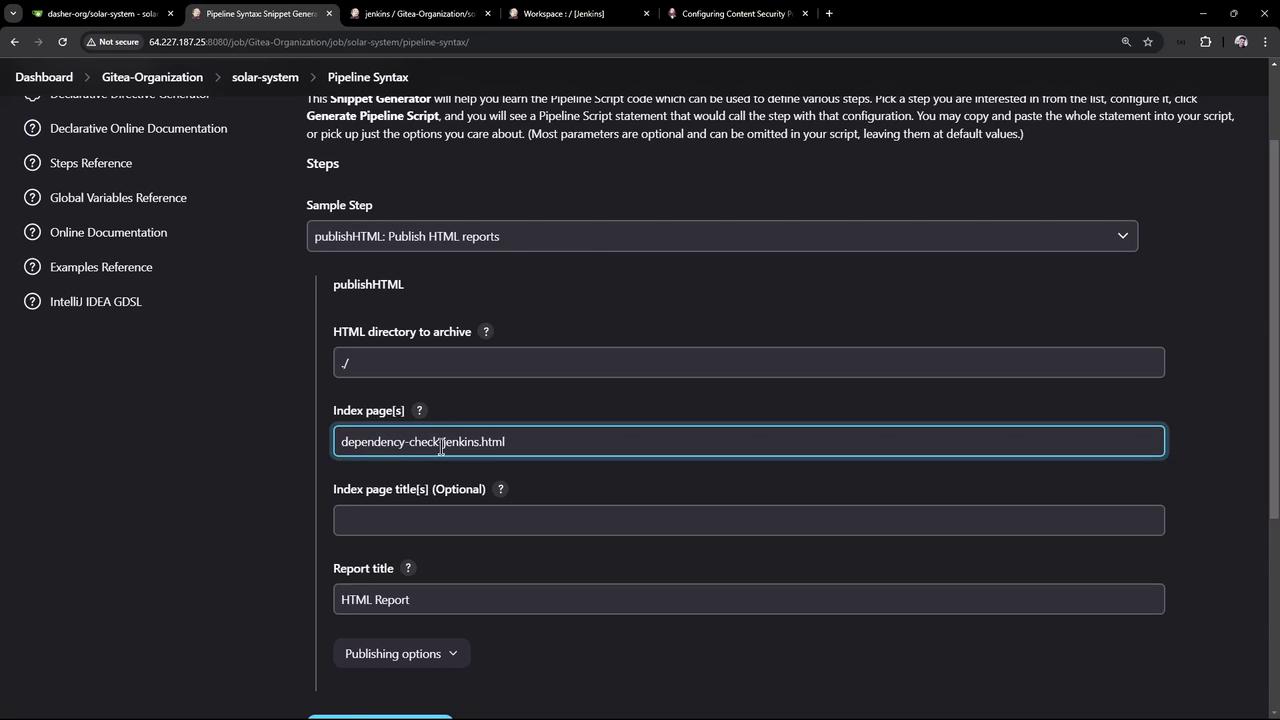
Using the Pipeline Syntax Generator, create a publish HTML step. The configuration parameters include:
Directory containing the report (e.g., the root directory ./).
The report file name (dependency-check-jenkins.html).
An optional report title if multiple reports exist.
Include the following snippet in your Jenkinsfile:
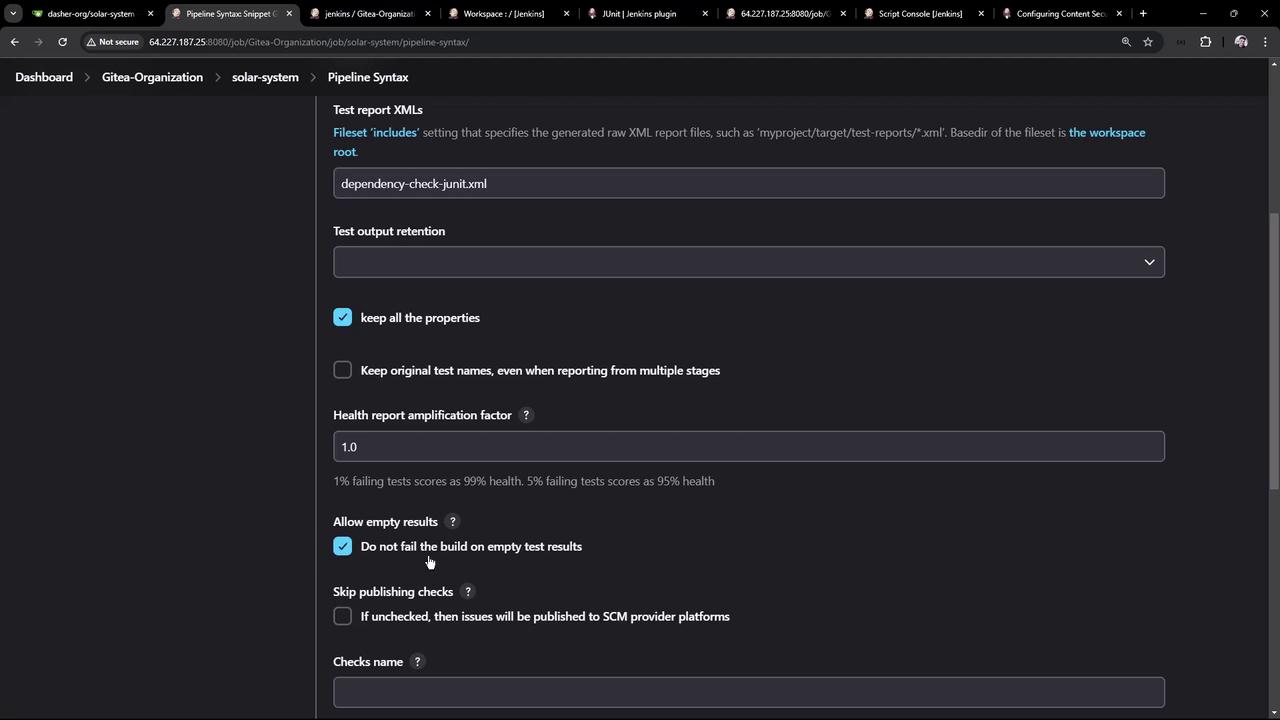
Additionally, publish JUnit XML reports to display test results in Jenkins. For example, if you generate a file like dependency-check-junit.xml, configure the JUnit publisher step as follows:
Below is a consolidated snippet from the Jenkinsfile that includes the npm audit step, OWASP Dependency-Check, and both report publishing configurations:
When the build finishes, Jenkins archives the HTML report. You can verify the archiving process by reviewing the console logs:
[htmPublisher] Archiving HTML reports...[htmPublisher] Archiving at BUILD level /var/lib/jenkins/workspace/your-project to /var/lib/jenkins/jobs/.../htmlReports/Dependency_20Check_20HTML_20Report[htmPublisher] Copying recursive using current thread
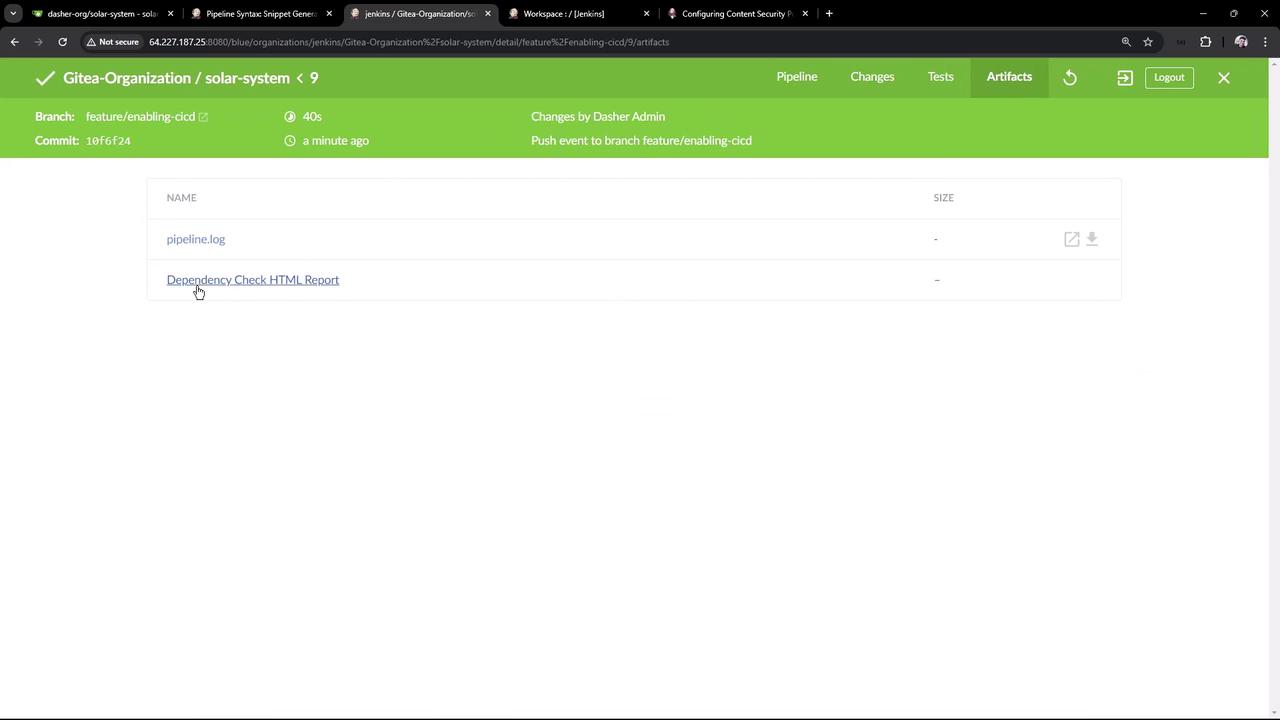
The artifact view will include the HTML dependency check report:
By default, the published HTML report may lack CSS styling due to strict Content Security Policies (CSP) in Jenkins. To ensure the report is correctly styled, update the system property accordingly.
To view the report with full styling, you can relax the CSP by updating the system property, for example:
These commands can be executed from the Jenkins script console on the desired node. Adjusting the CSP settings will affect newly generated builds.Additional useful commands in the script console include:
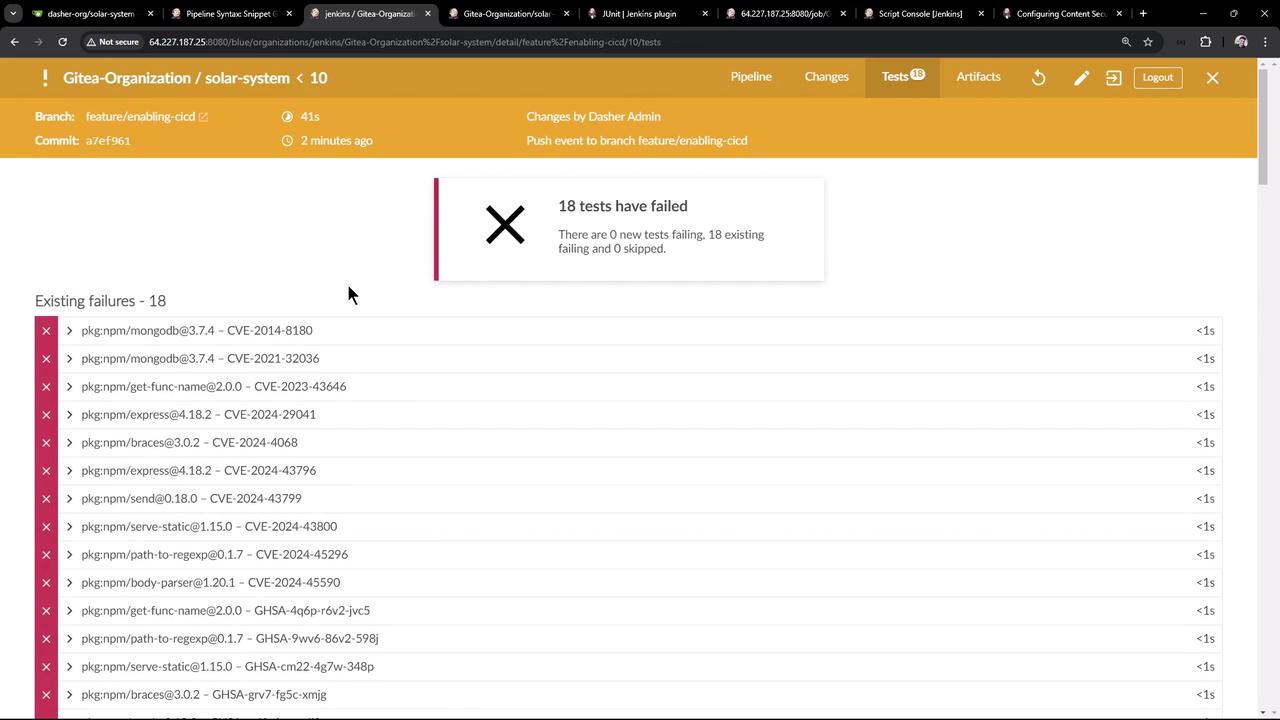
After the build completes, view the JUnit test results by navigating to the Test Results tab in Jenkins. The reports will present detailed information on vulnerabilities such as severity, CVSS scores, impacts, available patches, and workarounds. For example, a snapshot of the test results might display:
The screenshot below shows a Jenkins test results page listing several failures with details related to npm packages and CVE identifiers:
Clicking on an individual test entry provides more detailed information, including CVSS scores, patch recommendations, and links to commit patches (e.g., for Express.js redirection issues).
Run the npm audit command and update vulnerable dependencies.
Commit changes to trigger a new CI/CD build.
Configure your Jenkins pipeline to publish both HTML and JUnit reports.
Update the Content Security Policy (CSP) in Jenkins to correctly display the HTML reports.
Following this workflow ensures that vulnerabilities are addressed promptly and that comprehensive reporting is available directly within the Jenkins UI, enhancing the overall security posture and efficiency of your development pipeline.