Jenkins
Jenkins Plugins and Integrations
Searching through plugins
In this guide, learn how to search for and manage plugins on your Jenkins instance and how to integrate them into your pipelines.
Step 1: Accessing Plugin Management
Begin by navigating to your Jenkins dashboard. Once there, click on Manage Jenkins. This will display various administrative options including Manage Plugins. The plugin manager allows you to add, remove, disable, or enable plugins that extend Jenkins' functionality.
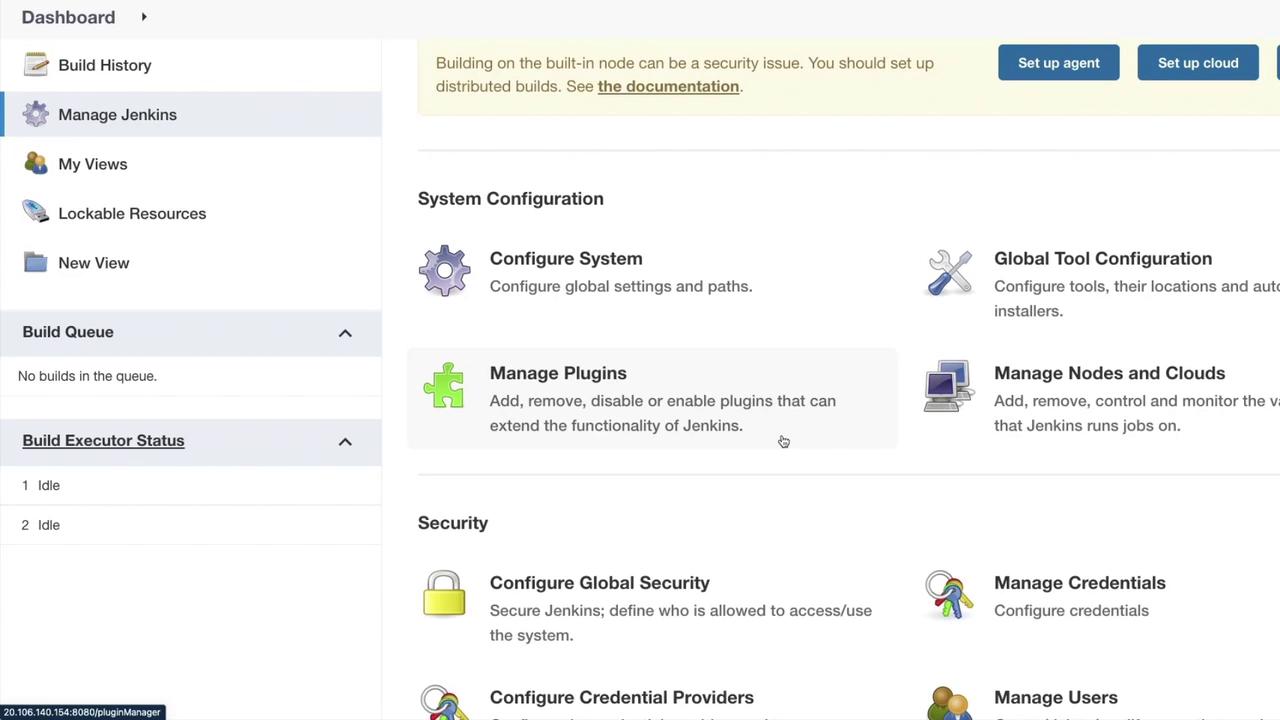
Step 2: Exploring Plugin Tabs
Click on Manage Plugins to view the following tabs:
- Updates: Lists plugins with available updates.
- Available: Displays plugins available for installation.
- Installed: Shows plugins already installed.
- Advanced: Provides settings such as HTTP proxy configuration and custom plugin uploads.
For instance, to integrate the Azure CLI with Jenkins, you might install the Azure CLI Plugin. Navigate to the Available tab and search for Azure Credentials. The search results indicate that the plugin was last updated two months and 17 days ago and is used for managing Azure credentials via the Jenkins Credentials API.
Tip
When you click on a plugin, detailed usage instructions are provided to help integrate it within your Jenkinsfile.
Step 3: Using the Azure Credentials Plugin in Your Jenkinsfile
The following example demonstrates how to securely use credentials within your pipeline using the Azure Credentials plugin.
echo "My client id is \$AZURE_CLIENT_ID"
echo "My client secret is \$AZURE_CLIENT_SECRET"
echo "My tenant id is \$AZURE_TENANT_ID"
echo "My subscription id is \$AZURE_SUBSCRIPTION_ID"
withCredentials({azureServicePrincipal('credentials_id')}) {
  sh 'az login --service-principal -u \$AZURE_CLIENT_ID -p \$AZURE_CLIENT_SECRET -t \$AZURE_TENANT_ID'
}
withCredentials({azureServicePrincipal(credentialsId: 'credentials_id',
    subscriptionIdVariable: 'SUBS_ID',
    clientIdVariable: 'CLIENT_ID',
    clientSecretVariable: 'CLIENT_SECRET',
    tenantIdVariable: 'TENANT_ID')}) {
  sh 'az login --service-principal -u \$CLIENT_ID -p \$CLIENT_SECRET -t \$TENANT_ID'
}
The snippet illustrates the secure incorporation of Azure credentials using environment variables. Although it may look similar to YAML, remember that it is specifically implemented inside your Jenkinsfile.
Another simplified version using the Azure service principal is:
withCredentials([azureServicePrincipal('credentials_id')]) {
    sh 'az login --service-principal -u $AZURE_CLIENT_ID -p $AZURE_CLIENT_SECRET -t $AZURE_TENANT_ID'
}
Step 4: Integrating Azure Credentials in Jenkins Plugins
Besides pipelines, you can also integrate these credentials directly into Jenkins plugins. For example, include the following Maven dependency in your plugin project:
<dependencies>
    <dependency>
        <groupId>org.jenkins-ci.plugins</groupId>
        <artifactId>azure-credentials</artifactId>
        <version>${azure-credentials.version}</version>
    </dependency>
</dependencies>
To configure an Azure Credentials field in your plugin, use this XML snippet:
<f:entry title="${%Azure Credential}" field="credentialsId">
    <c:select expressionAllowed="false"/>
</f:entry>
If you need to populate a dropdown list in your plugin UI, the following Groovy method demonstrates how:
public ListBoxModel doFillAzureCredentialsIdItems(@AncestorInPath Item owner) {
    StandardListBoxModel result = new StandardListBoxModel();
    result.add("---- Select Azure Credentials ----", "");

    if (owner == null) {
        return result;
    } else {
        if (!owner.hasPermission(Jenkins.ADMINISTER)) {
            return result;
        }
    }
    // Additional logic to populate the dropdown would go here.
    return result;
}
Security Warning
Always ensure that sensitive credentials are handled securely and are not exposed in plain text.
Step 5: Finalizing the Plugin Installation
After configuring your plugins, install them by selecting the desired plugin and choosing install without restart if prompted. Verify the installation by returning to Manage Jenkins > Manage Plugins to ensure that the plugin is now available.
Step 6: Using Additional Credentials in Jenkins Pipelines
Below is an example demonstrating how to use Azure credentials along with additional credentials (e.g., for Azure Key Vault) in a Jenkins pipeline:
withCredentials([usernamePassword(credentialsId: 'keyvault_credentials_id', usernameVariable: 'username', passwordVariable: 'password')]) {
    // Your code goes here
}
Conclusion
You have now learned how to search through Jenkins plugins, manage them through different tabs, configure Azure credentials in your pipelines, and integrate these credentials directly into your Jenkins plugins. This comprehensive guide equips you with the necessary skills to extend Jenkins functionality securely and efficiently.
For more information on Jenkins and its plugins, check out the following resources:
Happy automating with Jenkins, and see you in the next article!
Watch Video
Watch video content