Kubernetes and Cloud Native Security Associate (KCSA)

Kubernetes Security Fundamentals

Isolation and Segmentation Namespace

Efficient cluster management and security often start with isolating workloads into distinct environments. In Kubernetes, namespaces provide this isolation, much like separate houses in a neighborhood. In this guide, you’ll learn how namespaces work, how to interact with them using kubectl, and how to enforce resource boundaries.

An Analogy: Two Marks, Two Houses

Imagine there are two boys both named Mark. To avoid confusion, one goes by Mark Smith and the other by Mark Williams. They each live in separate houses: the Smiths’ house and the Williams’ house. Inside a house, family members simply say “Mark.” But when talking to someone outside, they use the full name.

The image shows two house-shaped outlines, one with a green family icon labeled "Mark Smith" and the other with a red single person icon labeled "Mark Williams."

When someone from outside needs to address a Mark, they must specify which house:

The image shows two houses labeled "Mark Smith" and "Mark Williams," each containing family figures. A person in the center is associated with speech bubbles indicating both names.

This is exactly how Kubernetes namespaces operate: each namespace holds its own pods, services, and rules, preventing naming collisions and enabling fine-grained policy application.

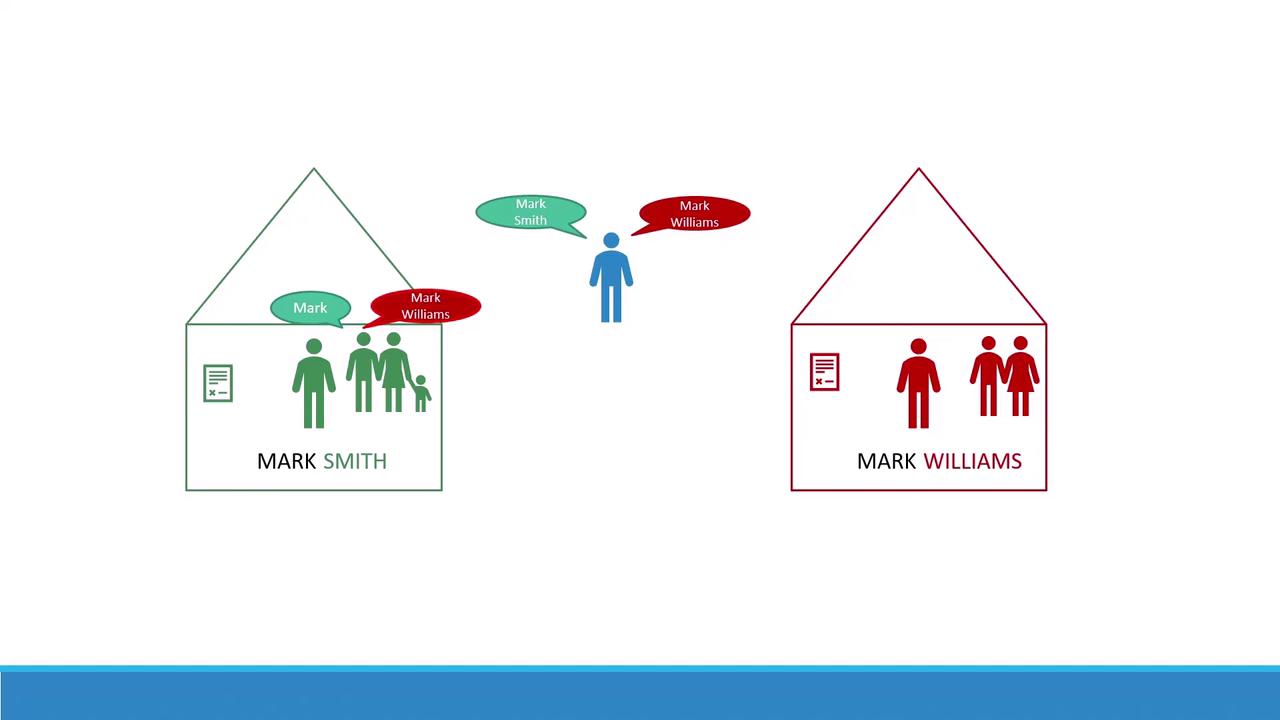
What Is a Kubernetes Namespace?

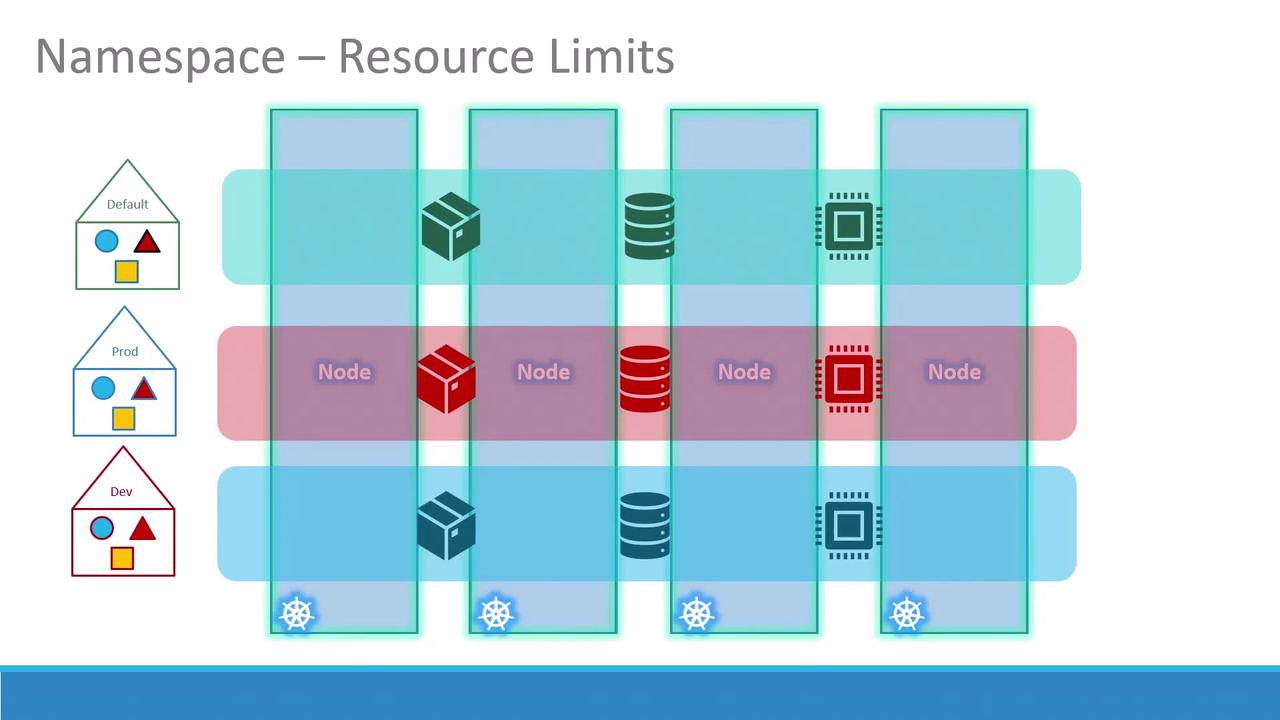
A namespace in Kubernetes is a virtual cluster backed by the same physical cluster. Namespaces help you:

  • Isolate workloads and resources
  • Organize environments (e.g., dev, staging, prod)
  • Enforce resource quotas and access controls

Default Namespaces

Kubernetes creates several namespaces out of the box:

NamespacePurpose
defaultStandard namespace for user workloads
kube-systemCore components and add-ons (DNS, network plugins, controllers)
kube-publicRead-only namespace for publicly accessible resources

Note

If you’re experimenting or running a small cluster, you can operate entirely within the default namespace. In production, separate namespaces (dev, prod, etc.) improve security and resource governance.

The image illustrates the concept of namespace isolation with three house-shaped diagrams labeled "kube-system," "Default," and "kube-public," each containing a blue circle, red triangle, and yellow square.

The image illustrates a diagram of Kubernetes namespaces and resource limits, showing different nodes and resources within a cluster. It includes labeled sections for Default, Prod, and Dev environments.

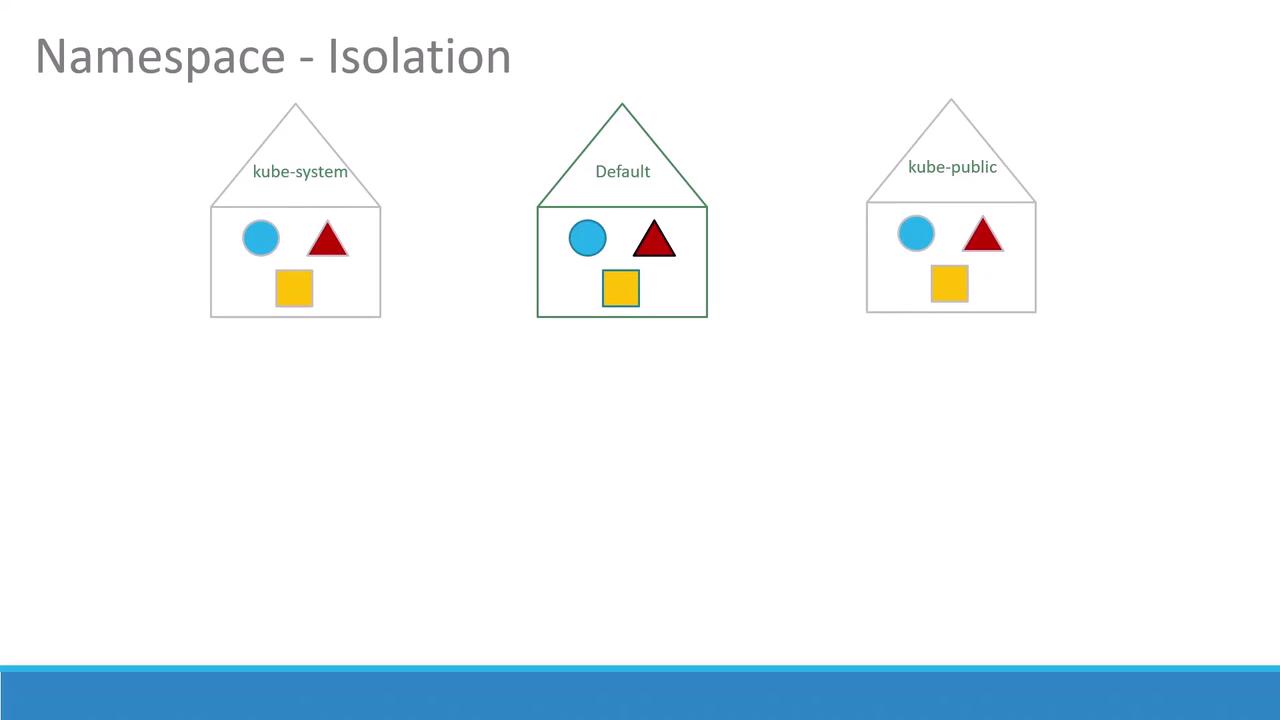
Service Discovery and DNS

Within the same namespace, services can discover each other simply by name:

# Connect to a local service in the default namespace
mysql.connect("db-service")

To reach a service in another namespace—say dev—use the fully qualified domain name:

mysql.connect("db-service.dev.svc.cluster.local")

Kubernetes automatically provisions DNS entries in the format:

<service>.<namespace>.svc.cluster.local
  • svc is the services subdomain
  • cluster.local is the default cluster domain

Tip

You can customize the cluster domain via the --cluster-domain flag in kubelet and kube-apiserver configurations.

Working with Namespaces in kubectl

1. Listing Resources

# Pods in the current namespace (default)
kubectl get pods

# Pods in kube-system
kubectl get pods --namespace=kube-system

# All pods across all namespaces
kubectl get pods --all-namespaces

2. Creating a Pod in a Specific Namespace

Given pod-definition.yml:

apiVersion: v1
kind: Pod
metadata:
  name: myapp-pod
  labels:
    app: myapp
    tier: frontend
spec:
  containers:
    - name: nginx
      image: nginx:latest

Create in the default namespace:

kubectl create -f pod-definition.yml

Or in dev:

kubectl create -f pod-definition.yml --namespace=dev

To bake the namespace into your manifest:

metadata:
  name: myapp-pod
  namespace: dev

3. Defining a Namespace

Option A: A YAML manifest (namespace-dev.yml):

apiVersion: v1
kind: Namespace
metadata:
  name: dev
kubectl apply -f namespace-dev.yml

Option B: One-liner:

kubectl create namespace dev

4. Switching Context Namespace

Rather than appending --namespace=, set a default in your current context:

kubectl config set-context --current --namespace=dev

Warning

Switching contexts affects all future kubectl commands in your shell. Confirm with kubectl config view --minify.

Resource Quotas

Limit CPU, memory, and object counts to prevent a single namespace from monopolizing cluster resources:

apiVersion: v1
kind: ResourceQuota
metadata:
  name: compute-quota
  namespace: dev
spec:
  hard:
    pods: "10"
    requests.cpu: "4"
    requests.memory: 5Gi
    limits.cpu: "10"
    limits.memory: 10Gi

Apply with:

kubectl apply -f compute-quota.yaml

References

Practice creating, configuring, and managing namespaces to master multi-tenant Kubernetes clusters!

Watch Video

Watch video content

Practice Lab

Practice lab

Previous
Secrets