Linode : Kubernetes Engine

Working with Linode

Scaling clusters

In this lesson, we’ll cover how to manually scale your Kubernetes cluster on Linode Kubernetes Engine (LKE) before automating with tools like Terraform. Understanding these steps is essential for one-off adjustments, troubleshooting, and verifying your infrastructure changes.

The image shows a Kubernetes cluster management interface with details about the cluster's configuration, including CPU, RAM, and storage, as well as the status and IP addresses of node pools.

Under the Node Pools section, you have three main actions:

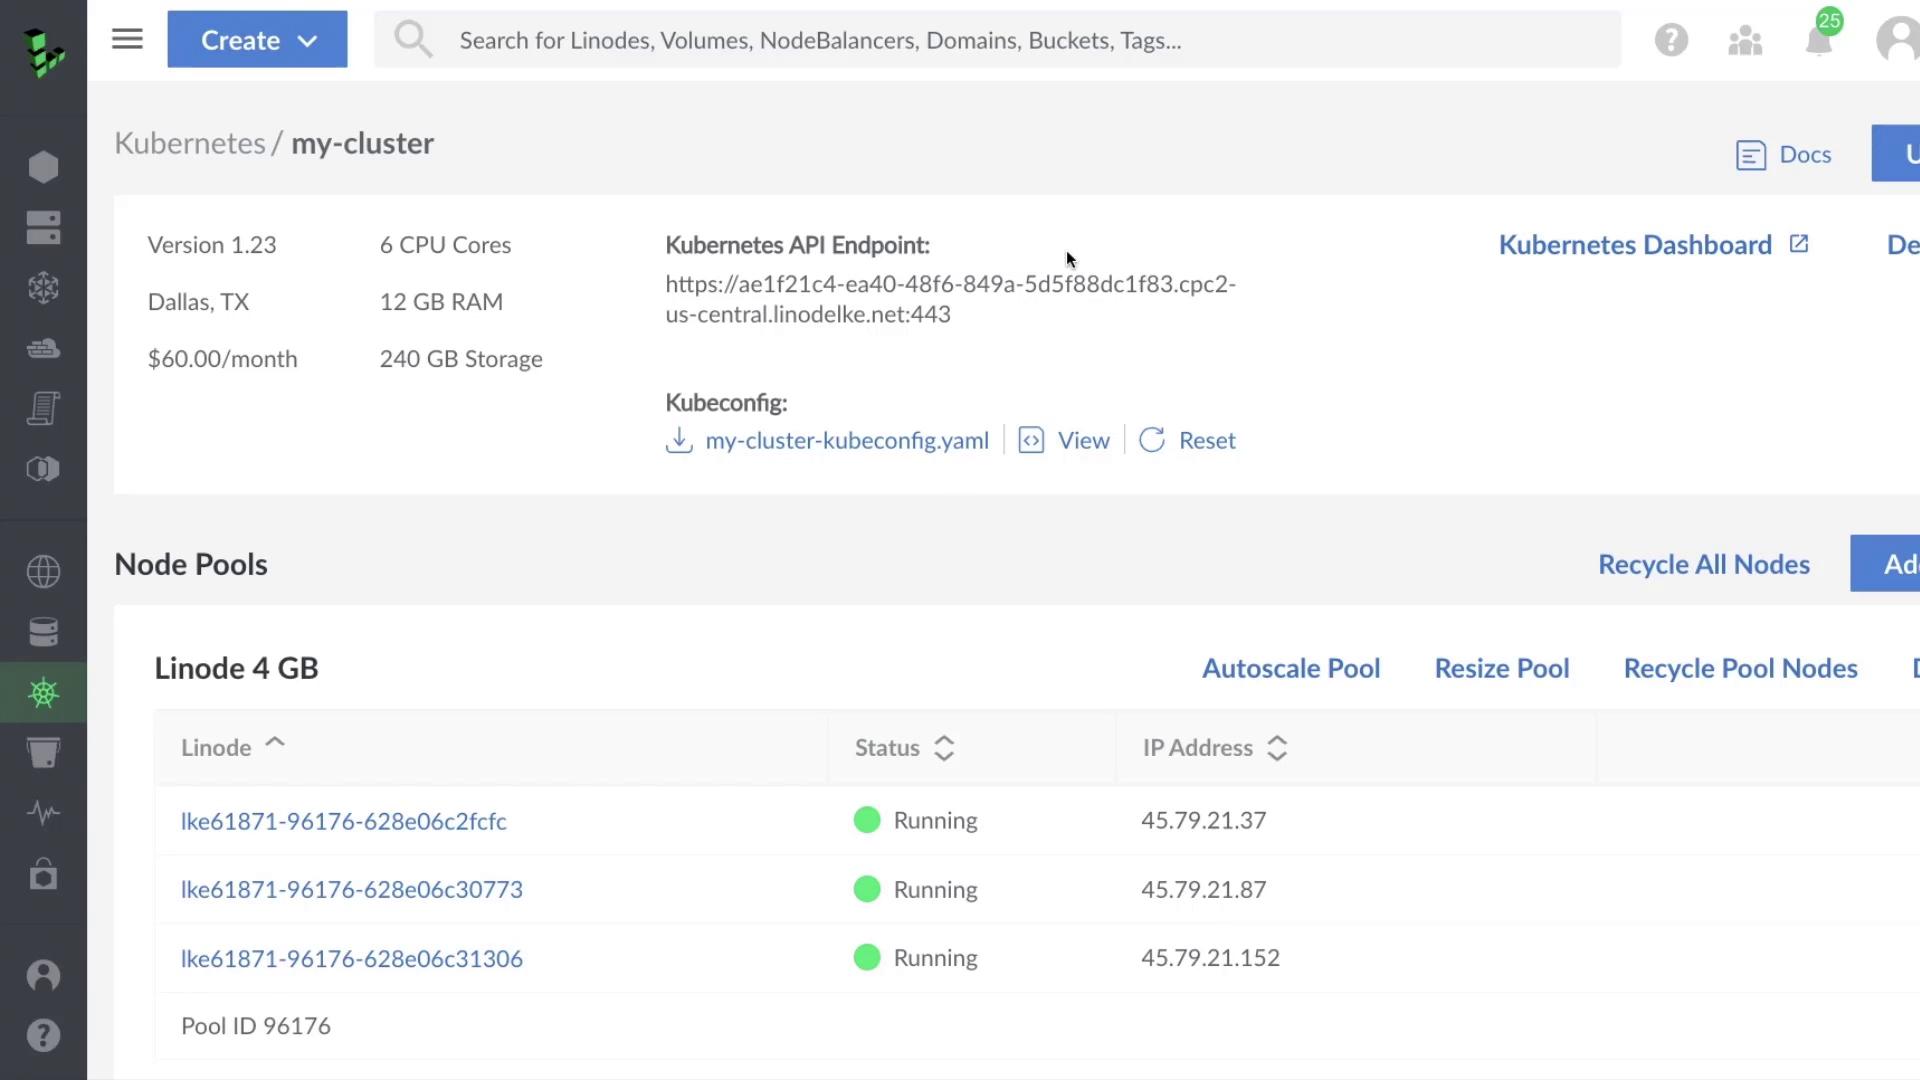
  • Enable autoscaling for a pool
  • Resize an existing pool
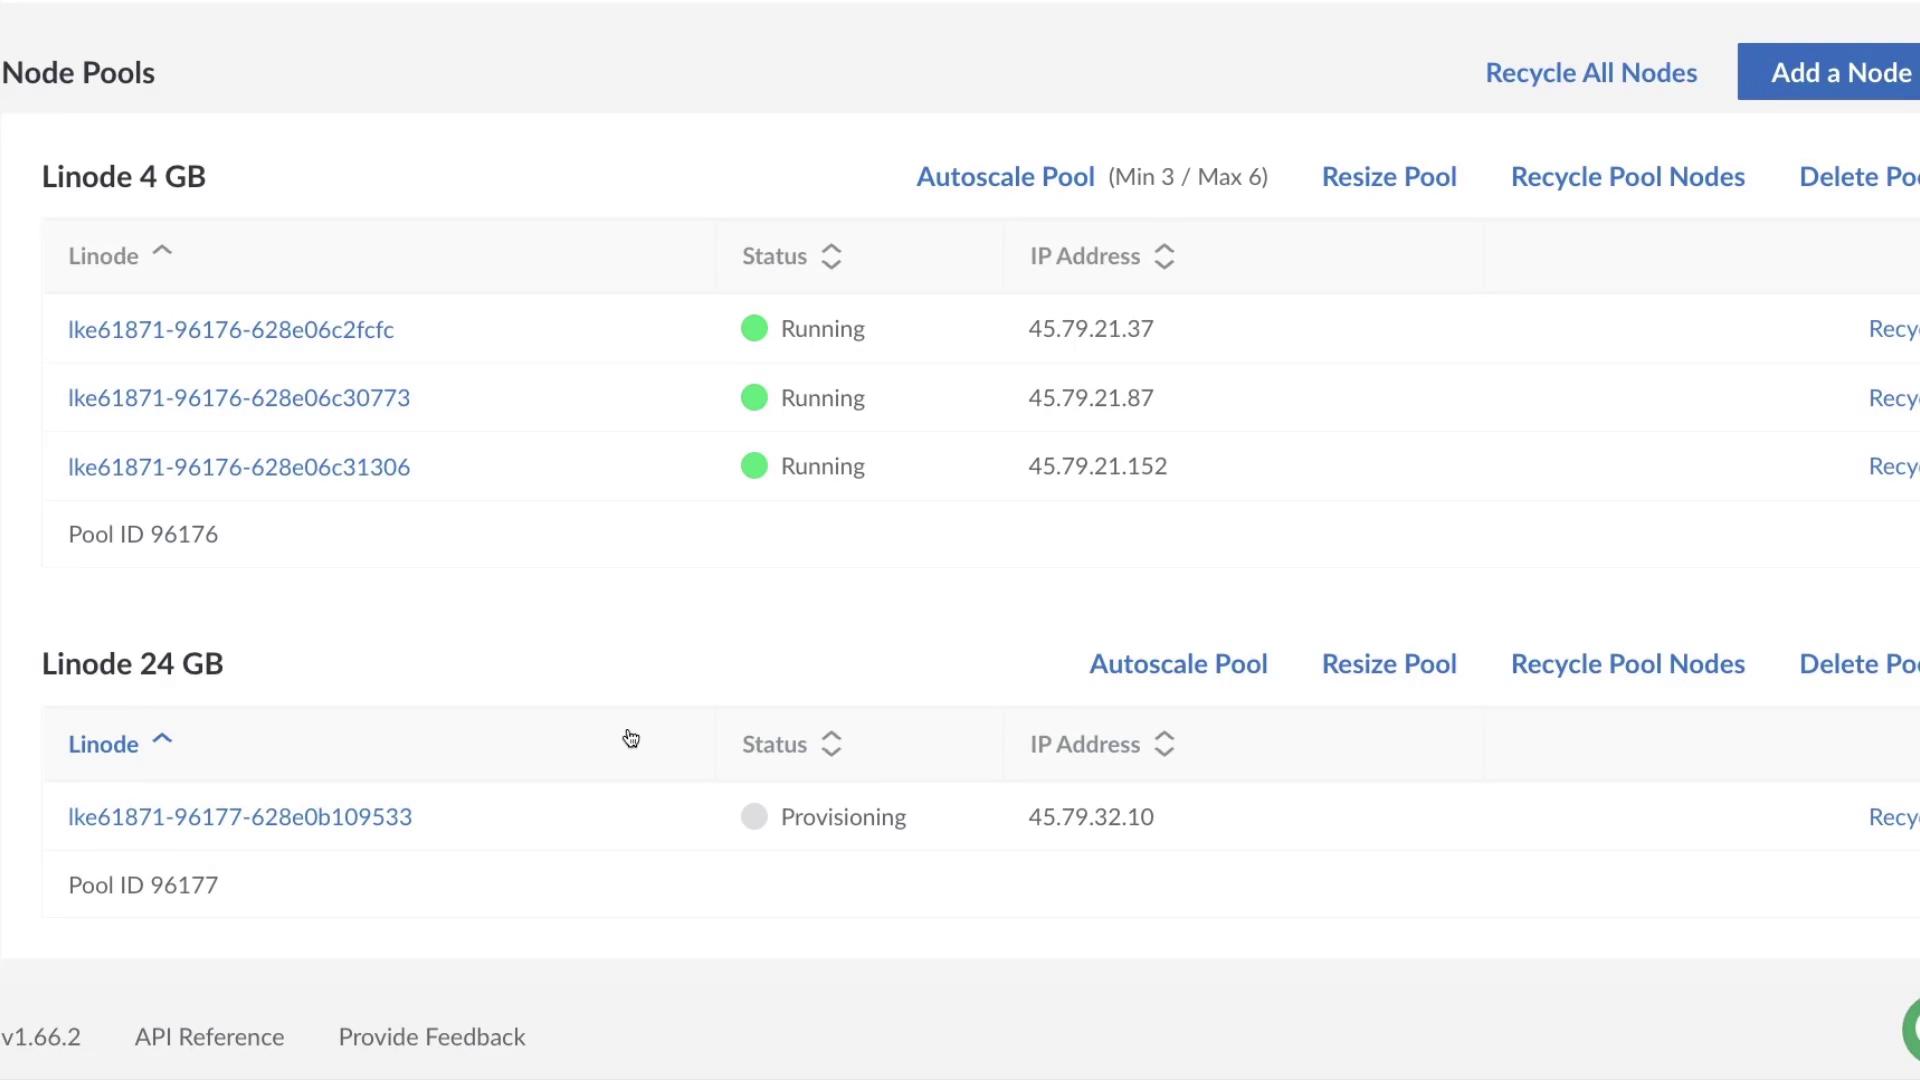
  • Add a new node pool

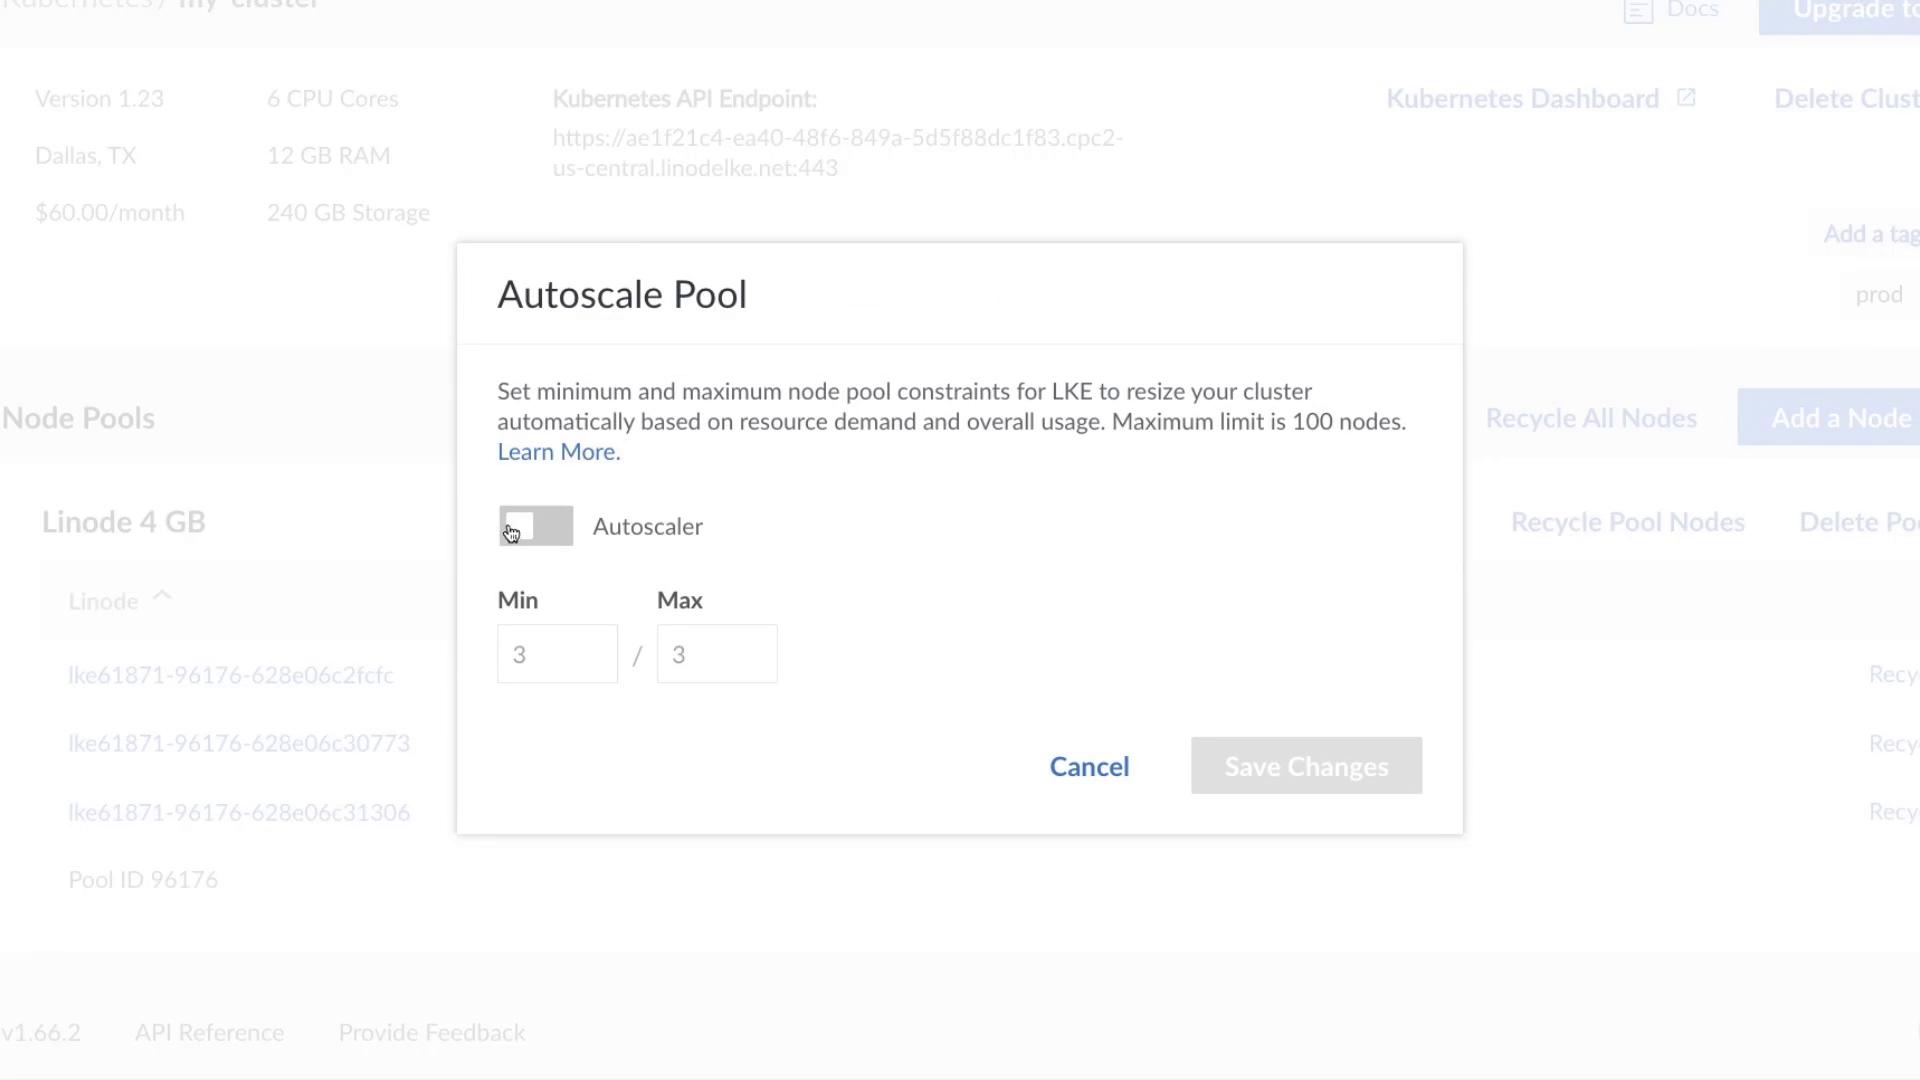
1. Autoscaling a Node Pool

To configure horizontal autoscaling:

  1. Click Autoscale Pool.
  2. In the Autoscale Pool dialog, check Autoscaler.
  3. Set the Min and Max worker node counts (for example, Min = 3, Max = 6).
  4. Click Save.

The image shows a dialog box titled "Autoscale Pool" with options to set minimum and maximum node pool constraints for LKE, including a checkbox for "Autoscaler" and fields for "Min" and "Max" values.

Note

You can automate this step with Terraform using the linode_lke_node_pool resource. See Terraform LKE Provider for details.

With autoscaling enabled, LKE will automatically adjust the number of nodes based on your cluster’s scheduling demands.

2. Resizing a Node Pool

To manually change the node count:

  1. Click Resize Pool for your target pool.
  2. Enter the desired number of nodes (e.g., increase from 3 to 4).
  3. Optionally, select Recycle Pool to replace all nodes.

The image shows a confirmation dialog box asking if the user wants to recycle a node pool, with options to cancel or proceed with recycling the pool nodes.

Warning

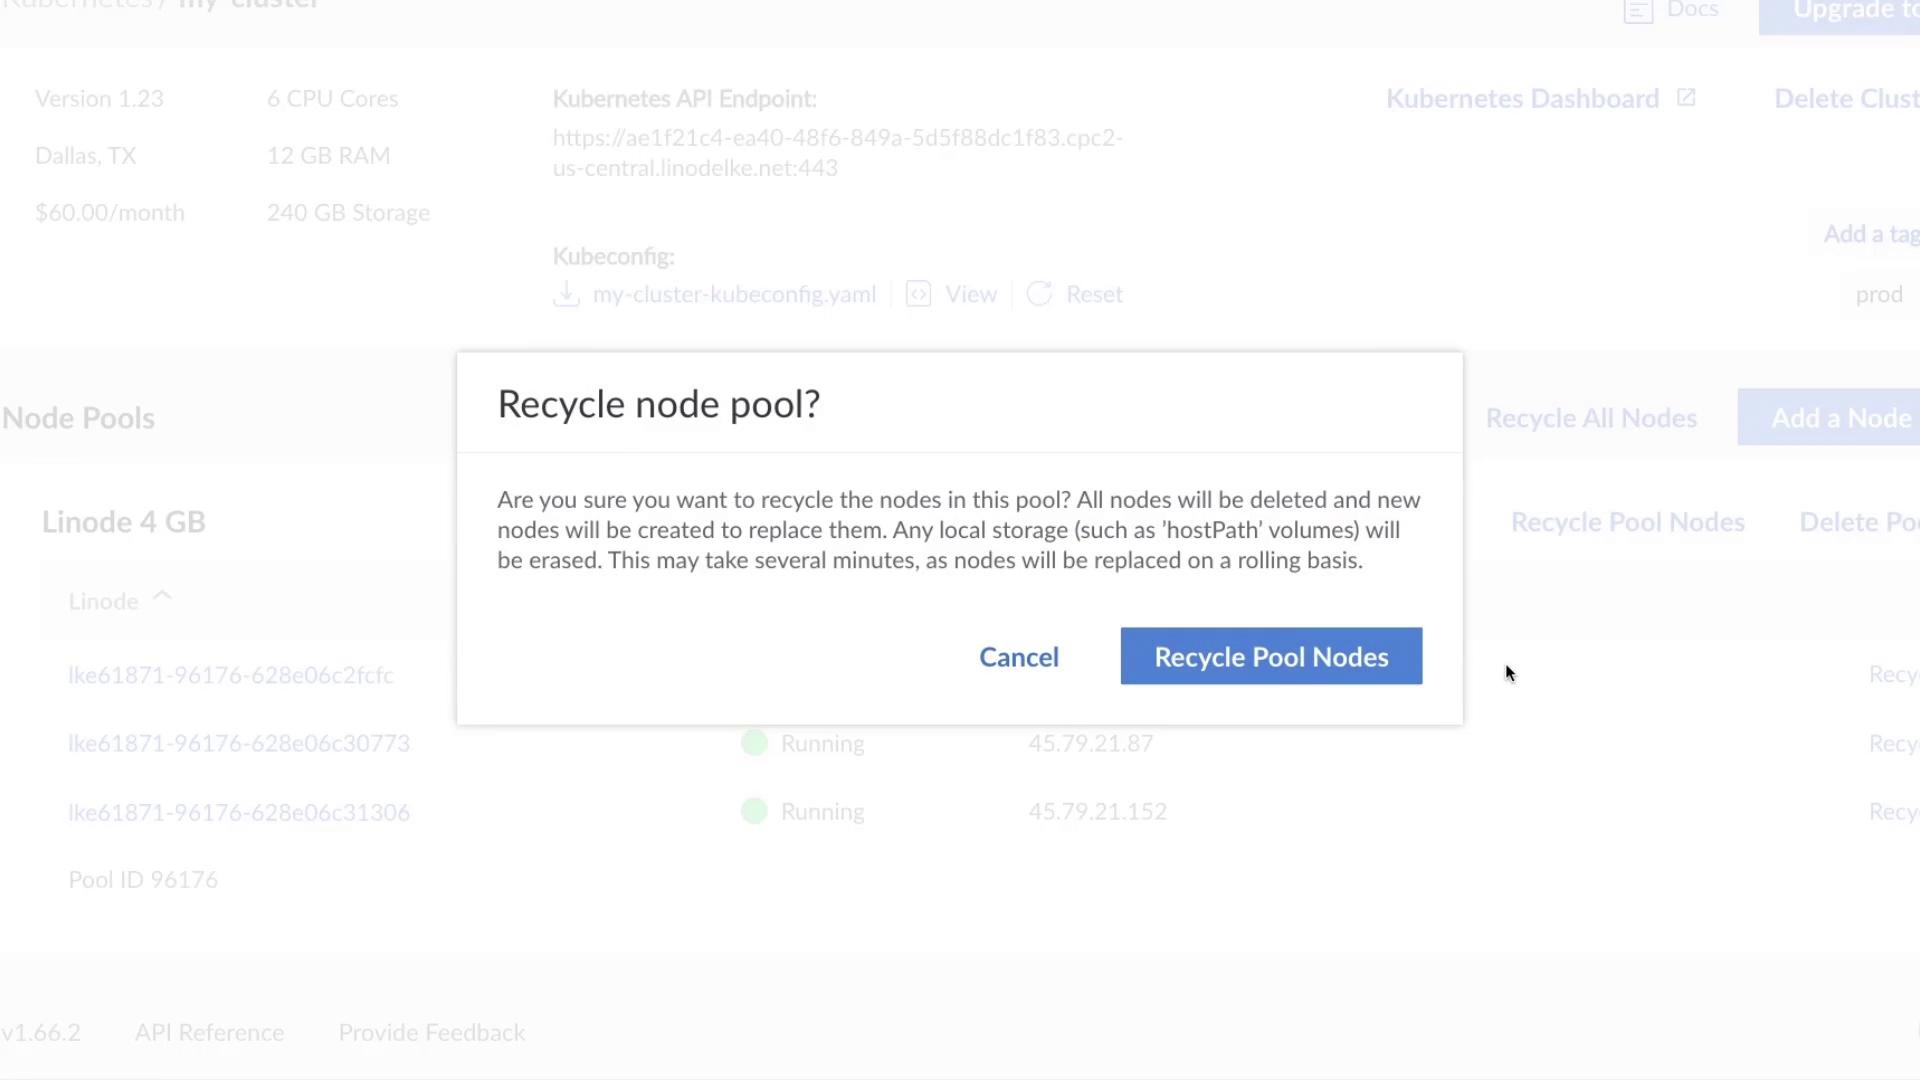
Recycling a pool deletes and re-provisions all nodes, which can cause downtime for pods running on those nodes. Schedule this during maintenance windows.

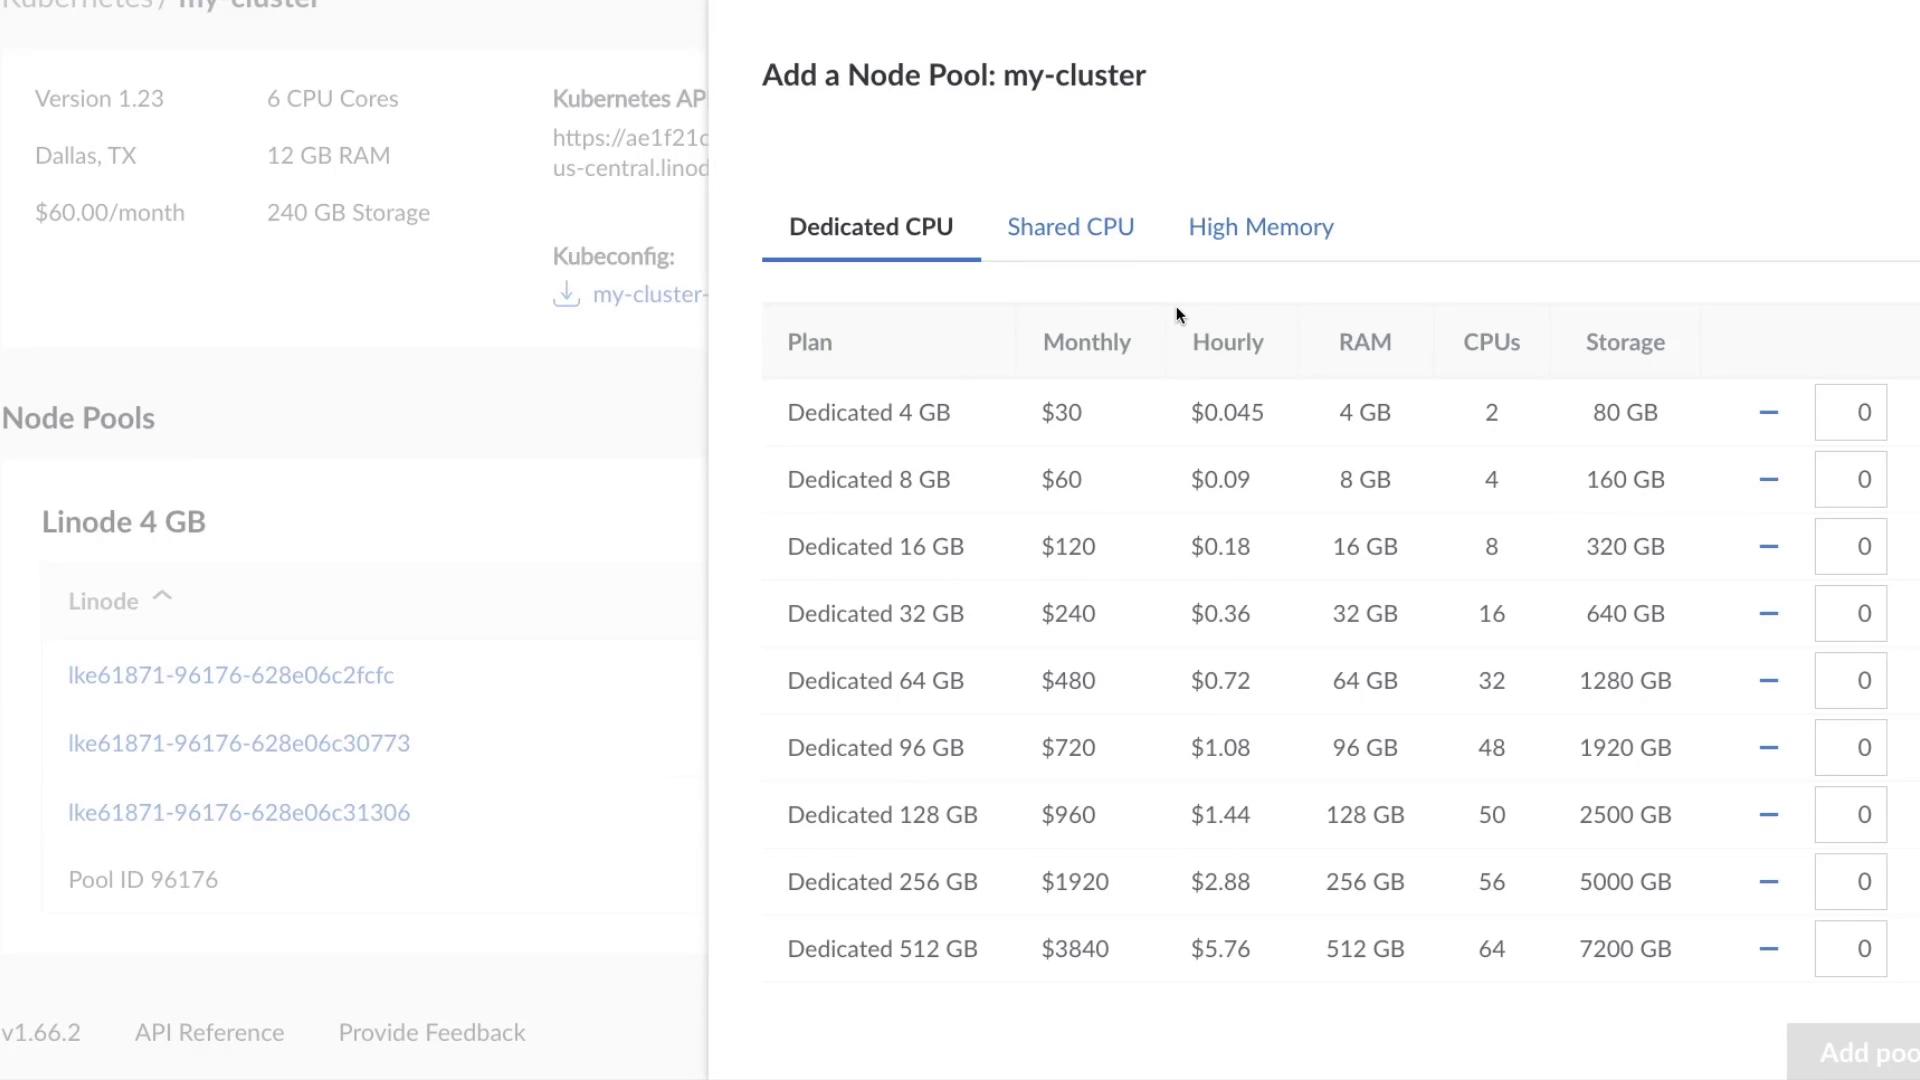
3. Adding a New Node Pool

For specialized workloads—such as high-memory or GPU-intensive applications—you can add a separate node pool:

  1. Click Add Pool.
  2. Choose the plan that fits your requirements.
  3. Click Add Pool to provision the nodes.

The image shows a pricing table for adding a node pool to a Kubernetes cluster, listing options for dedicated CPU plans with varying RAM, CPU, and storage specifications, along with their monthly and hourly costs.

Once provisioned, both pools appear in your dashboard, showing status and IP addresses.

The image shows a dashboard for managing node pools, displaying the status and IP addresses of nodes in "Linode 4 GB" and "Linode 24 GB" pools. The "Linode 4 GB" nodes are running, while the "Linode 24 GB" node is provisioning.

Scaling Options Overview

ActionUse CaseDescription
Autoscale PoolDynamic workloadsAutomatically adjusts node count (Min/Max).
Resize PoolPredictable scalingManually set the node count.
Recycle PoolUpdates or recoveryDeletes and re-provisions all nodes.
Add PoolMixed-instance workloadsCreate additional pools with new specs.

Watch Video

Watch video content

Previous
Deploying an LKE cluster using Terraform