Linux Foundation Certified System Administrator (LFCS)
Essential Commands
Work With SSL Certificates
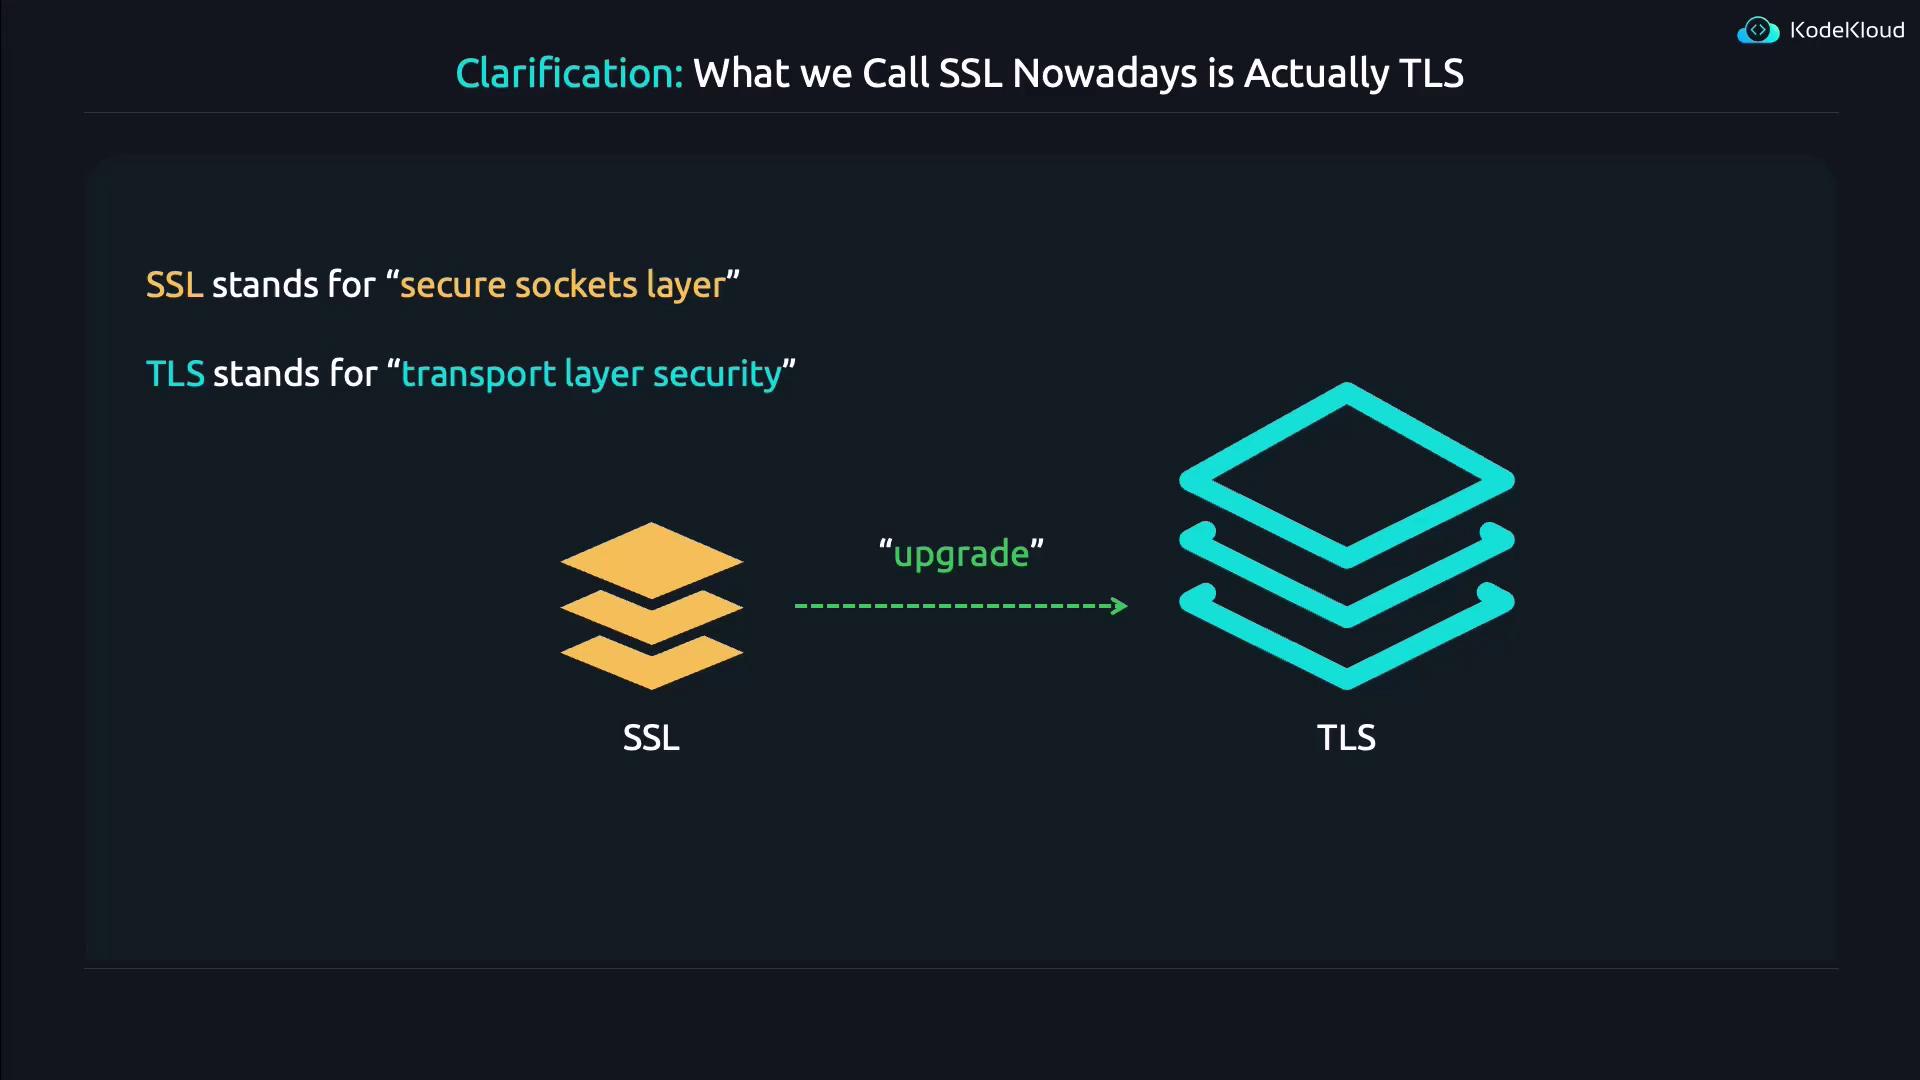
In this lesson, we explore SSL certificates—what they are for, how to create them, and how to inspect them. Although many still refer to these as SSL certificates, the correct term nowadays is TLS (Transport Layer Security). TLS is essentially an enhanced version of SSL, addressing many of its security vulnerabilities.
Purpose of SSL/TLS Certificates
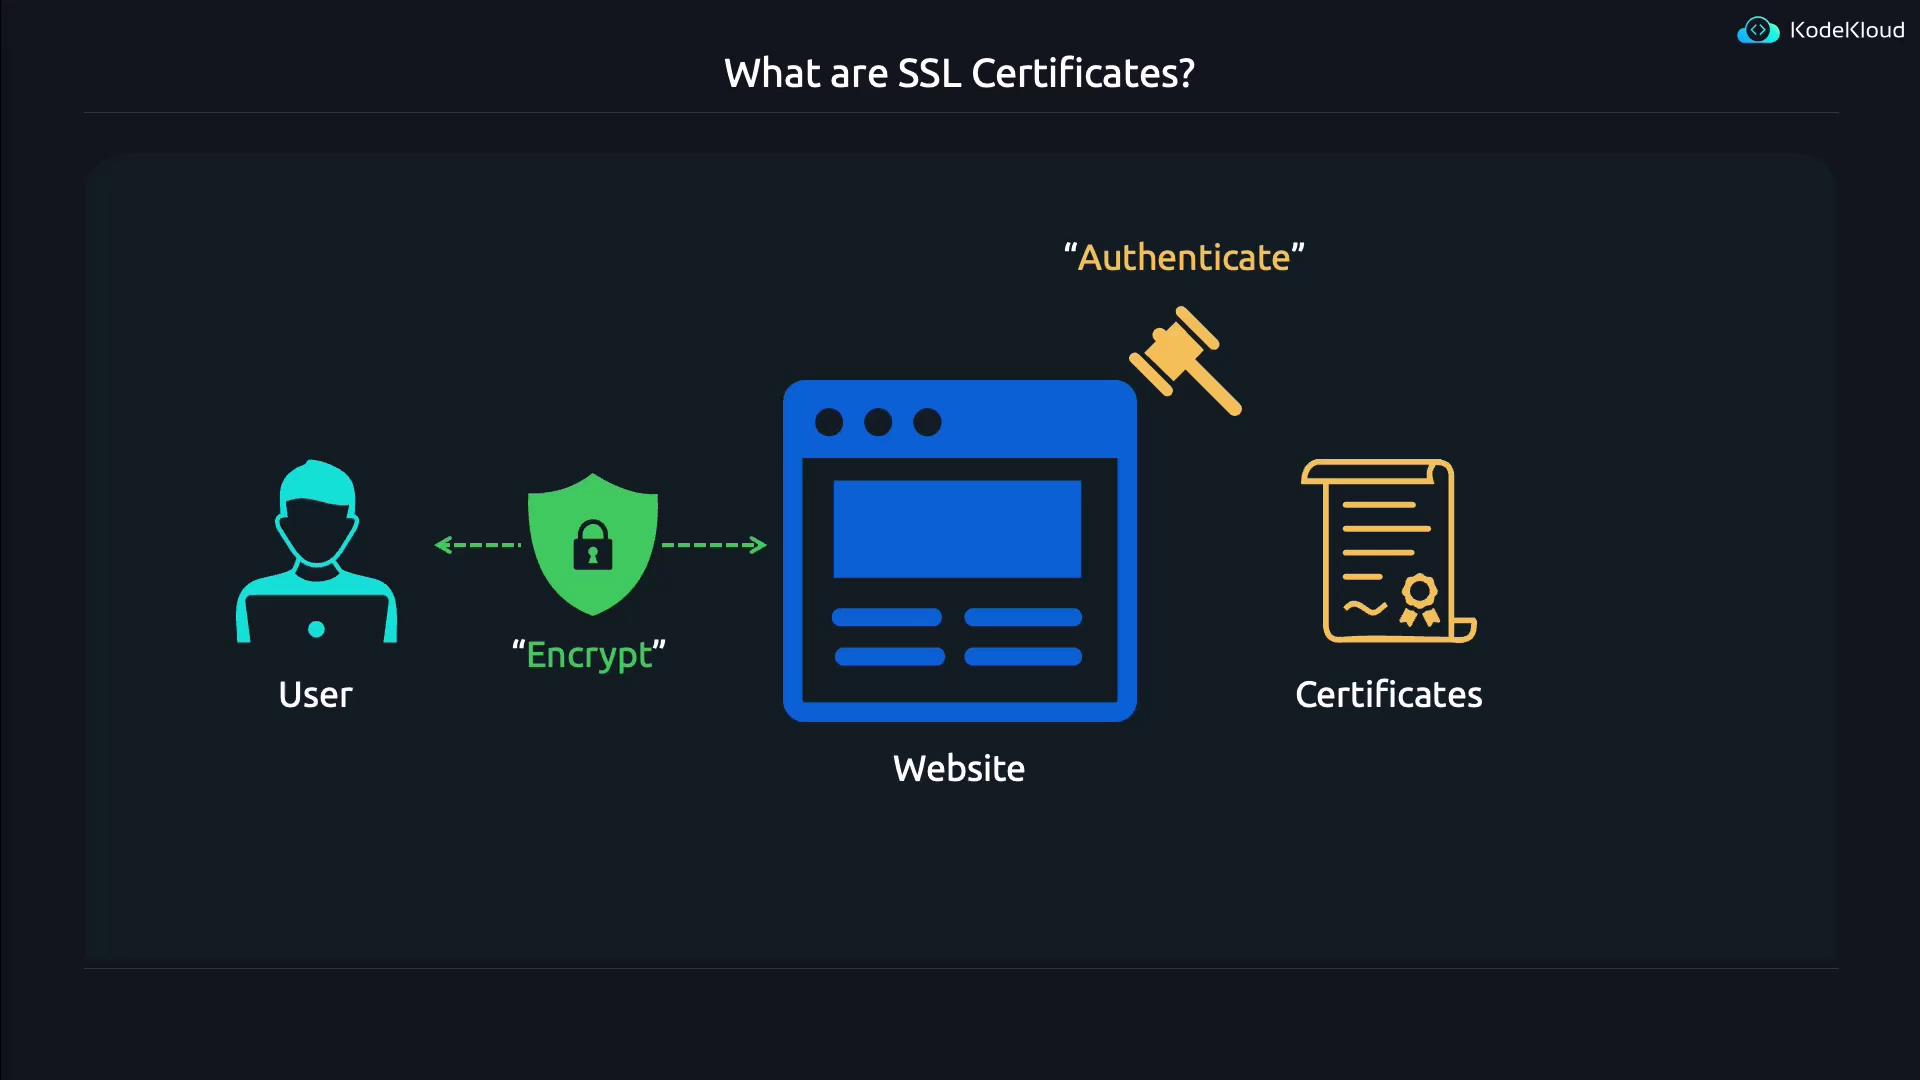
SSL/TLS certificates play a critical role in securing website communication. They serve two primary functions:
- Authentication: Verifies you are communicating with the legitimate website rather than an impostor. For example, it ensures you are connecting to KodeKloud.com and not a fraudulent clone.
- Encryption: Safeguards the data exchanged between a user and the website by encrypting network traffic.
Note
The certificate, combined with its corresponding private key, secures the connection by encrypting all exchanged data.
Creating Certificates with OpenSSL
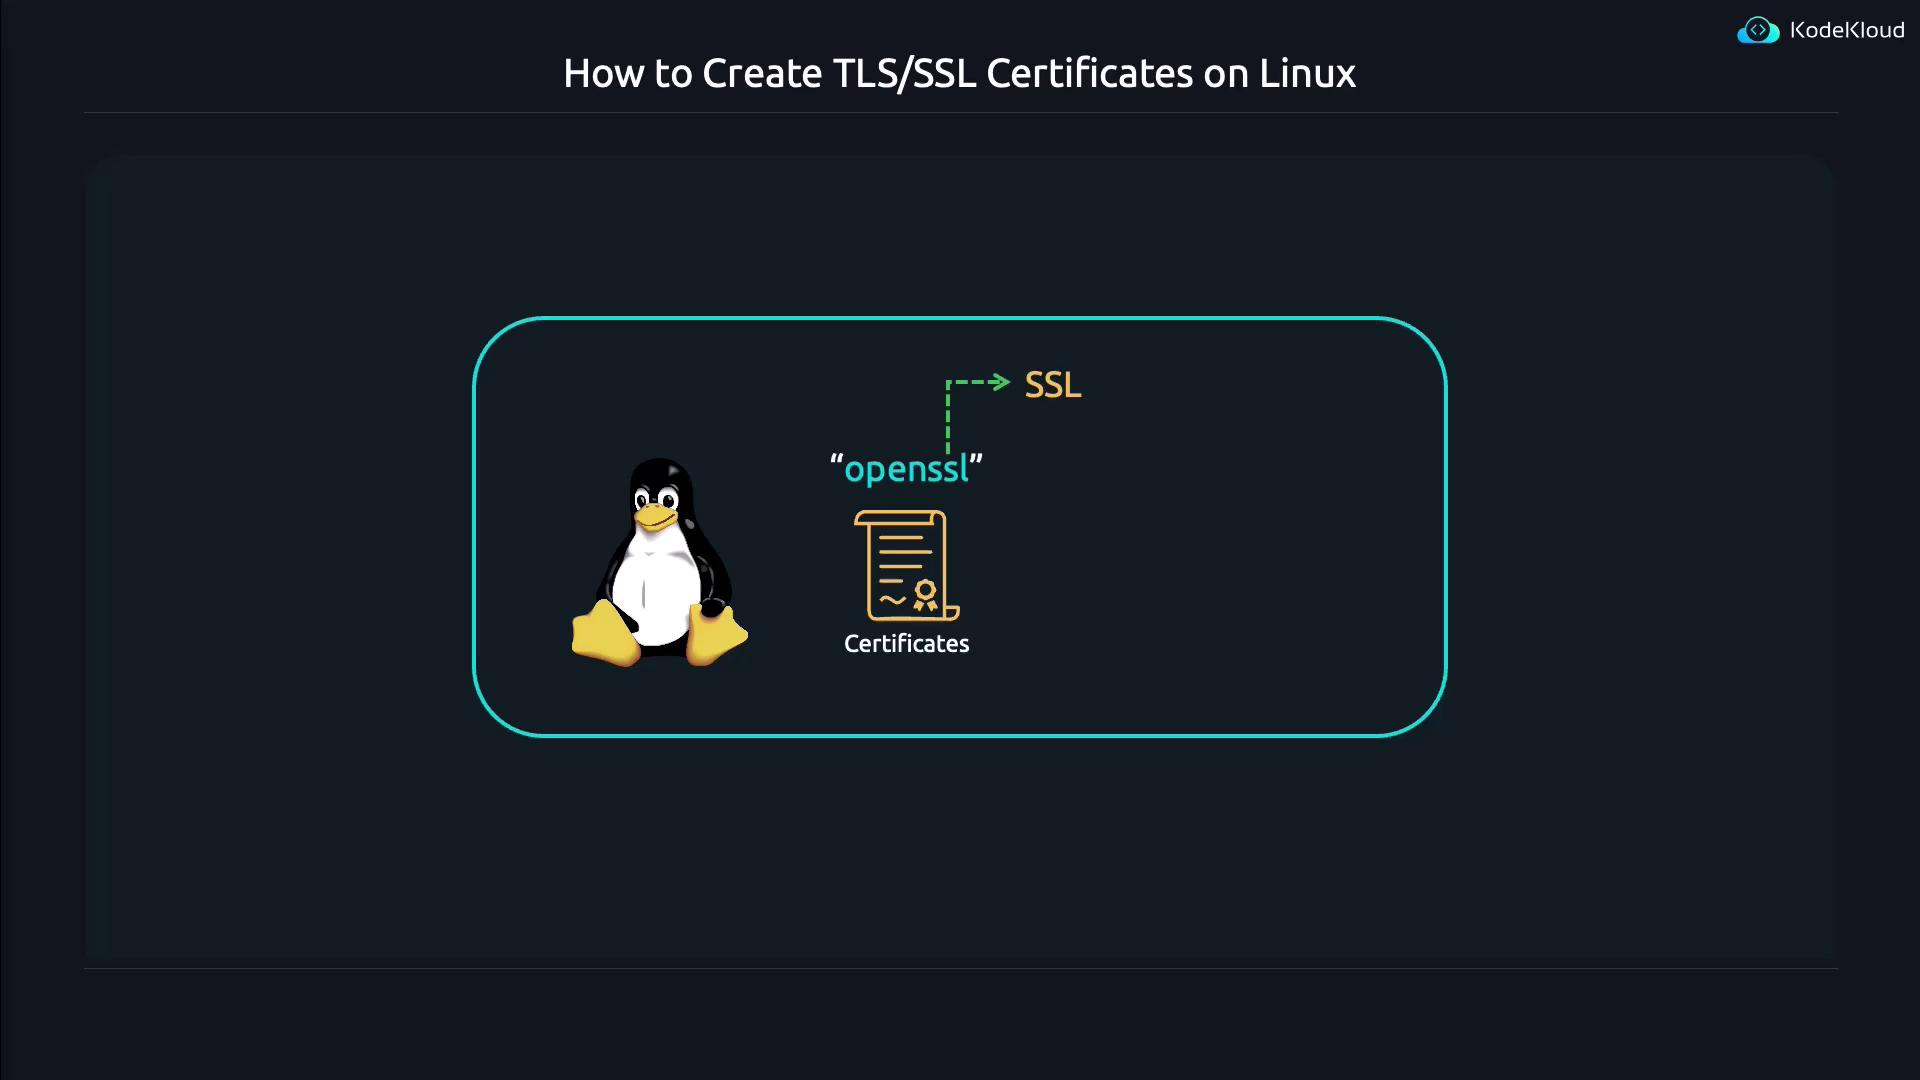
On Linux, OpenSSL is the most common utility for creating and managing TLS certificates. Even though its name still mentions “SSL,” it is fully compatible with creating modern TLS certificates.
Consulting the manual with the command man openssl reveals that OpenSSL can perform an array of cryptographic operations beyond certificate generation.
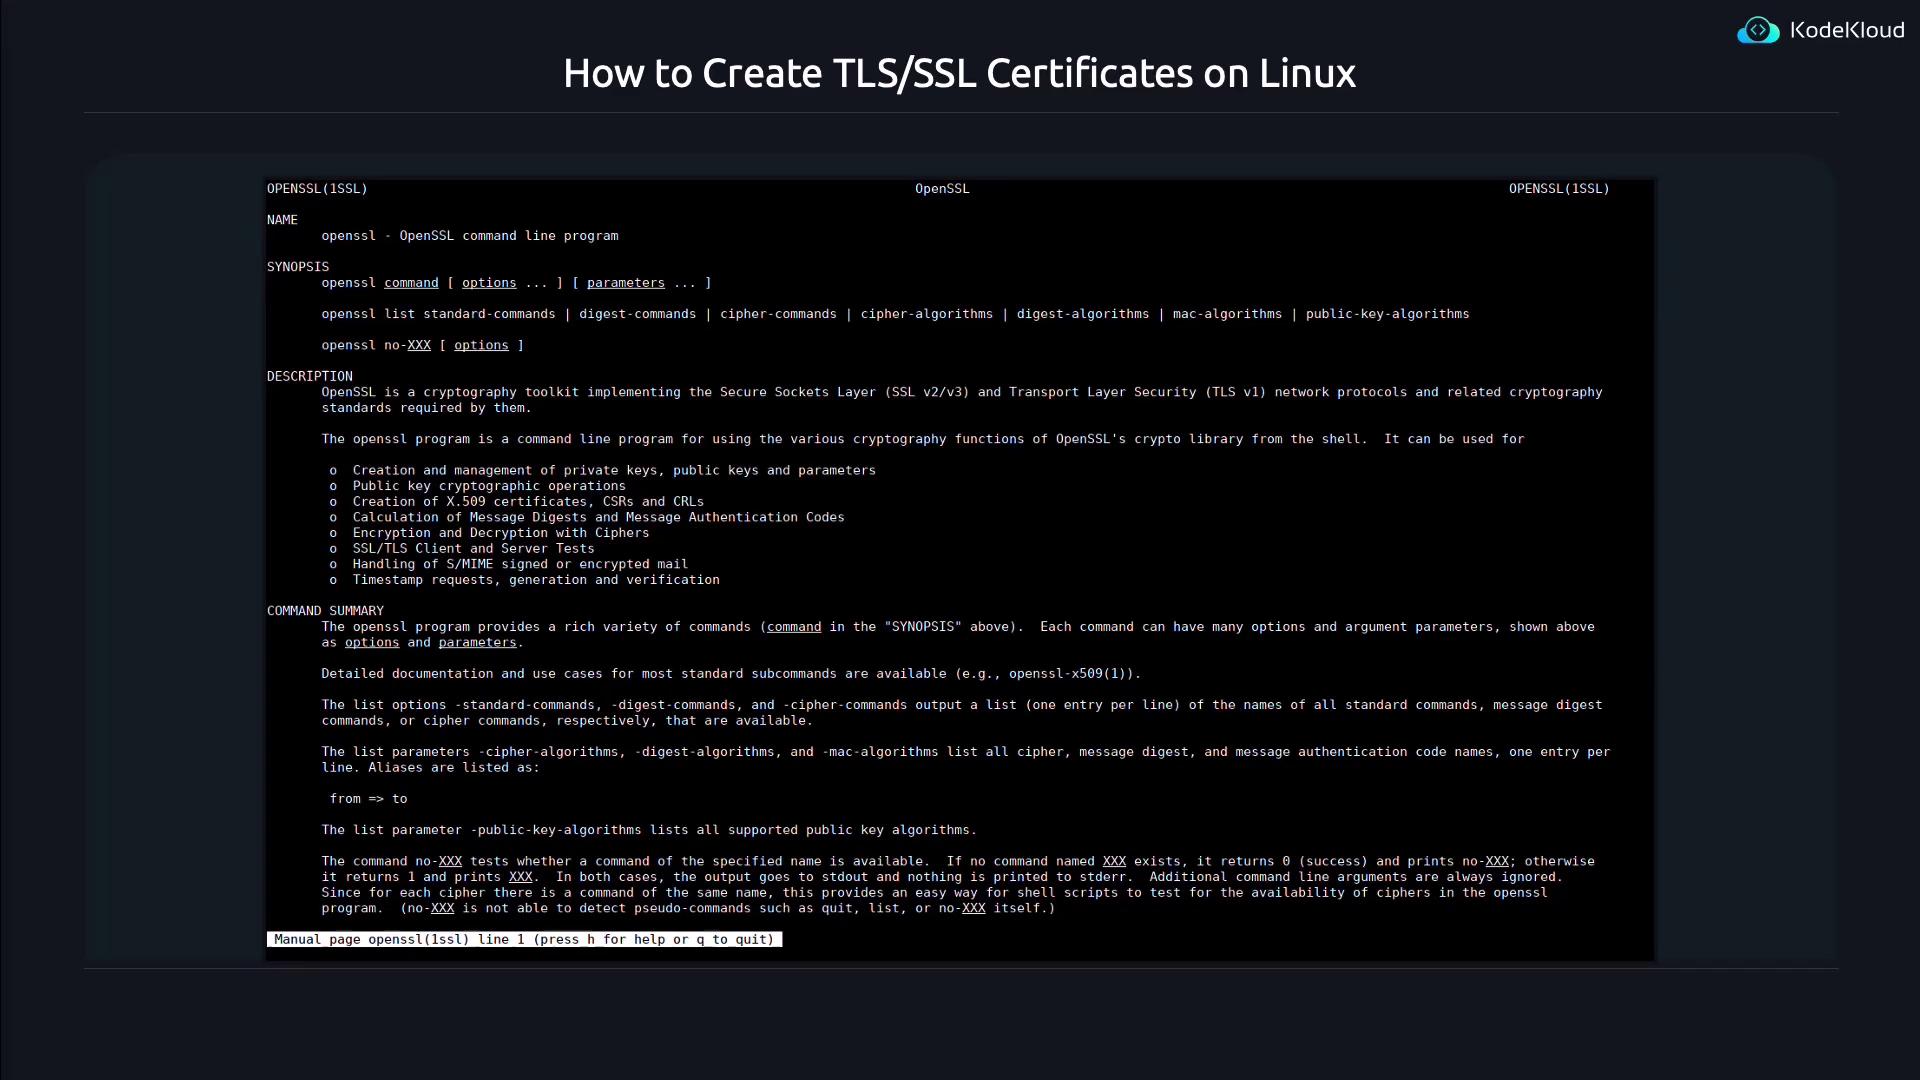
In this lesson we focus on creating X.509 certificates, which are essential for authenticating and encrypting website traffic. OpenSSL supports a broad range of subcommands and options. Here are some tips to get started.
Discovering OpenSSL Subcommands
To list the available subcommands, run one of the following commands in your terminal:
openssl help
or simply:
openssl
Look for the "Standard Commands" section. Of particular interest are:
reqfor generating certificate requests.x509for handling X.509 certificates.
Because OpenSSL provides a separate manual for each subcommand, view the manual page for a specific subcommand by using:
man openssl req
Alternatively, you might try:
man openssl-req
While browsing the manual, press the slash key (/) and search for "EXAMPLE" to locate sections that show how to generate certificates. For example, these two commands generate a certificate signing request (CSR) with slight variations:
openssl req -newkey rsa:2048 -keyout key.pem -out req.pem
openssl req -x509 -newkey rsa:2048 -keyout key.pem -out req.pem
Press Q to exit the manual once finished.
Certificate Signing Requests (CSR)
The req subcommand is primarily used to generate certificate signing requests (CSRs). While certificates secure the connection, browsers must also verify that the certificate was signed by a trusted Certificate Authority (CA).
When you generate a CSR, you send it to a CA (for example, Google) that will verify your details and sign your certificate. This digital signature allows browsers to confirm the certificate’s legitimacy.
![]()
To generate a CSR along with a new private key using OpenSSL, use a command like:
openssl req -newkey rsa:2048 -keyout key.pem -out req.pem
Here’s what the command options do:
-newkey rsa:2048generates a new 2048-bit RSA private key.-keyout key.pemspecifies the file to save your private key.-out req.pemdesignates the file for the CSR.
After executing this command, OpenSSL will prompt you for a password for the private key and request additional information such as country, state, locality, organization, and more. You can then verify the contents with:
cat key.pem
and
cat req.pem
In real-world scenarios, the CSR is sent to a CA that verifies the details and, upon successful validation, returns a signed certificate.
Below is an example CSR display:
jeremy@kodekloud:~$ cat req.pem
-----BEGIN CERTIFICATE REQUEST-----
MIICjCCAWCAQAwTElMakG1UBEBhMVhMCzAJBgNVBAgM5ZREwDwYDVQQH
DHaOZxcgw9YazESMBAgA1UECgws29zKzB3VGYgAOCQ8AMIBCgKQEAom6zqRUBsPk75fJ7keM671dM0GvSGWsCvIuJaoZJwfjmPkD2v2O+etwKxrVczidIab9mdJ3h3ywZoleOUzU/iQrSv6hSrEw37HEmzvNzL+xkIxue/eaYBjoBUm9FQbOoMCm5tM5tpzA7o67mC+IDABAoABM3dvJzK5IUhvcN
AQELBQADgEBADx7Msu0fEu1Gy618kkiG1KJclDArsvLgtknzbFMKS1TczGPgKjqIAvAeS359wUcrGm5wEJAsCWGEwx/1z+bWvJWBOAx6usgz6caiYBXJ6Cpt
GVyyjLn+vEUw6J2RcY9M84JoQi22g68NxRwZUl6CUSHLCXTEFSF15h6jl/Q0l
wUD2QoNOx8SWJ/xZCdo0fWQ9mUHHrS3XdJxJaXjplAcotDr7d351JUptIIBZvJ
+tjGx44pi25CyYE/O12PbrRFnjMZ3xSW63nwVflaDpkDwaiy8rHDUr3KdAGx+bRjUvFn2oJ/Nm8DFVNhvQpK3eWm5T/I=
-----END CERTIFICATE REQUEST-----
jeremy@kodekloud:~$
Generating a Self-Signed Certificate
In some cases—particularly on internal networks—you might prefer to generate a self-signed certificate rather than involve a Certificate Authority. Self-signed certificates can be appropriate where you have control over trusted certificates.
To generate a self-signed TLS certificate valid for 365 days with a 4096-bit RSA key, use the following command:
openssl req -x509 -noenc -newkey rsa:4096 -days 365 -keyout myprivate.key -out mycertificate.crt
The above command’s options are explained below:
-x509: Instructs OpenSSL to generate an X.509 certificate directly rather than just a CSR.-noenc: Specifies that the private key should not be encrypted. (Some distributions use-nodesinstead.)Warning
In production environments, it is recommended to encrypt the private key.
-newkey rsa:4096: Generates a new 4096-bit RSA private key.-days 365: Sets the validity period of the certificate to 365 days.-keyout myprivate.key: File to save the generated private key.-out mycertificate.crt: File to save the self-signed certificate.
During execution, OpenSSL will prompt for certificate details such as Country Name, State or Province, Locality, Organization, and Common Name. For example:
Country Name (2 letter code) [AU]:US
State or Province Name (full name) [Some-State]:Oregon
Locality Name (eg, city) []:Gaston
Organization Name (eg, company) [Internet Widgits Pty Ltd]:KodeKloud
You can verify your certificate by inspecting its contents with:
cat mycertificate.crt
This file will include base64-encoded data with header and footer lines indicating the certificate's boundaries.
Below is an example display of a CSR similar to what you might see when generating a self-signed certificate:
jeremy@kodekloud:~$ cat req.pem
-----BEGIN CERTIFICATE REQUEST-----
MIICjCCAW4CAQAwCTELMAkGA1UEBhMCVVMxCzAJBgNVBAMMAktFVm1xMTAeFw0y
MTA2MTAwMDAwMDBaFw0yMjA2MTAwMDAwMDBaDAQBg8AT0z9QdeG7DIAgAB
AOCAPgM7FhMPOlW6N6Epvld5OTNXD4Ggkem67TIdM5vGScVuiJoaoZJwfEmpKDv2
f8QgBzqgYUX1eOuzMKV8d2kQOuYOSCRjn3rTmT7kHC2O2+etKxrVczidab9mdJ3
3hYzloeiUo/iyCaXS4HUIqXBP2pV80upt5sJ872iQrSv6hSrEw37HEmVzulXkUxe
/fAY8bJO/Um9FybOboMkpIQRgZ3AtO6r++IDAQABYJK0EihVnCVhcnlOqT0incV
AQEBLQADggEBADx/tMsu0FEuf1gv618kkiG1KVJcJdArsvLgtknzbFMKSlTczGP
gKjqIAvAeS359WUkcrGm5wEJAsCWGEwx/1z+bWvJWBYoAx6usgz6caiYBXJ6Cpt
GVvyj1Zn+vEUw6J2RcY9M84JoQi22l68NxRwZUl6CUSHLCXTEFSF15h6jl/Oql
wUD2qoNOx8SwJ+/xZCdo0w9tUHrXSxdxJaXJpLaacotDPr7d351JUptIIBSzVJ
+tjCgx44pi25CcyYE/O12PbrRFTJmZ3xSW63nwVflaDpkDwaiy8rHDUr3KdAG
+x+bRjUvfn2oJ/Nm8DFVNhvQpK3eWfm5TI/E=
-----END CERTIFICATE REQUEST-----
jeremy@kodekloud:~$
To view the details of your self-signed certificate in a human-readable format, use the x509 subcommand:
openssl x509 -in mycertificate.crt -text
This command outputs details such as issuer and subject information, validity period, and public key details:
jeremy@kodekloud:~$ openssl x509 -in mycertificate.crt -text
Certificate:
    Data:
        Version: 3 (0x2)
        Serial Number:
            43:f0:d9:9b:fe:36:34:3d:f2:3d:64:ef:91:c2:30:3a:fe:d8:f9:cb
        Signature Algorithm: sha256WithRSAEncryption
        Issuer: C = US, ST = Oregon, L = Gaston, O = KodeKloud, CN = www.kodekloud.com
        Validity
            Not Before: Jun 13 02:38:25 2024 GMT
            Not After : Jun 13 02:38:25 2025 GMT
        Subject: C = US, ST = Oregon, L = Gaston, O = KodeKloud, CN = www.kodekloud.com
    Subject Public Key Info:
        Public Key Algorithm: rsaEncryption
        Public-Key: (4096 bit)
        ...
Note that abbreviated field names (e.g., CN for Common Name, O for Organization) and details such as expiration date under "Validity" are shown.
Recap and Further Exploration
To summarize:
- Start by generating a Certificate Signing Request (CSR) using the
reqsubcommand. - If you wish to bypass a Certificate Authority, generate a self-signed certificate with the
-x509flag.
Here is a quick reference command for generating a self-signed certificate:
openssl req -x509 -noenc -newkey rsa:4096 -days 365 -keyout myprivate.key -out mycertificate.crt
For more detailed examples and options, consult the OpenSSL manuals:
We hope these explanations and examples help you confidently work with OpenSSL in your future projects. Now, let's move on to the next lesson.
Watch Video
Watch video content