Linux Foundation Certified System Administrator (LFCS)

Operations Deployment

Create and Boot a Virtual Machine

Previously, a minimal virtual machine was created without an attached virtual disk, meaning it couldn’t host an operating system. That setup was useful for demonstrating basic management commands using bash. In this guide, we will build a complete virtual machine—with an operating system installed—to simulate real-world scenarios and introduce additional commands.


Downloading a Disk Image

The first step is to download a disk image. Ubuntu provides pre-configured cloud images that are ideally suited for virtual machines. Although similar images power services like Google Cloud, we will download the minimal cloud image using wget.

Before you proceed, note that you may have encountered alternative commands similar to:

lxc remote add --protocol simplestreams ubuntu-minimal https://cloud-images.ubuntu.com/minimal/releases/
lxc launch ubuntu-minimal:noble

For our purposes, we use wget:

jeremy@kodekloud:~$ wget https://cloud-images.ubuntu.com/minimal/releases/noble/release/ubuntu-24.04-minimal-cloudimg-amd64.img
--2024-06-05 17:49:43--  https://cloud-images.ubuntu.com/minimal/releases/noble/release/ubuntu-24.04-minimal-cloudimg-amd64.img
Resolving cloud-images.ubuntu.com (cloud-images.ubuntu.com)... 185.125.190.40, 185.125.190.37, ...
Connecting to cloud-images.ubuntu.com (cloud-images.ubuntu.com)|185.125.190.40|:443... connected.
HTTP request sent, awaiting response... 200 OK
Length: 238485504 (227M) [application/octet-stream]
Saving to: ‘ubuntu-24.04-minimal-cloudimg-amd64.img’

ubuntu-24.04-minimal-cloudimg-amd64.img  100%[=================================================>] 227.44M  846KB/s    in 7m 31s

2024-06-05 17:57:16 (517 KB/s) - ‘ubuntu-24.04-minimal-cloudimg-amd64.img’ saved [238485504/238485504]

jeremy@kodekloud:~$

Verifying the Integrity of the Image

To ensure that the downloaded image is authentic and uncorrupted, verify its checksum using the SHA-256 checksum provided on the Ubuntu page. Two files are released: SHA256SUMS (which contains checksums for all images) and SHA256SUMS.gpg (which is used to verify the checksum file itself). First, download the checksum file:

jeremy@kodekloud:~$ wget https://cloud-images.ubuntu.com/minimal/releases/noble/release/SHA256SUMS
--2024-06-05 18:00:28--  https://cloud-images.ubuntu.com/minimal/releases/noble/release/SHA256SUMS
Resolving cloud-images.ubuntu.com (cloud-images.ubuntu.com)... 185.125.190.40, 185.125.190.37, ...
Connecting to cloud-images.ubuntu.com (cloud-images.ubuntu.com)|185.125.190.40|:443... connected.
HTTP request sent, awaiting response... 200 OK
Length: 2174 (2.1K) [text/plain]
Saving to: ‘SHA256SUMS’

SHA256SUMS          100%[==================================================>]  2.12K  --.-KB/s    in 0s

2024-06-05 18:00:28 (69.1 MB/s) - ‘SHA256SUMS’ saved [2174/2174]

jeremy@kodekloud:~$ ls
SHA256SUMS  SHA256SUMS.gpg  ubuntu-24.04-minimal-cloudimg-amd64.img
jeremy@kodekloud:~$

Now verify the checksum:

jeremy@kodekloud:~$ sha256sum -c SHA256SUMS 2>&1 | grep OK
ubuntu-24.04-minimal-cloudimg-amd64.img: OK
jeremy@kodekloud:~$

Since the output confirms “OK,” the image is intact and ready for use.


Inspecting and Resizing the Disk Image

Next, inspect the image using QEMU’s tool to examine file format, virtual size, and allocated disk space:

jeremy@kodekloud:~$ qemu-img info ubuntu-24.04-minimal-cloudimg-amd64.img
image: ubuntu-24.04-minimal-cloudimg-amd64.img
file format: qcow2
virtual size: 3.5 GiB (3758096384 bytes)
disk size: 227 MiB
cluster_size: 65536
Format specific information:
    compat: 1.1
    compression type: zlib
    lazy refcounts: false
    refcount bits: 16
    corrupt: false
    extended l2: false
Child node '/file':
    filename: ubuntu-24.04-minimal-cloudimg-amd64.img
    protocol type: file
    file length: 227 MiB (238485504 bytes)
    disk size: 227 MiB
jeremy@kodekloud:~$

Although the virtual disk is set to 3.5 GiB, only 227 MiB is currently allocated. To install additional software, a larger disk is necessary. Expand the virtual disk to approximately 10 GiB with:

jeremy@kodekloud:~$ qemu-img resize ubuntu-24.04-minimal-cloudimg-amd64.img 10G
Image resized.
jeremy@kodekloud:~$ qemu-img info ubuntu-24.04-minimal-cloudimg-amd64.img
image: ubuntu-24.04-minimal-cloudimg-amd64.img
file format: qcow2
virtual size: 10 GiB (10737418240 bytes)
disk size: 227 MiB
cluster_size: 65536
Format specific information:
    compat: 1.1
    compression type: zlib
    lazy refcounts: false
    refcount bits: 16
    corrupt: false
    extended l2: false
Child node '/file':
    filename: ubuntu-24.04-minimal-cloudimg-amd64.img
    protocol type: file
    file length: 227 MiB (238486016 bytes)
    disk size: 227 MiB
jeremy@kodekloud:~$

Even though the virtual size is now 10 GiB, physical disk usage only increases as the virtual machine utilizes the extra space.


Creating a Storage Pool and Copying the Disk Image

Virtualization tools typically use storage pools to store virtual disk images, snapshots, and other data. By default, the storage pool is located at /var/lib/libvirt. To confirm, check the directory contents:

jeremy@kodekloud:~$ ls /var/lib/libvirt/
boot dnsmasq images qemu sanlock

Then, copy the disk image to the images subdirectory:

jeremy@kodekloud:~$ sudo cp ubuntu-24.04-minimal-cloudimg-amd64.img /var/lib/libvirt/images/
[sudo] password for jeremy:

Creating a Virtual Machine with virt‑install

Now comes the more advanced step: creating a virtual machine and specifying the image file as the virtual disk. The virt-install utility makes this straightforward. If parameters are missing, an error will appear indicating that required options (such as the operating system name) must be provided.

For example, running:

jeremy@kodekloud:~$ virt-install
ERROR
--os-variant/--osinfo OS name is required, but no value was set or detected.
...

This error reminds you to specify the OS name. To list available operating system variants, use:

jeremy@kodekloud:~$ virt-install --osinfo list

Scroll through the output to locate the variant you plan to use (in this case, Ubuntu 24.04) and note its identifier (for example, ubuntu24.04).

Examining the Manual

For additional command-line options, consult the manual:
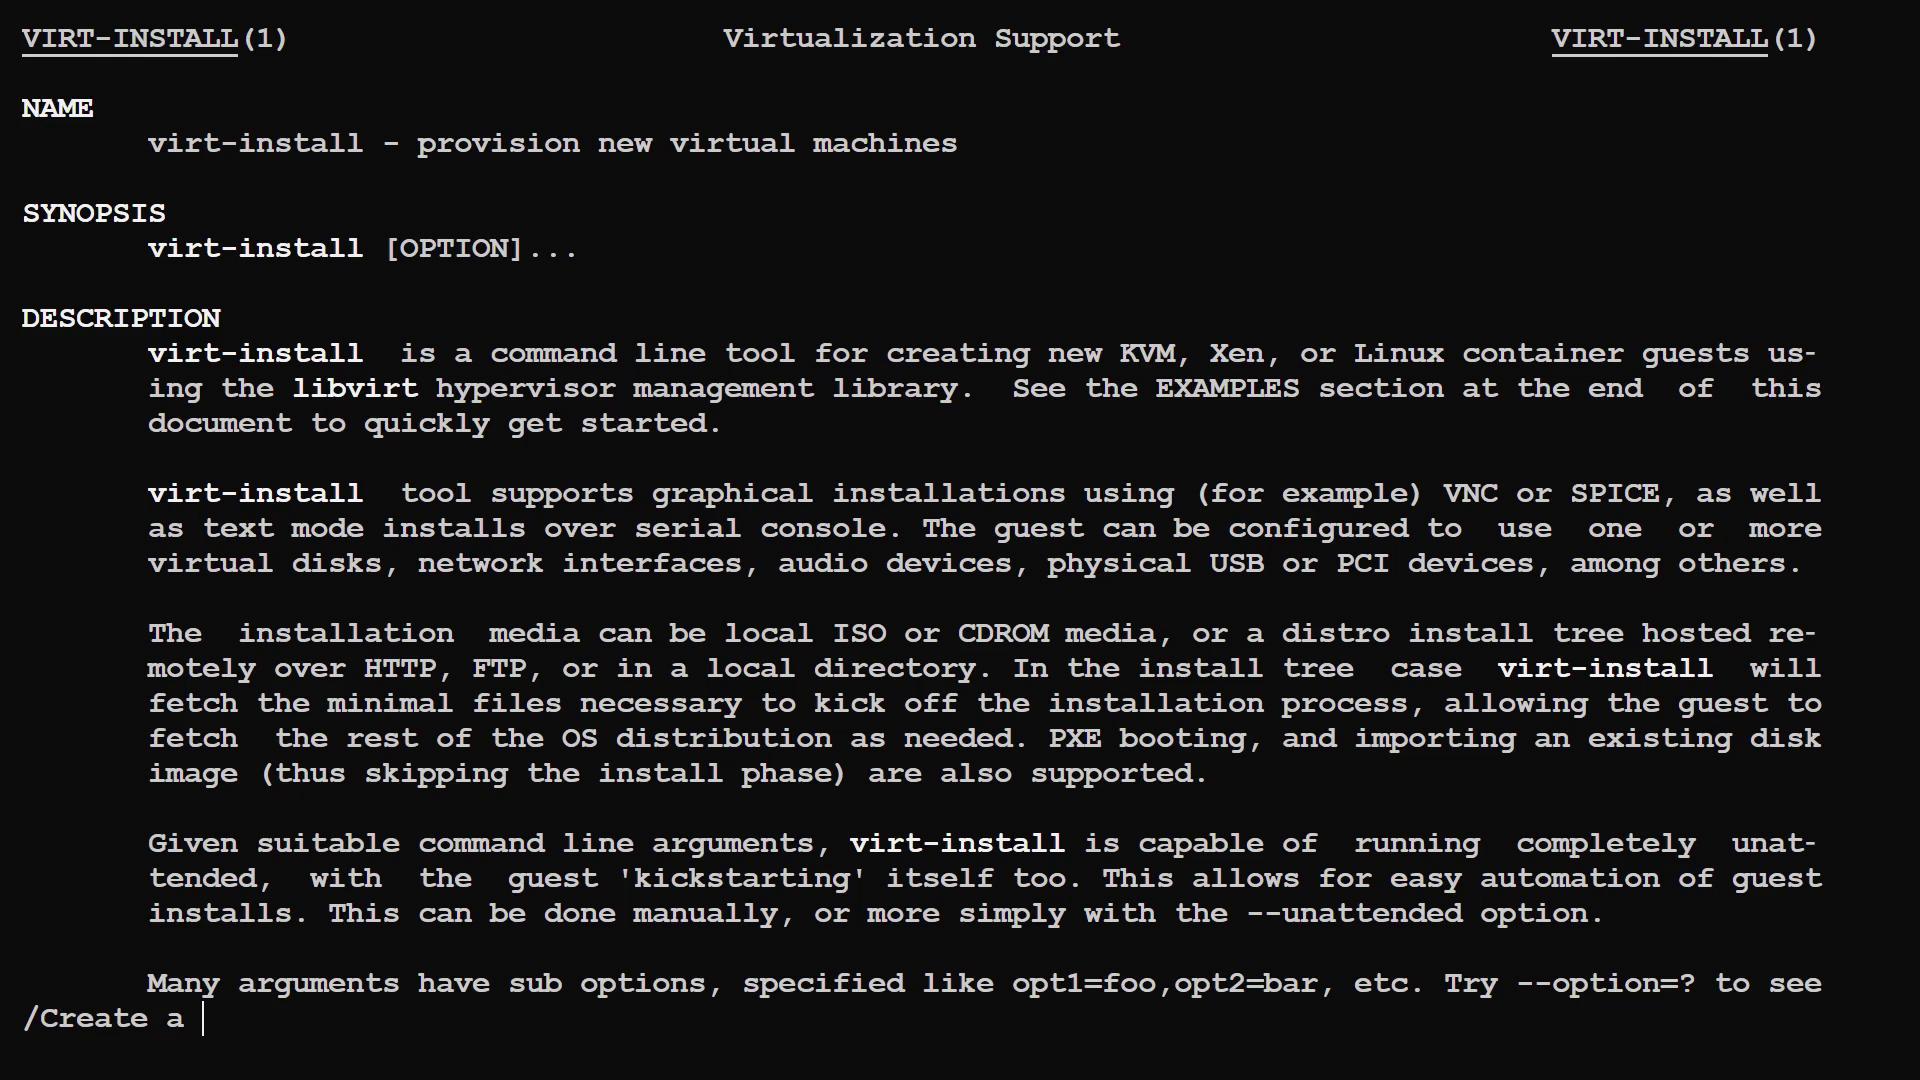
man virt-install

Below is an excerpt from the manual detailing the creation of a VM from an existing disk image:

The image shows a manual page for the "virt-install" command, which is used to provision new virtual machines. It includes sections like NAME, SYNOPSIS, and DESCRIPTION, explaining its functionality and options.

Remember to include the --import option to bypass a new OS installation because the disk image already contains an operating system:

  • With --import, the first device specified via --disk or --filesystem serves as the boot device.
  • By default, virt-install would perform a full installation.

Reviewing Available Options

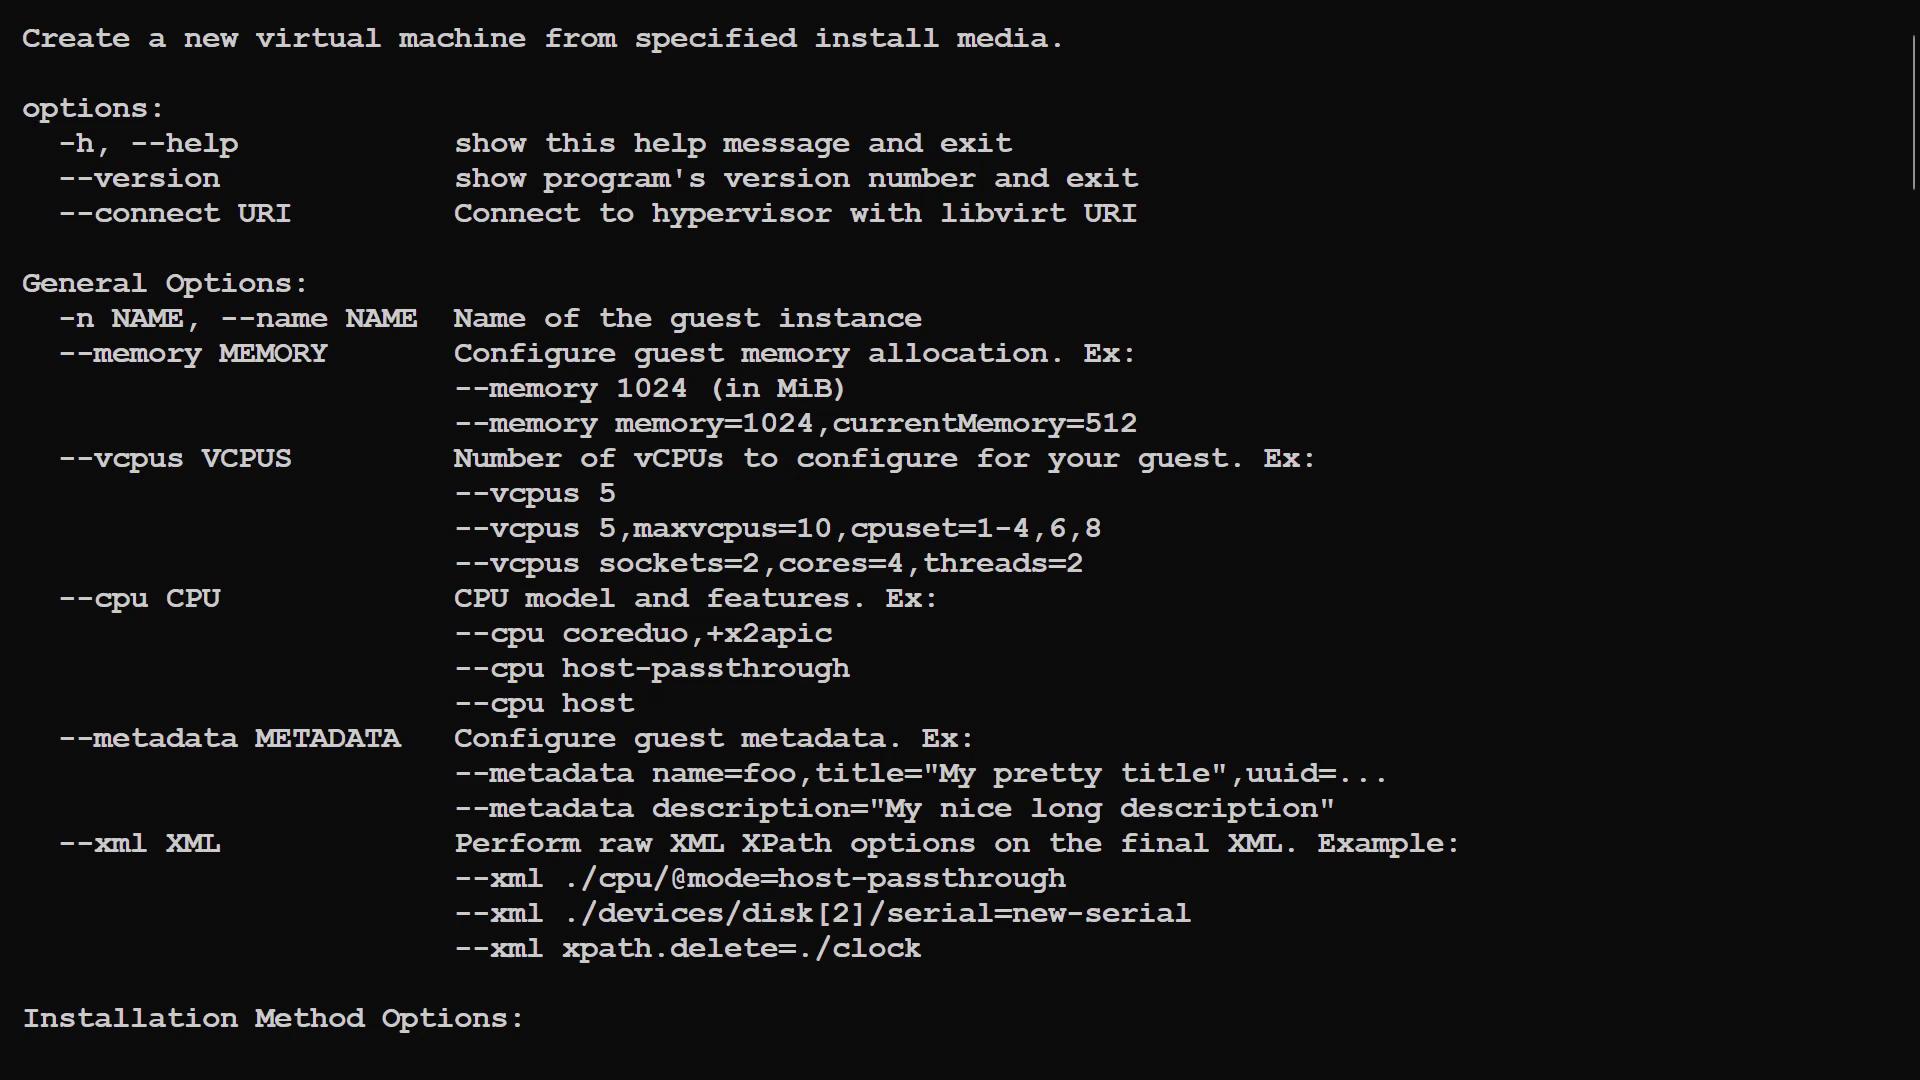
Run the following command to view all available options:

virt-install --help

Key options include:

  • Name, Memory, and vCPUs: Assign a name to the VM, allocate memory (in megabytes), and set the number of virtual CPUs.

  • Disk: Specify the path to the existing disk image. For example:

    --disk /var/lib/libvirt/images/ubuntu-24.04-minimal-cloudimg-amd64.img,cache=none
    
  • Graphics: Use --graphics none to disable a graphical interface and run the VM solely via a text console.


Building and Running the Virtual Machine

Use the following complete command to create a VM running Ubuntu 24.04 with 1024 MiB memory, 1 vCPU, and the pre-copied cloud image while disabling graphical output:

jeremy@kodekloud:~$ virt-install --osinfo ubuntu24.04 --name ubunt1 --memory 1024 --vcpus 1 --import --disk /var/lib/libvirt/images/ubuntu-24.04-minimal-cloudimg-amd64.img --graphics none

When you run the command, you may observe output similar to this:

WARNING  Requested memory 1024 MiB is less than the recommended 3072 MiB for OS ubuntu24.04

Starting install...
Creating domain...
Running text console command: virsh --connect qemu:///system console ubunt1
Connected to domain 'ubunt1'
Escape character is ^] (Ctrl + })
...
Domain creation completed.

This output indicates that you are connected directly to the VM’s text console—similar to having a monitor and keyboard attached. To exit the console, press Control + the closing square bracket (Ctrl + ]).

To list all virtual machines, run:

jeremy@kodekloud:~$ virsh list --all
 Id    Name       State
------------------------
 1     ubunt1     running
jeremy@kodekloud:~$

Shut down the VM by running:

jeremy@kodekloud:~$ virsh shutdown ubunt1
Domain 'ubunt1' is being shutdown
jeremy@kodekloud:~$ virsh list --all
 Id    Name       State
------------------------
 -     ubunt1     shut off

If necessary, force a shutdown using:

jeremy@kodekloud:~$ virsh destroy ubunt1

Once shut down, you can remove the VM’s definition and all associated storage (including the copied image):

jeremy@kodekloud:~$ virsh undefine ubunt1 --remove-all-storage
Domain 'ubunt1' has been undefined
Volume 'vda'(/var/lib/libvirt/images/ubuntu-24.04-minimal-cloudimg-amd64.img) removed.

Recreating the Virtual Machine Using Cloud-Init

The Ubuntu cloud image includes cloud-init automation scripts that allow you to set a root password automatically. To recreate the VM with cloud-init that generates a random root password, append the --cloud-init root-password-generate=on option.

jeremy@kodekloud:~$ virt-install --osinfo ubuntu24.04 --name ubunt1 --memory 1024 --vcpus 1 --import --disk /var/lib/libvirt/images/ubuntu-24.04-minimal-cloudimg-amd64.img --graphics none --cloud-init root-password-generate=on
WARNING  Requested memory 1024 MiB is less than the recommended 3072 MiB for OS ubuntu24.04
Starting install...
Password for first root login is: wMgdynhWmsdluzjH
Installation will continue in 10 seconds (press Enter to skip)...

Once the installation begins and the VM boots, you will eventually see a login prompt on the console. The boot output (including kernel messages and cloud-init logs) will scroll until you reach:

Ubuntu 24.04 LTS ubuntu ttyS0
ubuntu login:

Log in using "root" as the username, and paste the generated password (note that nothing appears as you paste). On first login, you will be required to change the password:

You are required to change your password immediately (administrator enforced).
Changing password for root.
Current password:

After updating the password, you’ll be logged into the Ubuntu operating system running on your virtual machine. Verify the virtual disk size is approximately 10 GiB:

root@ubuntu:~# df -h
Filesystem      Size  Used Avail Use% Mounted on
/dev/root       8.7G  466M  8.2G   6% /
tmpfs            481M     0  481M   0% /dev/shm
tmpfs            791M  756K  791M   1% /run
tmpfs           5.0M     0  5.0M   0% /run/lock
/dev/vda16      881M   42M  839M   6% /boot
/dev/vda15      105M   51M   47M  51% /boot/efi
tmpfs            97M     0   97M   0% /run/user/0
root@ubuntu:~#

Then update the package lists to ensure network connectivity:

root@ubuntu:~# apt update
...
Fetched 24.5 MB in 11s (2206 kB/s)
Reading package lists... Done
Building dependency tree... Done
Reading state information... Done
17 packages can be upgraded. Run 'apt list --upgradable' to see them.

To exit the VM’s console, press Control + ].

You can reconnect at any time with:

jeremy@kodekloud:~$ virsh console ubunt1

If no login prompt appears, simply press Enter.


Handling OS Variants with virt‑install

Sometimes the operating system inside a virtual disk image may be a newer or unlisted variant in the virt-install OS database. Here are some options to handle such cases:

  1. Auto-detect OS

    Use --osinfo detect=on to let virt-install automatically determine the OS type.

    Example:

    virt-install --osinfo detect=on --name ubuntu1 --memory 1024 --vcpus 1 --import --disk /var/lib/libvirt/images/ubuntu-24.04-minimal-cloudimg-amd64.img --graphics none --cloud-init root-password-generate=on
    
  2. Specify a Generic OS Variant:
    If you are sure the distribution is modern, you might use a generic identifier:

    virt-install --osinfo linux2022 --name ubuntu1 --memory 1024 --vcpus 1 --import --disk /var/lib/libvirt/images/ubuntu-24.04-minimal-cloudimg-amd64.img --graphics none
    
  3. Disable Strict OS Requirement:
    Use --osinfo detect=on,require=off or set the environment variable:

    export VIRTINSTALL_OSINFO_DISABLE_REQUIRE=1
    

If you see an error similar to:

ERROR
--os-variant/--osinfo OS name is required, but no value was set or detected.
...

refer to the provided options.


Wrapping Up

In this guide, we covered the following steps:

  • Downloading and verifying an Ubuntu cloud image
  • Inspecting and resizing the virtual disk using QEMU
  • Setting up a storage pool by copying the image to /var/lib/libvirt/images/
  • Creating a virtual machine with virt-install, including essential options such as name, memory, vCPUs, disk, and graphics
  • Utilizing the --import option to deploy a guest from an existing disk image
  • Incorporating cloud-init to automatically generate a root password
  • Connecting to and managing the VM console using virsh
With these steps, you now have a fully functional virtual machine running Ubuntu 24.04. In the next lesson, we’ll explore additional configuration and management options.

The image shows a command-line interface with options and examples for creating a new virtual machine using specified install media. It includes parameters for configuring memory, vCPUs, CPU features, metadata, and XML options.

Watch Video

Watch video content

Previous
Manage and Configure Virtual Machines