Linux Foundation Certified System Administrator (LFCS)
Storage
List Create Delete and Modify Physical Storage Partitions
In this guide, we'll explore how to effectively manage disk partitions on Linux systems. Using a practical example, imagine you have a 2TB SSD to be split for dual-booting Windows and Ubuntu. Since Windows requires NTFS and Ubuntu uses EXT4, you must divide the SSD into partitions—1TB for Windows and 1TB for Ubuntu. This process is known as partitioning, ensuring each operating system functions independently.
Inspecting Partitions with lsblk
The lsblk
command is an essential tool in Linux for listing block devices and their partitions. Running lsblk
displays all disks and partitions on your system:
jeremy@kodekloud:~$ lsblk
NAME MAJ:MIN RM SIZE RO TYPE MOUNTPOINTS
sda 8:0 0 45G 0 disk
├─sda1 8:1 0 1M 0 part /boot
├─sda2 8:2 0 2G 0 part
├─sda3 8:3 0 43G 0 part
└─ubuntu--vg-ubuntu--lv 252:0 0 21.5G 0 lvm /
sr0 11:0 1 1024M 0 rom
In this output, the disk sda
comprises three partitions (sda1
, sda2
, sda3
). Note that Logical Volume Manager (LVM) entries are handled separately. On physical machines, you commonly see disk names like sda1
, sda2
, etc., while virtual environments may use different naming conventions. For example, a sample layout might be:
sda
├─sda1
└─sda2
sdb
├─sdb1
├─sdb2
└─sdb3
sdc
└─sdc1
Here, the disk identifier (e.g., sda
) and the partition number indicate the order and location of partitions. In Linux, every partition is treated as a file in the /dev
directory, as shown below:
jeremy@kodekloud:~$ ls /dev/sda1
/dev/sda1
jeremy@kodekloud:~$ ls /dev/sda
/dev/sda
Viewing Detailed Partition Information with fdisk
The fdisk
utility offers a detailed view of disk partitions. To display the partition table for /dev/sda
, use:
jeremy@kodekloud:~$ sudo fdisk --list /dev/sda
[sudo] password for jeremy:
Disk /dev/sda: 45 GiB, 48318382808 bytes, 94371840 sectors
Disk model: VBOX HARDDISK
Units: sectors of 1 * 512 = 512 bytes
Sector size (logical/physical): 512 bytes / 512 bytes
I/O size (minimum/optimal): 512 bytes / 512 bytes
Disklabel type: gpt
Disk identifier: F2775F4C-AE12-41CE-B808-027E4304B615
Device Start End Sectors Size Type
/dev/sda1 2048 4095 2048 1M BIOS boot
/dev/sda2 4096 419839 419304 2G Linux filesystem
/dev/sda3 4198400 9436791 90171392 43G Linux filesystem
Note
The partition table divides a storage device into sectors. For instance, with a sector size of 512 bytes, starting at sector 2048 means the partition begins after 512 × 2048 = 1,048,576 bytes (1MB). Adjust the calculation based on your disk's sector size if it is different.
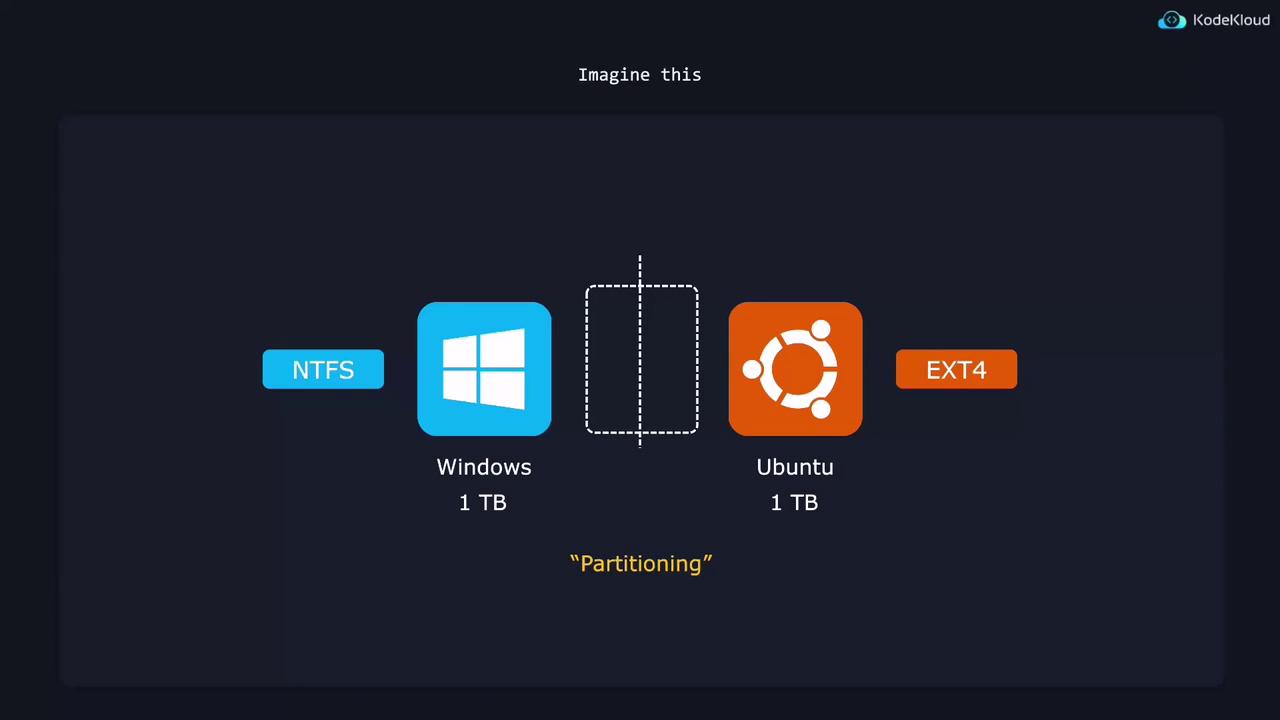
Partitioning Using cfdisk
For users who prefer a more interactive graphical interface, cfdisk
is an excellent tool for creating and modifying partitions. Suppose you've added a second storage device and want to partition /dev/sdb
. Launch cfdisk with:
sudo cfdisk /dev/sdb
In the cfdisk interface, you'll see how data is stored as a series of 0s and 1s, with the partition table clearly marking start and end points.
Modern systems generally prefer GPT (GUID Partition Table) as it offers enhanced reliability, supports more primary partitions, and supports larger partition sizes compared to older MBR (DOS) systems.
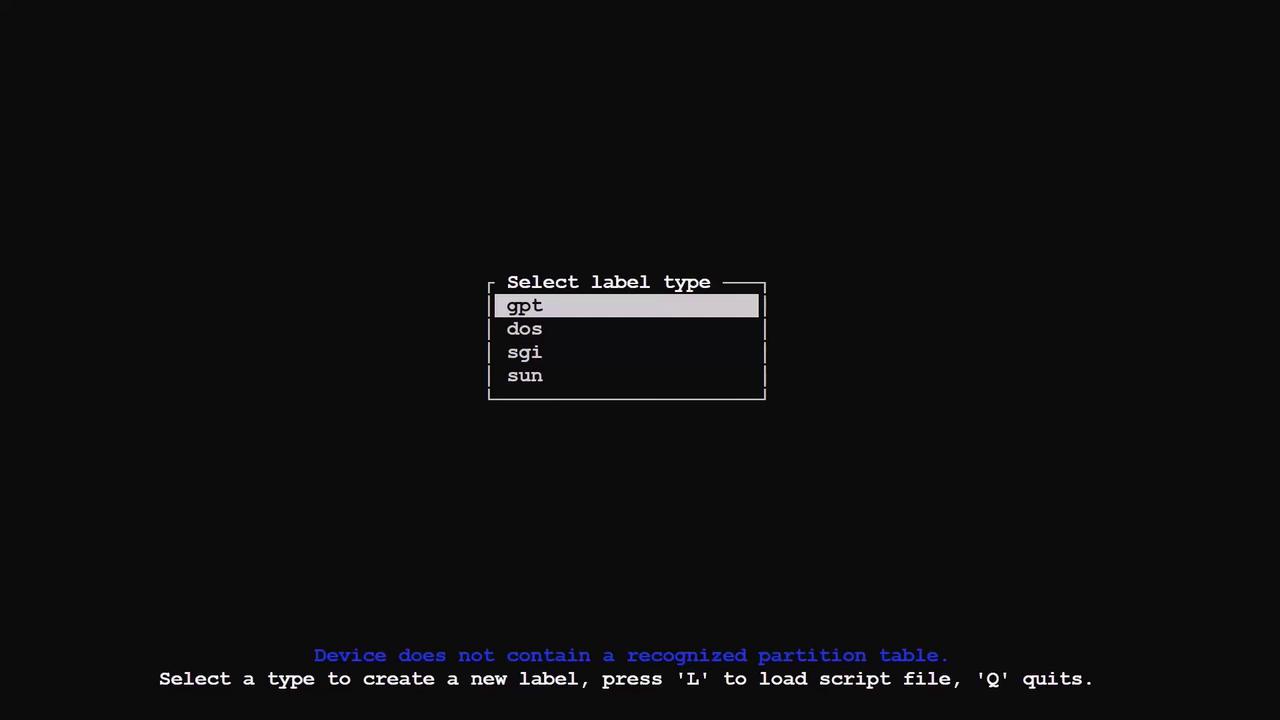
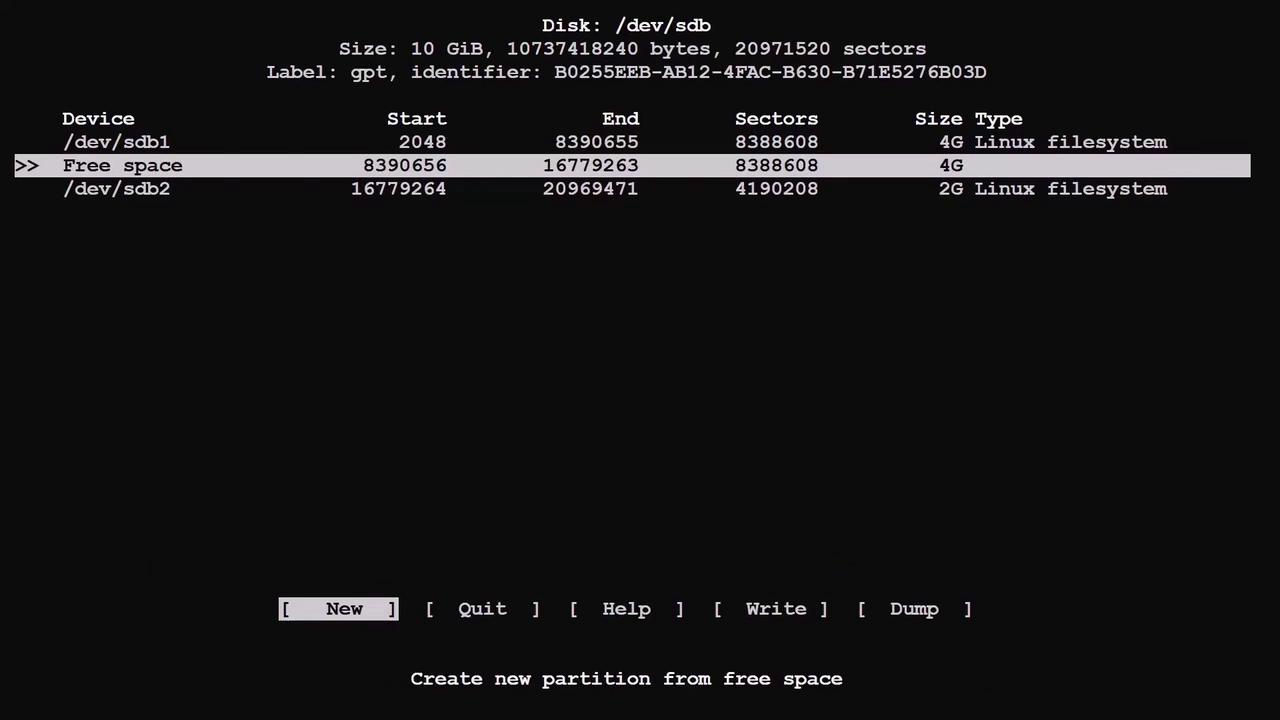
Example: Partitioning a 10 GiB Drive
Imagine you have a 10 GiB drive that needs to be partitioned into an 8 GiB partition for an operating system and a 2 GiB partition for swap. Follow these steps in the cfdisk interface:
- Navigate to the free space and press the New button. Adjust the partition size to "8G" for the first partition.
- Use the remaining free space to create a second partition of 2 GiB.
- If needed, modify partition sizes later using the Resize option. For instance, you can shrink the first partition to "4G" to free up space for an additional partition.
Below is an example of the cfdisk interface:
Disk: /dev/sdb
Size: 10 GiB, 10737418240 bytes, 20971520 sectors
Label: gpt, identifier: B0255EEB-AB12-4FAC-B630-B71E5276803D
Device Start End Sectors Size Type
/dev/sdb1 2048 16779263 167771216 8G Linux filesystem
>> /dev/sdb2 16779264 20969471 419208 2G Linux filesystem
Partition UUID: D1496BAD-498E-419D-98D7-0DF0096F2A5F
Partition type: Linux filesystem (OFC63DAF-8483-4772-8E79-3D69D8477DE4)
[ Delete ] [ Resize ] [ Quit ] [ Type ] [ Help ] [ Write ] [ Dump ]
Tip
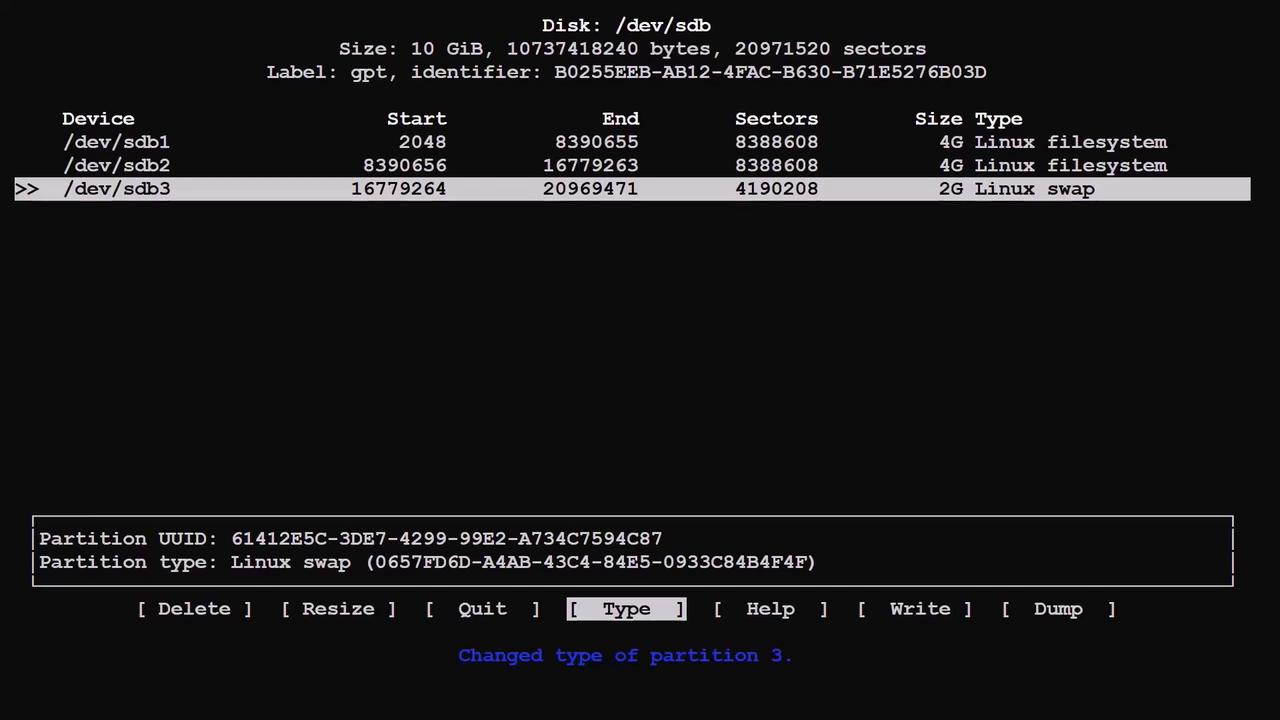
Partitions in cfdisk are numbered in the order of creation rather than by physical location. In other words, a partition created later may appear as SDB2 even if it's located at the end of the disk. Use the Sort option in cfdisk to reorder partitions naturally.
After sorting, the partition layout might display as follows:
Disk: /dev/sdb
Size: 10 GiB, 10737418240 bytes, 20971520 sectors
Label: gpt, identifier: B0255EEB-AB12-4FAC-B630-B71E5276B03D
Device Start End Sectors Size Type
/dev/sdb1 2048 8390655 8388608 4G Linux filesystem
>>/dev/sdb2 8390656 16779263 8388608 4G Linux filesystem
/dev/sdb3 16779264 20969471 4190208 2G Linux filesystem
Partition UUID: EED5DAE2-BE25-42C5-A0F5-09FFCD4DFBA3
Partition type: Linux filesystem (OFC63DAF-8483-4772-8E79-3D69D8477DE4)
[ Delete ] [ Resize ] [ Quit ] [ Type ] [ Help ] [ Write ] [ Dump ]
If you wish to change a partition’s type (for example, to designate the 2G partition as Linux swap), select the partition, press the Type button, and then choose "Linux swap" from the available options. Similarly, you can change a partition to the EFI system type if you're setting up a boot partition.
Committing Your Changes in cfdisk
Remember that cfdisk only plans the changes until you commit them. Here’s how to proceed:
- Review all changes and use Quit to undo any unintended modifications.
- Once you are satisfied, press the Write button. Confirm your changes by typing "Yes" when prompted.
- Finally, exit cfdisk by selecting Quit and verify the new partition layout using the
lsblk
command.
Summary
This guide has walked you through the process of listing, creating, deleting, and modifying physical storage partitions using tools like lsblk
, fdisk
, and cfdisk
. By understanding these fundamental partitioning techniques, you can efficiently manage disk resources and optimize your Linux system installations.
For further reading and advanced partition management strategies, explore our related articles and documentation.
Happy partitioning!
Watch Video
Watch video content