Microsoft Azure Security Technologies (AZ-500)
App Security
Configure Microsoft Graph permissions
This guide provides step-by-step instructions for configuring Microsoft Graph permissions using the Azure portal, Graph Explorer, and Postman. It also explains how tokens and JWTs work within this context.
Overview of Microsoft Graph
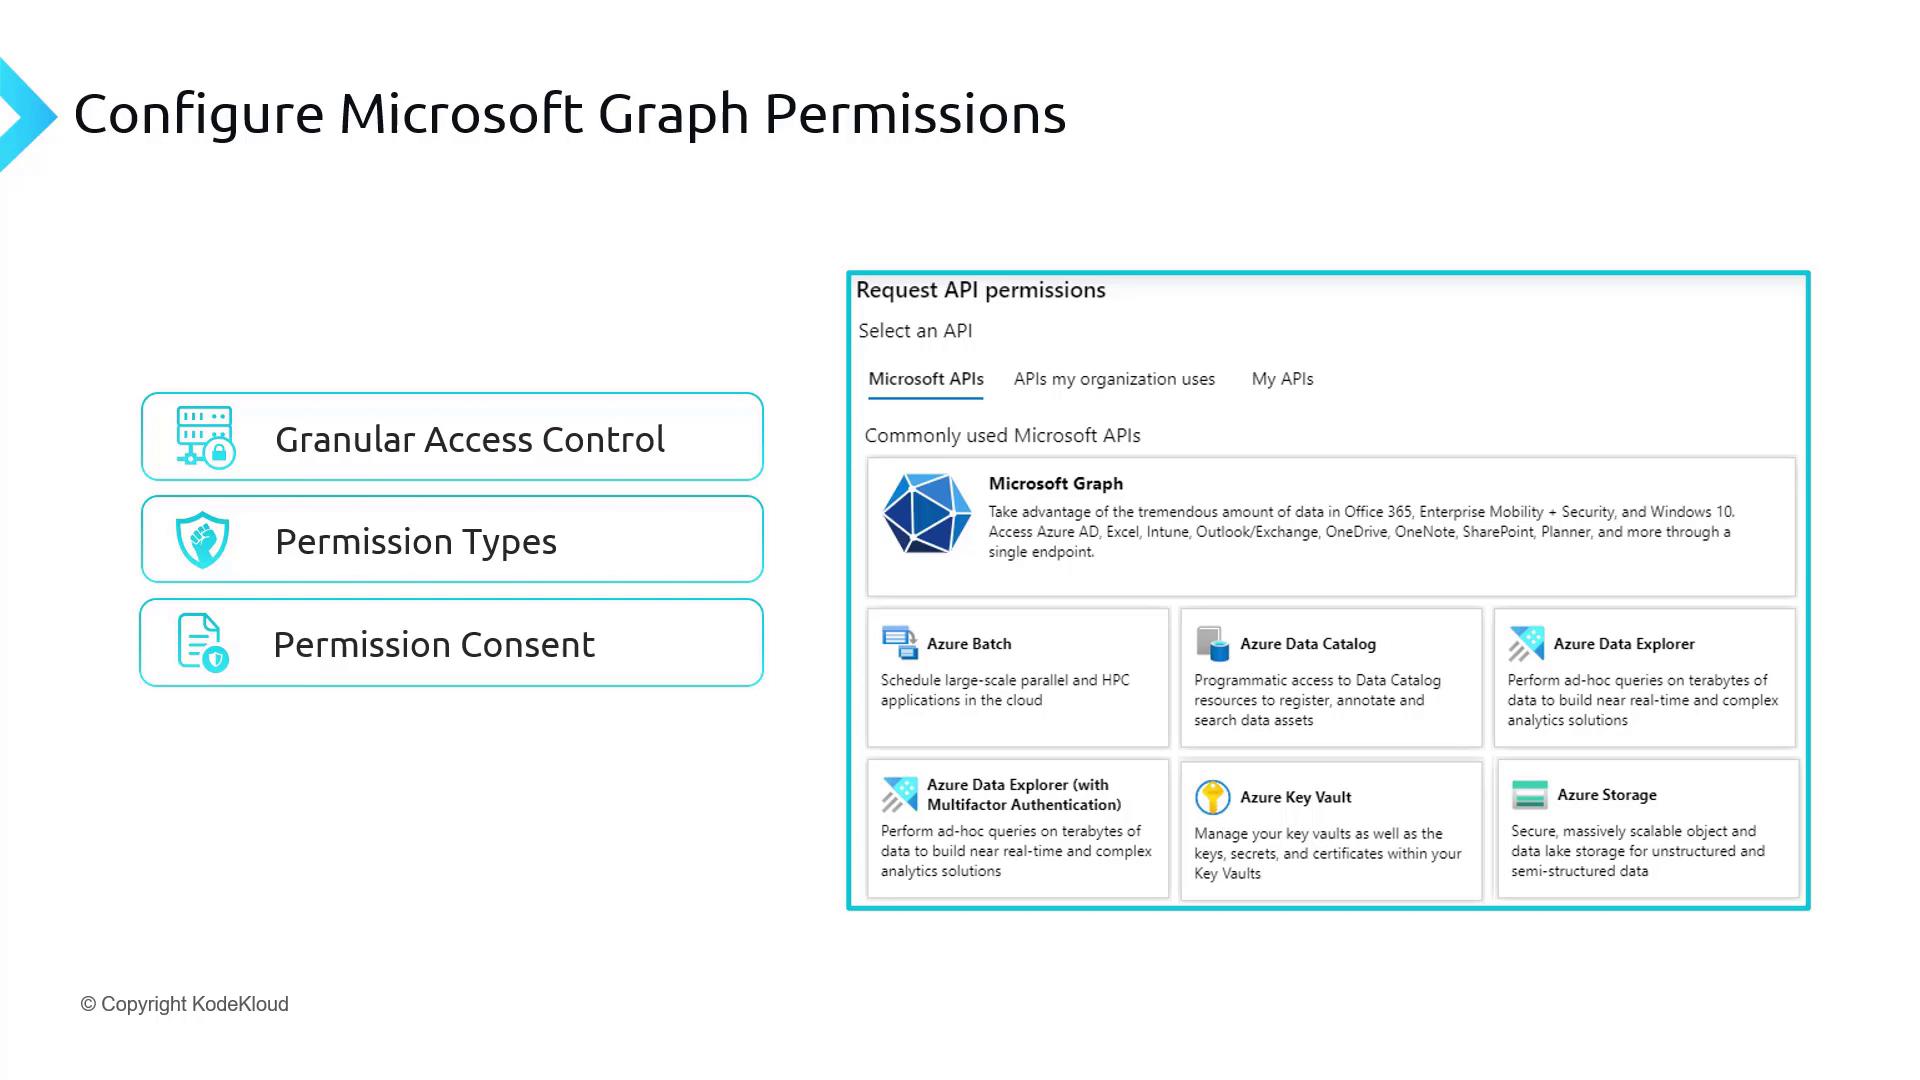
Before configuring permissions, it is essential to understand Microsoft Graph and its benefits. Microsoft Graph is a unified API endpoint that provides access to data, relationships, and insights across various Microsoft Cloud services—such as Office 365, Azure Active Directory, OneDrive, SharePoint, and more. Developers leverage Microsoft Graph to integrate applications with Microsoft services, performing operations like reading user data, accessing OneDrive files, managing SharePoint sites, and controlling group memberships in Azure AD, all from a single endpoint.
By using Microsoft Graph, your application can interact seamlessly with multiple Microsoft services (e.g., Azure AD, OneDrive, SharePoint, OneNote, Booking, Planner) without dealing with multiple endpoints.
Permission Types and Consent
Access to Microsoft Graph resources is secured via granular permissions. Permissions are divided into:
- Delegated Permissions: Used when your application acts on behalf of a signed-in user.
- Application Permissions: Used by daemon or background services where no user is present to delegate permissions.
For example:
- User.Read: Allows reading the profile information of the signed-in user.
- Directory.Read: Enables reading directory data.
- Groups.ReadWrite: Permits reading and writing group information.
Granting consent is a critical step. Users or administrators must consent to the permissions requested by an application; this consent can be applied individually or organization-wide.
Configuring Permissions in the Azure Portal
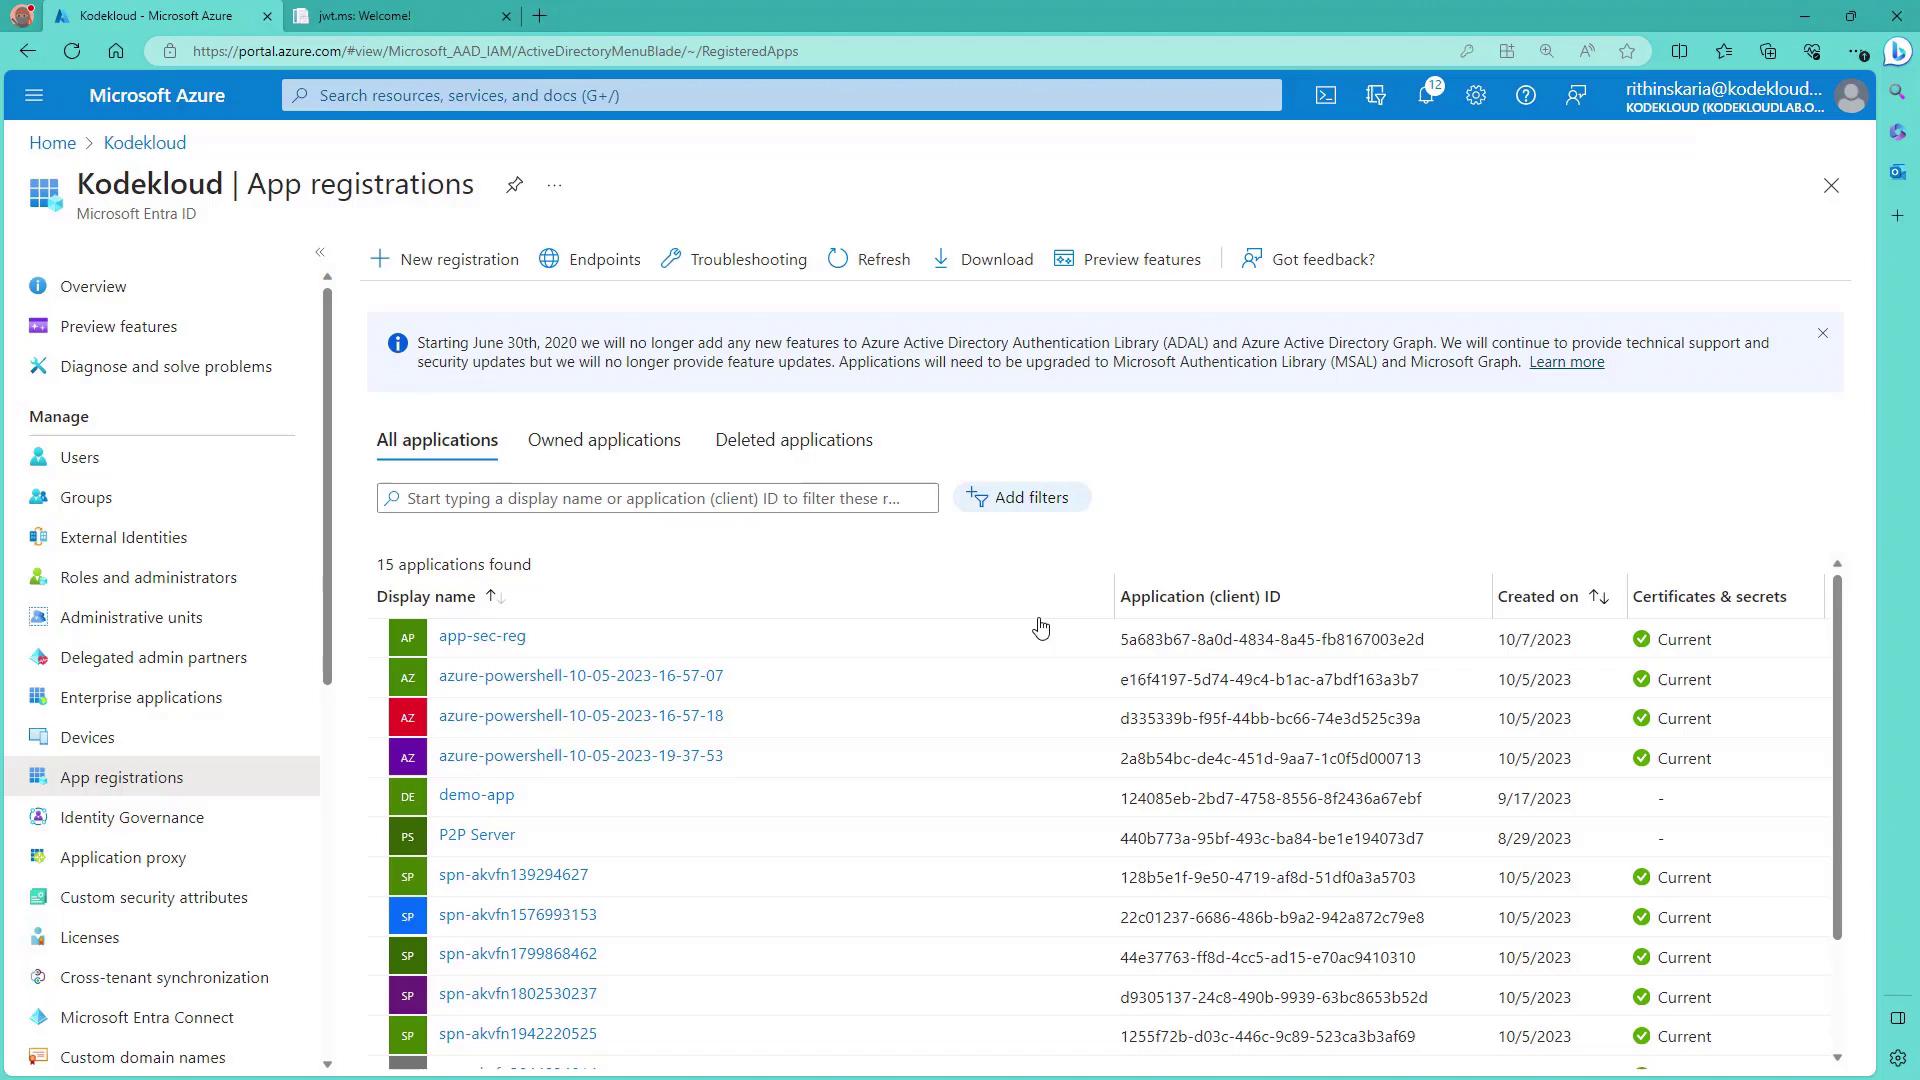
Navigate to your Azure Active Directory and open the App registrations section. For demonstration purposes, this guide uses an app registration named AppSecReg.
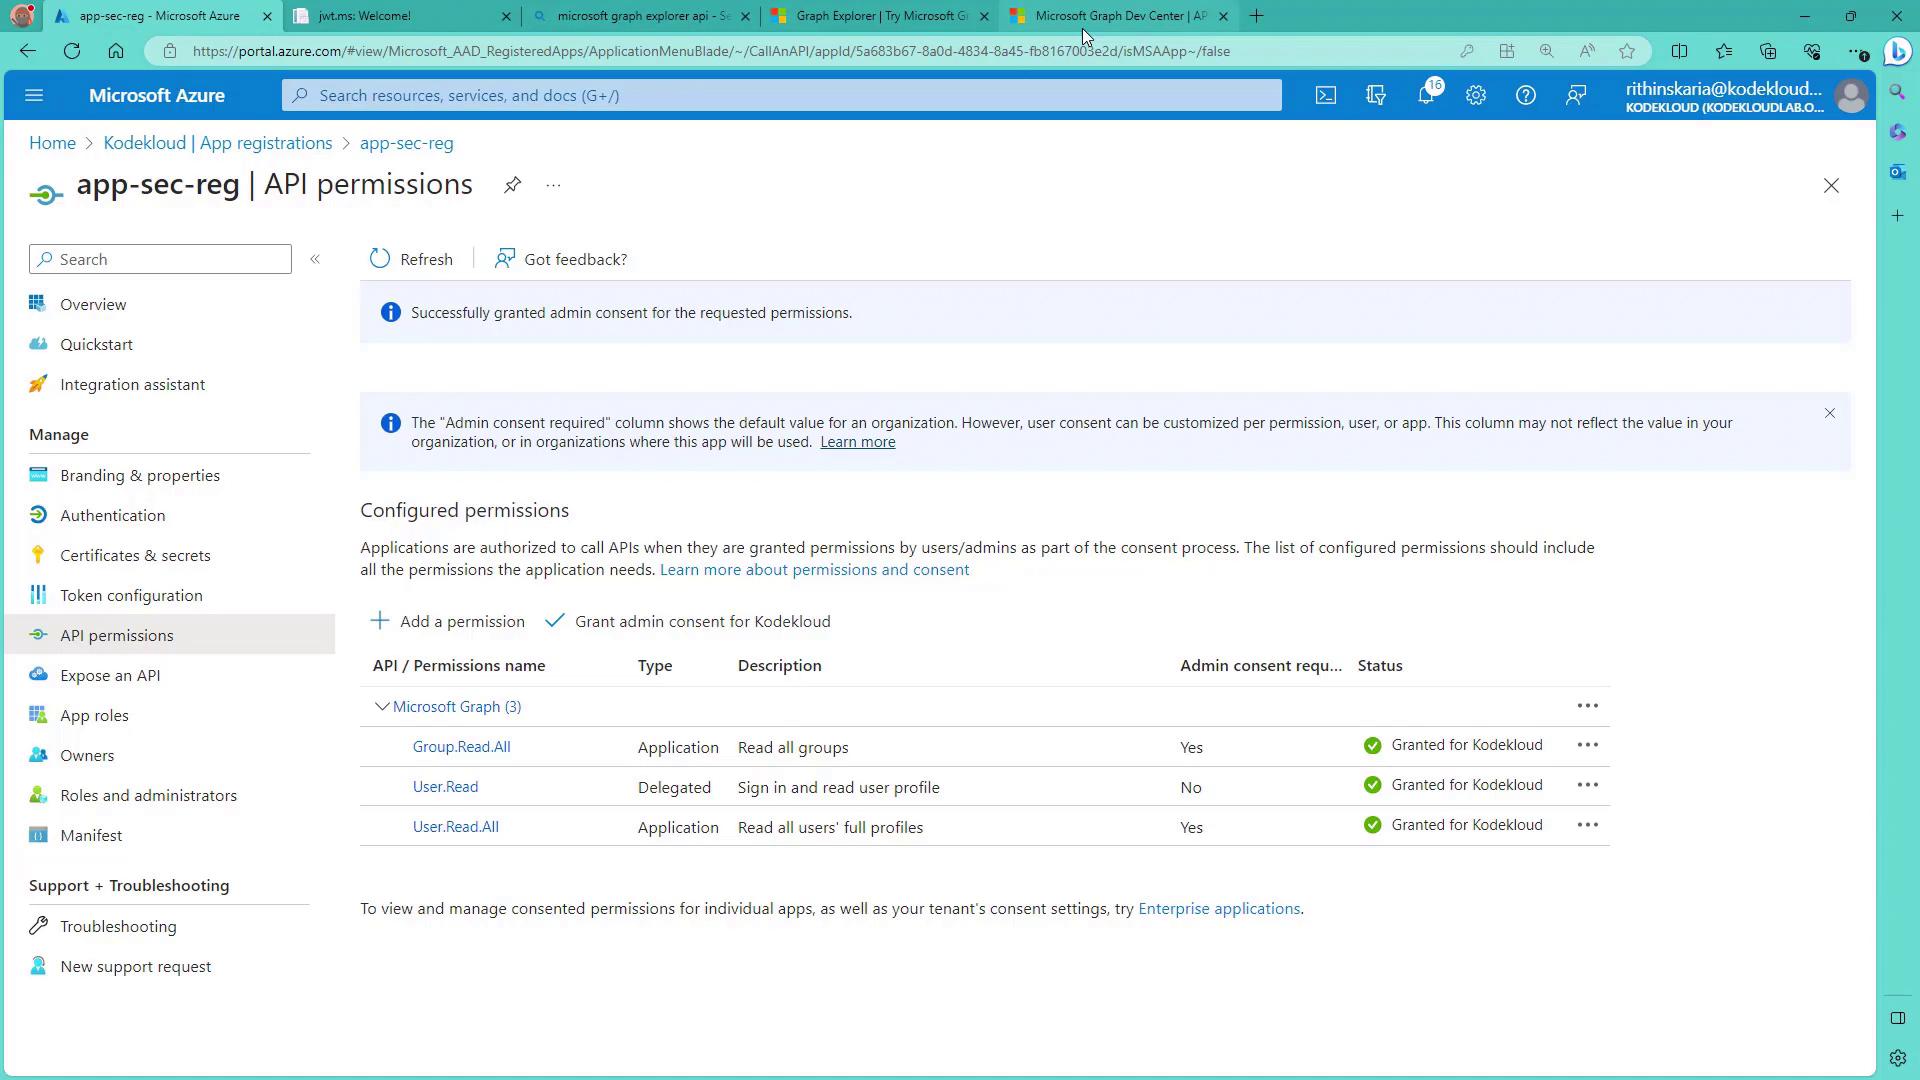
In the app registration, select API permissions. Initially, you may see a delegated permission already configured, enabling the app to perform actions on behalf of the signed-in user.
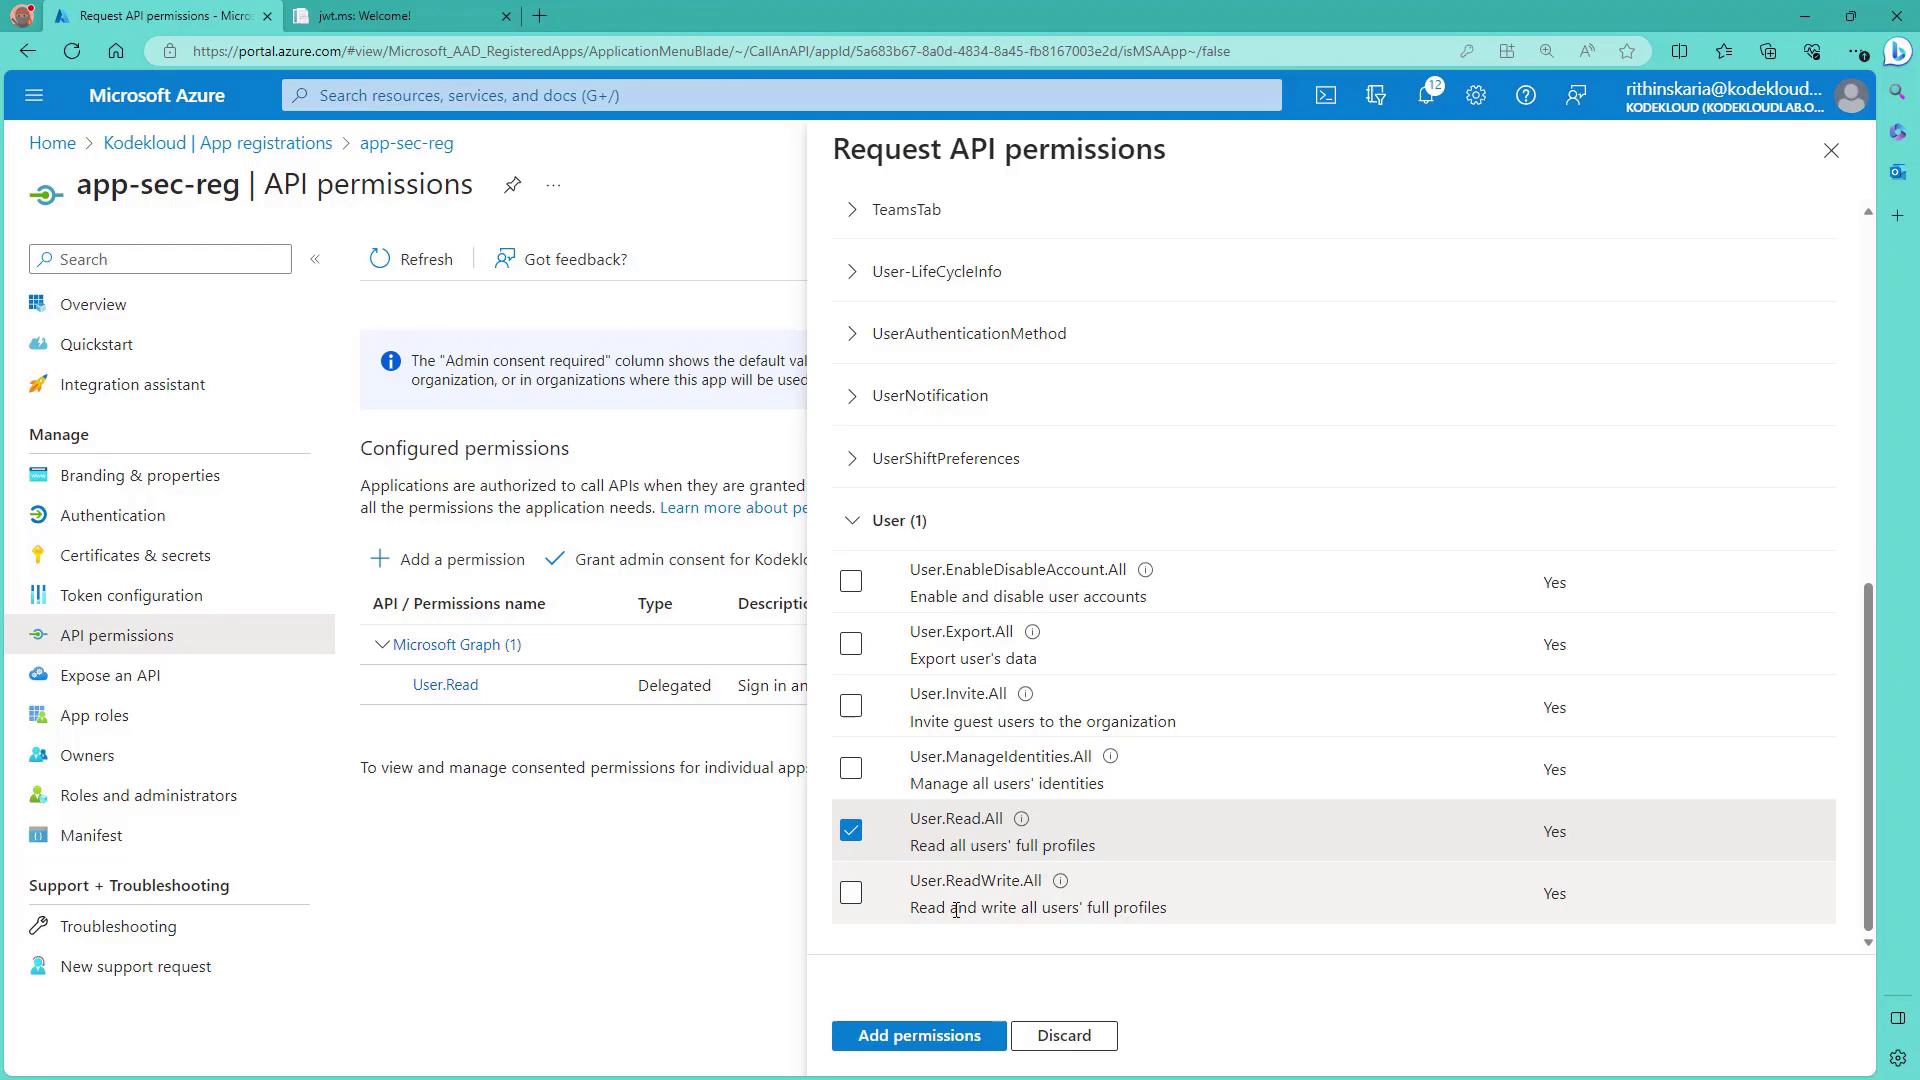
To add additional permissions (for example, to read all users in the directory), select Microsoft Graph and then the Application permissions option. Under the Users section, add the User.ReadWrite.All permission.
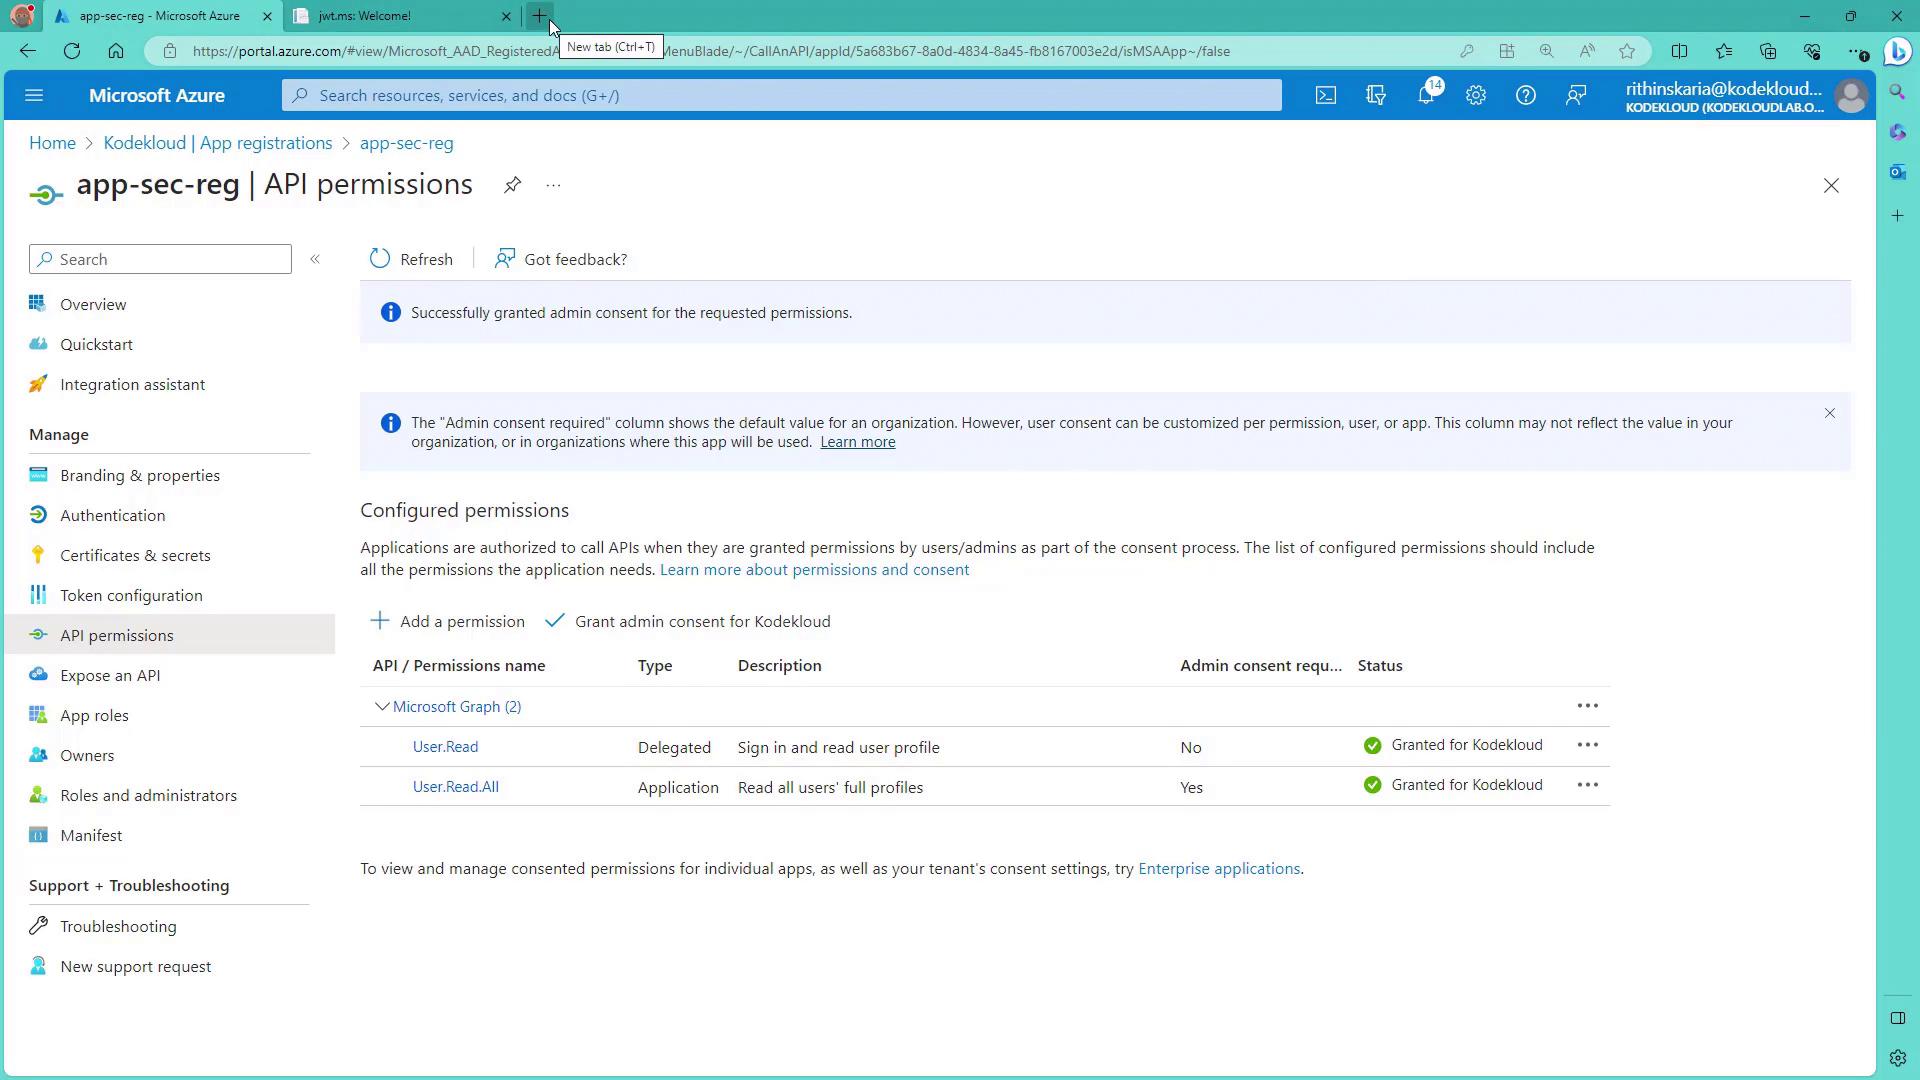
After adding new permissions, an administrator must grant consent to enable them. Once granted, revisit the API permissions page to verify that the updated permissions are in effect.
Testing with Microsoft Graph Explorer
Microsoft Graph Explorer is a web-based tool to test API endpoints and explore supported resources. You can use a sample tenant or sign in with your own account.
- Sign in with your account and consent to the application's permissions as necessary.
- Run a query to retrieve user details. If the permissions are insufficient, the response will display an "Insufficient privileges" error.
For example, a query to get all user details might return:
{
"error": {
"code": "Authorization_RequestDenied",
"message": "Insufficient privileges to complete the operation.",
"innerError": {
"date": "2023-10-07T08:37:20",
"request-id": "15a6426b-5feb-4ae2-8687-7bd546f384d",
"client-request-id": "dadc59e-beag-45f-3bf9-949e61b0e5a7"
}
}
}
After granting the required User.Read.All consent, running the query again should return a 200 response with the list of users.
Working with Service Principals and Postman
The next step is to test API calls using a service principal and Postman.
Open the Endpoints section for your service principal in the Azure portal and select the V1 endpoint (which uses the term "resource").
In Postman, create a GET request that includes the generated token in the Authorization header. A sample token response in JSON format might look like:
{
"token_type": "Bearer",
"expires_in": "3599",
"ext_expires_in": "3599",
"expires_on": "1696671520",
"not_before": "1696667620",
"resource": "https://graph.microsoft.com/",
"access_token": "eyJ0eXAiOiJKV1QiLCJhbGciOiJSUzI1NiIsInR5cCI6IkpXVCJ9.eyJhdWQiOiIxOTU3MDc1Ny0zZGZhLTQ2MjMtYjllMS02ZWM0NTdjZmU3M2IiLCJ1c2VyX2lkIjoiYzEyZmY5ZmYtZjAxYy00ODRkLTg4ZDUtZDA1NWRmMzYyYTE1Iiwic3ViX3R5cGUiOiJ0b2tlbiIsInNjb3BlIjpbImFsbCJdLCJleHBpcmF0aW9uX3N0YWdlcyI6Ii9zcGFjZXMvaW50ZWdyYXRpb24vY3VzdG9tZXIvc2hhcmUvbm9kZXMvYWN0cy9hbGxhdGFnZTEifQ.sD_ntVBj0oWg9qgPcbzB21n7JH1OiId=15n6k6Nh2SE7G6u_Dx-Nq-dr-xC5fh-1-chcFu2wCxd49yY06hS2=THx_XcB_4wGmFWgEHA6wE6VqyYoYV2Elz7sn0=Cl0sHB5YDFHylFmBzYg8Xg85YzB2Wg2Y"
}
- When you send the request, you should receive a 200 response that returns user information, such as:
{
"businessPhones": [],
"displayName": "Florrie Adams",
"givenName": "Florrie",
"jobTitle": null,
"mail": null,
"mobilePhone": null,
"officeLocation": null,
"preferredLanguage": null,
"surname": null,
"userPrincipalName": "[email protected]",
"id": "0194870d-84d5-4e63-b5fe-14991564e0e5"
}
{
"businessPhones": [],
"displayName": "Florrie Cunningham",
"givenName": "Florrie",
"jobTitle": null,
"mail": null,
"mobilePhone": null,
"officeLocation": null,
"preferredLanguage": null,
"surname": null,
"userPrincipalName": null,
"id": "d8704c92-14a0-41b7-85c6-2273896ac2b5"
}
- If you attempt an operation that requires write permissions (for example, modifying a user) without the correct permissions, the request will fail.
You can inspect the included claims and roles in the JWT token by pasting it into a JWT decoder. An example inspection might return:
{
"type": "JWT",
"nonce": "bjpbdJzOAnkIgjXZTIJpVStcwJnO3_Vp7z7kyv8A",
"alg": "RS256",
"x5t": "KI3Q9NmR7RofxmeZoXqbhZGew",
"kid": "KI3Q9NmR7RofxmeZoXqbhZGew",
"aud": "https://graph.microsoft.com/",
"iss": "https://sts.windows.net/le0fa211-37dc-45f5-bb0f-b66087cac64b/",
"iat": 1696676200,
"nbf": 1696676200,
"exp": 1696671520,
"azp": "E2F9Y3LkI7B53WlyvicenMooCAA=",
"app_displayname": "app-sec-reg",
"appid": "5a68b637-8ad4-4834-b845-fb167008e2d3",
"acr": "1",
"idp": "https://sts.windows.net/le0fa211-37dc-45f5-bb0f-b66087cac64b/",
"appidacr": "0",
"tid": "pp",
"oid": "33c9f1df-55d1-4ce7-97d5-840123798",
"rh": "0.AbCqEAPIHt9U7DgHrG5cWAAAAAAAAAAAAAAJAAA.",
"roles": [
"User.Read.All"
],
"sub": "33c9f1df-55d1-4ce7-97d5-840123798",
"tenant_region_scope": "NA",
"iss": "https://le0fa211-37dc-45f5-bb0f-b66087cac64b",
"uti": "njFBQ0B0-ef_sW4ZGA",
"exp": 1696612058,
"wids": [
"0d1-0d1-4acb-b408-d5ca73121e90"
],
"xms_tcdt": 1692737836
}
Note
This JWT indicates that only the User.Read.All permission is present. To add further capabilities—such as listing groups—you need to add additional permissions like Group.Read.All.
Adding Group Permissions
- In the Azure portal, add the Group.Read.All permission (under Microsoft Graph application permissions) from the Groups section.
- After adding the permission, grant admin consent and generate a new token in Postman.
- Verify the updated token using a JWT decoder. The new token should include roles such as Group.Read.All and User.Read.All:
{
"typ": "JWT",
"nonce": "FFSCEN2jSRdrRxFjory1wMFbnsZ1m5_OXOMqLq0o",
"alg": "RS256",
"skid": "K1309NnR7BofxmeZoXqbHZGew",
"kid": "K1309NnR7BofxmeZoXqbHZGew",
"aud": "https://graph.microsoft.com",
"iss": "https://sts.windows.net/1e0fa21a-37dc-45f5-bbf6-e66876ac64b/",
"exp": 1696678261,
"nbf": 1696675061,
"iat": 1696675081,
"azp": "E2YfYBax4p8iFtWk81t868/BAA",
"appid": "sa6b3678-aad4-ab5d-e2fd-36e703e1e30c",
"appidacr": "1",
"idtyp": "appid",
"tid": "c9a18c94-55d1-4cc7-9d78-54d5312978",
"roles": [
"Group.Read.All",
"User.Read.All"
]
}
- Test the new permission by executing a GET request for groups in Postman. A successful response returns group details, similar to:
{
"@odata.context": "https://graph.microsoft.com/v1.0/$metadata#groups",
"@microsoft.graph.tips": "Use Select to choose only the properties your app needs, as this can lead to performance improvements. For example: GET groups?$select=assignedLabels,assignedLicenses",
"value": [
{
"id": "63493487-44ef-4874-8683-825e5e3ad31",
"deletedDateTime": null,
"classification": null,
"createdDateTime": "2023-09-01T11:57:28Z",
"creationOptions": [],
"displayName": "DNS Administrators Group",
"expirationDateTime": null,
"groupTypes": [],
"mail": null,
"mailEnabled": false,
...
}
]
}
Summary
In this article, we covered how to configure Microsoft Graph permissions, including:
- The differences between delegated and application permissions.
- Configuring permissions in the Azure portal and granting admin consent.
- Testing permissions using Microsoft Graph Explorer and Postman.
- Inspecting JWT tokens to verify granted claims and roles.
Next, we will discuss managed identities—a crucial concept for secure service-to-service communication within Azure.
Happy integrating!
Watch Video
Watch video content