Microsoft Azure Security Technologies (AZ-500)
App Security
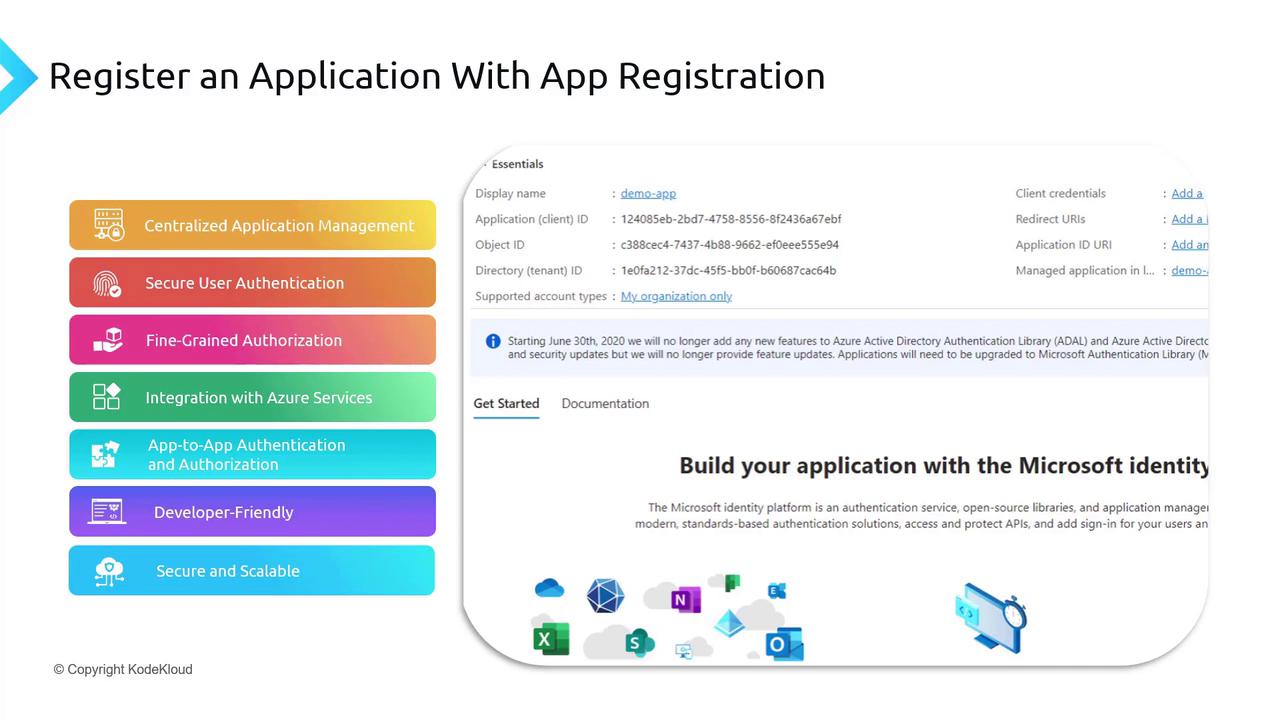
Register an application with App Registration
In this guide, you will learn how to integrate your application with Azure Active Directory (Azure AD) using the app registration process. App registration enables Azure AD to recognize your application by configuring credentials and settings for authentication and authorization. Once registered, your app is assigned a unique application (client) ID, which acts as an identifier during authentication—similar to a username for individuals.
Core Features of App Registration
Registering your application with Azure AD provides several advantages:
Centralized Application Management:
Manage all your registered applications through a unified Azure AD dashboard that streamlines configuration, permissions, and settings.Secure User Authentication:
Leverage robust authentication mechanisms provided by Azure AD to ensure only authorized users gain access to your application.Fine-Grained Authorization:
Define specific permissions for accessing resources or performing operations once a user is authenticated.Seamless Azure Services Integration:
Grant your application permission to access various Azure services such as Azure SQL Database and Blob Storage.Tip
For example, in a Key Vault demonstration, an app registration was created and its credentials were shared with a function app to grant the appropriate permissions effortlessly.
App-to-App Authentication:
Securely establish communication between your application and other services using application IDs and secrets or certificates.Developer-Friendly Tools:
Benefit from comprehensive SDKs, libraries, and samples available for multiple languages and platforms.Enhanced Security and Scalability:
Build on a globally distributed platform that follows industry-standard protocols to ensure high availability and robust security.
Creating an App Registration in the Azure Portal
Follow these steps to create an app registration using the Azure Portal:
Access the Azure Portal and Microsoft Entra ID:
Sign in to the Azure Portal. Navigate to Microsoft Entra ID (formerly Azure Active Directory).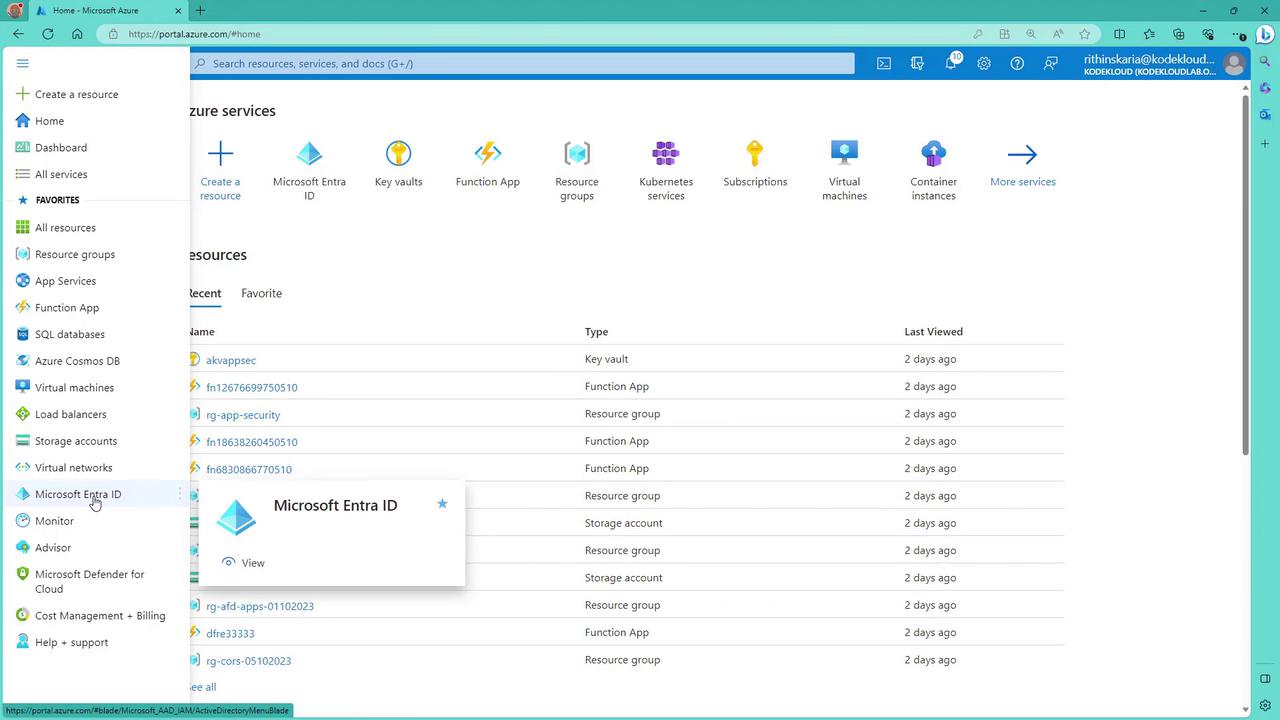
Navigate to App Registrations:
In the Microsoft Entra ID menu, select App registrations to view your existing applications or create a new one.
Initiate a New Registration:
Click New registration. Enter a descriptive name for your application (for example, "appsecreg"). Choose the supported account type based on whether your users are in a single organizational directory or multiple directories/personal accounts. This selection determines the authentication methods and credential types available.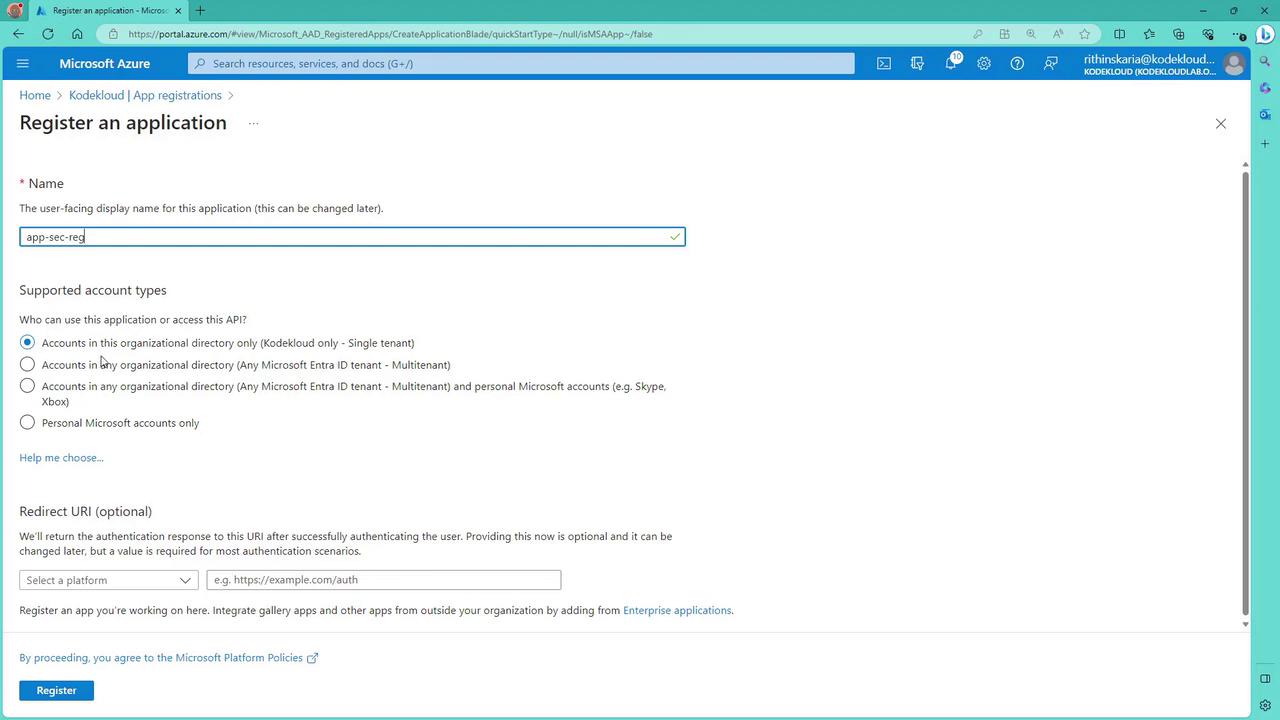
Configure the Redirect URI:
Specify the Redirect URI where users are sent after authentication. If your application requires a redirect (for instance, to a homepage), provide the appropriate URL. If not, simply click Register.Review Registration Details:
Once registered, the application details page displays critical information such as the application ID, object ID, and directory (tenant) ID.
Obtaining and Using Tokens
After completing app registration, you can use the provided credentials (client ID and client secret) to authenticate against Azure AD and acquire tokens.
Copy Essential Registration Details:
On the app registration page, copy the application (client) ID and note the token endpoint provided under Endpoints. This token endpoint is necessary when making authentication requests.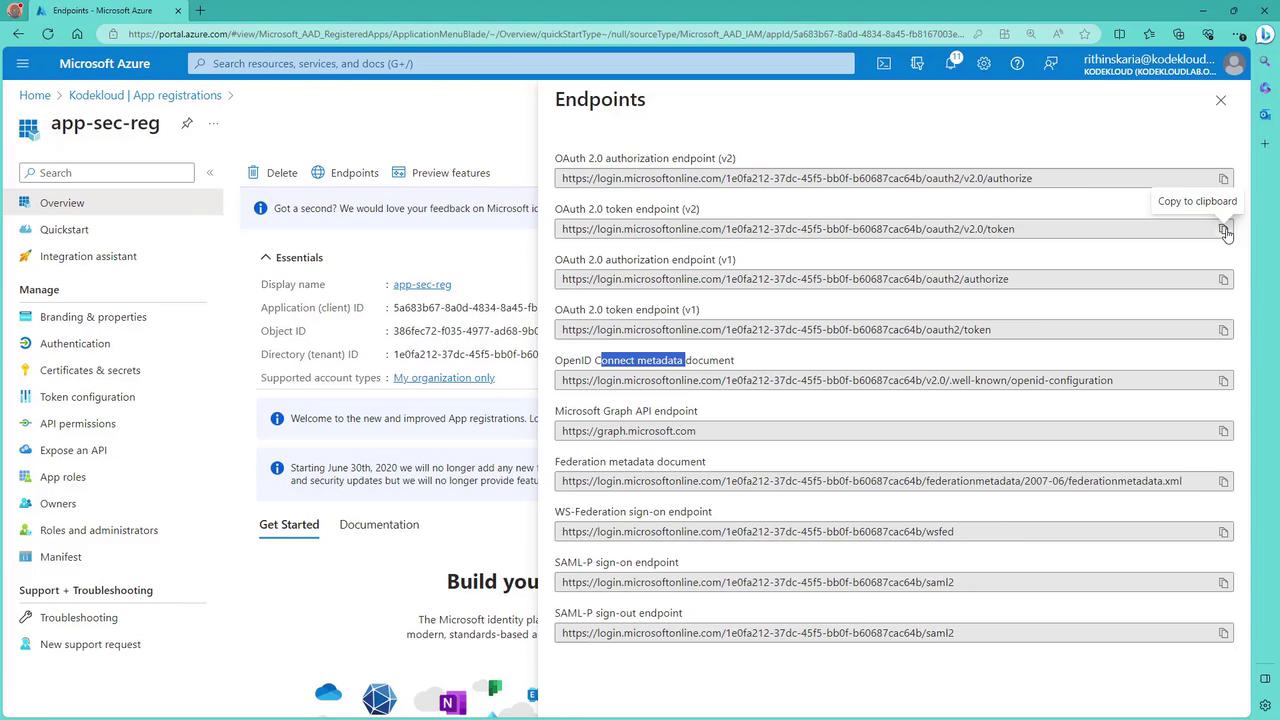
Generate a Client Secret:
Navigate to the Certificates & secrets section. Create a new client secret by assigning it a descriptive name (for example, "app secret") and choosing an appropriate expiration period.Important
Make sure to copy the client secret value immediately after creating it, as it will only be displayed once.
Test with Postman:
Use Postman to verify token generation by performing a POST request to the token endpoint URL. In the request, set the parameters in the x-www-form-urlencoded body:- client_id
- client_secret
- grant_type (for instance, client_credentials)
- scope (for example, graph.microsoft.com/.default)
The snippet below shows an example of the token endpoint and credentials:
https://login.microsoftonline.com/1e0fa212-37dc-45f5-bbbf-b66867cac64b/oauth2/v2.0/token
client_id: 5463b367-8a0d-4834-84a5-f81670632e3d
client_secret: xWNq7_W_x1O1WGyQGxC8twgCwK83mvDenbLG
Handling API Errors:
If any required parameters are missing, Postman will display an error message indicating the missing field (for example, a missing grant_type). Include all necessary values and click Send to receive an access token.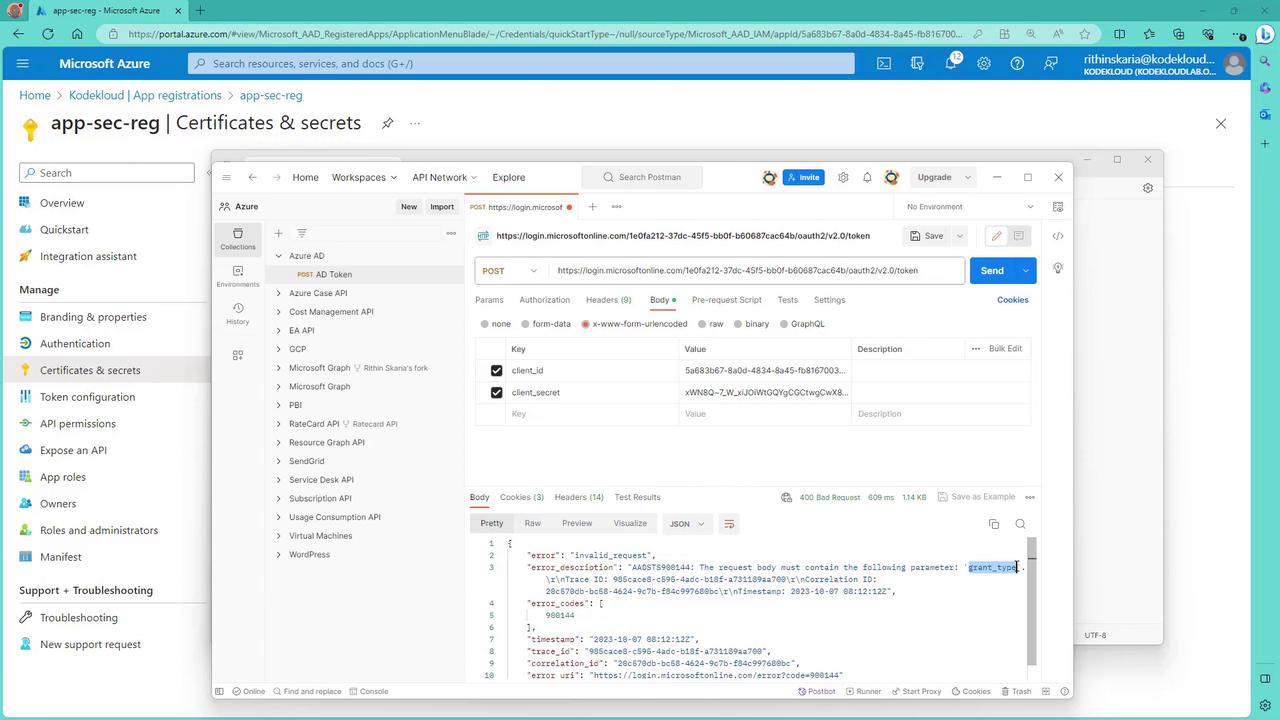
After correcting the request:

Validating the JWT Token
The access token returned by Azure AD is a JWT (JSON Web Token). To inspect its content:
- Copy the JWT token from Postman.
- Visit a JWT validation website, such as jwt.ms.
- Paste the token to review details including audience, issuer, application ID, tenant ID, and additional claims.
Below is an example of a decoded JWT payload:
{
  "type": "JWT",
  "nonce": "qN0I_Mj8hC-NIsp0hiqzdHqm663-kLuYjGL7FeD08",
  "alg": "RS256",
  "kid": "KI3g0Mn7RboKfxmeZoXqbhHZGew",
  "aud": "https://graph.microsoft.com/",
  "iss": "https://sts.windows.net/10efa212-37dc-45f5-bb6f-606876cac64b/",
  "iat": 1696666347,
  "exp": 1696669947,
  "azp": "sa368d87-8ad8-4834-84d5-fb816780e32d",
  "appid": "9c4de6c6-33f1-46cf-ad9d-55c840123798",
  "oid": "33f9f41d-55d1-4ece-97d5-55c840123798",
  "tid": "ABCdAEIptP1uU3D7Y0hGrShSAAAAAAAAAAAAAAAAAAA",
  "sub": "33f9f41d-55d1-4ece-97d5-55c840123798",
  "upn": "app_sec-reg@[email protected]",
  "wids": []
}
If you inspect tokens generated via user-based authentication (using password or Azure MFA) through the Developer Console, you will observe additional details indicating user impersonation. For example:
{
  "typ": "JWT",
  "alg": "RS256",
  "kid": "KI3Q9hN7RfoKmeZoXqbHZGew",
  "aud": "https://management.core.windows.net/",
  "iss": "https://sts.windows.net/1e0fa212-37dc-45f5-bbe6-b6687cace64b/",
  "iat": 1696617373,
  "exp": 1696686867,
  "acr": "1",
  "aio": "AVQAAQ/8UAAAAPzxmG5u82DxmphEHaqQbJHZARn43EhDyyb1ProUY10GxTrJ8R9Y10h38Y8nq4dRCb4a4-9K1B11xGCYuaZL6FNcrg1lMYQr8aTx8/",
  "amr": [
    "pwd"
  ],
  "appid": "c44bd083-3bb0-49c1-b47d-974e53cbdf3c",
  "appidacr": "0",
  "groups": [
    "12052lea-47ad-455b-abf8-287697d9544f"
  ],
  "idtyp": "user",
  "ipaddr": "2a04:7f80:2:daba:8c54:272:95b2:c2d0",
  "name": "Rithin Skaria",
  "oid": "4d469429-1f09-4d4b-b476-9c72c74b3639",
  "rh": "1A0J3022E8F35673",
  "sid": "A8cEia6jPhtW3U7DVGrhG6S2f1XakutPukPawf2MBPJACC.",
  "sub": "hZdyYtUtbW8hUYPKIyLPLoQkb8BSRoUeJAP7y7Yf",
  "tid": "1e0fa212-37dc-45f5-bbe6-b6687cace64b",
  "unique_name": "rithinskariaqdokeloudlab.onmicrosoft.com",
  "upn": "rithinskariaqdokeloudlab.onmicrosoft.com",
  "ver": "odxG1G6ubctB43dAfaA",
  "xms_caa": "1",
  "xms_tcd": 1692377386
}
These tokens provide all the necessary data to verify both the user's and the application's authenticity.
Conclusion
App registration is a crucial first step for securing your application with Azure AD by leveraging Microsoft's Identity Services. By following the steps in the Azure Portal, generating tokens with Postman, and validating JWT tokens, you can ensure secure authentication and authorization for your application.
For further details on integrating with Microsoft services, explore the Graph API.
Watch Video
Watch video content