Microsoft Azure Security Technologies (AZ-500)

App Security

Securing web apps

In this lesson, we explore how to secure web applications in Azure by understanding key components like App Service Plans and leveraging built-in security features. Before diving into security measures, it is essential to understand the different tiers of App Service Plans, as some security functionalities are dependent on the selected plan.

Overview of App Service Plans

Azure App Service offers several tiers: Free, Shared, Basic, Standard, Premium, and Isolated. The Free and Shared tiers run on shared infrastructure, meaning compute resources are shared with other customers.

The image is a table comparing different app service plans, detailing specifications like web apps, disk space, auto scale, deployment slots, and max instances across various tiers such as Free, Shared, Basic, Standard, Premium, and Isolated.

The Basic, Standard, and Premium tiers provide dedicated compute resources. For example, when you create a Standard plan, a dedicated virtual machine (VM) is provisioned exclusively for your applications.

The Isolated tier (also known as App Service Environment or ASC) deploys your applications directly into a virtual network, unlike the simulated VNet integration available in Standard and Premium. This tier offers advanced networking features and enhanced isolation. The table above also outlines additional features such as the number of apps, disk space, auto-scaling capabilities, deployment slots, and maximum supported instances.

Billing Note

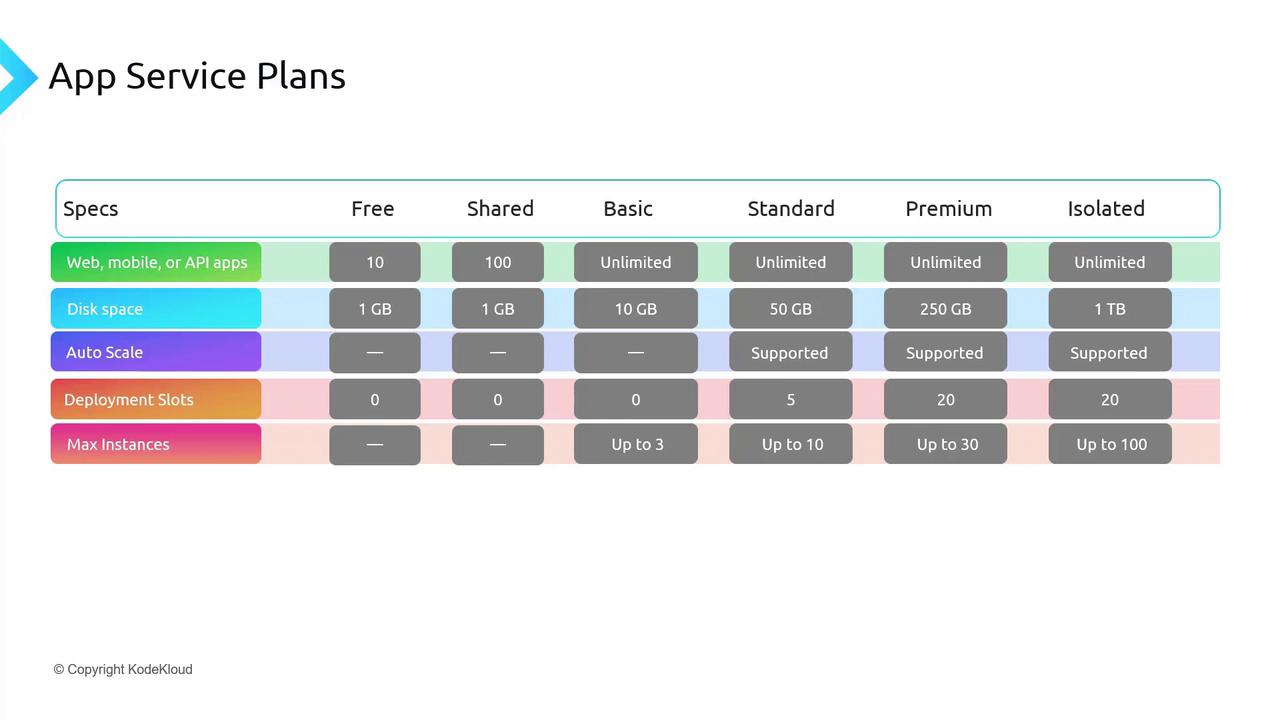
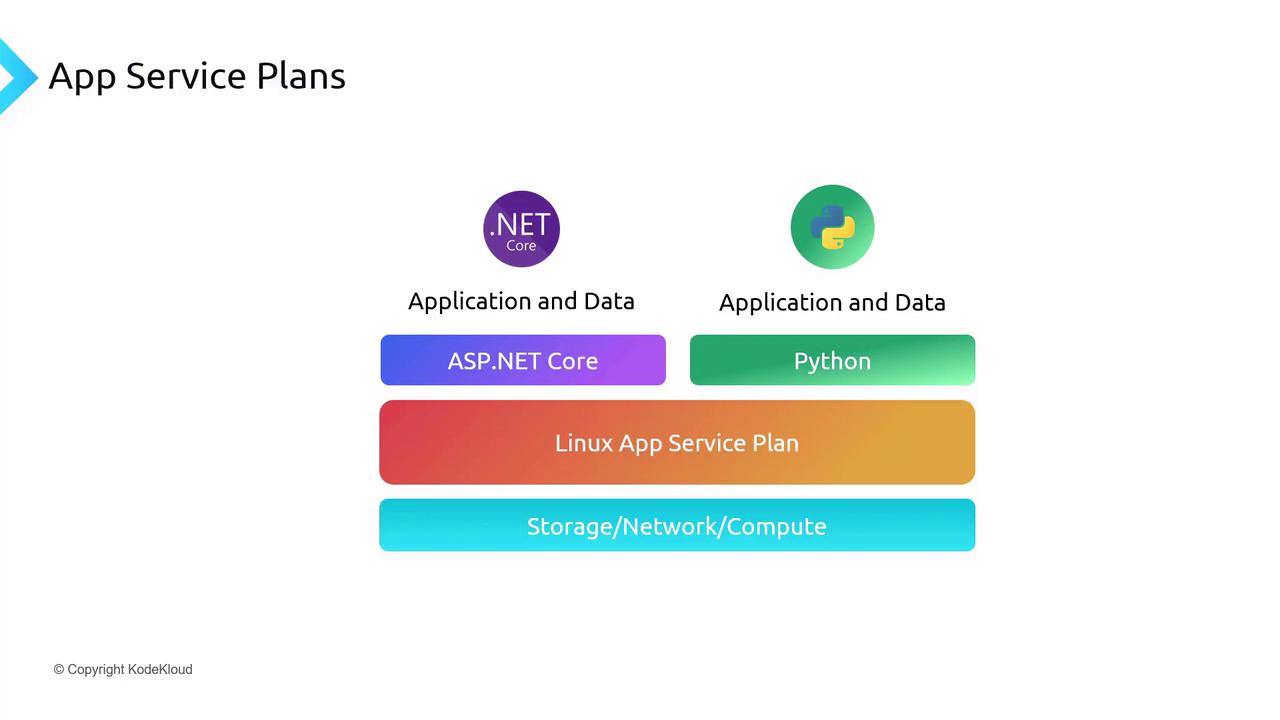
Regardless of the number of applications running on an App Service Plan, you are billed for the plan itself. For instance, on a Linux App Service Plan, you can host both an ASP.NET Core and a Python application concurrently provided the shared resources are sufficient.

The image illustrates app service plans, showing layers for ASP.NET Core and Python applications, a Linux App Service Plan, and Storage/Network/Compute.

Securing Web Applications

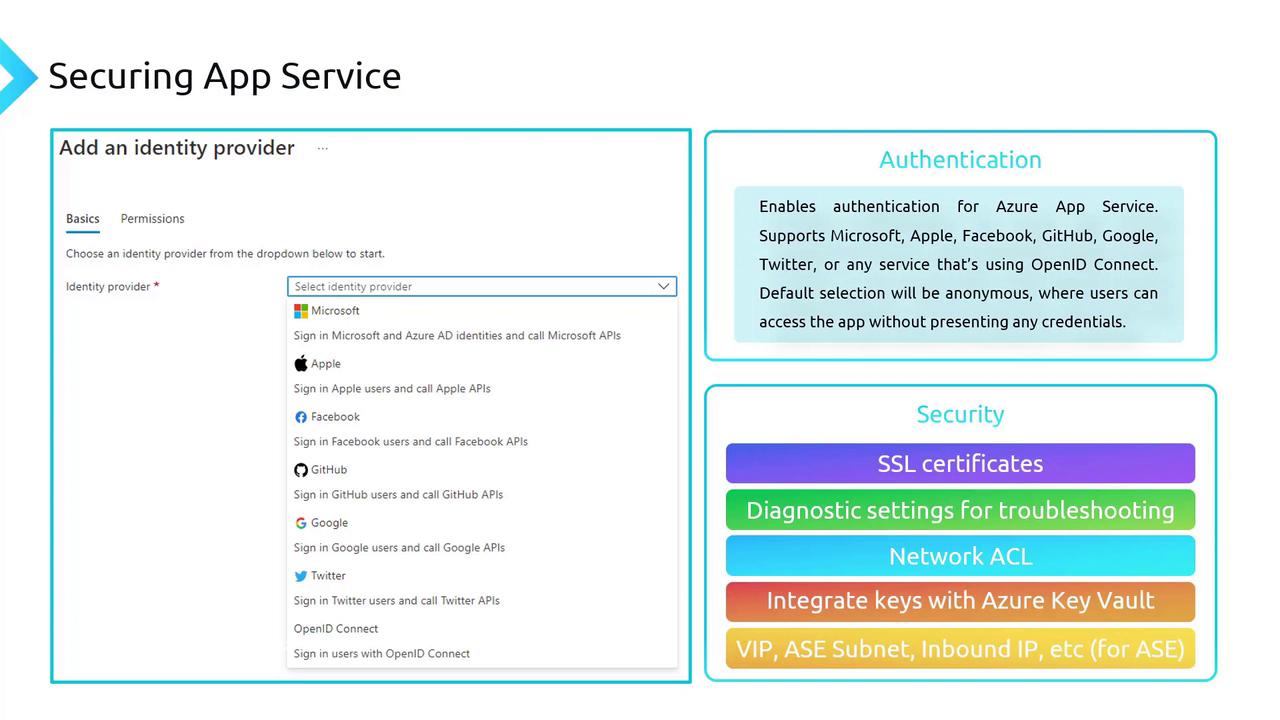
Azure App Service is a robust platform for hosting scalable web applications, RESTful APIs, and mobile backends. It incorporates several built-in security features, including authentication, SSL certificates, diagnostic settings, network access control lists (ACLs), and integration with Azure Key Vault. These features work together to protect your applications and data.

Authentication

Enabling authentication ensures that users and services are verified before accessing your application. Azure App Service supports integration with popular identity providers such as Microsoft, Apple, Facebook, GitHub, Google, Twitter, and any provider supporting OpenID Connect. Without configured authentication, anonymous access is allowed by default, which might simplify access but can introduce security vulnerabilities.

Key security features include:

  • SSL Certificates: Encrypt connections between clients and your App Service, protecting sensitive information during transmission.
  • Diagnostic Settings: Capture logs and metrics to help identify and address security issues.
  • Network Access Controls: Specify IP ranges that are permitted to access your application, effectively whitelisting trusted addresses.
  • Azure Key Vault Integration: Securely store cryptographic keys, API keys, and connection strings using managed identities.

The image is about securing an app service, showing options for adding an identity provider with a list including Microsoft, Apple, Facebook, GitHub, Google, Twitter, and OpenID Connect. It also highlights authentication and security features like SSL certificates, diagnostic settings, and Azure Key Vault integration.

For applications running in an App Service Environment (ASC/Isolated tier), additional features such as VIP (Virtual IP) assignment, subnet management, and inbound IP restrictions further enforce security by ensuring that access is restricted to known IP addresses within a controlled network.

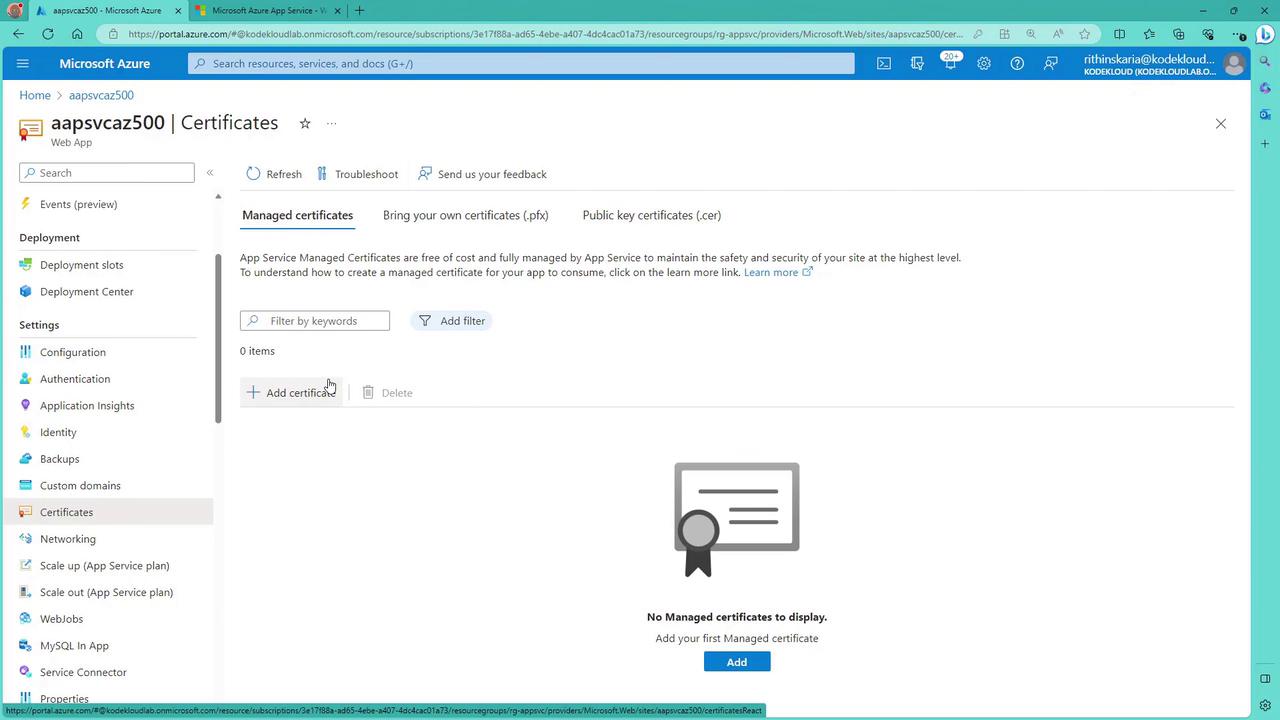
Hands-On: Creating and Securing a Web App in Azure

This section walks you through creating a simple web app in the Azure portal and configuring authentication to secure it.

1. Create a Web App

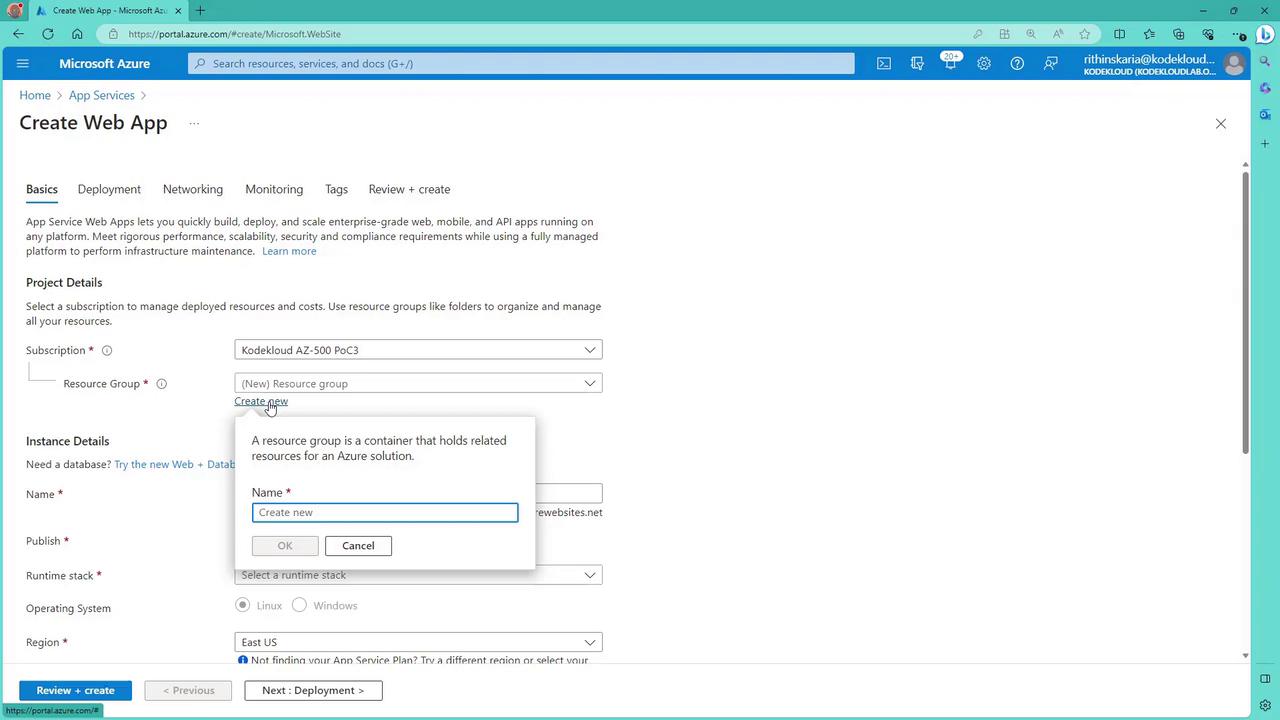
  • Navigate to the Azure portal and search for "App Service".
  • Click to create a new web app. If needed, create a new resource group.
  • Provide a unique name for your app (this becomes part of the azurewebsites.net URL).
  • Select a runtime (e.g., ASP.NET) and choose a region (e.g., East US).
  • If you require a dedicated environment, choose to create a new App Service Plan and select the Standard tier.

The image shows the Microsoft Azure portal interface for creating a new web app, with fields for project and instance details, and a pop-up for creating a new resource group.

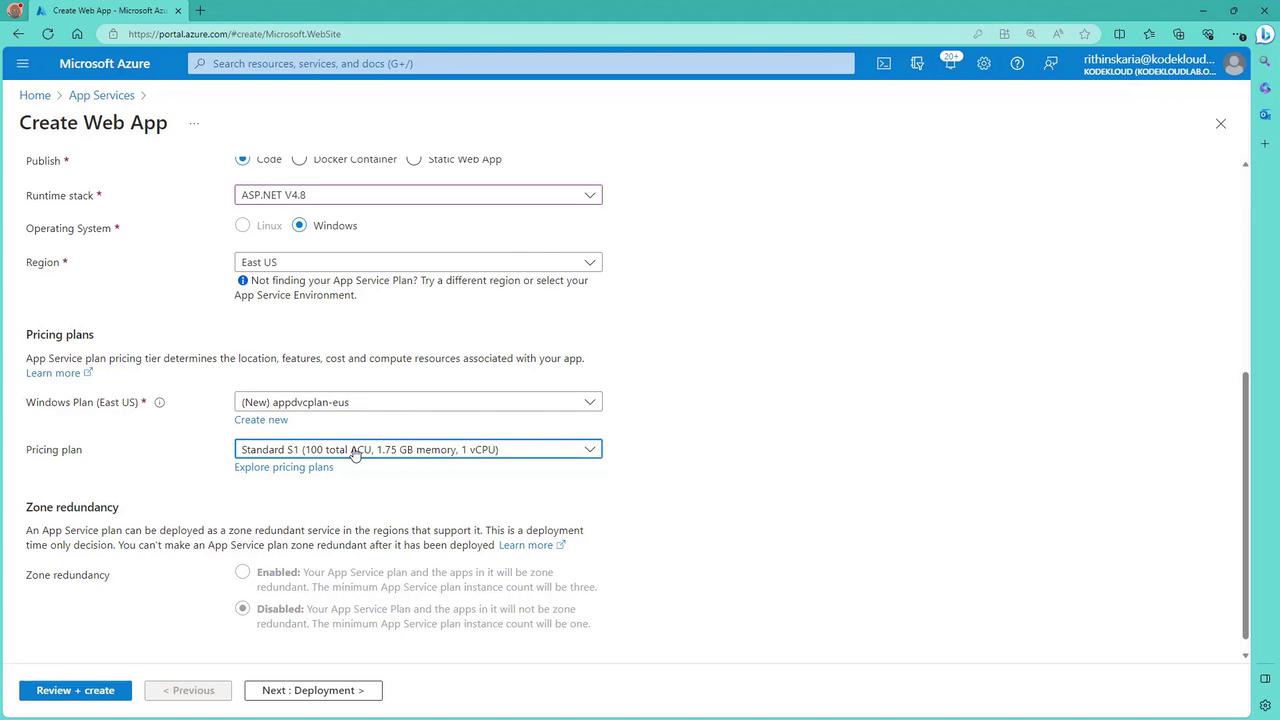
2. Configure the Web App

  • During the creation process, select the appropriate runtime stack and operating system.
  • Choose a pricing plan that aligns with your demonstration needs.
  • Skip deployment options like CI/CD integrations for this demonstration.
  • If necessary, configure networking options; for testing, ensure that public access remains enabled.
  • Review your settings and click “Create”.

The image shows a Microsoft Azure portal page for creating a web app, with options to select the runtime stack, operating system, region, and pricing plan.

The image shows the "Create Web App" page on the Microsoft Azure portal, displaying a summary and details of a web app configuration, including subscription, resource group, and app service plan information.

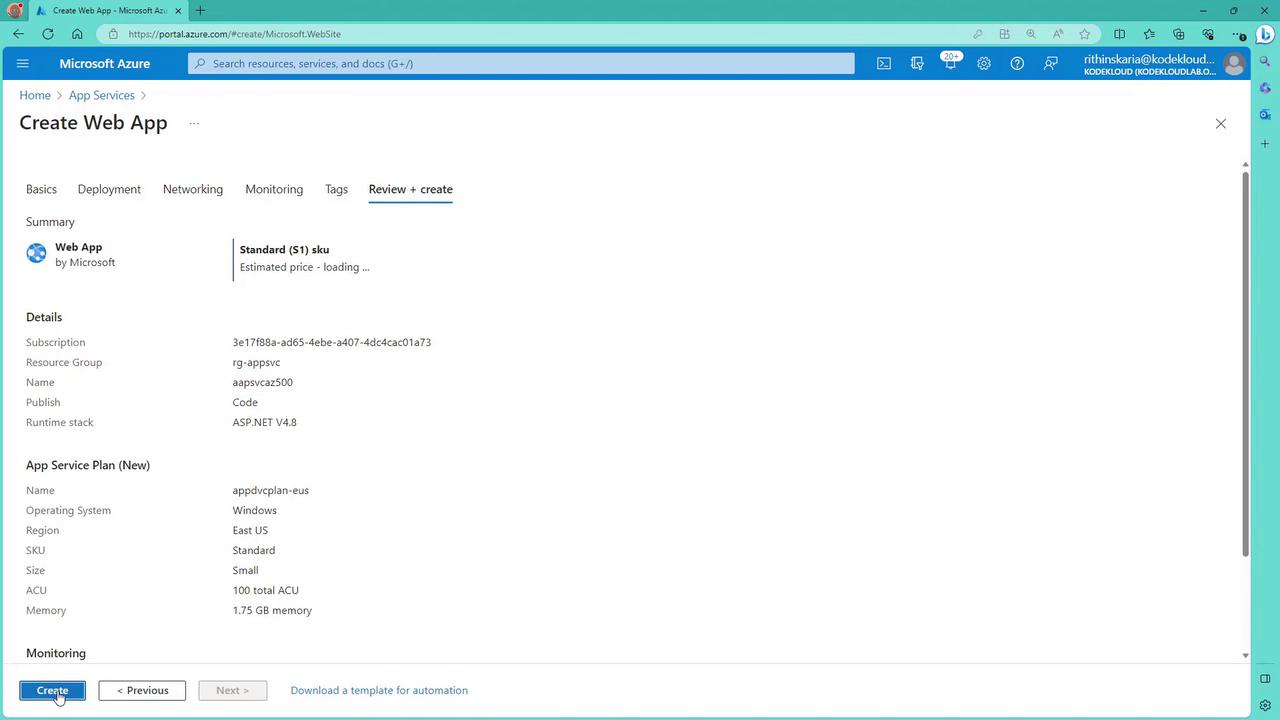
3. Deploy and Test the Web App

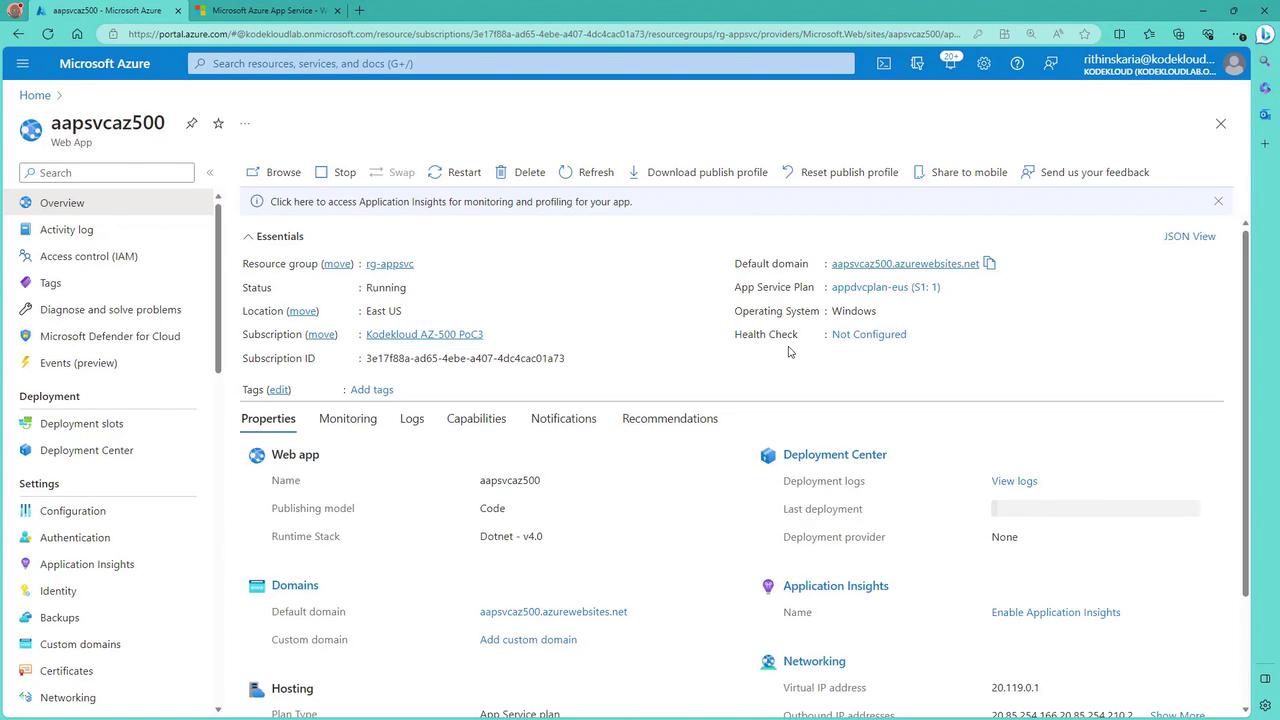
  • After deployment, click “Go to resource” to review your web app details.
  • Access the provided URL to view the landing page.
  • Deploy your code using methods such as Visual Studio, PowerShell, or CI/CD pipelines. For more details, refer to the AZ-104: Microsoft Azure Administrator course.

The image shows a Microsoft Azure portal interface displaying details of a web app named "aapsvcaz500," including its status, location, and configuration settings.

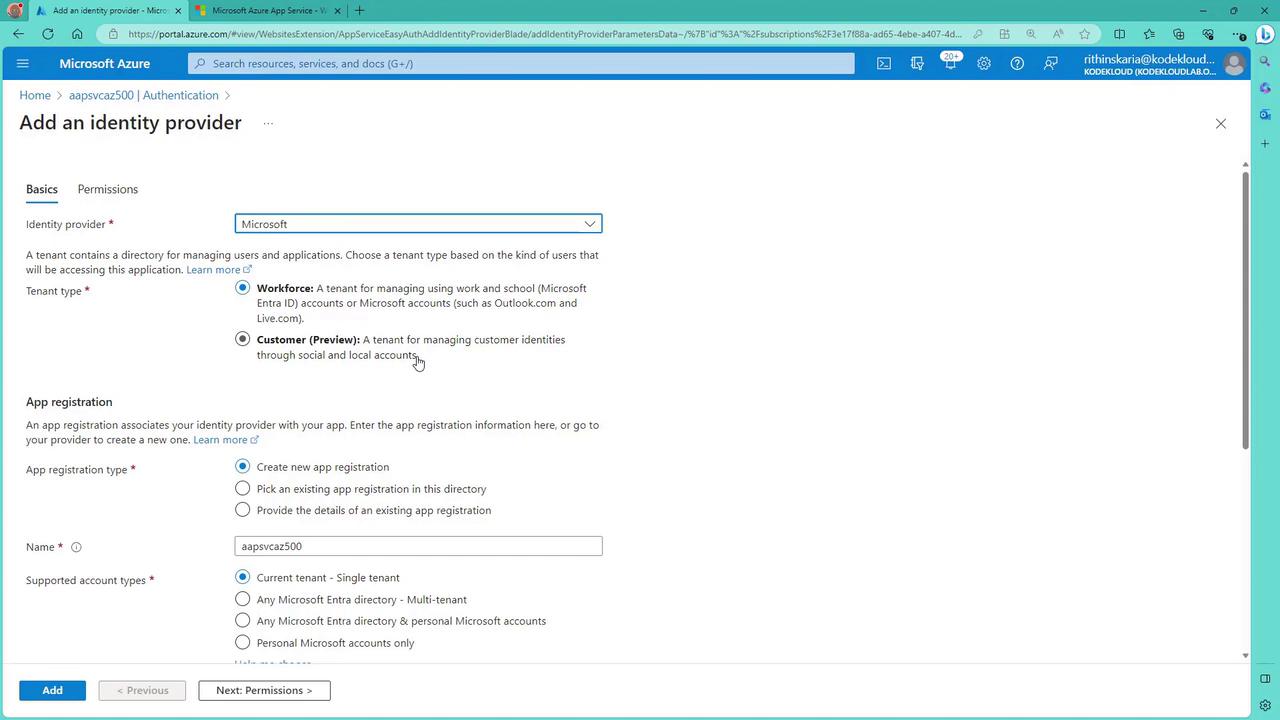
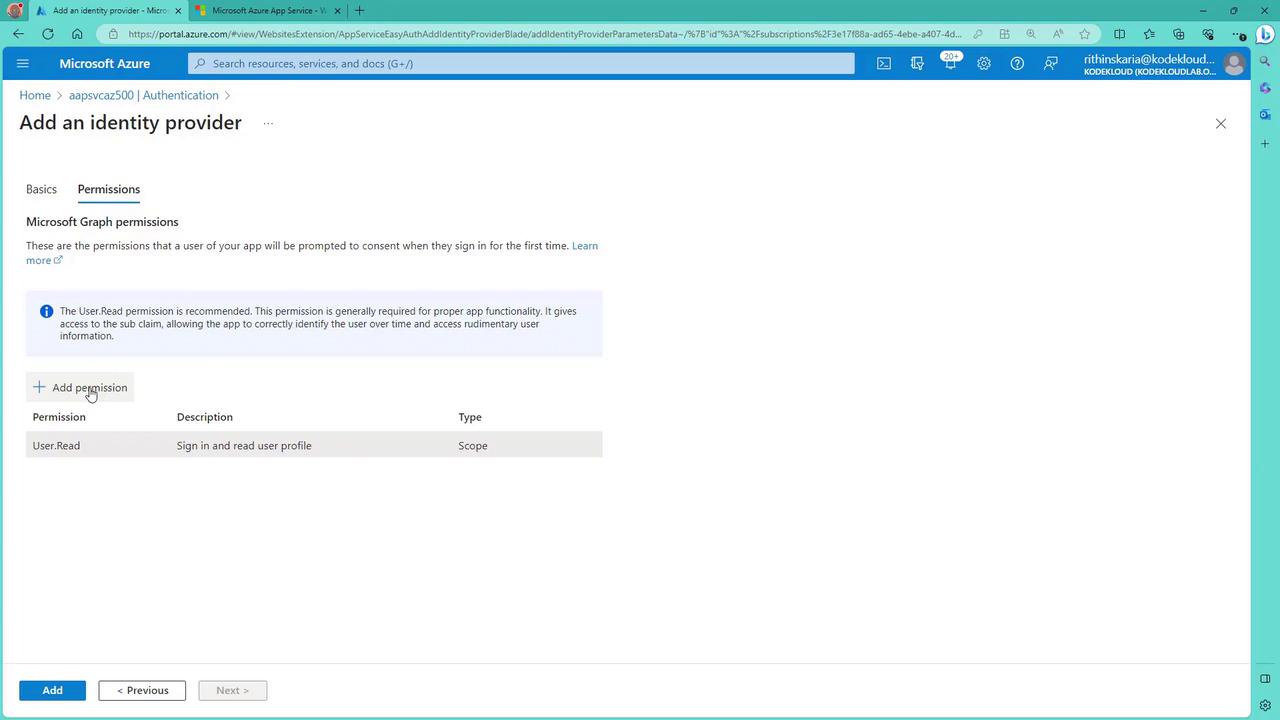
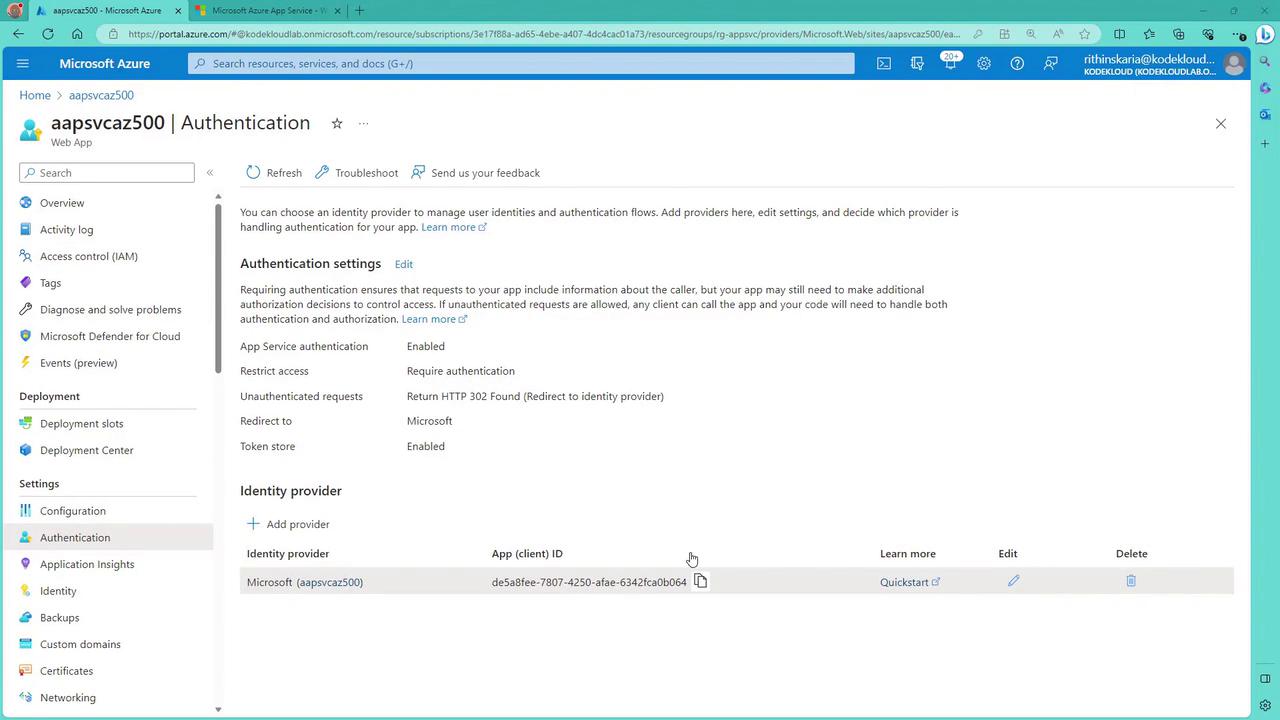
4. Configure Authentication

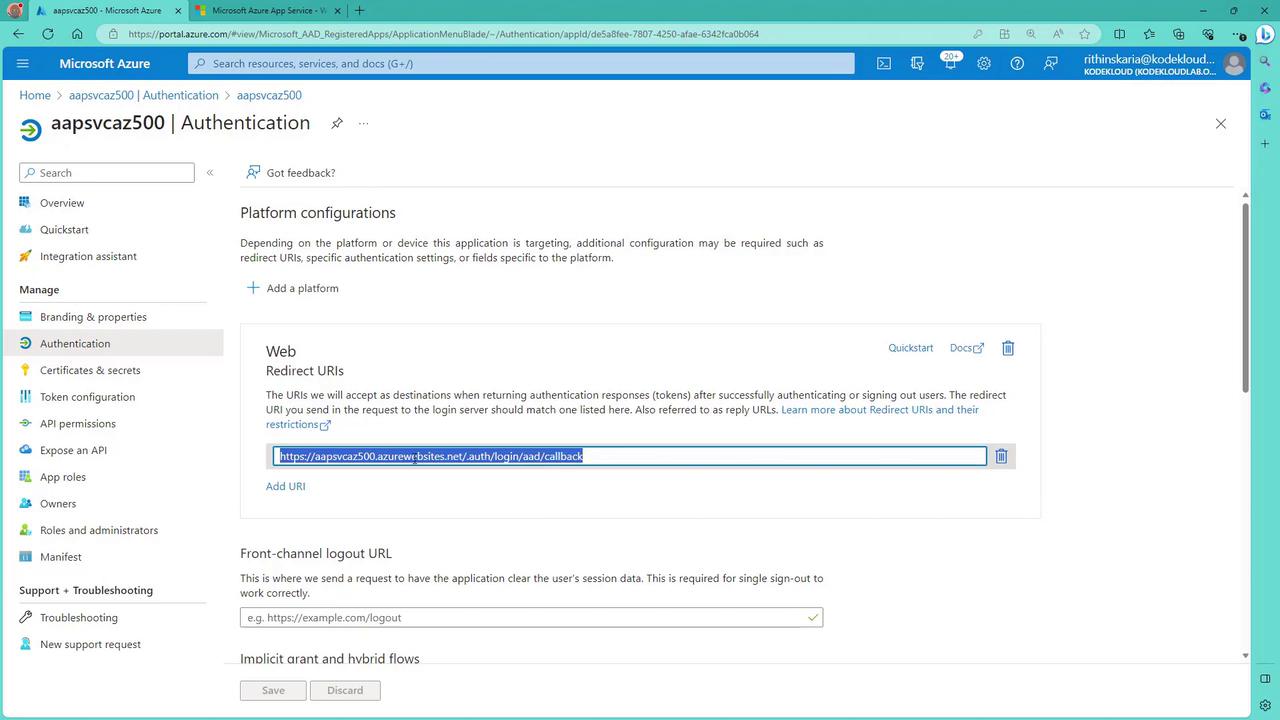
  • Open the “Authentication” section in the App Service resource within the Azure portal.
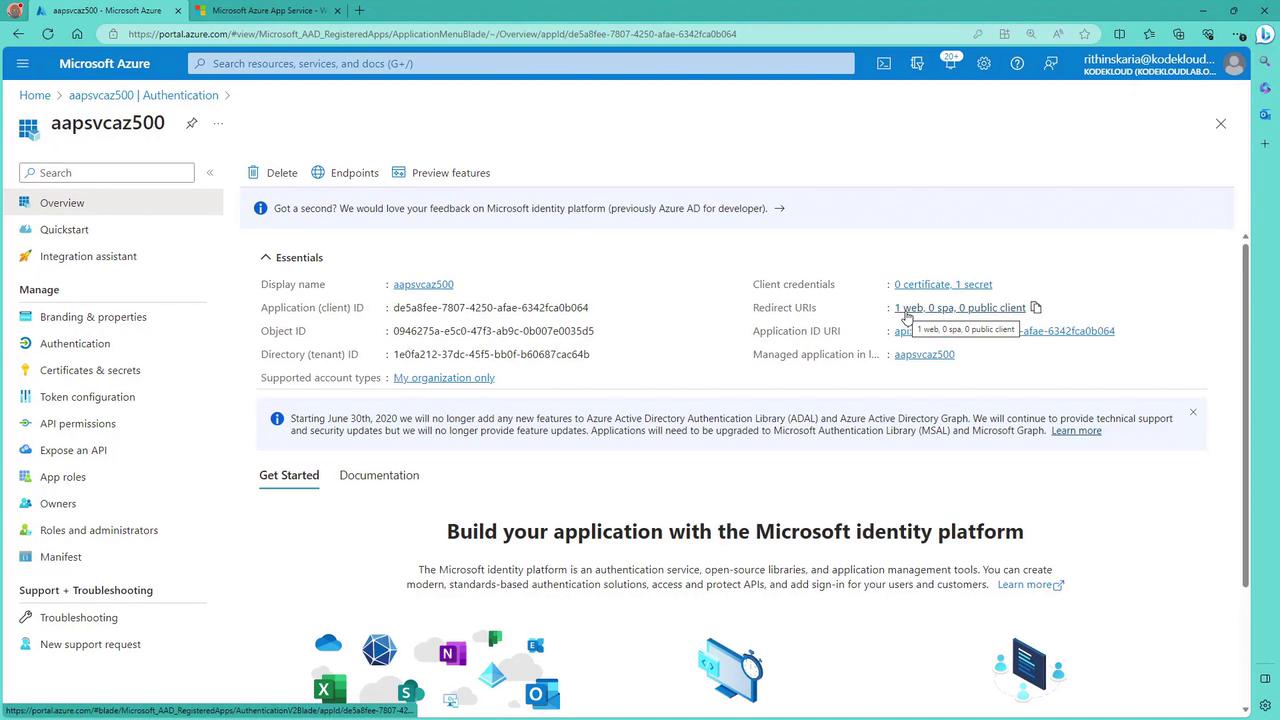
  • Add an identity provider by selecting Microsoft (using Azure AD), then choose the appropriate tenant type (e.g., Workforce for organizational accounts).
  • Create a new app service registration, which will include redirect URI details similar to registering an app in Azure Active Directory.
  • Ensure the token store option is enabled if token management is required.

The image shows a Microsoft Azure portal interface for adding an identity provider, with options for selecting tenant type and app registration details.

The image shows a Microsoft Azure portal page for adding an identity provider, with options for supported account types and authentication settings. The page includes fields for naming the provider and configuring access restrictions and responses to unauthenticated requests.

The image shows a Microsoft Azure portal page for adding an identity provider, specifically focusing on setting Microsoft Graph permissions. It includes an option to add permissions, with "User.Read" permission already listed.

After setting up the identity provider, review the full authentication settings:

The image shows a Microsoft Azure portal page focused on authentication settings for a web app. It includes options for enabling app service authentication, restricting access, and configuring identity providers.

Verify that the redirect URI is correctly configured by checking the app registration details:

The image shows a Microsoft Azure portal page for an application named "aapsvcaz500," displaying details like application ID, object ID, and directory ID. It also includes options for managing authentication, certificates, and API permissions.

When you access your web app (using an incognito window to avoid single sign-on), you should be redirected to the Microsoft login page. After successful authentication, you will land on your secure web app.

The image shows a Microsoft Azure portal page for configuring authentication settings, specifically focusing on platform configurations and redirect URIs for a web application.

Additional Security Measures

To further enhance the security of your web app, consider implementing these practices:

  • SSL Certificates: Enable and manage SSL certificates through the Azure portal to secure data transmission.
  • Monitoring Diagnostics: Set up diagnostic settings to capture logs and metrics for tracking and addressing potential security issues.
  • Inbound IP Restrictions: Limit access by specifying allowed IP addresses.
  • Leveraging Azure Key Vault: Integrate your App Service with Azure Key Vault to securely manage sensitive keys and secrets.

The image shows a Microsoft Azure portal page for managing certificates in a web app, with options to add a certificate and no managed certificates currently displayed.

Conclusion

This lesson covered the foundational aspects of securing web applications using Azure App Service. We discussed various App Service Plans and their impact on security features and demonstrated how to configure authentication along with other security measures via the Azure portal.

By utilizing identity provider integrations, SSL certificates, network restrictions, diagnostic settings, and Azure Key Vault, you can significantly enhance the overall security posture of your web applications hosted on Azure.

Watch Video

Watch video content

Previous
Enable managed identities