This article explores advanced configuration settings for Privileged Identity Management in Azure, focusing on role activations, assignments, and security enhancements.
In our previous guide, we covered the basics of setting up Privileged Identity Management (PIM). In this article, we delve deeper into the configuration settings that control role activations and assignments in PIM, enhancing both security and flexibility.When assigning a role, eligible status is defined by default. However, for heightened security—such as enforcing Azure Multi-Factor Authentication (MFA) for access to critical databases or setting a maximum activation duration—these advanced configuration settings are crucial.Below is a screenshot that outlines these configuration settings before transitioning to a detailed walkthrough in the Azure portal.
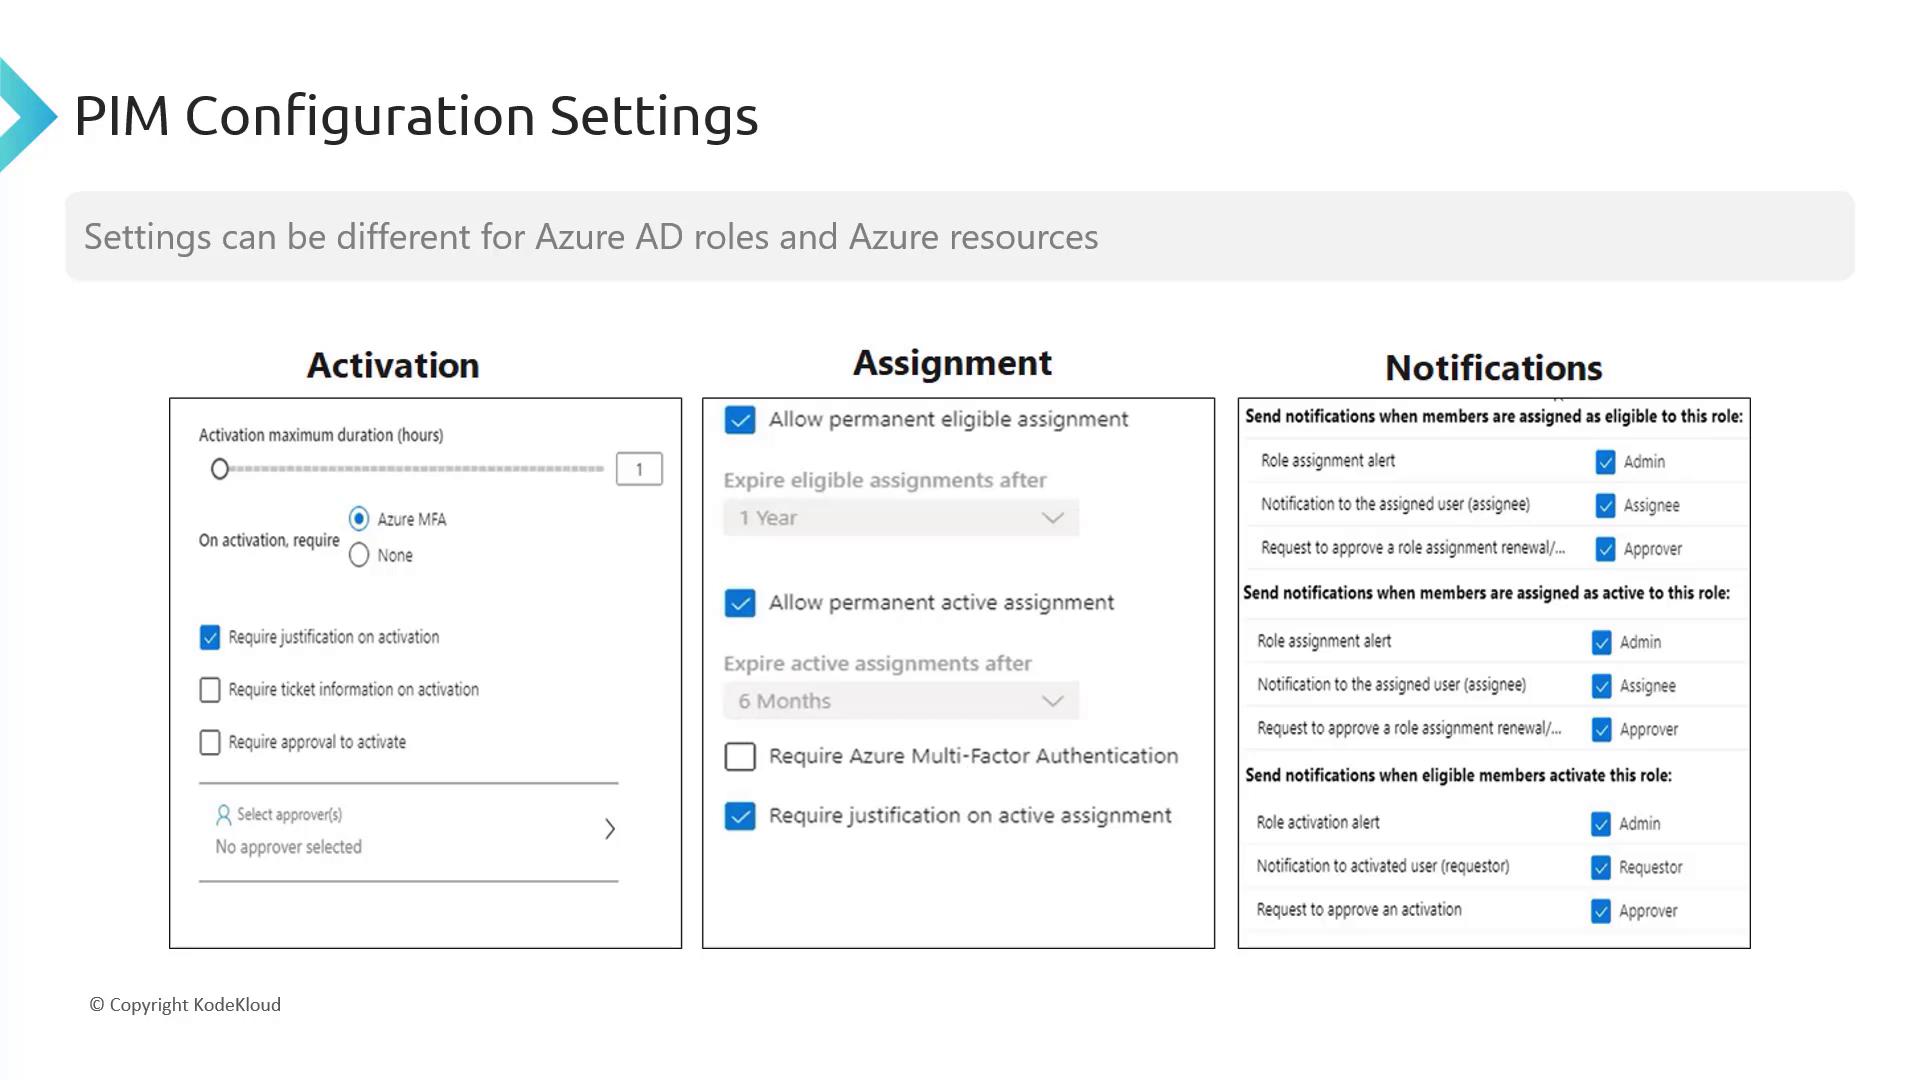
PIM configuration settings are scoped by type. Azure AD roles and Azure resources each have specific settings. Here are some key configuration options:
Activation Settings: Define a maximum duration (e.g., two or three hours) for which a user can maintain access after activation. Once this duration expires, reactivation is required.
Security Enhancements: Enforce Azure MFA during activation, require justification, or mandate ticket information from internal systems for auditing purposes.
Approval Process: Configure approvers (such as global administrators) to validate role activations. If approvals aren’t needed, activations are processed automatically.
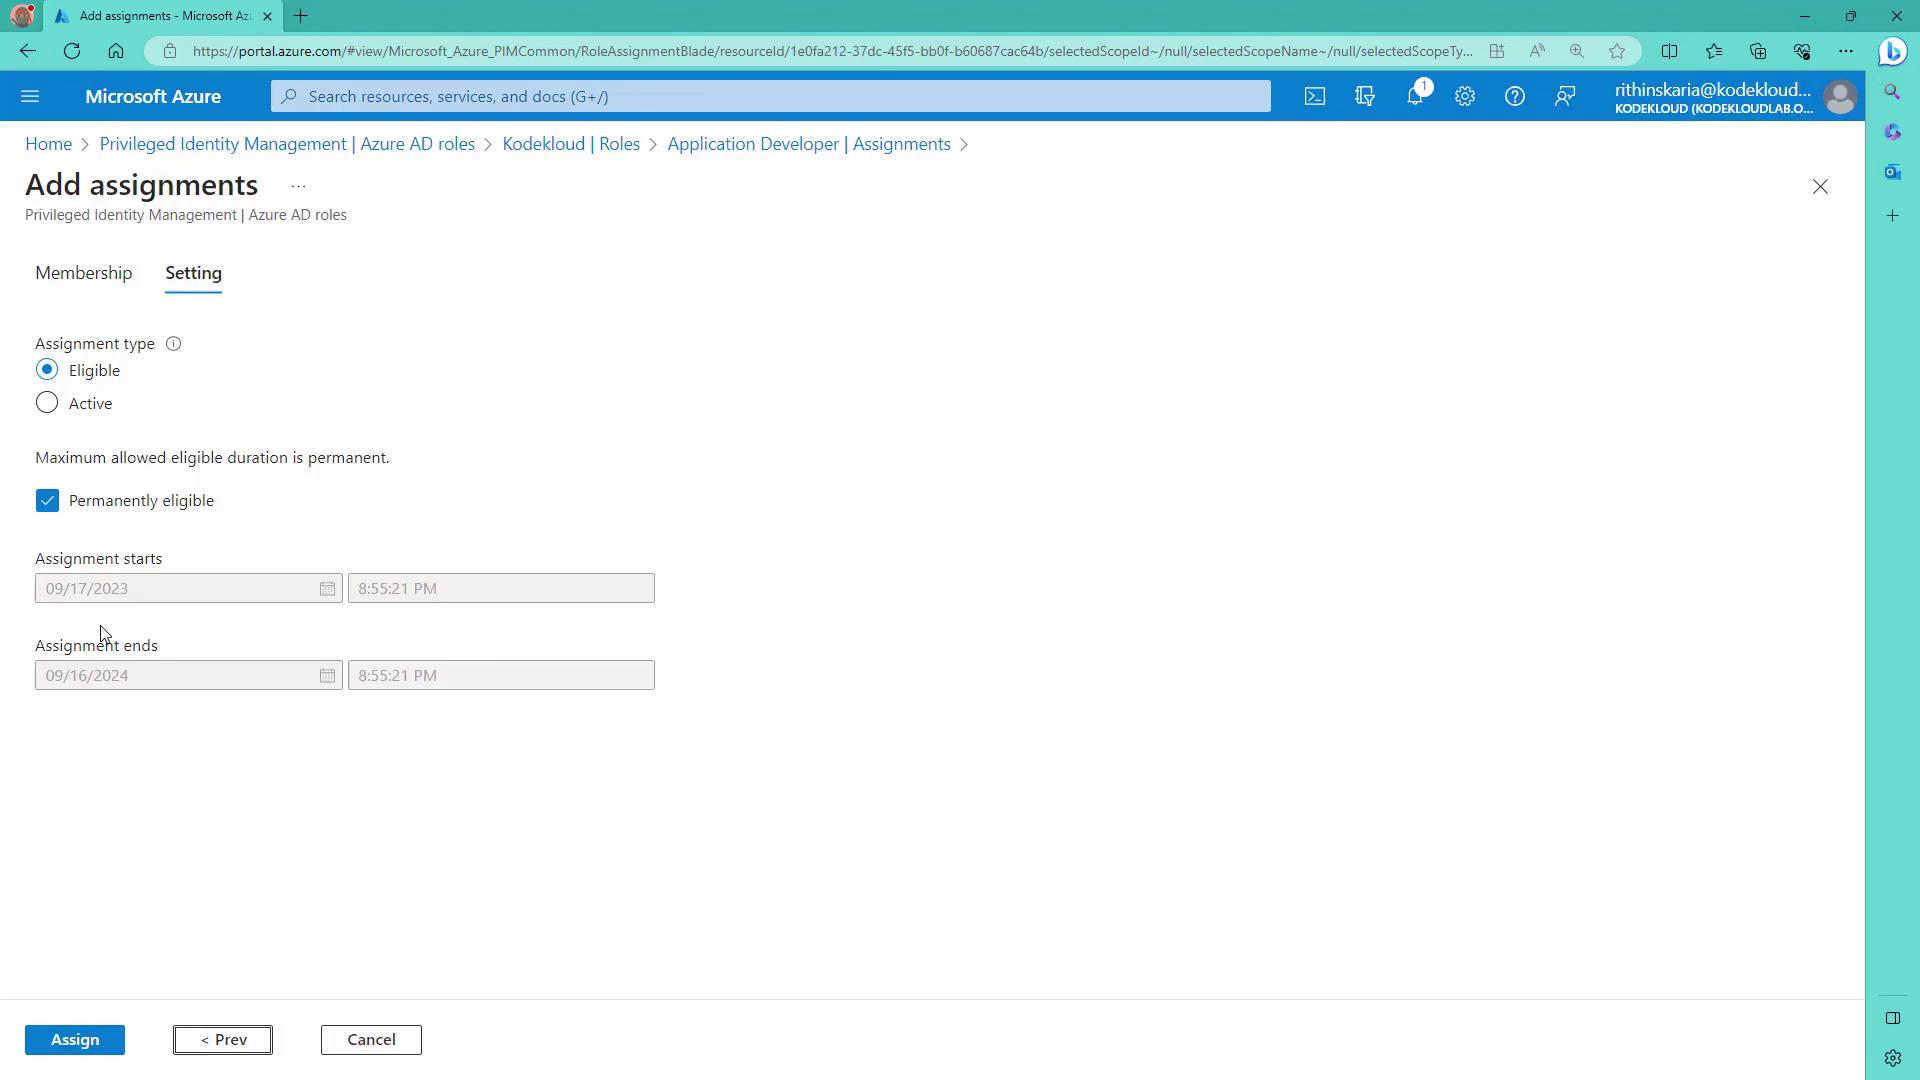
For role assignments, you have multiple options:
Allow permanent eligible or active assignments.
Require MFA during assignment.
Demand justification for active assignments.
Set up comprehensive notifications for role assignments and activation events.
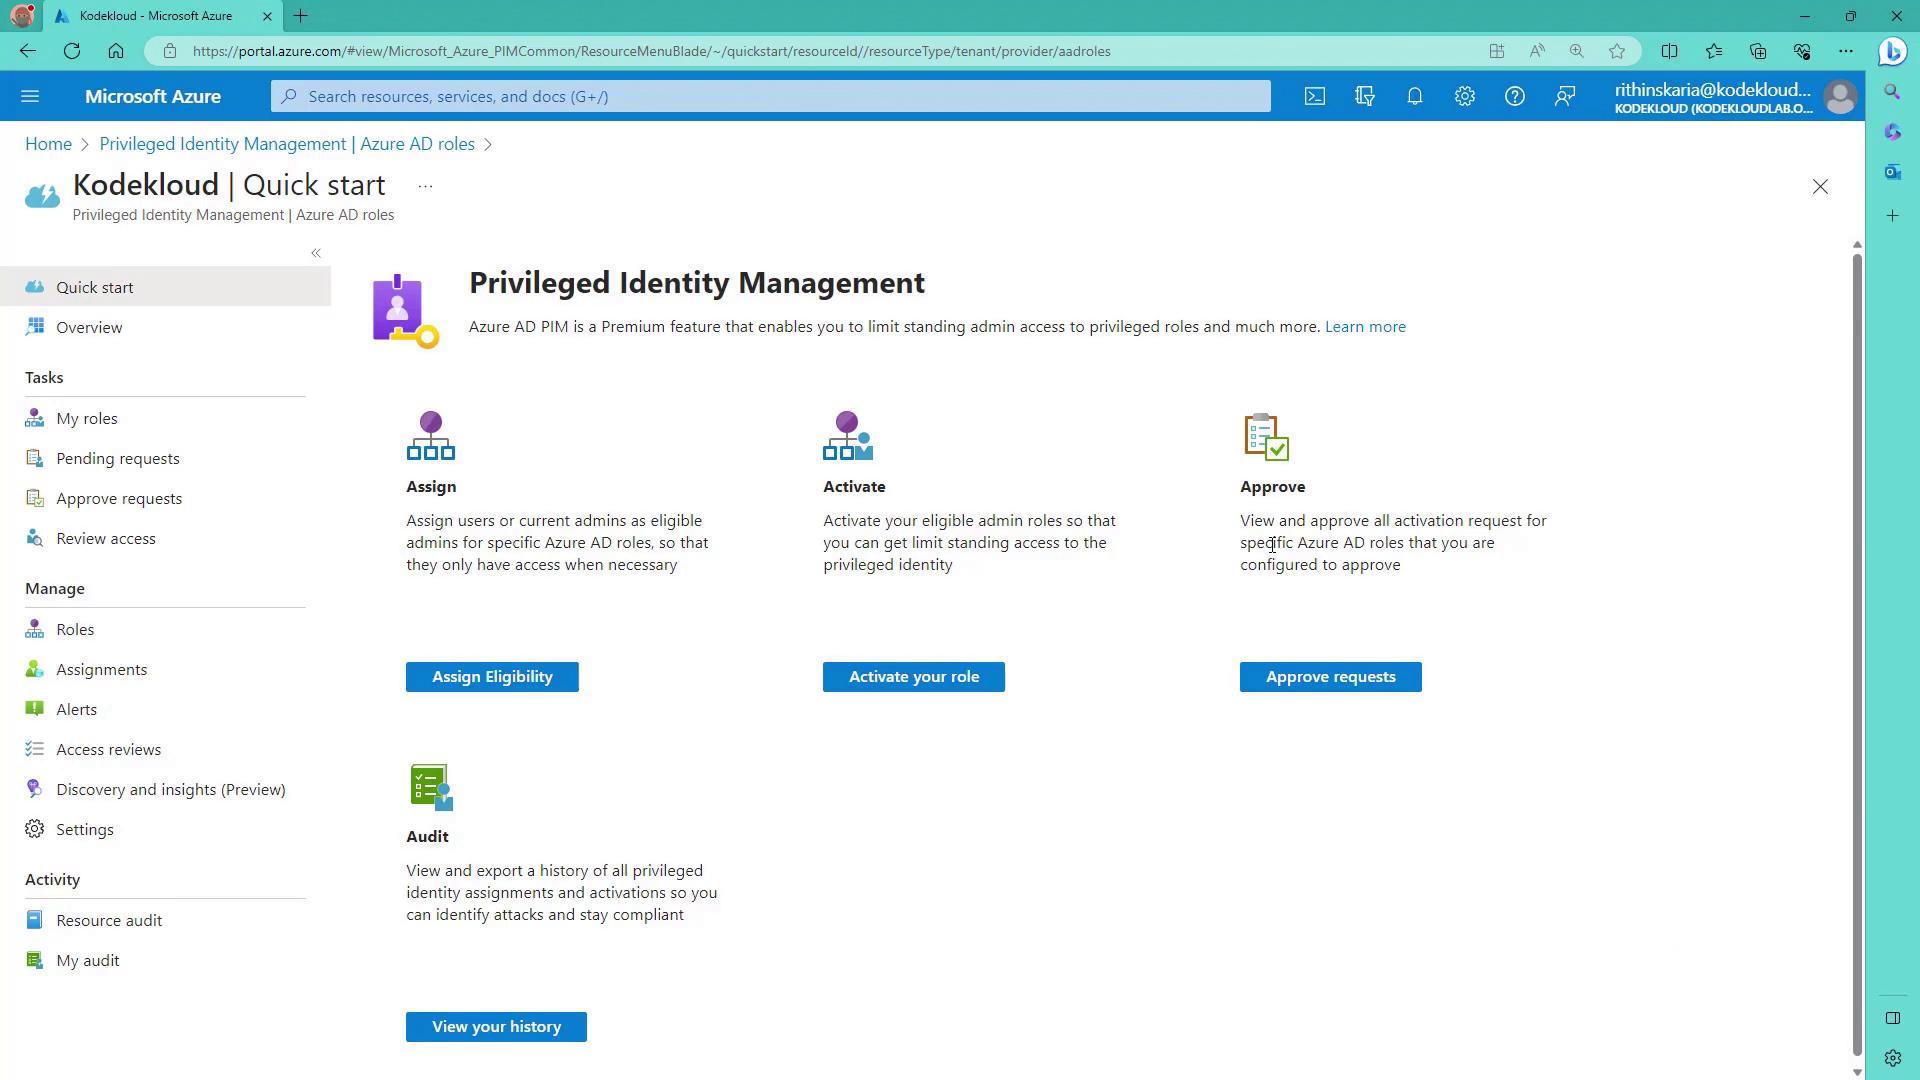
Let’s explore how these settings are managed within the Azure portal.
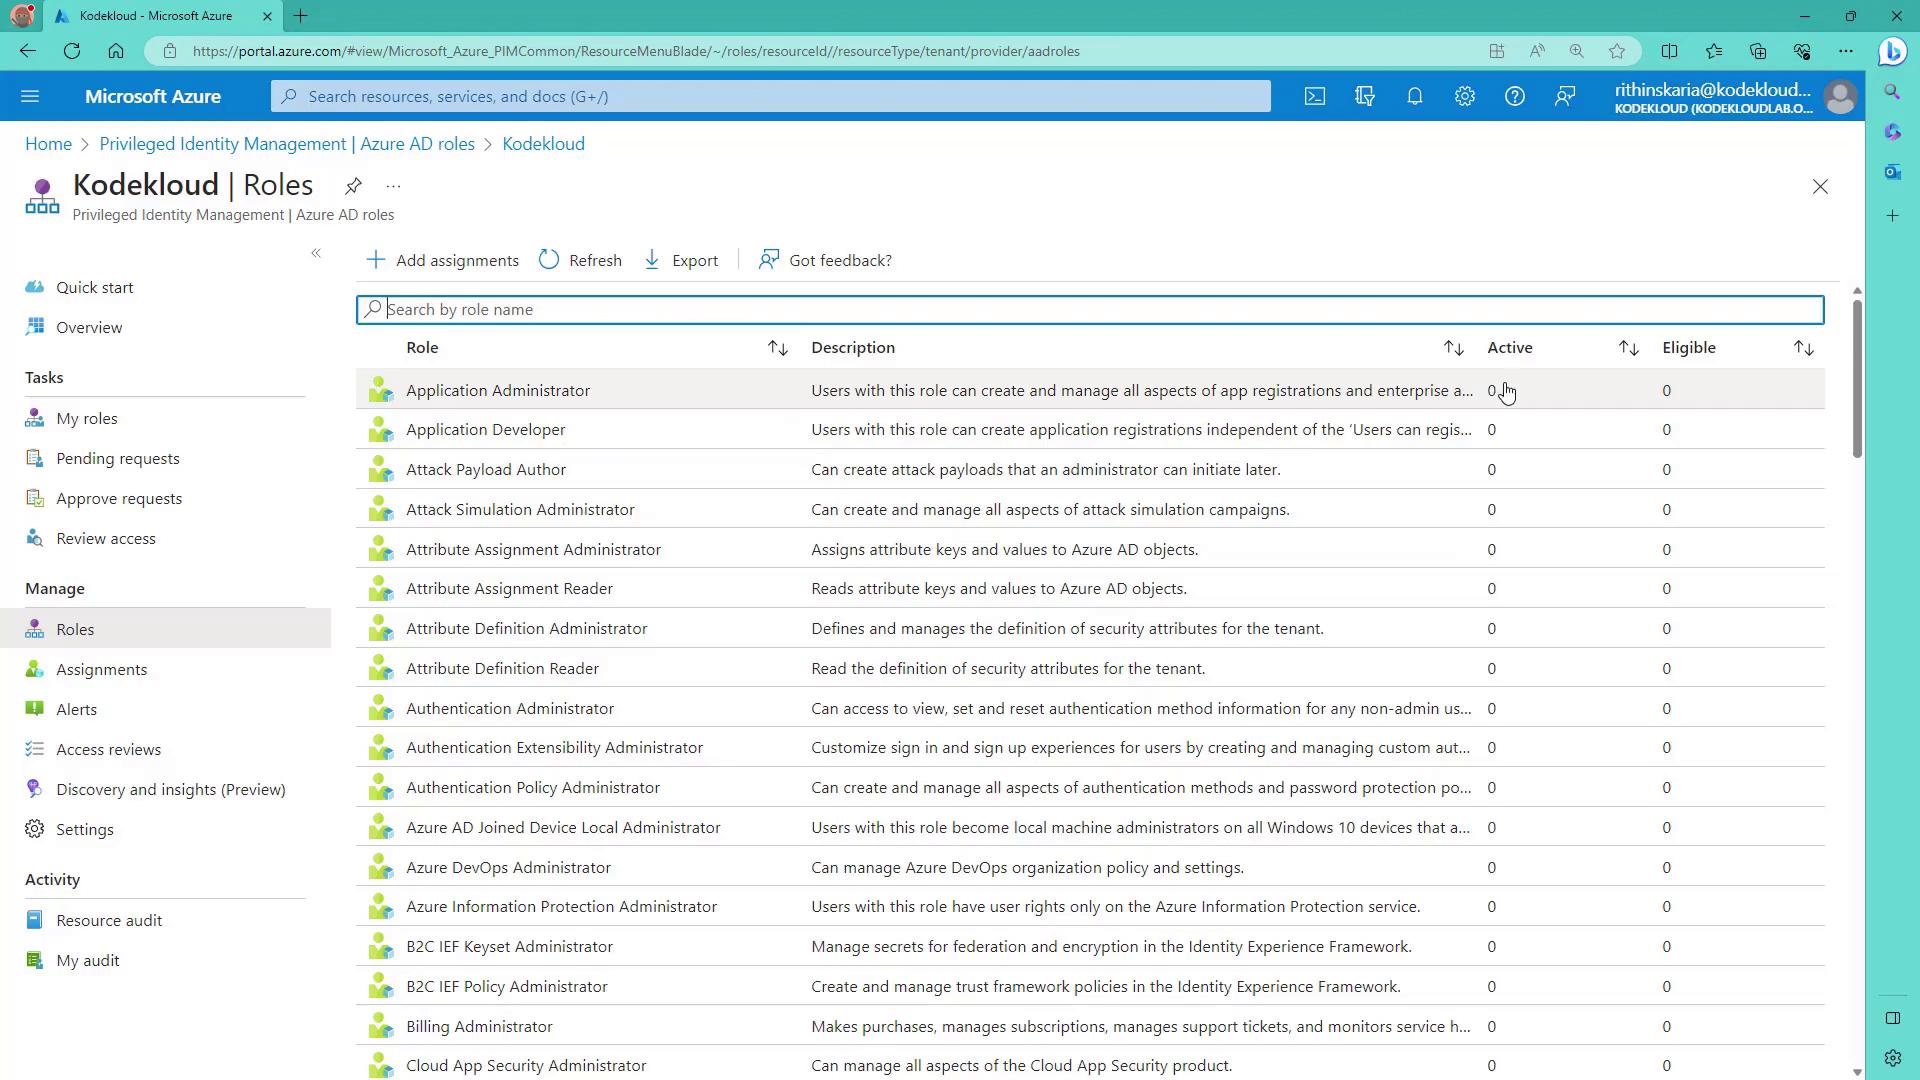
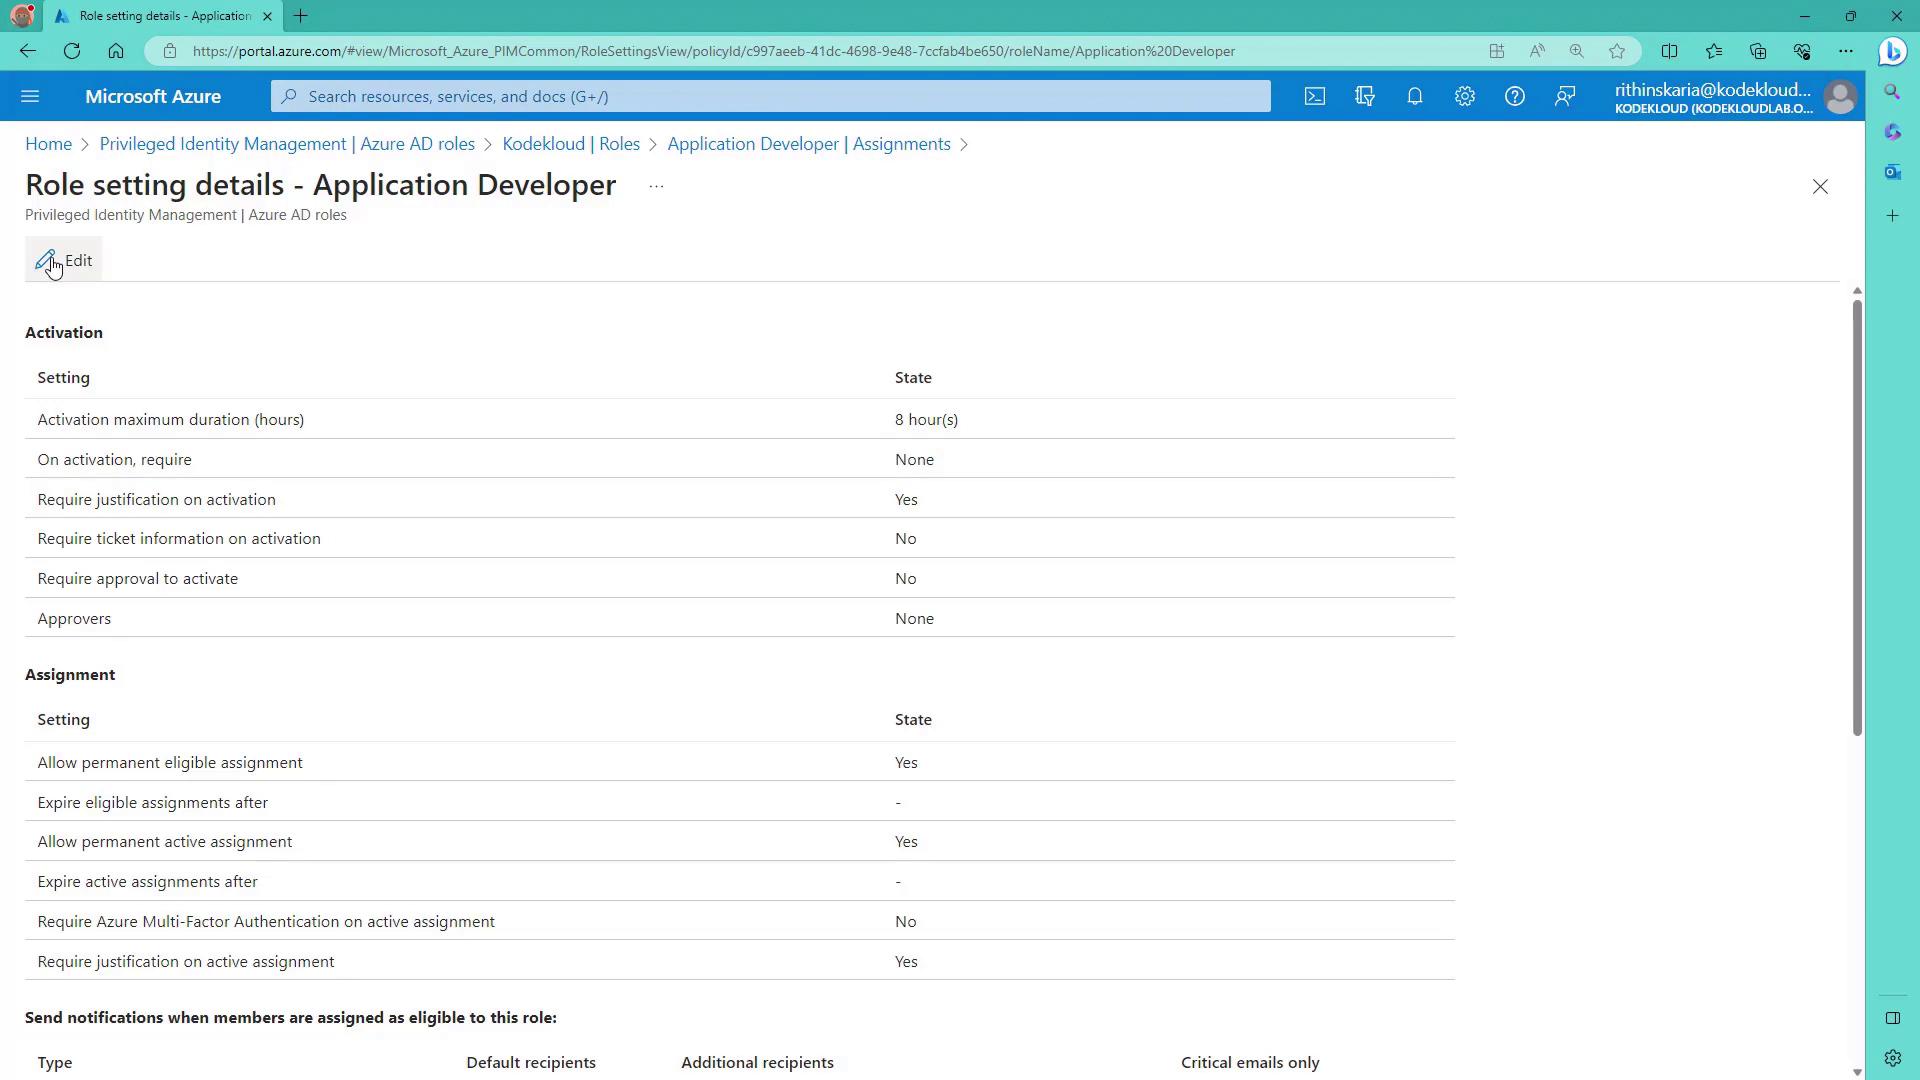
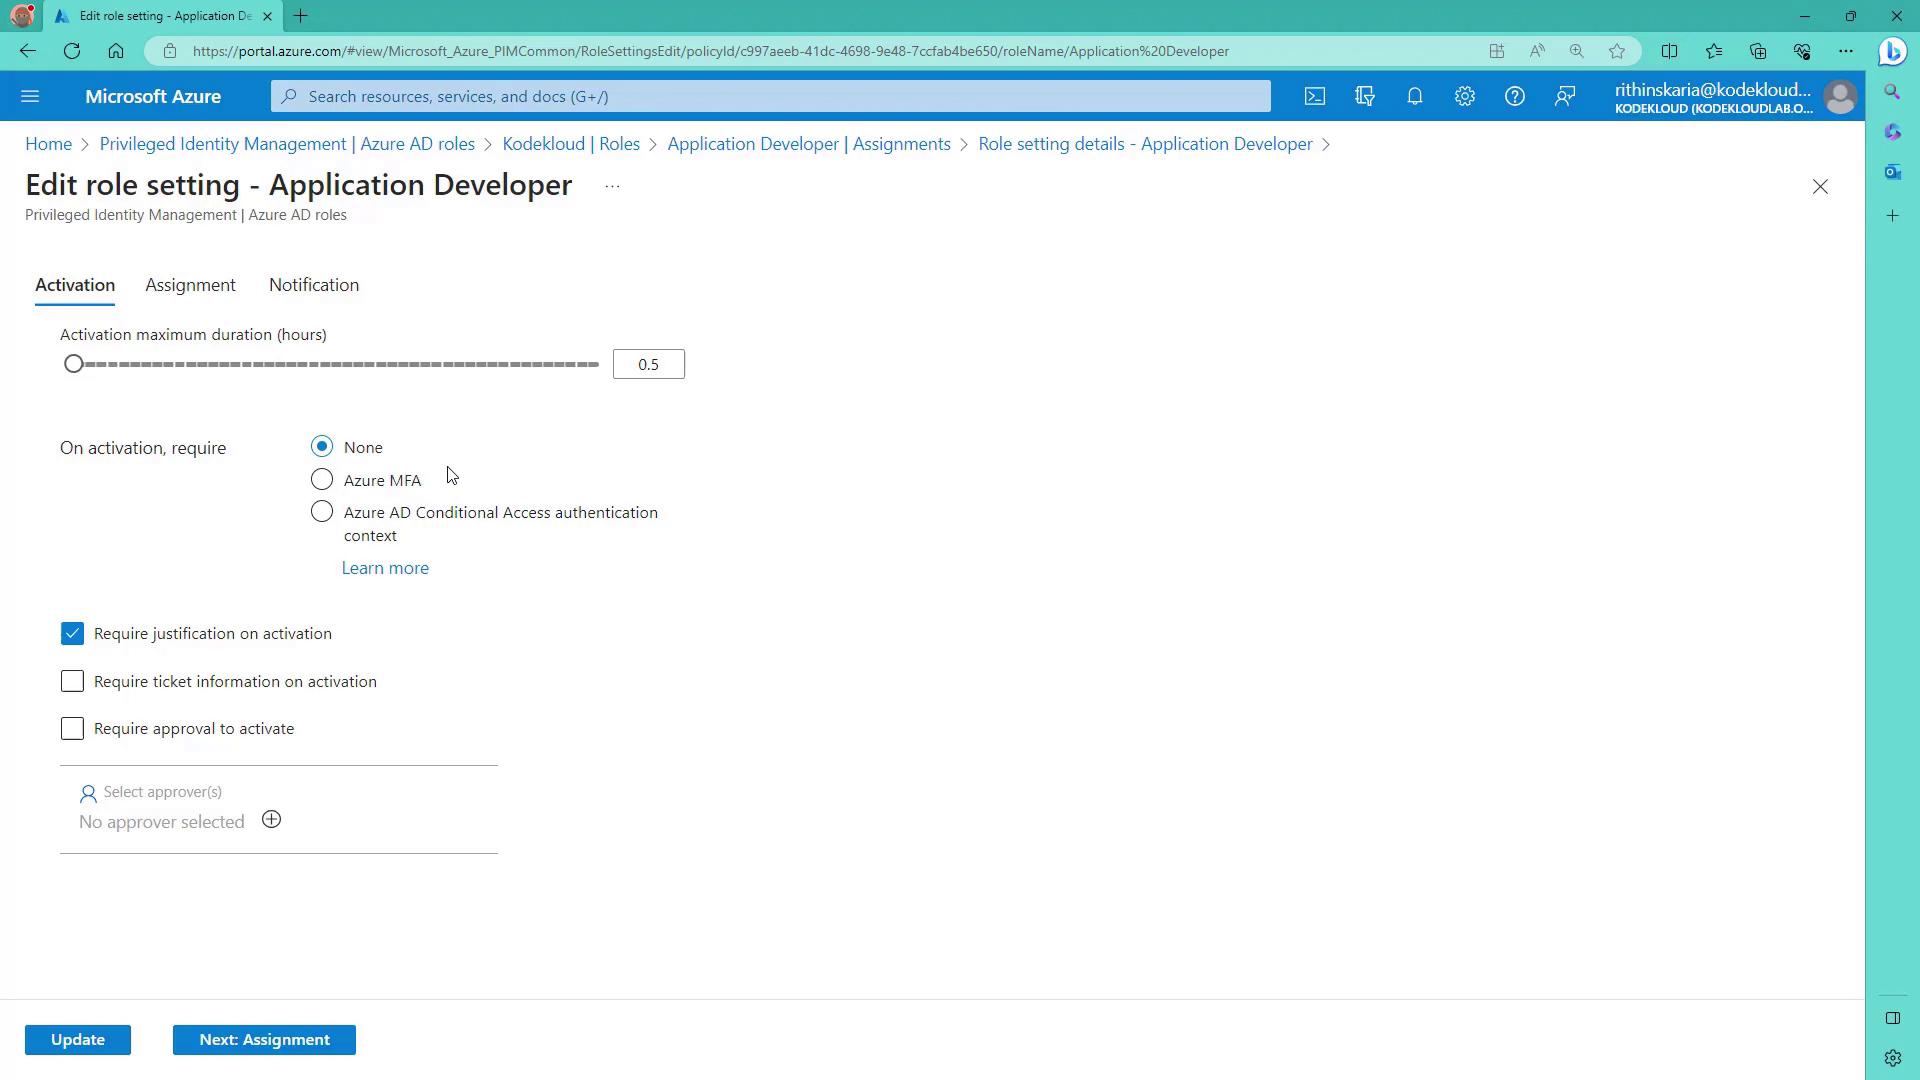
For example, to configure the “Application Developer” role, click on the settings at the top of the screen to review the predefined configuration options. You can adjust parameters such as:
Maximum activation duration
Requirement for Azure MFA
Necessity of additional information (e.g., justification or ticket details)
Option for role activation approvals
In this demonstration, set the maximum activation duration to 30 minutes and enable a justification requirement.
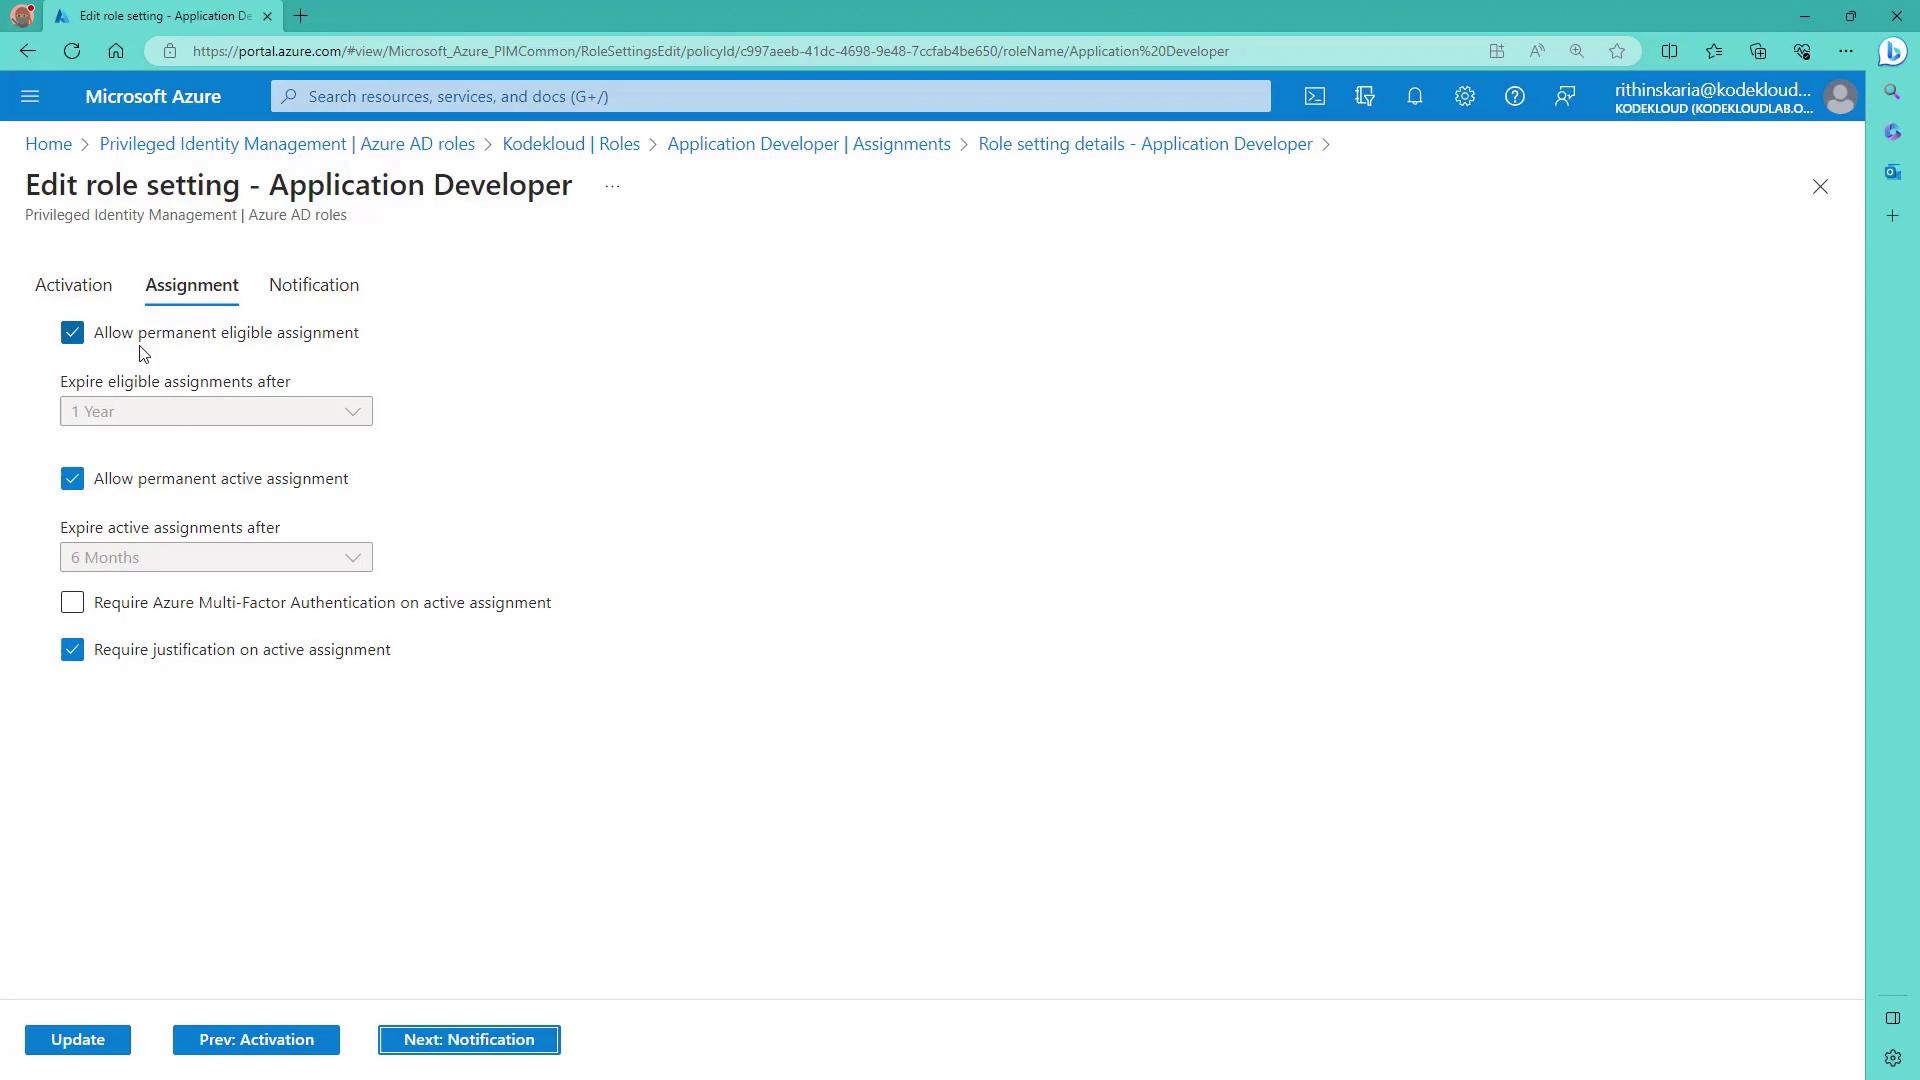
For assignments, additional configurations include:
Allowing permanent or active assignments.
Requiring MFA upon assignment.
Enforcing justification for active assignments.
Customizing notification settings for assignment and activation events.
After making your desired changes, click Update. These changes apply solely to the selected role, while other roles will maintain their default configurations.
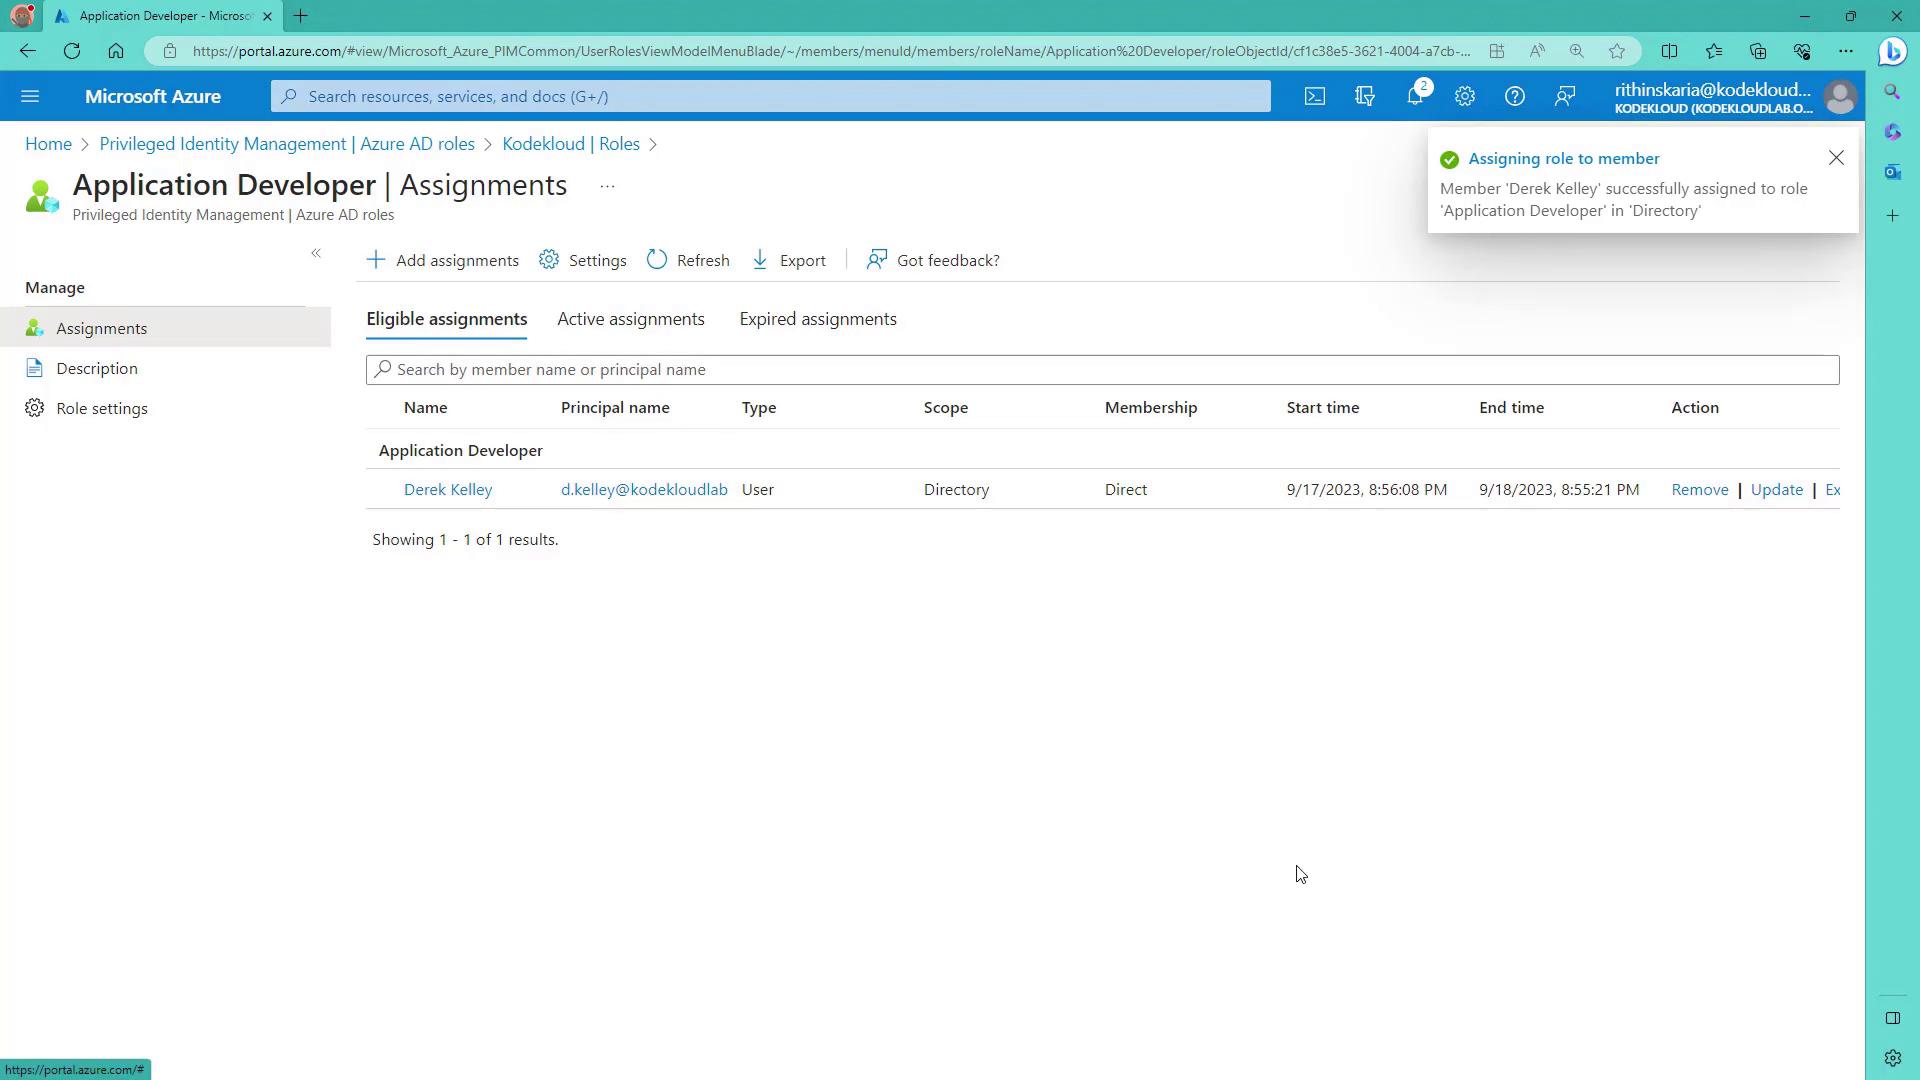
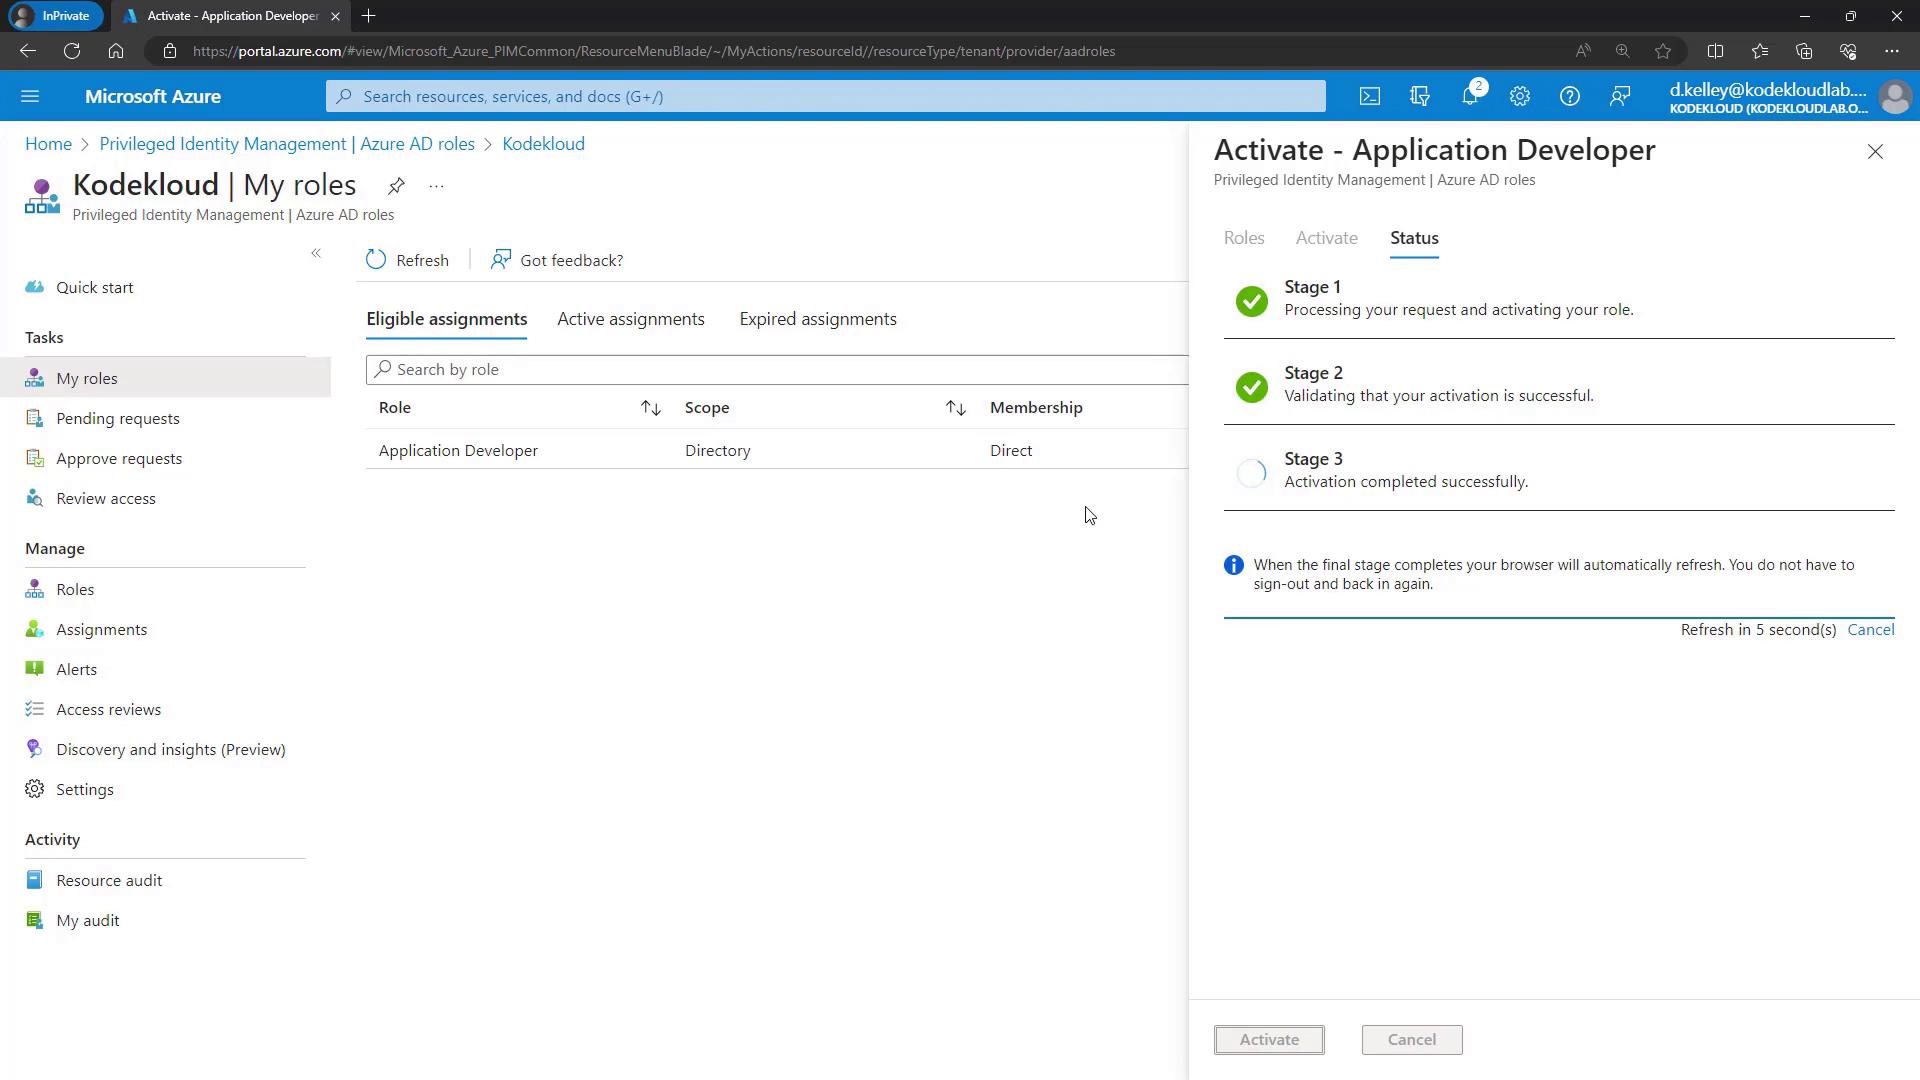
Next, let’s examine the activation process from the end-user standpoint. When Derek logs into the Azure portal, his role is inactive by default. To activate his “Application Developer” role:
Go to Privileged Identity Management → Azure AD Roles.
Select Activate.
During activation, the configured maximum duration of 30 minutes is displayed, and Derek is prompted to provide a justification (e.g., “justification is for testing”). If no approvers are set, activation completes automatically. If approvals are needed, an email notification is sent or the portal prompts for approval.
Once activated, subsequent activation attempts will indicate that the role is already active. After 30 minutes, reactivation is required to continue access.
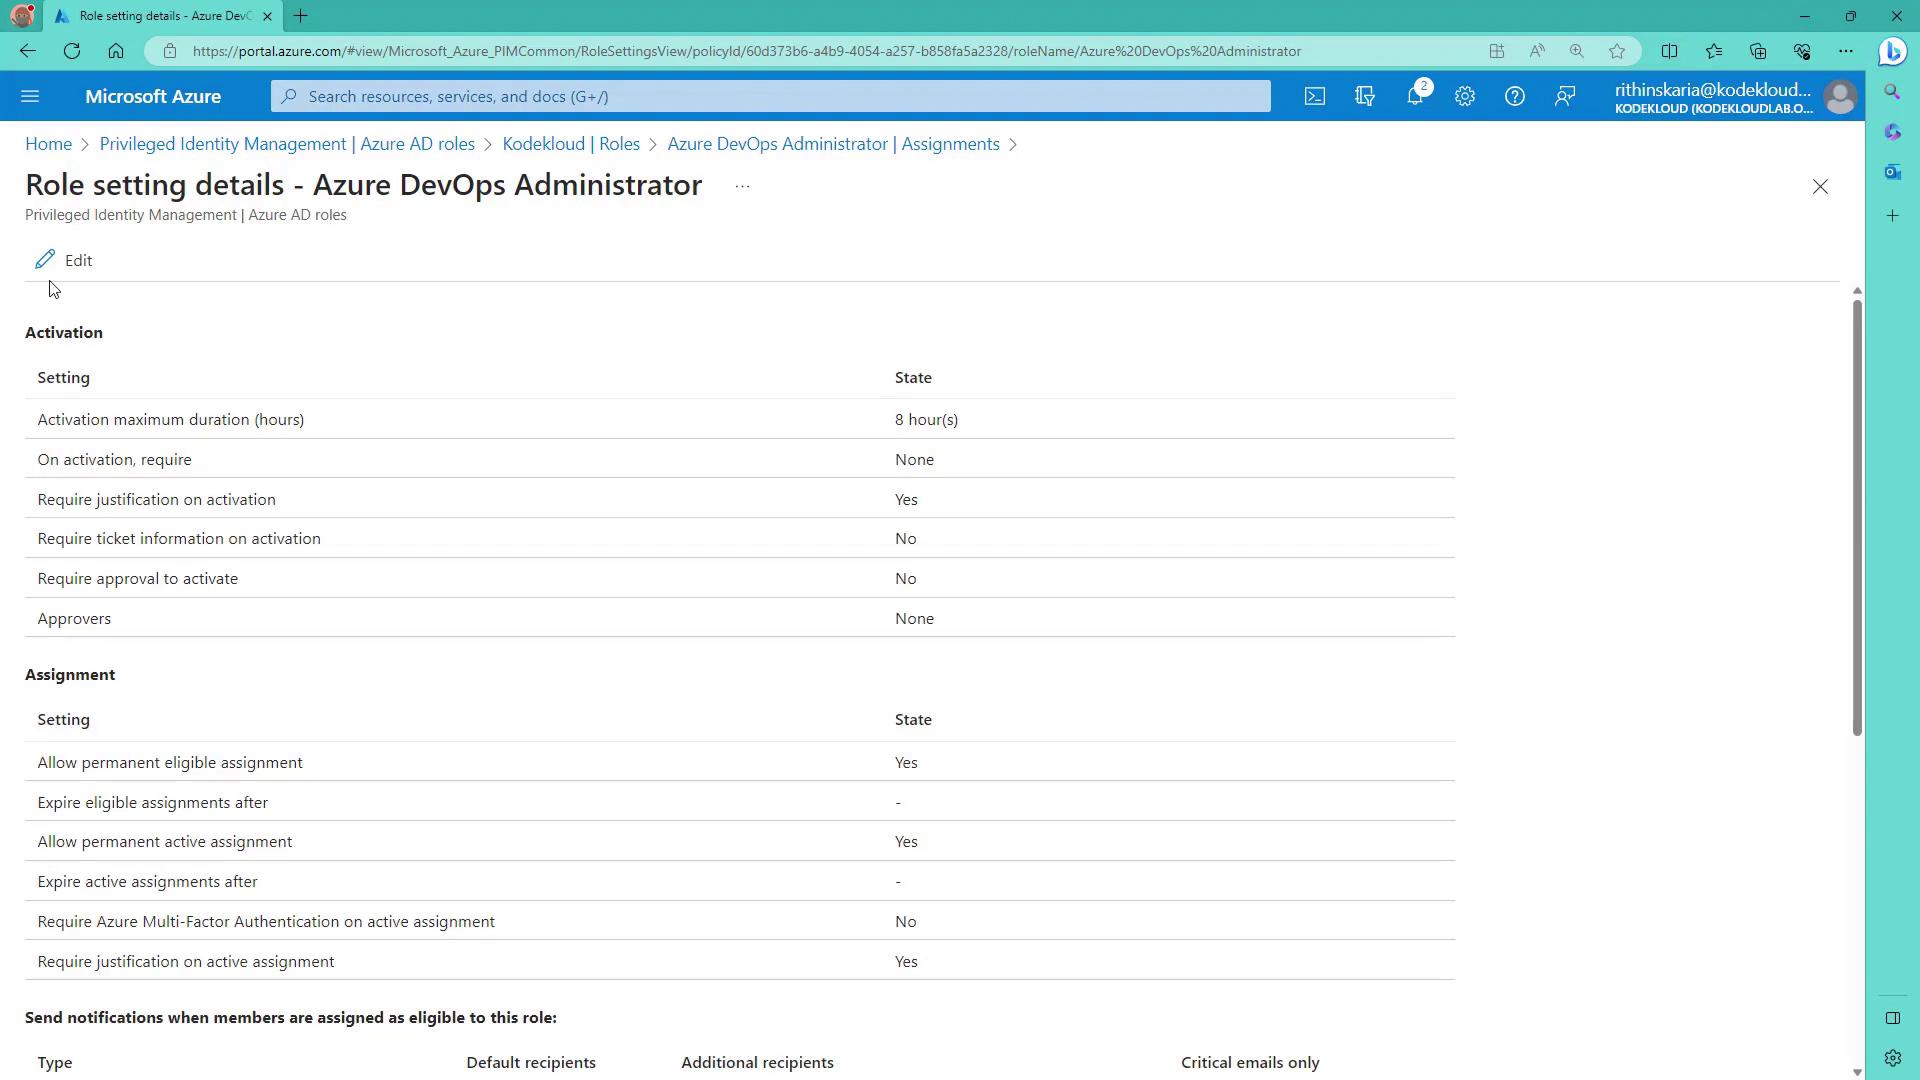
Now, let’s examine the configuration process for the Azure DevOps Administrator role. In the Azure portal under Privileged Identity Management → Azure AD Roles:
Select the Azure DevOps Administrator role.
Modify settings to include an approval step.
Set the maximum activation duration to two hours.
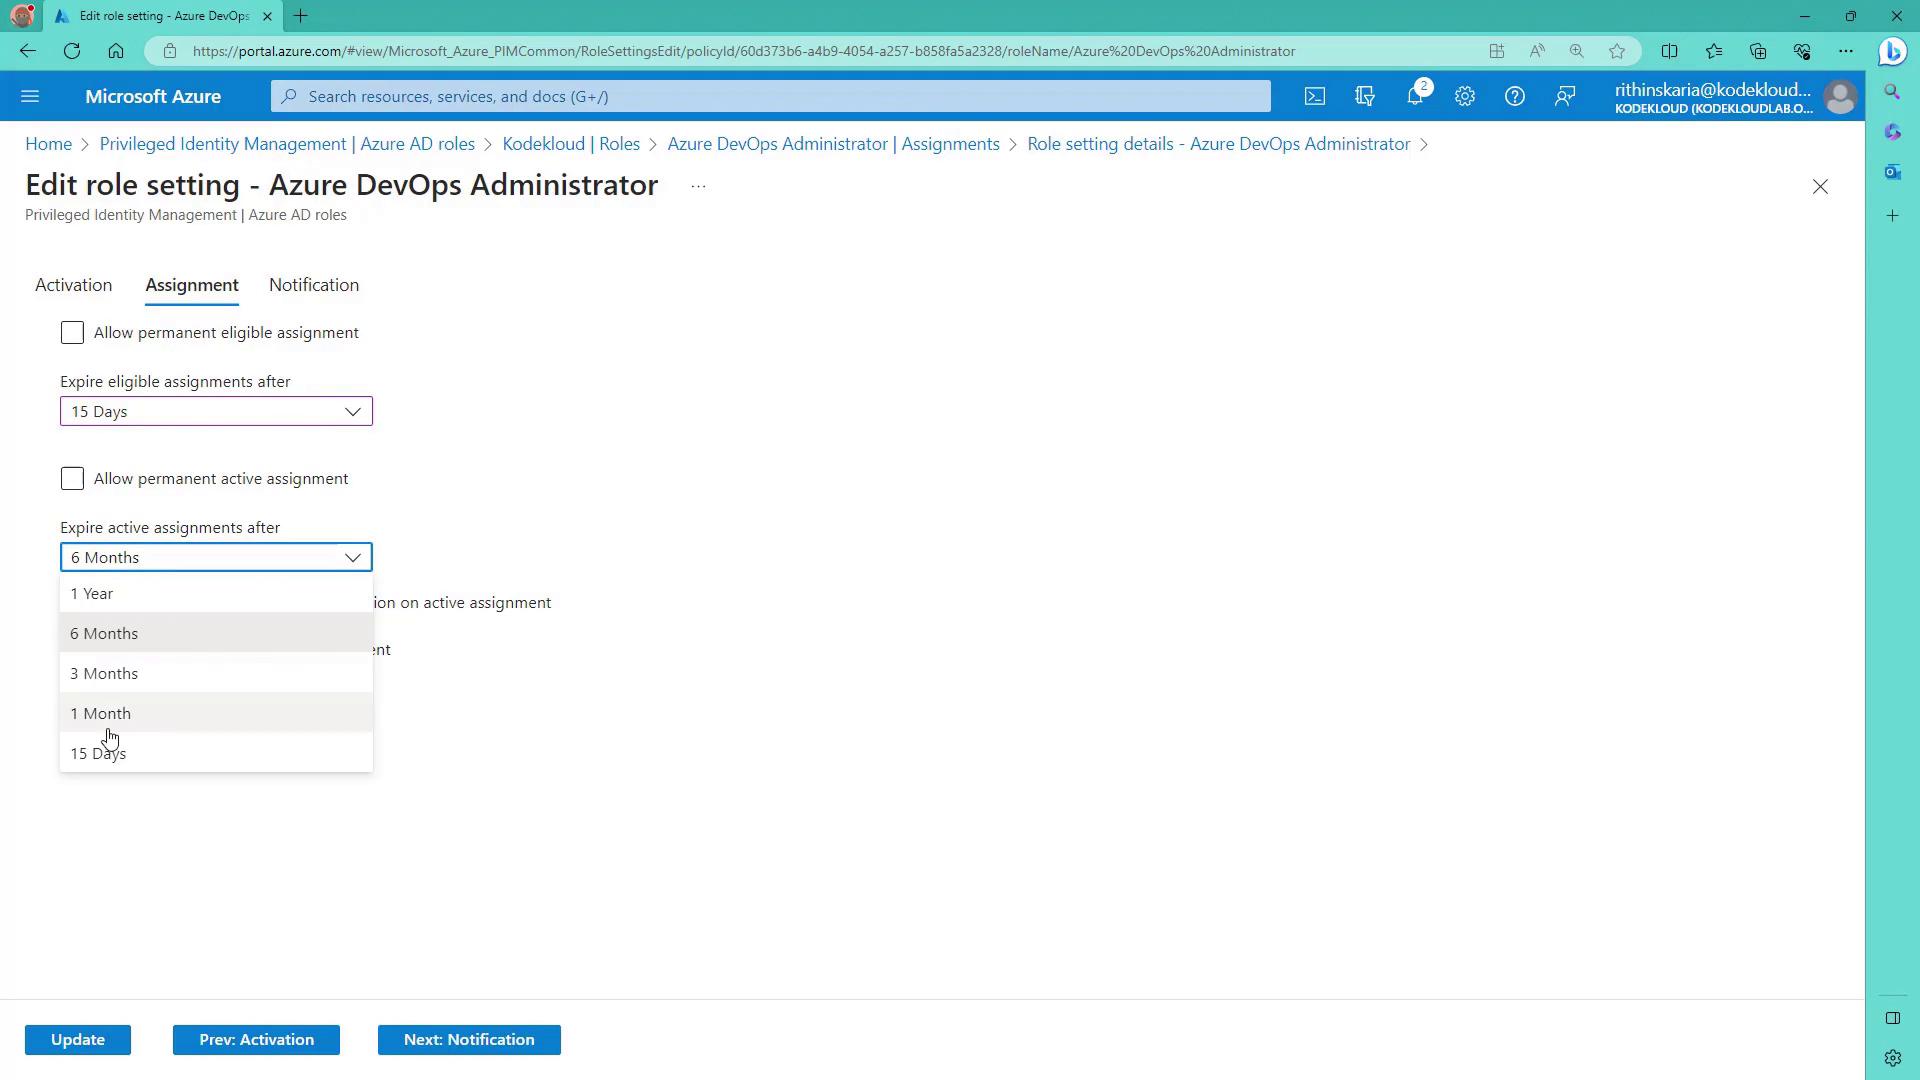
For assignments, specify a maximum duration of 15 days.
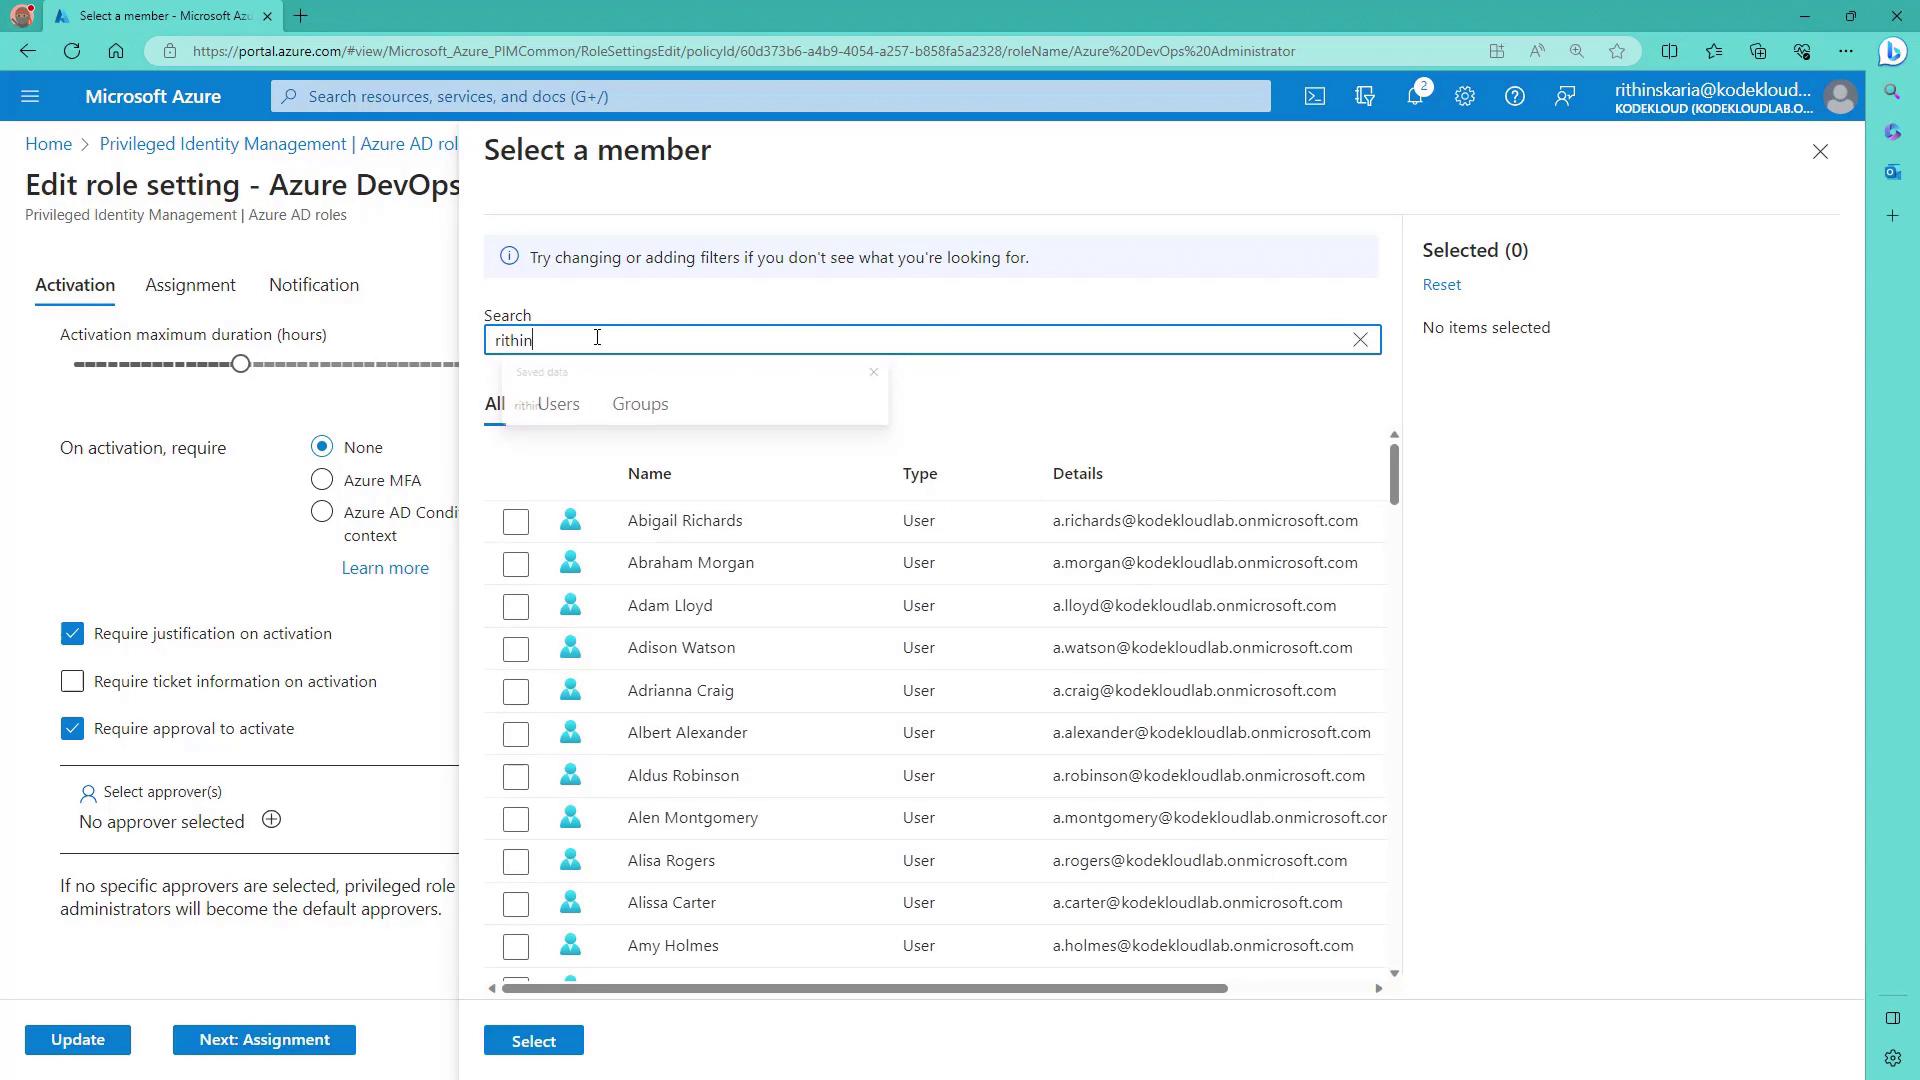
Select your Global Administrator account as the approver. You can also adjust the assignment expiration settings as needed.
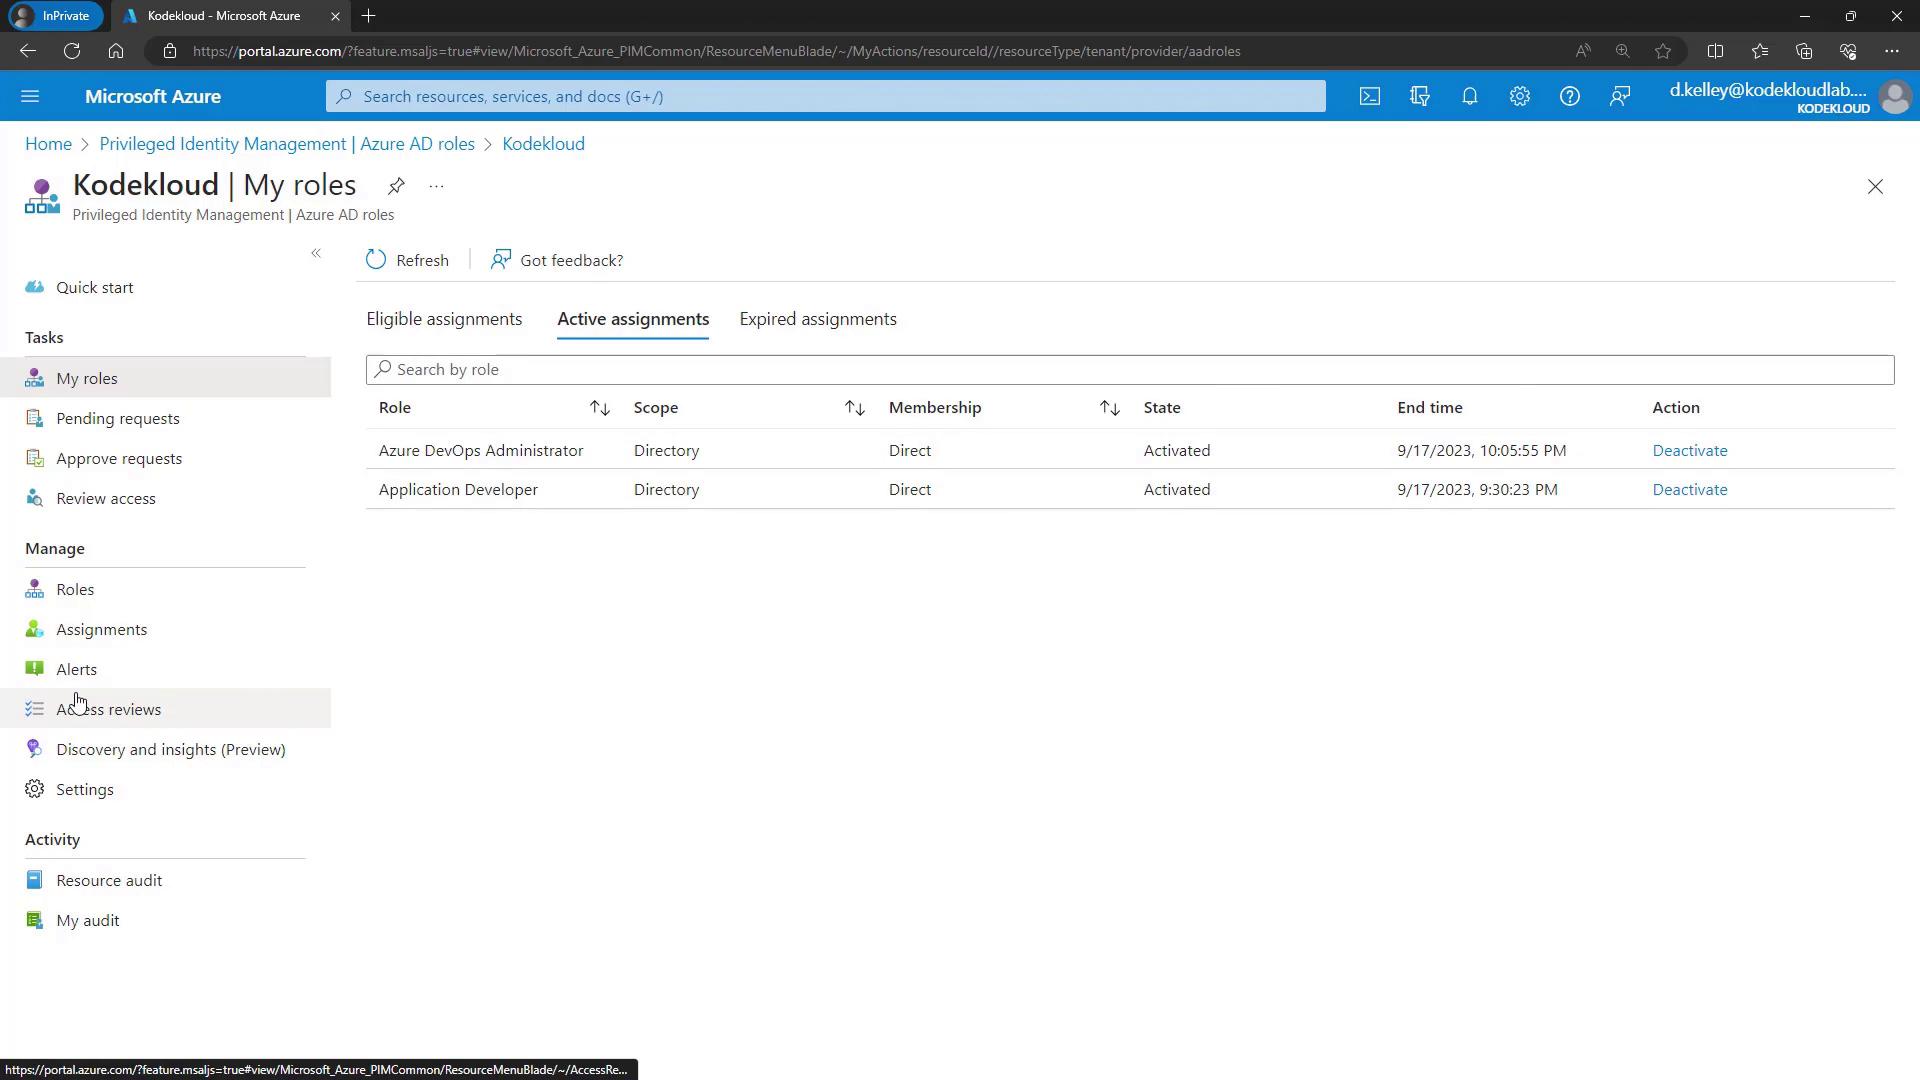
After updating the settings, assign the role to a member (for example, Derek). Choose the allowed maximum duration (default: 15 days) or customize it as needed. Upon activation, even though the maximum duration is two hours, Derek may request a shorter duration. In such cases, his activation request will be pending until approved. As the approver, review and approve the request, which then finalizes the activation with the designated duration.Active assignments—including both the “Application Developer” and “Azure DevOps Administrator” roles—can be viewed under Azure Active Directory → Roles and Administrators.
If a user finishes their task or no longer requires access, they can proactively deactivate their role by navigating to the Active Assignments section and revoking the activation.
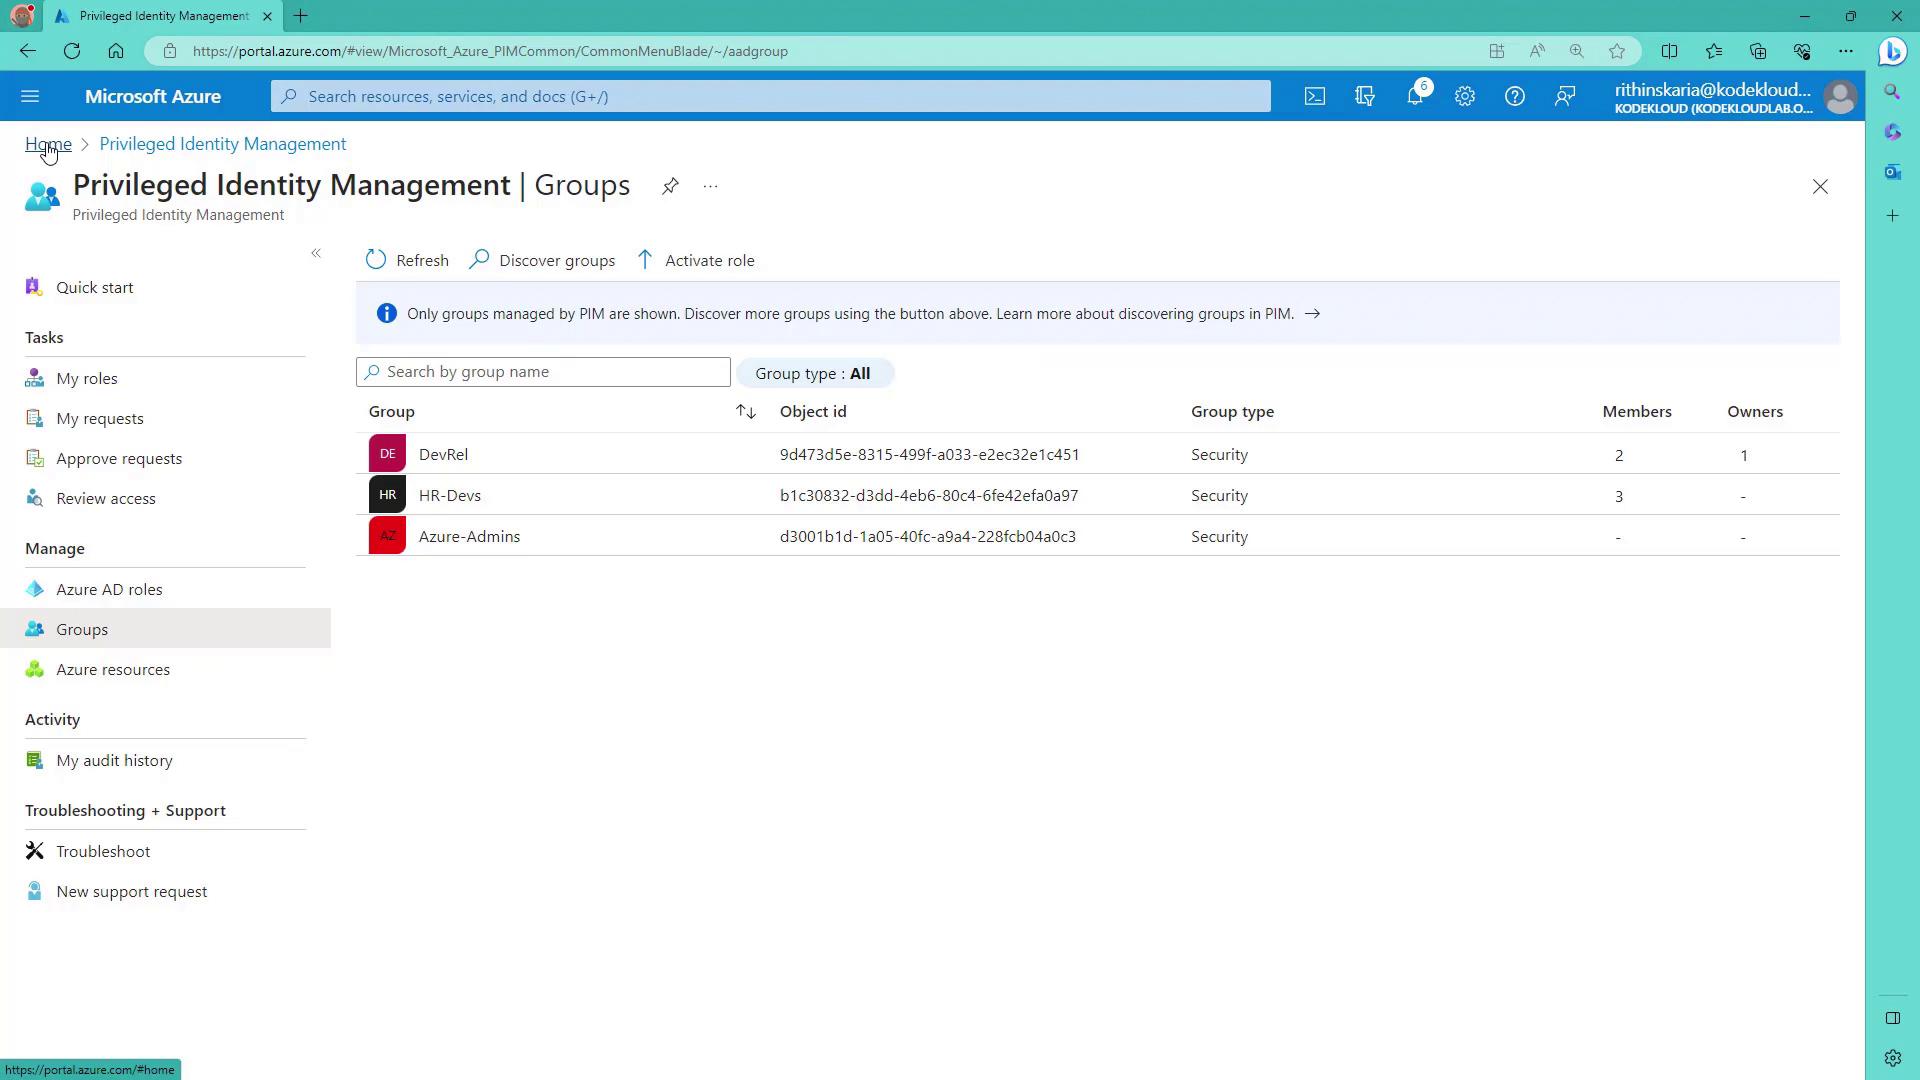
PIM also supports roles for groups, which is especially useful when multiple users require the same roles. To onboard groups:
Navigate to Privileged Identity Management and select Groups.
Discover available groups in Azure Active Directory.
Note: Groups controlled by dynamic membership rules or synchronized from on-premises cannot be managed through PIM. Only eligible groups can be onboarded.For example, to onboard the “Azure Admins” group:
Click Discover Groups.
Select the appropriate group.
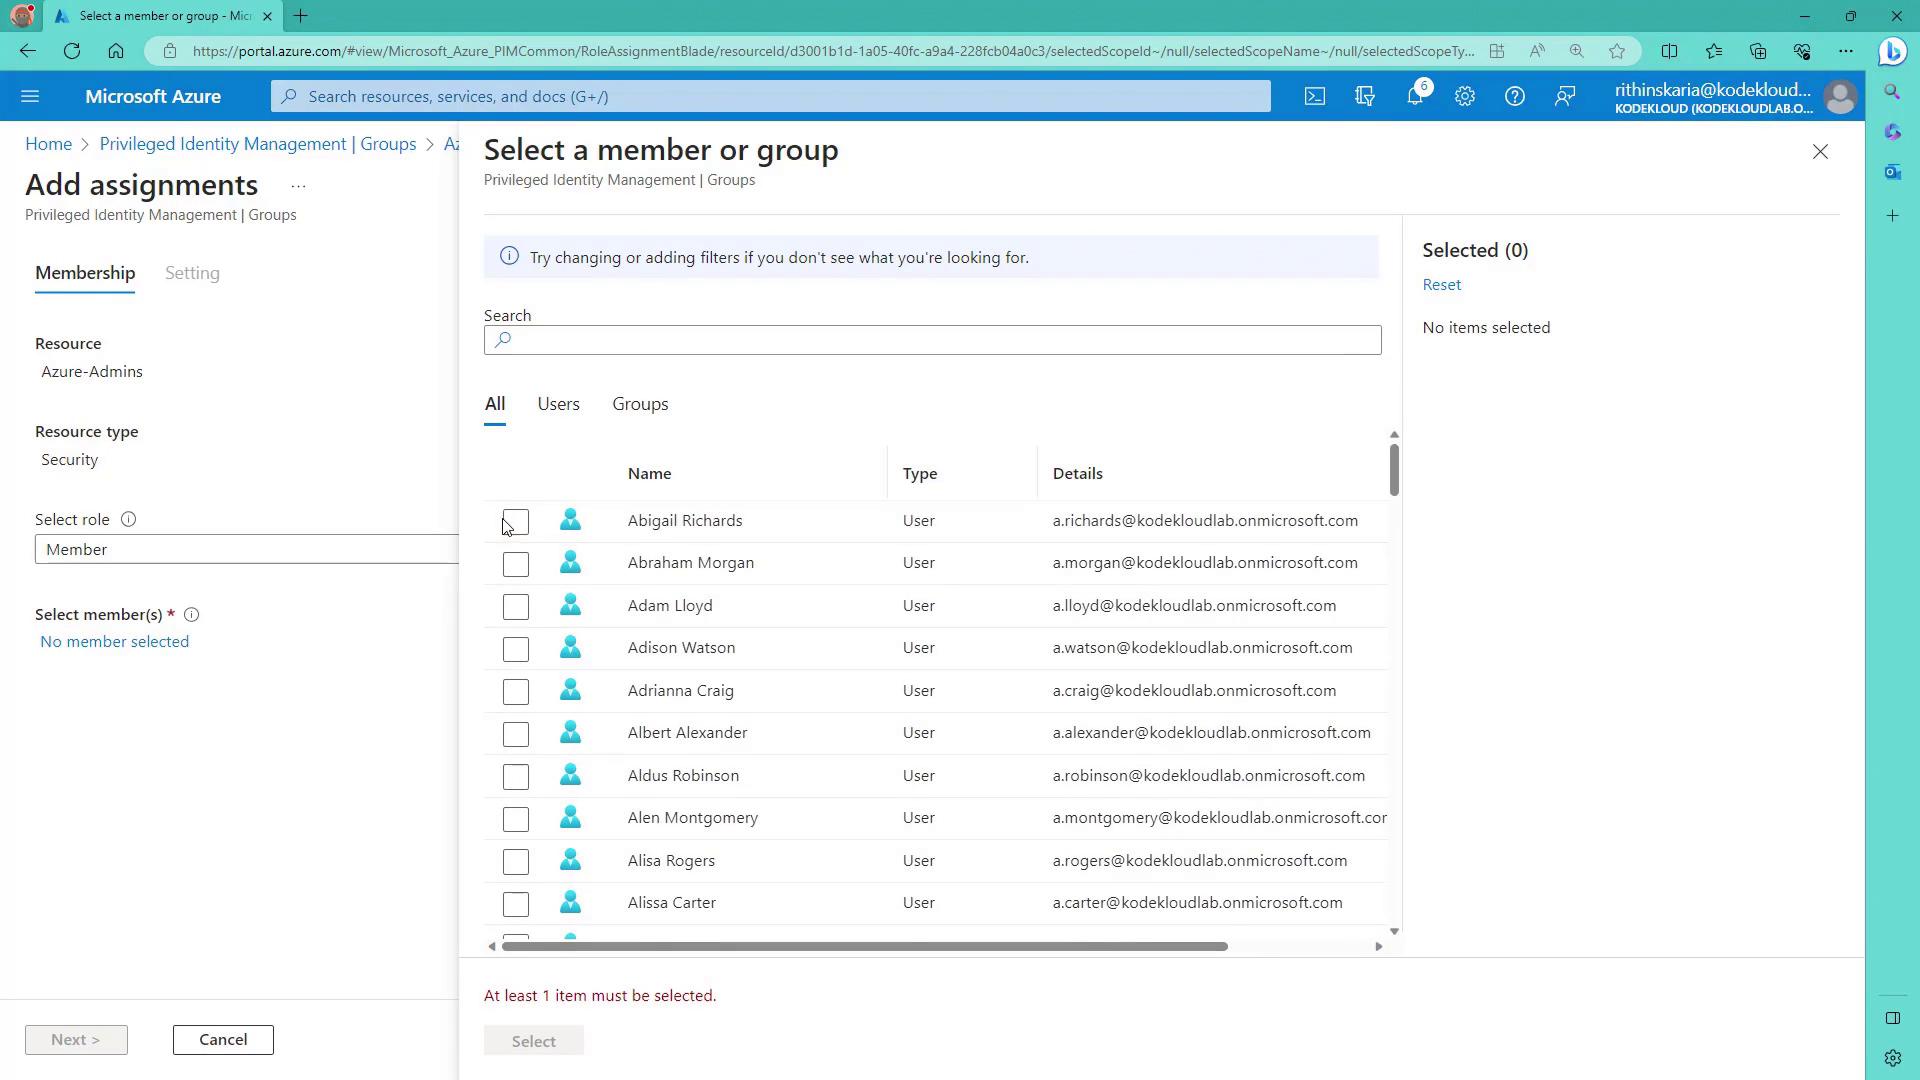
Once onboarded, assign eligible or active assignments through PIM to streamline role management for multiple users.
Instead of assigning roles individually, you can enable role assignments for a group and control group membership via PIM. For instance, assign roles to the group and set a duration (e.g., one or two days). You can even add specific users (such as Derek) to the group for demonstration purposes.
When creating groups in Azure AD for role assignments, ensure the flag for role assignment is set to “Yes” during creation. If this setting is not enabled initially, you will need to recreate the group for PIM compatibility.
To demonstrate, navigate to Azure Active Directory → Roles and Administrators and add roles (e.g., “Attack Payload Author,” “Billing Administrator,” “Directory Writers”) to the selected group. These assignments are direct and permanent. Then, switch to Privileged Identity Management → Groups and activate group membership (setting a duration, say, one hour), so the group gains temporary role privileges until the activation expires.
This guide has detailed how to configure PIM settings for both individual roles and groups. By controlling activation durations, enforcing security measures such as Azure MFA, requiring justifications, and applying approval processes, you can enhance the security and flexibility of managing critical roles in your Azure environment.With these advanced PIM configuration settings in your toolkit, you’re well-equipped to explore even more sophisticated PIM workflows in future publications.Happy configuring!