Allows specification of either custom or predefined services (e.g., HTTP, HTTPS, RDP, SSH) to open the necessary ports. • Port Range
Enables configuration of individual ports or a range of ports for flexible traffic management. • Priority
Ranging from 100 to 4096, lower numbers denote higher priority. For example, a rule with priority 100 processes before one with priority 200. (Default rules typically have priorities around 65,000.) • Action
Specifies whether the rule will allow or deny traffic.
NSG Rule Evaluation and Traffic Flow
Consider a virtual network containing one or more subnets. You can associate an NSG either with a subnet or directly with a virtual machine’s network interface (NIC). For instance, if you have a web server running on a VM within a subnet and you need to allow HTTP traffic (port 80), you would create an NSG rule permitting that port. When traffic flows into the network, the NSG first evaluates the subnet-level rules; if the traffic is allowed, it then checks the NIC-level rules. Only if both NSGs grant access will the web server receive the request. Conversely, if either NSG denies traffic, the request is blocked before reaching the VM.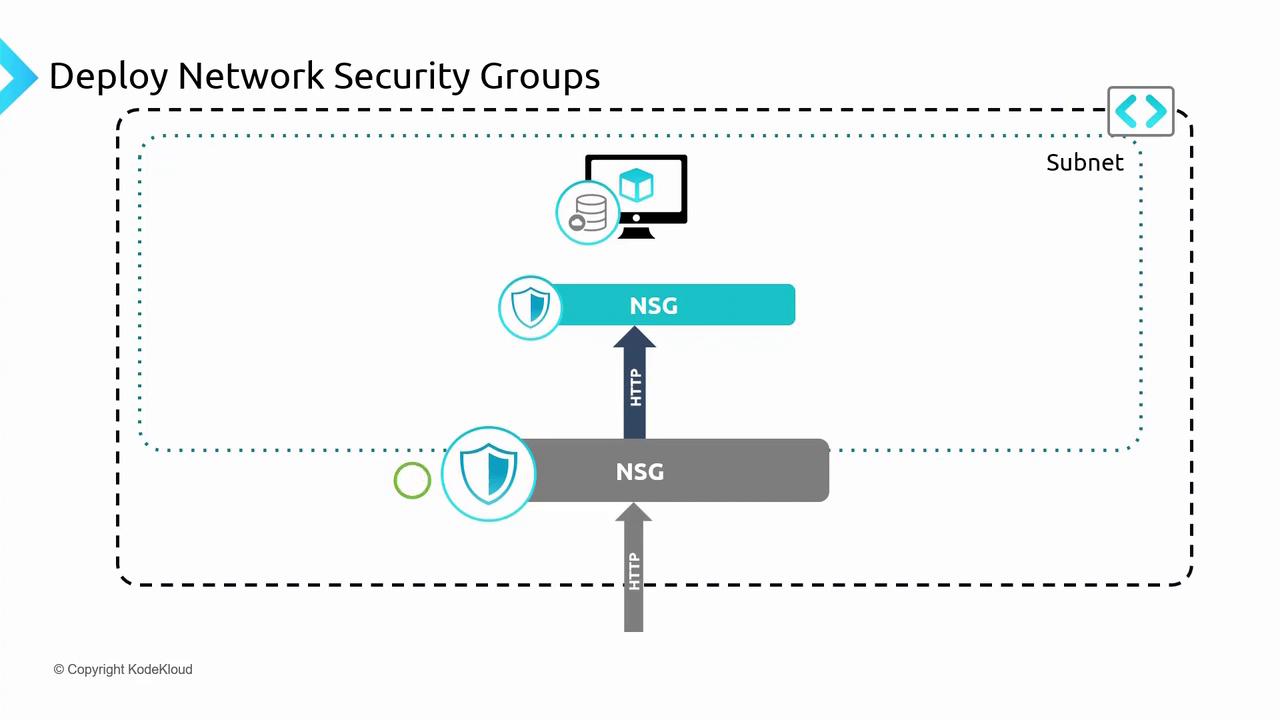
Hands-On Deployment via the Azure Portal
In this demonstration, we deploy a virtual network with two subnets, each hosting two virtual machines labeled Workloads A and B. The deployment script is available in your repository under the folder 080-Network Security with the file namednsg-prep-infra.ps1.
Deploying the Infrastructure
Set the subscription context and deploy the resources using the following PowerShell commands:

Configuring a Web Server on a VM
Next, sign into one of the VMs (assumed to be acting as a web server) and configure Apache to host a simple webpage. Use SSH to connect to the VM: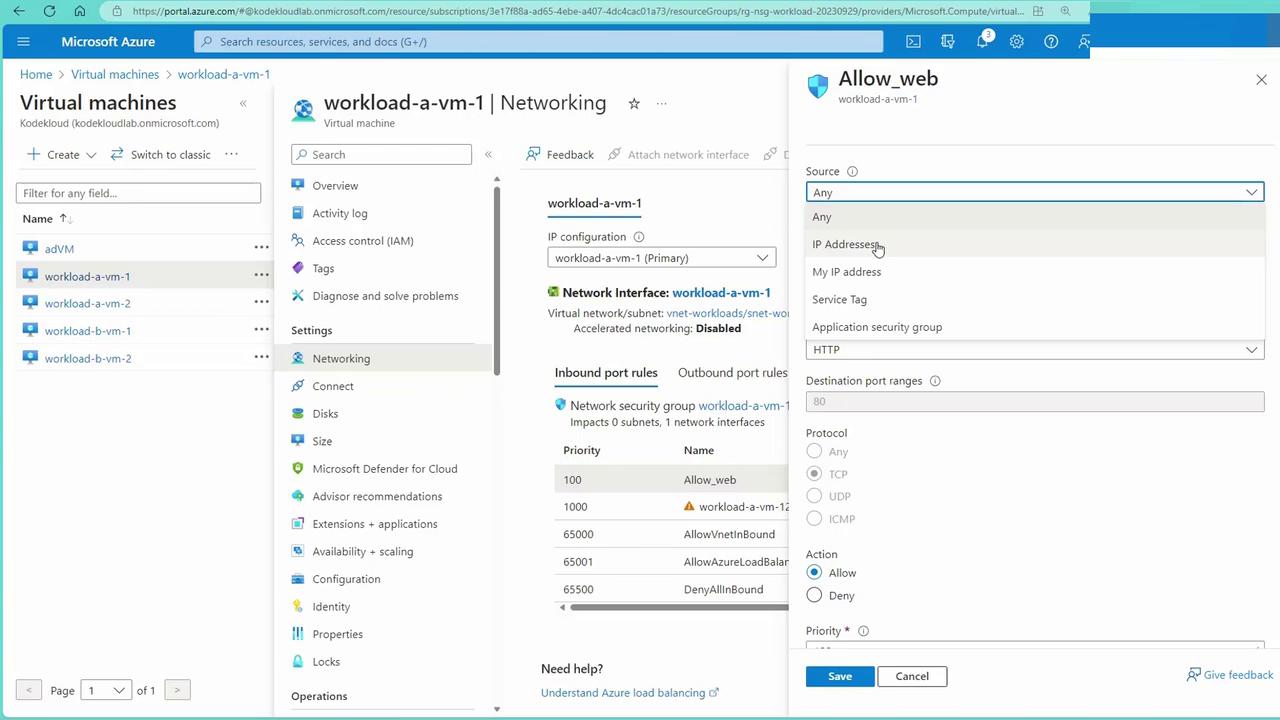
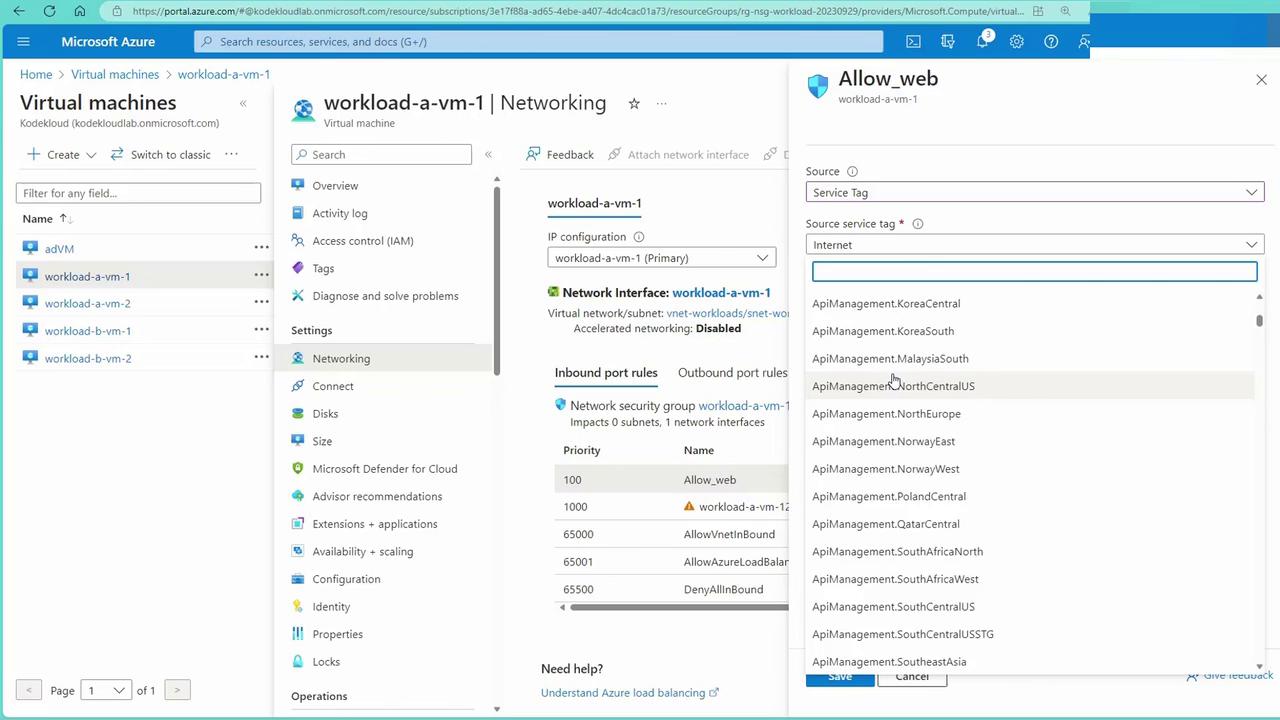
Service Tags and NSG Rule Overrides
Service tags are groups of IP addresses maintained by Microsoft for its public services (such as Storage, Synapse, and Databases). Instead of manually managing dynamic IP addresses, you can reference service tags (e.g., “Internet,” “Load Balancer,” “Storage”) in your NSG rules. For example, if your VM needs access to a Storage account, you can allow traffic based solely on the Storage service tag rather than opening access to the entire Internet. NSG rule attributes also allow specification of source and destination criteria, such as IP ranges and service tags. Consider the following scenario to override the default virtual network communication rule (with priority around 65,000):- Modify the rule to deny traffic from a specific source IP range (e.g., 192.168.2.0/24 for VMs in subnet B).
- Although system routes permit virtual network (VNet) communication, a custom deny rule with a priority of 100 will block traffic from that range.
-
To demonstrate this effect, open a new terminal and SSH into one of the VMs (e.g., workload-b-vm-1). Initially, executing a
curlcommand to workload A’s IP address will display the expected webpage: -
After updating the NSG rule to deny traffic, retrying the
curlcommand will yield no output because the request is blocked.
Testing NSG Changes and Blocking Traffic
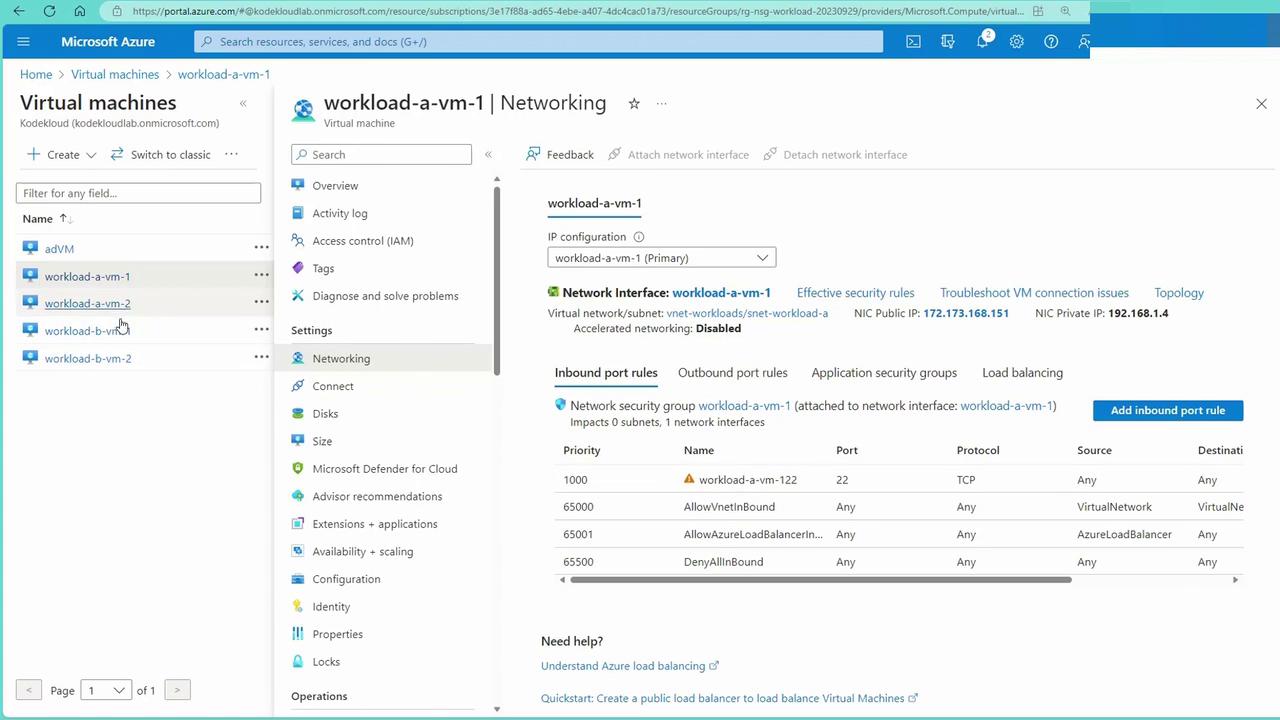
To verify the impact of NSG modifications, try updating an inbound rule. For example, change an existing rule to deny SSH (port 22) traffic and apply the updated NSG to the subnet. The image below displays the inbound security rules before and after incorporating a deny rule: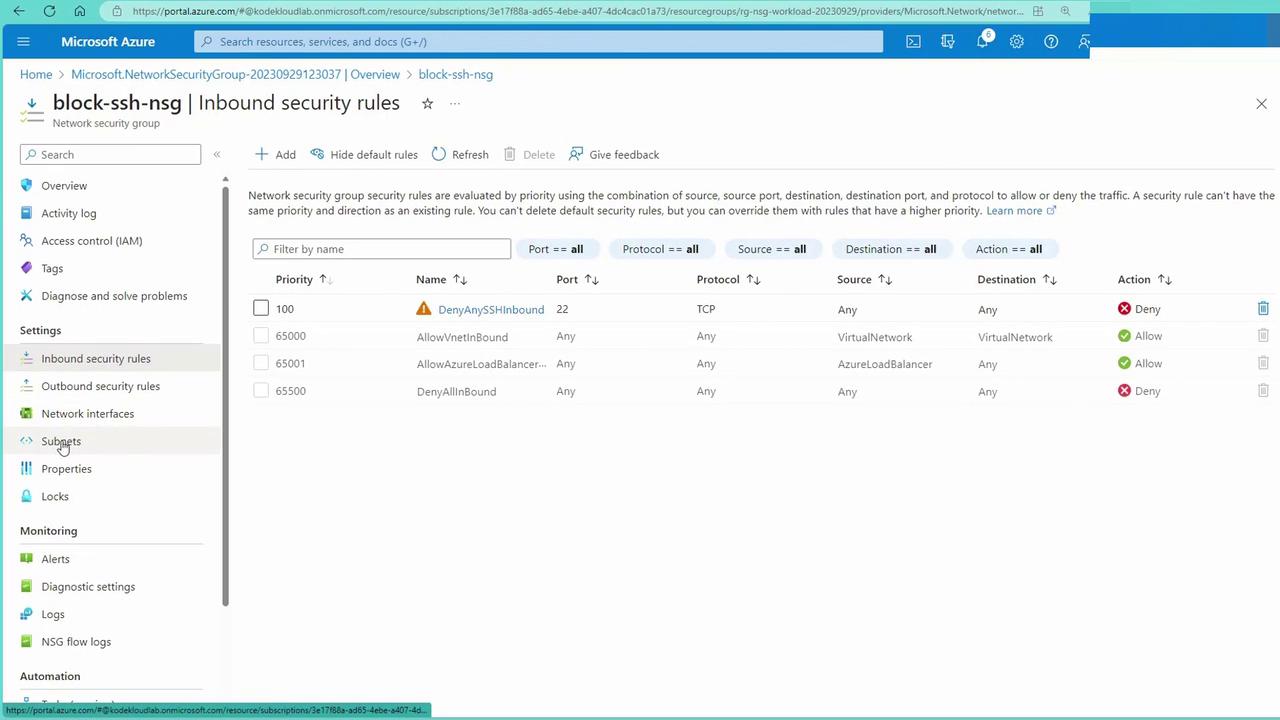
curl on port 22 (or HTTP traffic) will fail. For example, trying to curl workload A’s IP will return no output, and SSH attempts will be reset due to the NSG block.
For added flexibility, you can also configure augmented network security rules. These allow you to combine multiple ports or IP ranges into a single rule using comma-separated values or hyphenated ranges, thereby reducing management complexity.
Applying a New NSG to Block SSH
To further illustrate, let’s create a new Network Security Group specifically designed to block SSH (port 22) traffic:- In the Azure portal, create a new NSG (e.g., “NSGsBlock”).
- Add an inbound rule that denies traffic on port 22 from any source.
- Associate this NSG with the appropriate subnet. (Remember, if a network interface is already associated with another NSG, you cannot attach a second NSG to that NIC.)
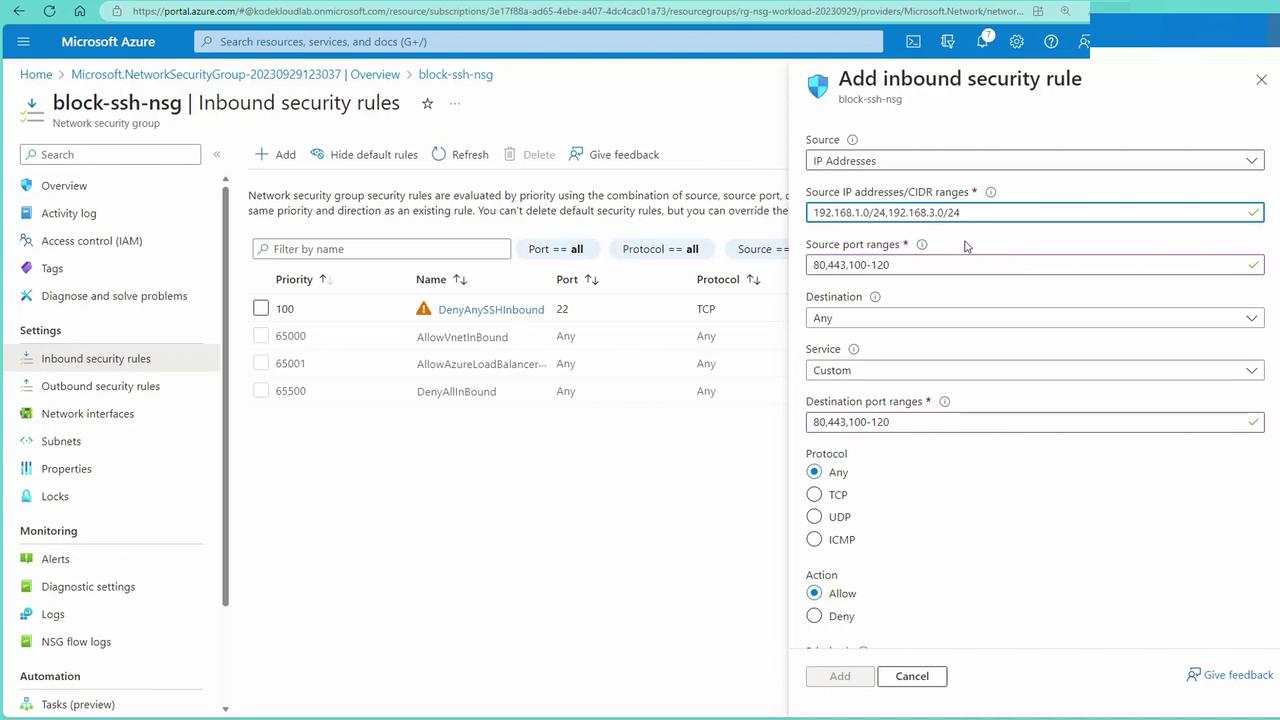
Augmented Network Security Rules
Augmented network security rules simplify administration by allowing multiple ports or IP address ranges to be managed within a single rule. Instead of creating separate rules for each port or IP range, combine them using comma-separated values or hyphenated ranges. This streamlined approach reduces rule clutter and simplifies management. For instance, if your application requires several port ranges or must allow access from multiple IP subnets (e.g., 192.168.1.0/24 and 192.168.3.0/24), you can specify these ranges within one consolidated rule. With NSGs fully configured and thoroughly tested, you have successfully secured the traffic flowing to and from your Azure virtual machines.Next Steps: Application Security Groups
In the next section, we will explore Application Security Groups (ASGs). ASGs allow you to group similar servers and apply security rules based on these groups rather than using individual IP addresses. This further streamlines network security management in Azure.For more information on NSG best practices and advanced configurations, refer to the Azure Network Security documentation.