Microsoft Azure Security Technologies (AZ-500)

Network Security

Implement Application Gateway

In this lesson, you will learn how to implement the Azure Application Gateway—a web traffic load balancer operating at layer 7 of the OSI model. Unlike the Azure Load Balancer that works at layer 4, the Application Gateway is designed to handle HTTP, HTTPS, HTTP/2, and WebSocket traffic. It offers granular routing features and advanced security capabilities, including the Web Application Firewall (WAF). Let’s explore the architecture and configuration process in detail.

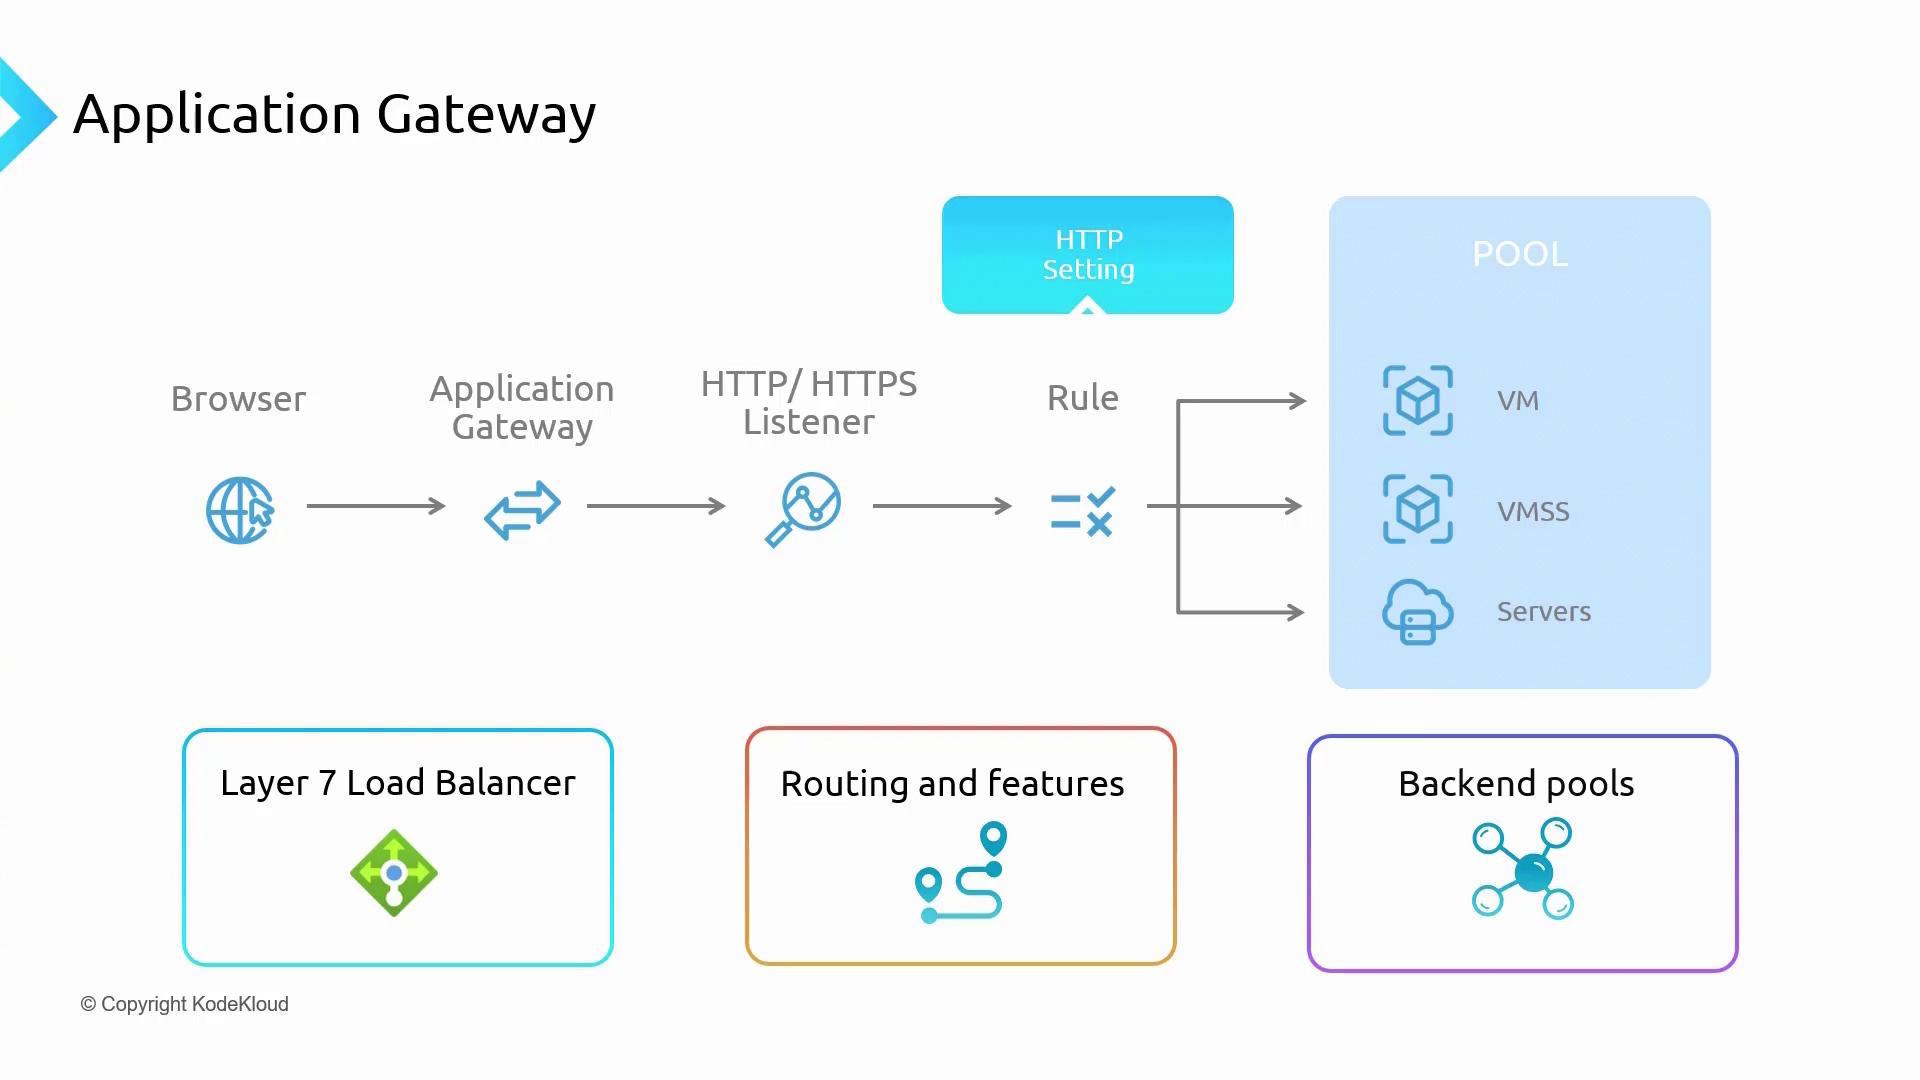
Overview of Traffic Flow

A client sends an HTTP or HTTPS request from a browser, which is then received by the Application Gateway. The gateway uses HTTP/HTTPS listeners, set up on specific IP addresses and ports, to capture incoming traffic. Each listener has associated rules that determine how requests are forwarded based on attributes such as URL paths or host headers.

This architecture mirrors a traditional load balancer setup with a front-end, back-end, and intermediary rules. However, due to its layer 7 functionality, the Application Gateway can route requests to multiple back-end targets including Virtual Machines (VMs), Virtual Machine Scale Sets (VMSS), App Services, deployment slots, and even on-premises servers.

HTTP settings further refine traffic behavior by specifying parameters such as cookie-based session affinity, request timeouts, and custom probes for health monitoring. Once the rules and settings are processed, the traffic is forwarded to the appropriate back-end pool. The response then follows the reverse path through the Application Gateway, ensuring that the back-end servers remain hidden to enhance security.

Additional features include path-based routing, URL redirection, SSL termination, HTTP header rewriting, and custom error pages for fine-tuned control.

Supported Back-end Scenarios

Azure Application Gateway supports a wide range of back-end targets that extend beyond the capabilities of the Azure Load Balancer:

  • Azure Virtual Machines (VMs)
  • Azure Virtual Machine Scale Sets (VMSS)
  • Azure App Services and App Service deployment slots
  • Servers hosted on other cloud providers or on-premises

The image is a diagram illustrating the flow of an application gateway, showing components like a browser, application gateway, HTTP/HTTPS listener, rules, and a pool of VMs, VMSS, and servers. It highlights features such as a Layer 7 load balancer, routing, and backend pools.

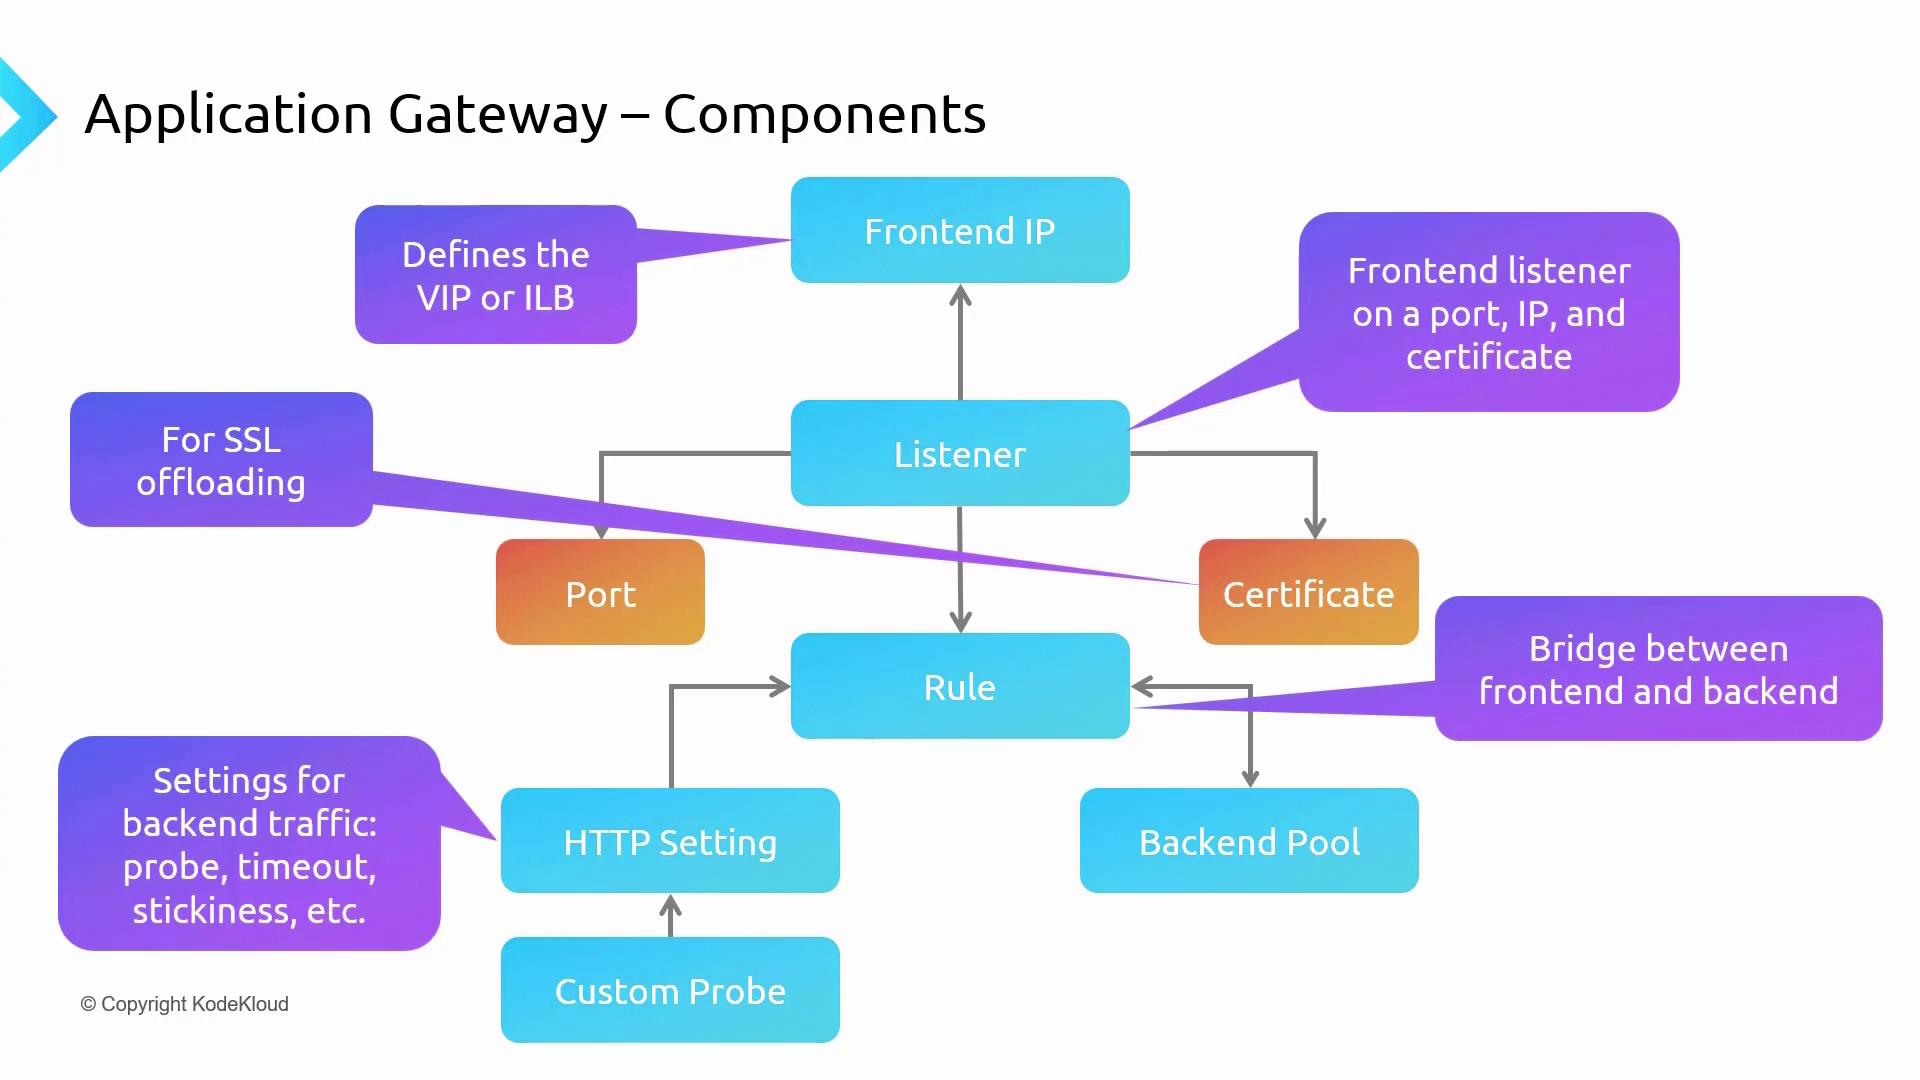
Application Gateway Components

Below is a breakdown of the key components within an Application Gateway:

  1. Front-end IP:
    The entry point for client requests.

  2. Listener:
    Monitors incoming traffic on designated IP addresses and ports. An SSL certificate is required when using HTTPS for secure communication and SSL offloading.

  3. Rule:
    Bridges the front-end and back-end by determining how traffic should be processed and routed.

  4. HTTP Settings:
    Defines details like cookie-based session affinity, request timeouts, and stickiness options.

  5. Custom Probes (Optional):
    Monitor the health of back-end resources to ensure they are ready to process requests.

  6. Back-end Pool:
    Contains the servers hosting your applications. Traffic is routed here based on the rules and settings defined earlier.

The image is a flowchart illustrating the components of an application gateway, including elements like Frontend IP, Listener, Port, Certificate, Rule, HTTP Setting, Custom Probe, and Backend Pool, with descriptions of their functions.

This ordered design ensures that client requests are securely processed following predefined rules and settings before reaching the back-end servers.

Routing Rules and Basic Portal Requirements

Path-Based Routing

Path-based routing allows you to direct client requests to different back-end pools based on the URL path. For instance, requests ending with /images might be mapped to an image server pool, while /video can be routed to a video server pool.

Multiple Site Routing

Multiple site (or multi-site) routing enables you to host several websites on a single Application Gateway. For example, you can host both kodekloud.com and azuretales.com on one gateway, with routing decisions based on host headers. This approach is cost-effective and simplifies management by avoiding the deployment of multiple gateways.

Summary of Routing Methods

  • Path-Based Routing: Routes traffic within a single website based on URL paths.
  • Multiple Site Routing: Hosts multiple websites on one gateway by differentiating traffic based on host headers.

Deployment Using Custom Scripts

In the Azure portal, you can deploy the Application Gateway along with back-end servers using custom scripts. Occasionally, issues with the custom script extension may occur (for example, package download errors). An example error might be:

E: Failed to fetch http://azure.archive.ubuntu.com/ubuntu/pool/main/a/apr-util/libaprutil-dbd-sqlite3_1.6.1-3build1_amd64.deb  404  Not Found [IP: 52.147.219.192 80]
...
chmod: cannot access '/var/www/html/index.html': No such file or directory
...
ErrorCode: VMExtensionProvisioningError

In such cases:

  1. Copy the GitHub URL for the script.
  2. SSH into the target VM (for example, the jumpbox).
  3. Download the script using wget.

For example, you can execute the following PowerShell script:

$Params = @{
    ResourceGroupName = $rg
    VMName           = 'jumpbox-vm'
    Name             = 'CustomScript'
    Publisher        = 'Microsoft.Azure.Extensions'
    ExtensionType    = 'CustomScript'
    HandlerVersion   = '2.1'
    Settings         = @{
        "fileUris"         = @('https://raw.githubusercontent.com/rithinskaria/kodekloud-azure/main/AppGateway/jumpbox.sh')
        commandToExecute   = 'bash jumpbox.sh'
    }
}

Set-AzVMExtension @Params

The downloaded jumpbox.sh script uses wget to retrieve the necessary files and configure the VMs. An excerpt from the script is shown below:

for i in {0..1}
do
  j=$(($i + 4))
  redIP="10.0.2.$j" \
  sshpass -p "VMP@$55w0rd" \
  ssh -o StrictHostKeyChecking=no kodekloud@jumpbox bash -c \
  '"export VAR=$i"
  println | grep VAR
  echo "Setting up red VM"
  sudo apt install apache2 -y
  sudo chmod -R 777 /var/www/
  sudo mkdir -v /var/www/html/red
  sudo curl "https://raw.githubusercontent.com/rithinskaria/kodekloud-azure/main/AppGateway/sample.html" > /var/www/html/index.html
  sed -i "s/PAGECOLOR/red/g" /var/www/html/index.html
  sed -i "s/VMID/$g/" /var/www/html/index.html
  cat /var/www/html/index.html > /var/www/html/red/red.html
  exit'
done

A similar script block handles configuration for blue VMs. To download the jumpbox.sh script, run:

wget 'https://raw.githubusercontent.com/rithinskaria/kodekloud-azure/main/AppGateway/jumpbox.sh' -O jumpbox.sh

Then update the file permissions:

chown +x jumpbox.sh

Note:

Errors from the custom script extension are often intermittent. The output below confirms that the green server is responding correctly:

kodekloud@jumpbox-vm:~$ curl 10.0.1.4
<html>
<body style="background-color:green;">
<h1 style="color:white;">Hi from green-1</h1>
</body>
</html>

Accessing the red and blue pages similarly confirms that the path-based routing is functioning as expected.

Verifying the Setup

From the jumpbox, you can test the responses of various servers using curl. For example:

kodekloud@jumpbox-vm:~$ curl 10.0.1.4
<html>
<body style="background-color:green;">
<h1 style="color:white;">Hi from green-1</h1>
</body>
</html>

kodekloud@jumpbox-vm:~$ curl 10.0.2.4
<html>
<body style="background-color:red;">
<h1 style="color:white;">Hi from red-1</h1>
</body>
</html>

These tests indicate that the environment is correctly set up with blue, green, and red VMs along with a jumpbox for configuration.

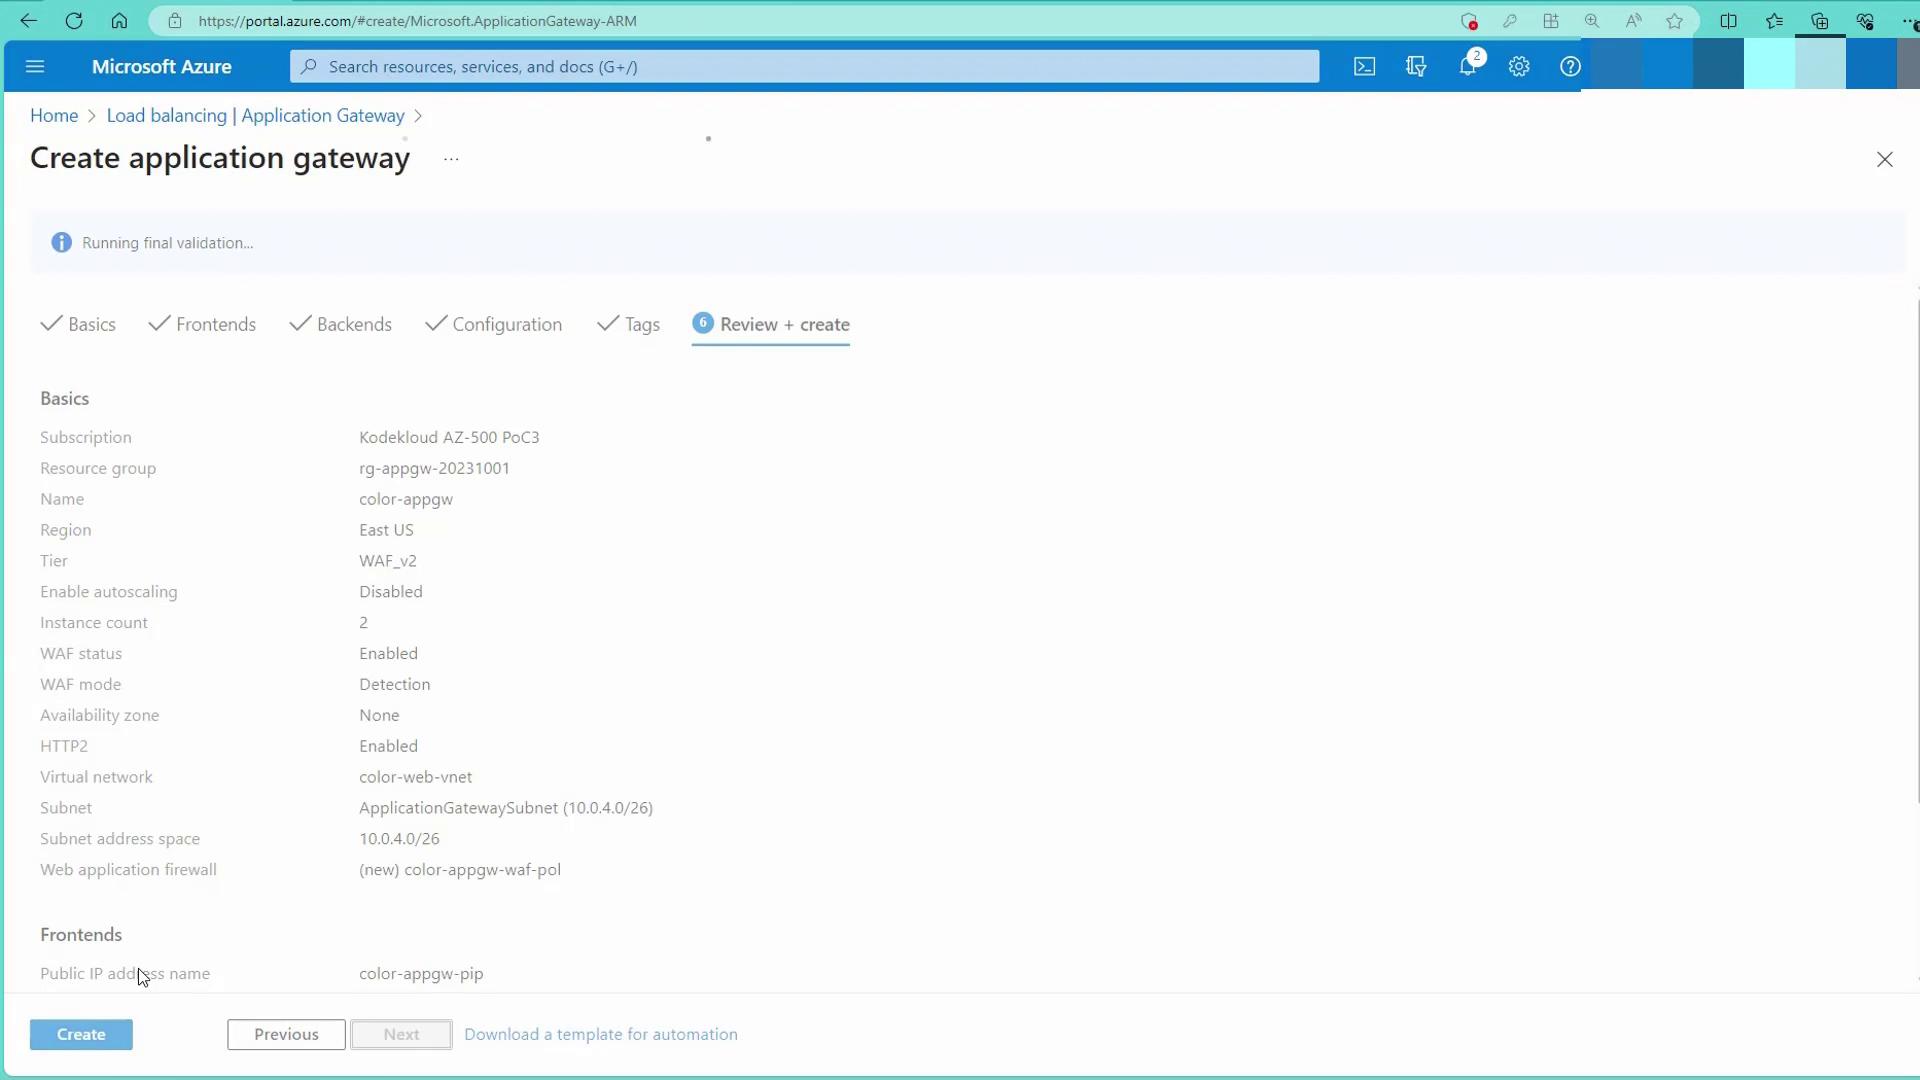
Configuring the Application Gateway in the Azure Portal

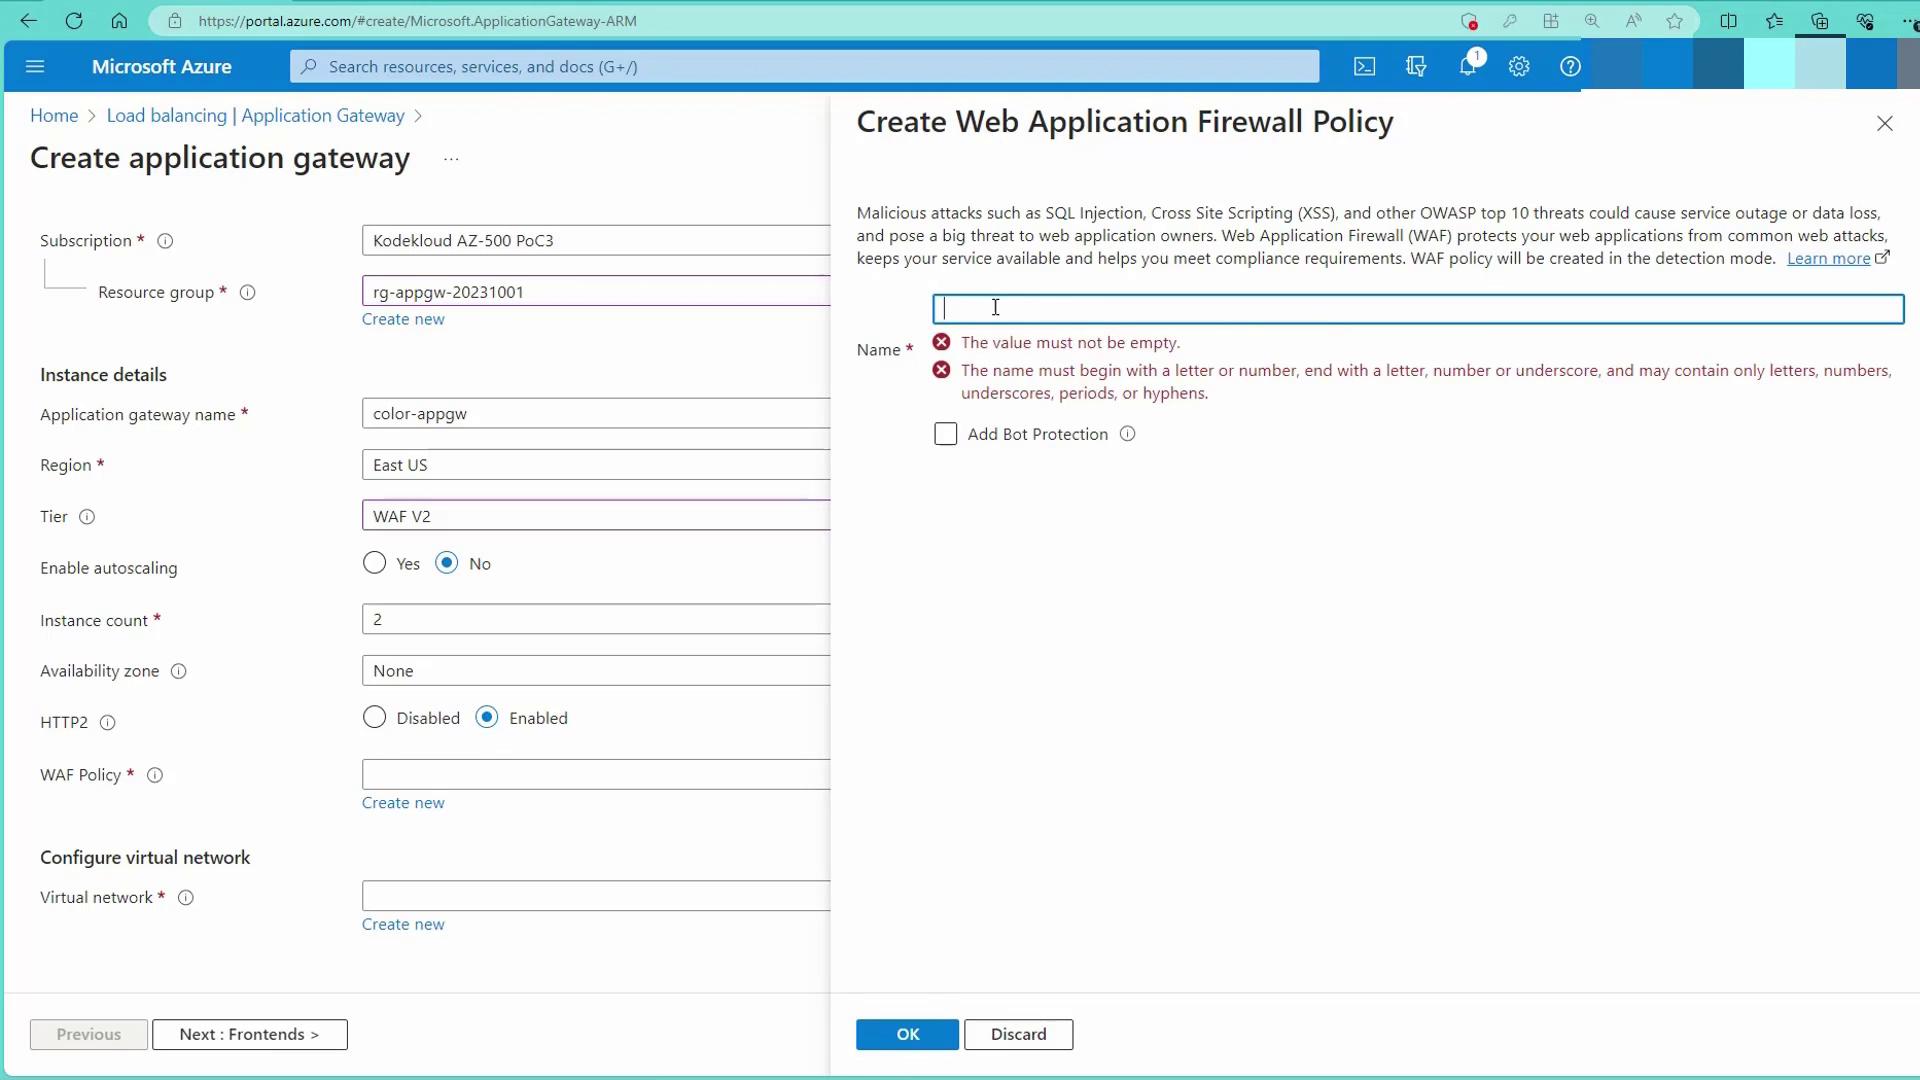
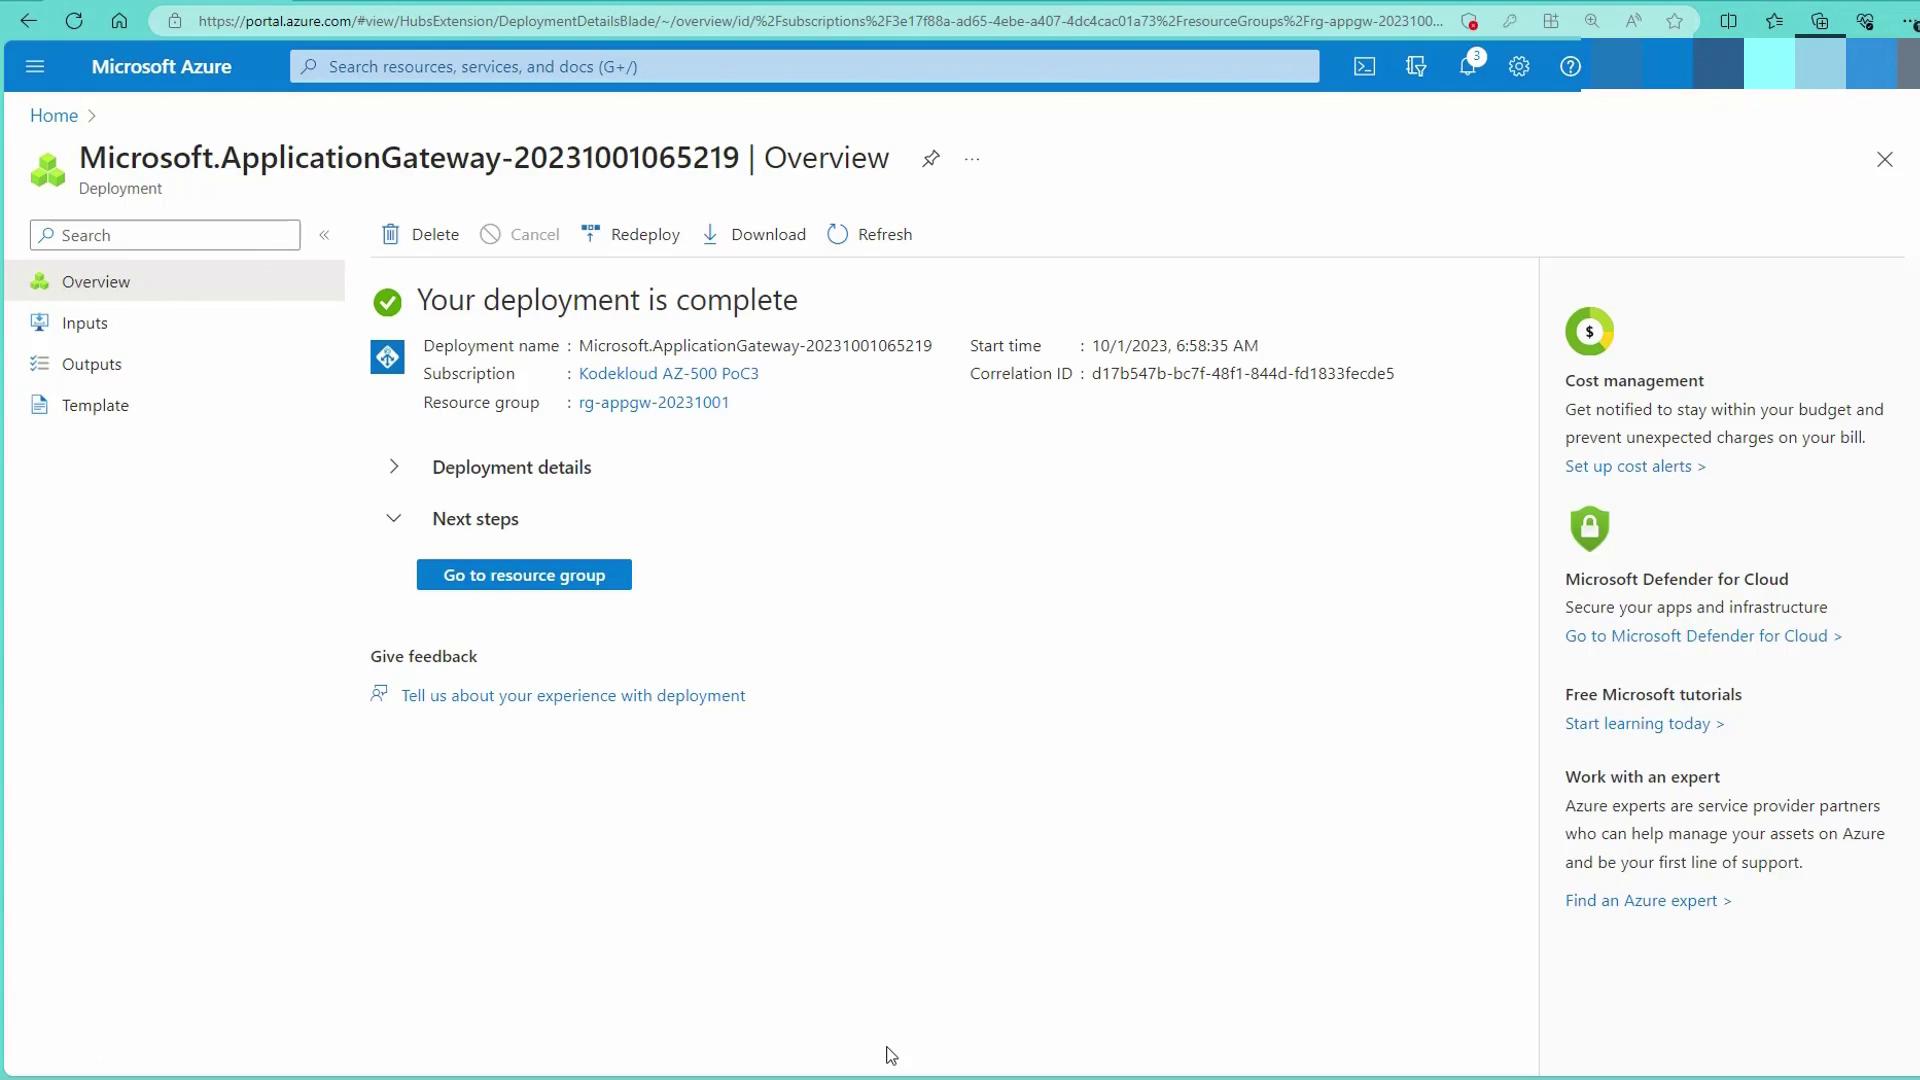
Step 1: Create the Application Gateway

  1. Open the Azure portal and search for "Application Gateways".
  2. Choose your resource group and provide a unique name (e.g., appGW).
  3. Select the WAF v2 SKU (Web Application Firewall) for enhanced security, aligning with future modules.
  4. Set the instance count to 2 and enable HTTP/2.
  5. Create a simple WAF policy (for example, name it color).

The image shows a Microsoft Azure portal interface for creating an application gateway and a web application firewall policy. It includes fields for instance details, such as application gateway name, region, and tier, with a section for configuring a virtual network.

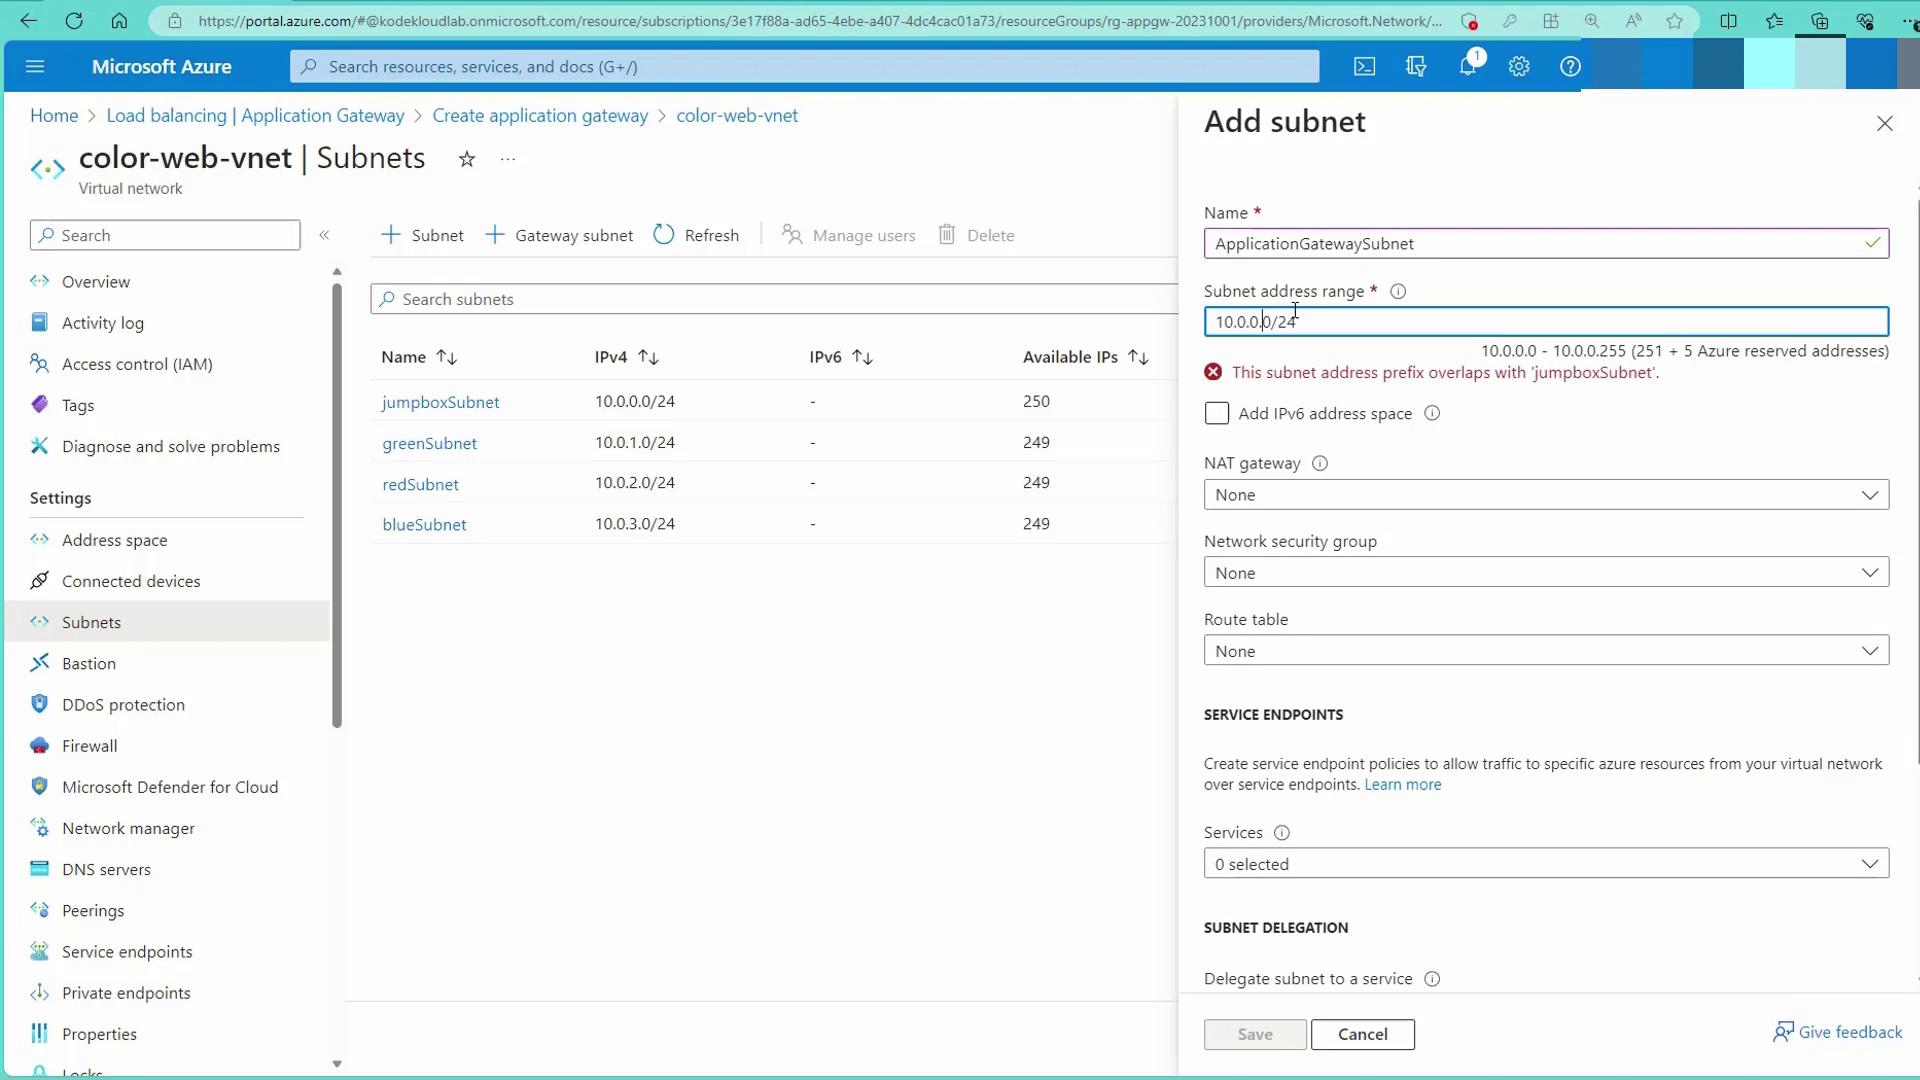
Step 2: Configure the Virtual Network

  • Select your Virtual Network (e.g., color web VNet).
  • Click on "Manage subnet configuration" and add a dedicated subnet (e.g., ApplicationGatewaySubnet with an address space like 10.0.0.0/26).

If you encounter an error due to overlapping subnets (for example, with the Jumpbox subnet), adjust the configuration accordingly.

The image shows a Microsoft Azure portal interface where a user is attempting to add a new subnet named "ApplicationGatewaySubnet" to a virtual network. An error message indicates that the subnet address range overlaps with an existing subnet called "jumpboxSubnet."

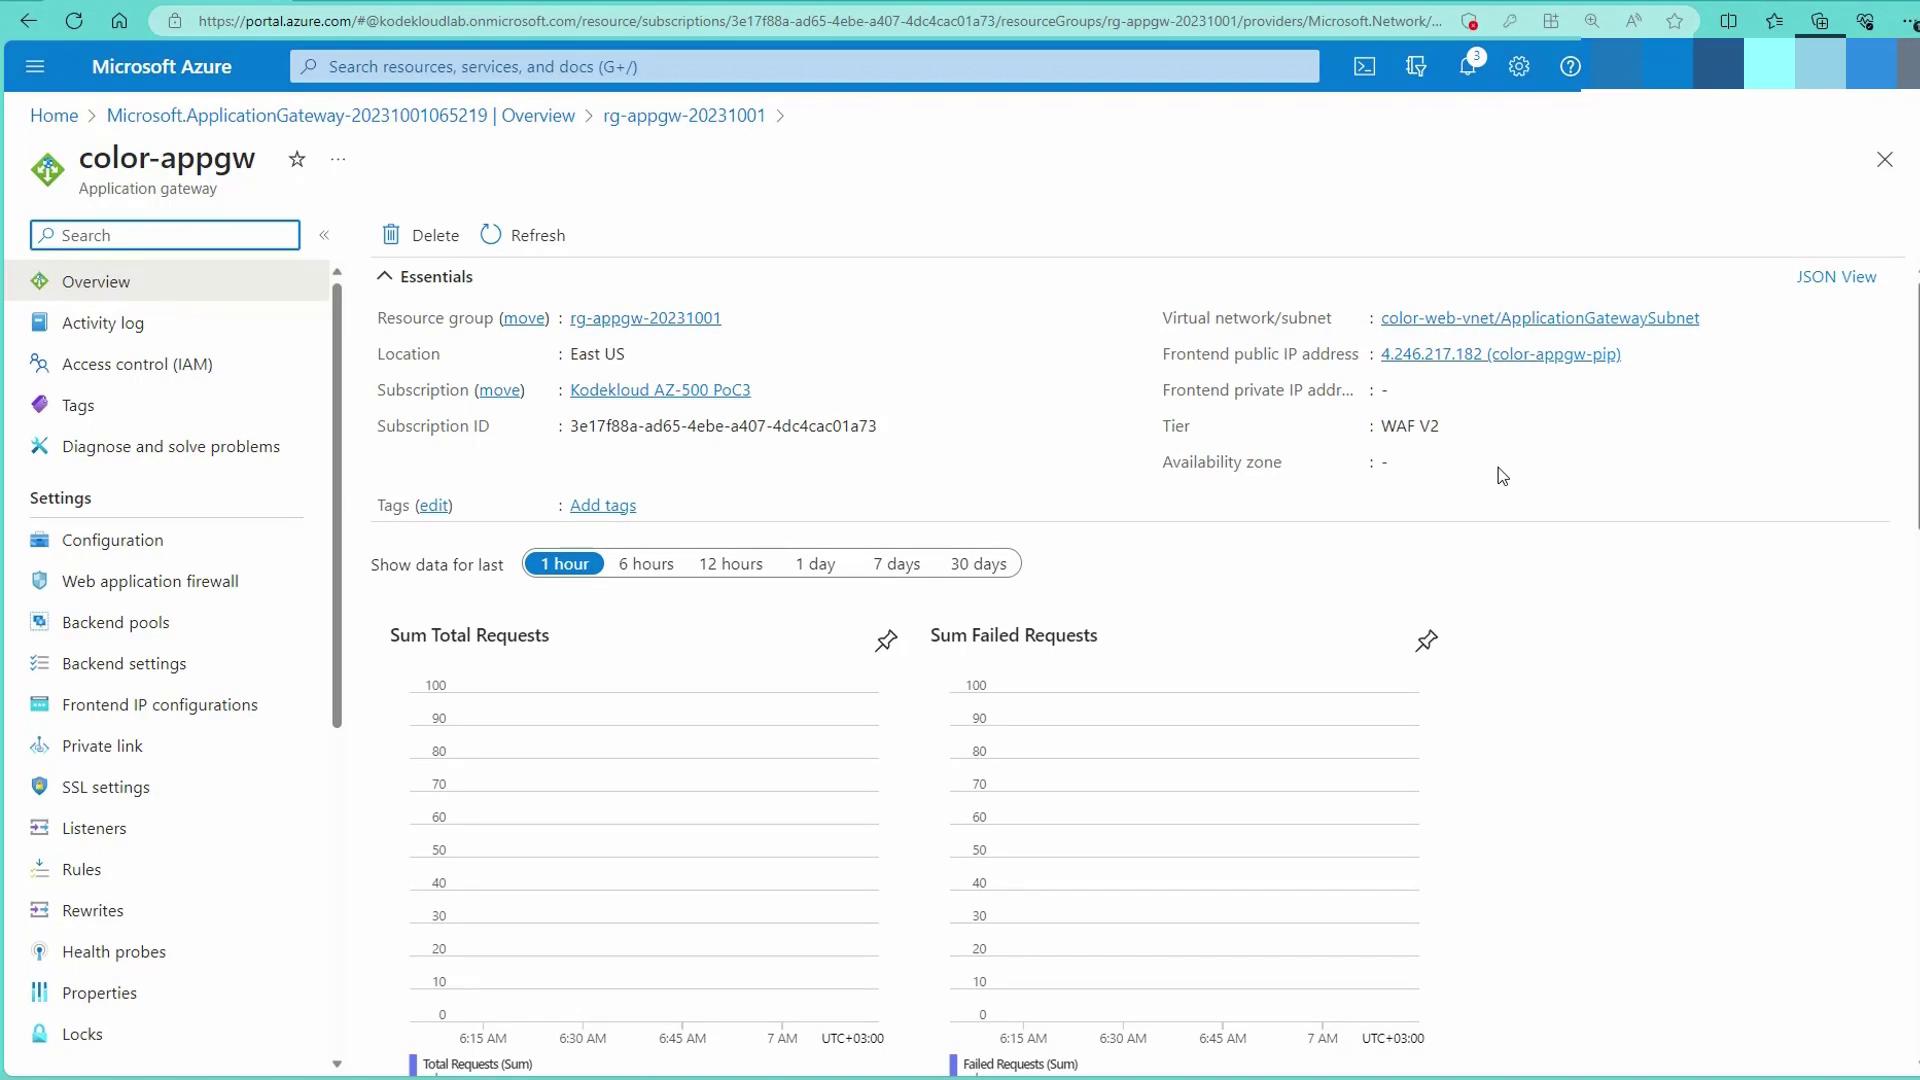
Step 3: Create Front-end and Back-end Pools

  • Front-end:
    Create a public IP address for the front-end of the Application Gateway.

    The image shows a Microsoft Azure portal interface for creating an application gateway, specifically focusing on adding a public IP address. A dialog box is open for entering details like the name, SKU, and assignment type for the public IP.

  • Back-end Pools:
    Create backend pools for the red, green, and blue servers. Initially, you may create the pools without adding servers. Later, attach the appropriate virtual machines to their corresponding pools.

    The image shows a Microsoft Azure portal interface for creating an application gateway, displaying the configuration where the backend servers and public IP are being added.

Step 4: Configure Routing Rules

  1. Create a routing rule (e.g., color-appGW-rule-HTTP) with a priority (set to 1).
  2. Create a listener (e.g., color-appGW-listener-HTTP) that uses the public IP at port 80 with a basic listener type.
  3. Set the default back-end target to the green server pool.
  4. Add path-based routing rules:
    • Requests matching /red/* are forwarded to the red server pool.
    • Requests matching /blue/* are forwarded to the blue server pool.

After completing the configurations, click "Create" to deploy the Application Gateway. Deployment may take 15 to 20 minutes.

The image shows a Microsoft Azure portal page for creating an application gateway, displaying configuration details such as subscription, resource group, region, and WAF status. The "Create" button is visible at the bottom.

Once deployed, verify the Application Gateway in your resource group:

The image shows a Microsoft Azure portal page indicating that a deployment named "Microsoft.ApplicationGateway-20231001065219" is complete. It includes details like the subscription, resource group, and start time, with options for further actions and feedback.

View the Application Gateway overview to confirm the configuration:

The image shows the Microsoft Azure portal displaying an overview of an application gateway named "color-appgw." It includes details such as resource group, location, subscription, and graphs for total and failed requests.

Step 5: Add Back-end Targets

Navigate to the backend pools and add your virtual machines (red, green, and blue) as targets. For example, add the appropriate red VMs under the red backend pool and do the same for the green and blue pools.

The image shows a Microsoft Azure portal interface for editing a backend pool, with options to add virtual machines or IP addresses as backend targets.

Testing and Path-Based Routing Verification

After configuring the backend pools, access the public IP of the Application Gateway:

  • A request to the gateway's IP returns the green page by default.
  • Appending /red/* routes the request to the red servers.
  • Appending /blue/* routes the request to the blue servers.

Round-robin load balancing is enabled, ensuring that repeated requests are evenly distributed among the available servers.

To further verify, test from the jumpbox using curl commands:

kodekloud@jumpbox-vm:~$ curl 10.0.1.4
<html>
<body style="background-color:green;">
<h1 style="color:white;">Hi from green-1</h1>
</body>
</html>

kodekloud@jumpbox-vm:~$ curl 10.0.2.4
<html>
<body style="background-color:red;">
<h1 style="color:white;">Hi from red-1</h1>
</body>
</html>

These tests confirm that the back-end servers are returning the correct responses and that path-based routing is operating correctly.

Moving Forward

The Application Gateway has now been deployed with its essential components, routing rules, and back-end server configurations. In the next lesson, you will learn how to further secure your applications by configuring and deploying the Web Application Firewall (WAF) on the Application Gateway.

Happy learning!

Watch Video

Watch video content

Previous
Implement load balancing