1. Preparing Your Data
Begin by opening PgAdmin. Before modifying the table structure, it’s recommended to clear existing data from the posts table. While deleting rows isn’t a requirement in production environments, it simplifies adding columns with NOT NULL constraints. First, review the current data in the posts table by executing:Clearing the posts table ensures that new columns and constraints can be added without conflicting with existing data.
2. Configuring the Foreign Key in PgAdmin
Adding the Foreign Key Column
- Right-click on the posts table and select Properties.
- Navigate to the Columns tab.
- Add a new column named
user_id.
user_id matches the primary key in the users table (e.g., integer, bigint, smallint, or UUID). In this example, the column is set to NOT NULL to enforce that every post is associated with a valid user.
You should now see an interface similar to the one described below.
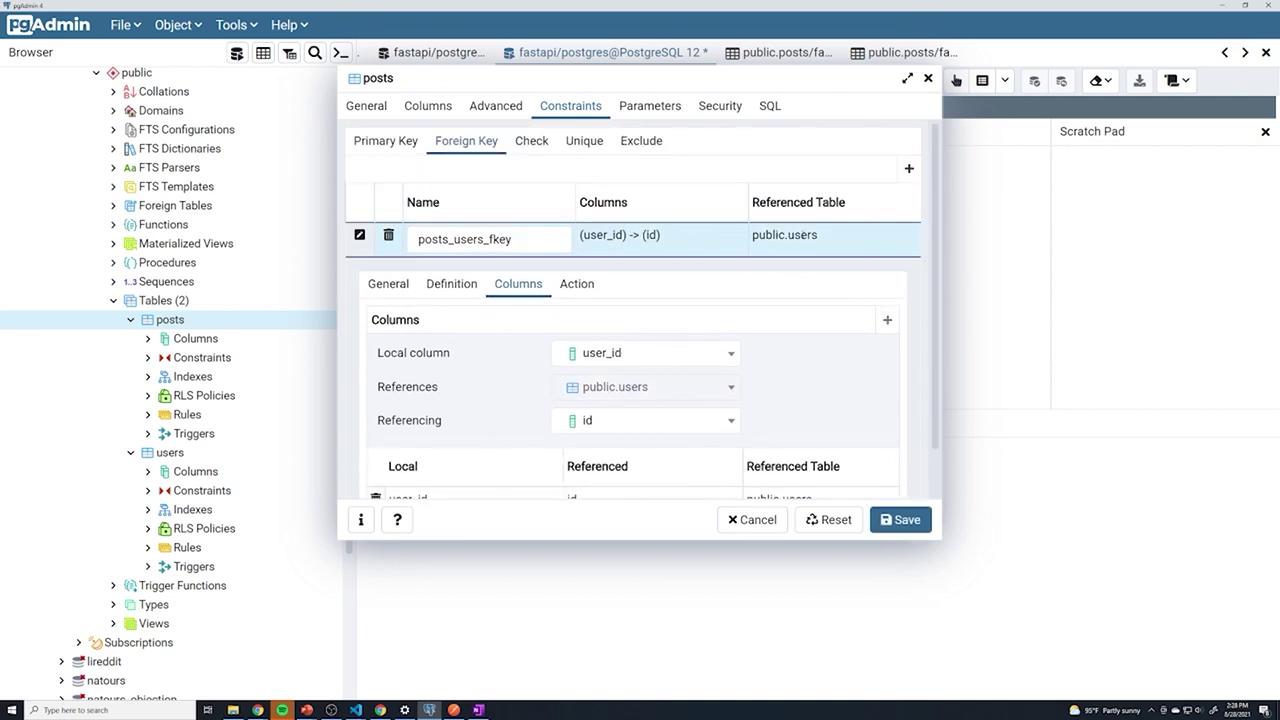
Setting Up the Foreign Key Constraint
- Switch to the Constraints tab and then the Foreign Key sub-tab.
- Click the plus sign (+) to add a new foreign key constraint. While the constraint’s name does not affect functionality, using a clear naming convention such as
posts_users_FKeyis best practice. - Under the Columns section:
- Select the local column (
user_id). - Choose the referenced table (users).
- Select the referenced column (typically, the ID column in the users table).
- Select the local column (
3. Testing the Foreign Key Constraint
Before adding posts, check the current users with:user_id due to the NOT NULL constraint. For example, assign a valid user ID like 17.
To inspect the posts, execute:
user_id, PgAdmin will show an error indicating that a non-null column does not have a value.
Next, create another post with user_id set to 18. Both posts should be saved and correctly linked to their corresponding users.
To test invalid foreign key behavior, try assigning a non-existent user ID (e.g., 20) for user_id:
Always ensure that any new post references an existing user ID to maintain referential integrity.
4. Querying Posts by User
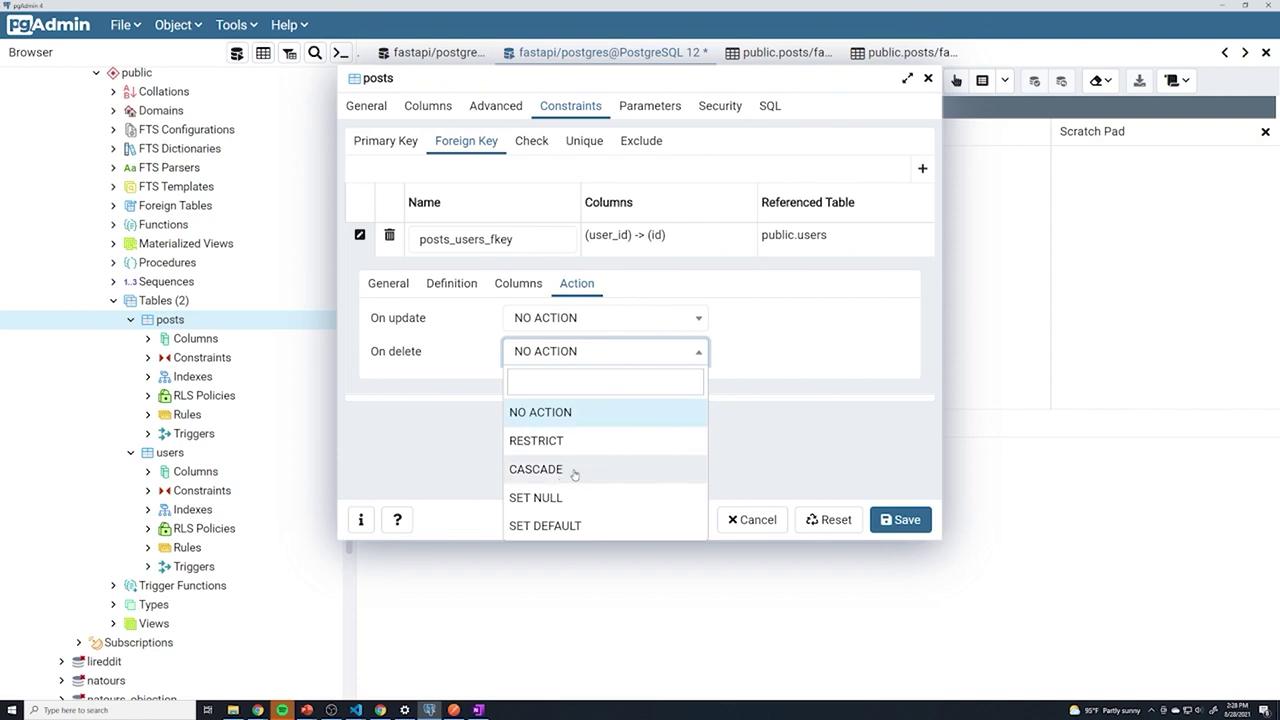
Filter posts based on the associated user using a simple WHERE clause. For example: To view all posts from user 17:5. Demonstrating Cascade Deletion
Test the cascade delete functionality by removing a user. With posts referencing user ID 17, run the following command:user_id 17 should no longer be present.
6. Cleaning Up the Schema
To revert the changes and test automatic constraint handling via SQLAlchemy, follow these steps:- Open the posts table properties and remove the foreign key constraint from the Constraints tab.
- Delete the
user_idcolumn from the Columns tab. - Save your changes.
user_id column: