Python API Development with FastAPI
Introduction
The app that we will be building
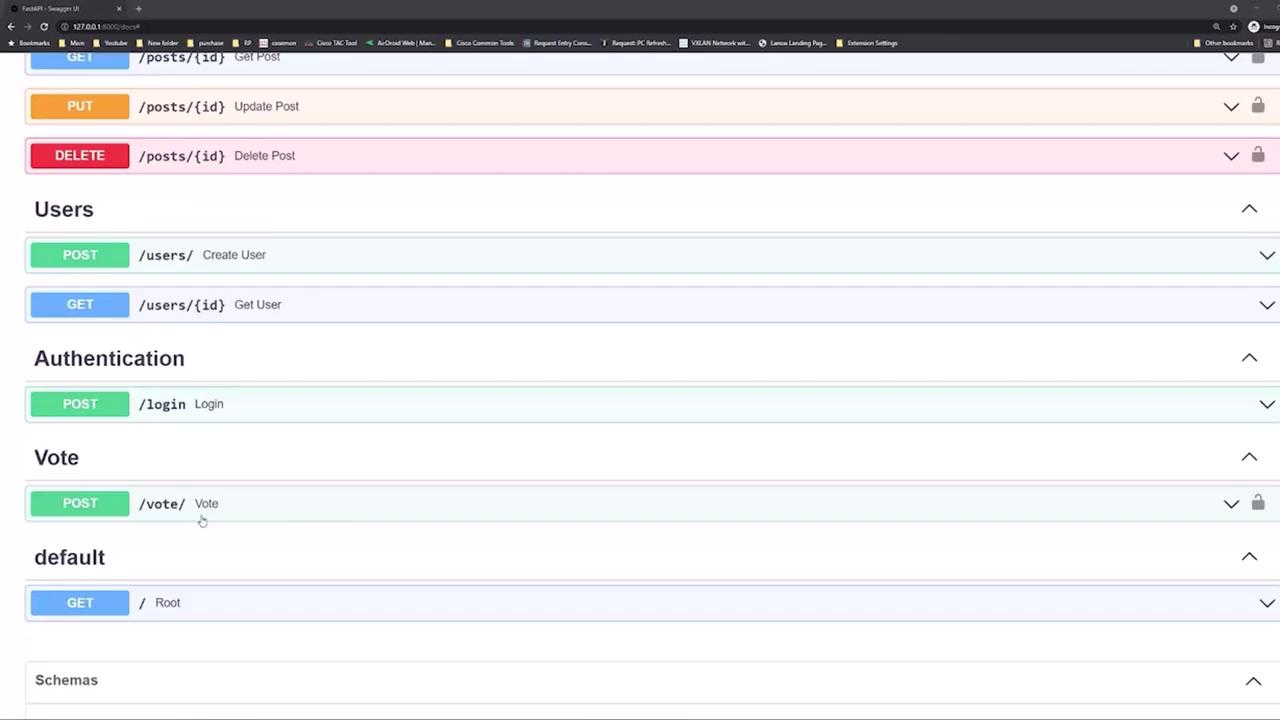
In this guide, we will develop a social media–inspired application using FastAPI. The app allows users to create posts, as well as perform all CRUD operations (create, read, update, and delete). Additionally, users can vote or "like" posts—one of the common features in modern social media applications.
FastAPI automatically generates interactive documentation that displays all the endpoints we will create. These endpoints include:
- Posts: Retrieve all posts, create a post, retrieve an individual post, update posts, and delete posts.
- Users: Create a user and fetch user information.
- Authentication: Log in to the system.
- Voting: Vote or “like” posts.
Testing the API Endpoints
Start by using the interactive documentation to test your API. For example, try retrieving all posts by clicking the GET button in the Swagger UI. When you perform this action, a request is sent to the API. Below is an example of the corresponding curl command:
curl -X 'GET' \
"http://127.0.0.1:8000/posts/?limit=10&skip=0" \
-H 'accept: application/json'
The API responds with a 401 Unauthorized error if you are not logged in:
HTTP/1.1 401 Unauthorized
Content-Length: 30
Content-Type: application/json
Date: Thu, 07 Oct 2021 01:37:34 GMT
Server: uvicorn
www-authenticate: Bearer
{
"detail": "Not authenticated"
}
Authentication Required
All API endpoints require user authentication. Be sure to log in before testing endpoints that modify or retrieve protected data.
Creating a New User
To begin, create a new user. In the interactive documentation, navigate to the users' section and select the "create user" endpoint. You will see a JSON structure similar to the following:
{
"email": "[email protected]",
"password": "string"
}
Replace these values with your desired credentials. For demonstration purposes, we will create a user with the email [email protected]
and a simple password. Once you execute the request, the API will respond with a 201 status code, indicating that the user has been successfully created, along with details such as the user ID, email, and creation date.
Next, log in using either the login endpoint or by clicking the "Authorize" button on the top right of the documentation. Enter the credentials for [email protected]
to receive an authorization token.
Retrieving Posts After Authentication
After successfully logging in, try retrieving posts again. With a valid authorization token, the API should return the posts in the database. For example, using the following curl command:
curl -X 'GET' \
'http://127.0.0.1:8000/posts/?limit=10&skip=0' \
-H 'accept: application/json' \
-H 'Authorization: Bearer ayhbgc1OJ1JUizNIsInRSC6IkpVC39.eyJ2c2yY2lKjoxNyY4ZXhmIjoxNj...'
A successful API response (HTTP 200 OK) will return a JSON object with the post details:
{
"Post": {
"title": "this is my first post",
"content": "wohoo",
"published": true,
"id": 1,
"created_at": "2021-10-12T01:34:48.302895-04:00",
"owner_id": 1,
"email": "[email protected]"
}
}
Note: Initially, there may only be a few posts created by other users.
Creating a Post
To add your own post, navigate to the "create post" endpoint in the interactive documentation. The required JSON schema for creating a post includes:
- title (required)
- content (required)
- published (optional, defaults to true)
The schema is defined as follows:
PostCreate {
title* string
content* string
published boolean
default: true
}
For instance, you can create a post with the title "favorite foods" and the content "pizza and burgers." Since the published field defaults to true, it can be omitted. Execute the following command:
curl -X 'POST' \
'http://127.0.0.1:8000/posts/' \
-H 'accept: application/json' \
-H 'Authorization: Bearer eyJhbcG1OiJ1I2iInlIsInRsCC16kpVC39.eyJ1c2VyX2lkIjoxNjIwNjYxNjoxMjk1MjEzNDgzMTg3Mzg3MjI2MzQwMjMxMjY4IjoicmFyb2N1c2IifQ.4Xex2p9938/Z1188sIHk8PI' \
-H 'Content-Type: application/json' \
-d '{
"title": "favorite foods",
"content": "pizza and burgers"
}'
The API will respond with a 201 status code and return the following JSON object with details of the created post:
{
"title": "favorite foods",
"content": "pizza and burgers",
"published": true,
"id": 3,
"created_at": "2021-10-06T21:40:11.648734-04:00",
"owner_id": 1,
"owner": {
"id": 1,
"email": "[email protected]",
"created_at": "2021-10-06T21:39:19.898998-04:00"
}
}
The response headers confirm the success of your request:
access-control-allow-credentials: true
access-control-allow-origin: *
content-length: 233
content-type: application/json
date: Thu, 07 Oct 2021 01:04:11 GMT
server: uvicorn
Additional CRUD Operations & Voting
Beyond creating posts, the API supports complete CRUD operations:
- Retrieve a specific post.
- Update an existing post.
- Delete a post.
Additionally, there is an endpoint for voting or "liking" a post. For example, to create a user using another endpoint, you might use:
curl -X POST \
'http://127.0.0.1:8000/users/' \
-H 'accept: application/json' \
-H 'Content-Type: application/json' \
-d '{
"email": "[email protected]",
"password": "password"
}'
The API will confirm the user creation with a response similar to:
{
"id": 17,
"email": "[email protected]",
"created_at": "2021-10-06T21:38:19.918998-04:00"
}
And the response headers may include:
access-control-allow-credentials: true
access-control-allow-origin: *
content-length: 82
content-type: application/json
date: Thu, 07 Oct 2021 01:38:18 GMT
server: uvicorn
The JSON structure for casting a vote (like) on a post looks like this:
{
"post_id": 0,
"dir": 1
}
This structure allows you to indicate which post to vote on as well as the direction of the vote.
With these endpoints, you have a solid foundation to build a fully functioning social media–style application. This guide covers the essentials of API design including SQL and database operations using FastAPI.
Now that you have an overview of the application's API endpoints and how to interact with them, let's begin coding the application!
Watch Video
Watch video content