This article guides you through deploying a FastAPI application on Heroku, covering setup, configuration, and troubleshooting.
In this lesson, we guide you through one of the primary methods for deploying your FastAPI application—using Heroku. With Heroku’s simplicity and efficiency, you can launch your application and push updates quickly. We will cover installing the Heroku CLI, creating your Heroku app, configuring a Procfile, deploying your code, troubleshooting common issues, and managing your production PostgreSQL database using Alembic.
Download the Heroku CLI installer for your operating system. After installation, restart your terminal (or VS Code) for the changes to take effect. Verify the installation by running the following command:
sudo snap install heroku --classic
Next, log in to Heroku:
heroku login
Upon logging in (a web browser will open for authentication), confirm the installation with:
heroku --version
The output should resemble:
> Warning: heroku update available from 7.38.1 to 7.59.0.heroku/7.38.1 win32-x64 node-v12.13.0
Heroku provides comprehensive tutorials (search for “Heroku Python” online) but here are the essential steps to create your app:
If you’re using your own application instead of the demo from the Heroku tutorial, skip the repository cloning.
Create your app with the following command:
heroku create
This generates a globally unique random name and sets up a Git remote pointing to your Heroku app. Verify your Git remotes using:
git remote -v
You should see both your GitHub origin and a new Heroku remote. To deploy your code, simply push to Heroku:
git push heroku main
For custom app names, execute:
heroku create fastapi-sanjeev
App names must be globally unique. If the name is already in use, try a different name (e.g., append numbers).
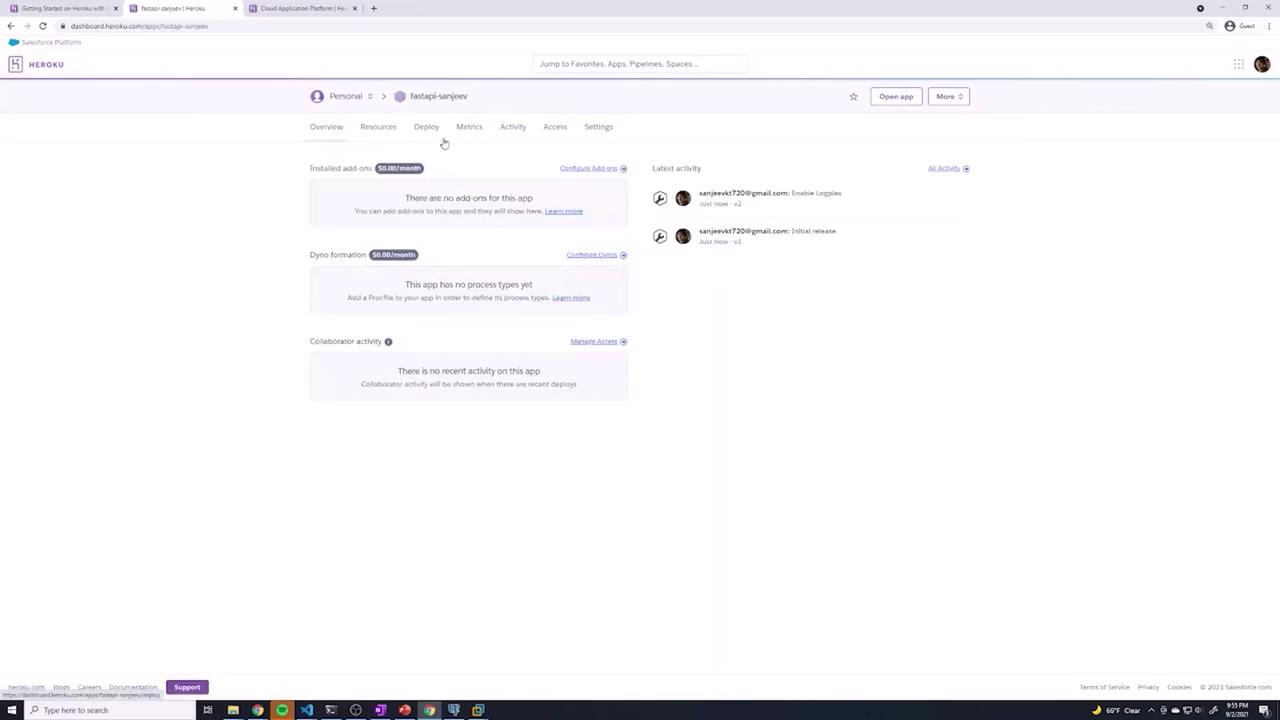
After creating your app, visit your Heroku dashboard to see your newly created app, even if no resources are configured yet.Below is an example image of a Heroku dashboard:
To deploy your code to Heroku, push your application to the Heroku remote with:
git push heroku main
During deployment, Heroku installs dependencies, sets up the Python runtime (defaulting to python-3.9.7 unless specified otherwise), and builds your application. A successful build might output messages similar to:
remote: -----> Python app detectedremote: -----> Installing dependencies with pipremote: -----> Launching...remote: Released v3remote: https://fastapi-sanjeev.herokuapp.com/ deployed to Heroku
If your browser opens the app URL and you encounter an error, it may indicate FastAPI has not been correctly set up for Heroku. To monitor the deployment process in real time, use the logs command:
heroku logs --tail
A “Boot timeout” error may mean that Heroku is unsure how to start your FastAPI application. Ensure your configuration is correct.
Heroku requires a Procfile in your project’s root directory to define how to run your application. Create a file named Procfile (with a capital P) and add the following line:
This command launches Uvicorn without the --reload flag (which is intended for development only) and instructs it to use the port provided by Heroku via the PORT variable (defaulting to 5000 if unspecified).After updating your Procfile, add, commit, and push the changes to both GitHub and Heroku:
git add --allgit commit -m "Added Procfile for Heroku"git push origin maingit push heroku main
Finally, restart your Heroku dynos to load the new configuration:
After deploying the code, visit your app URL (e.g., https://fastapi-sanjeev.herokuapp.com/) to verify the application is running. If the app hangs or displays an error, check the logs using:
heroku logs --tail
Common issues include missing environment variables that were available in a local .env file. For example, your application may require variables such as:
If your application uses PostgreSQL, set up the database as follows:
Create a free PostgreSQL instance (hobby-dev plan) using this command:
heroku addons:create heroku-postgresql:hobby-dev
Example output:
Creating heroku-postgresql:hobby-dev on ⬢ fastapi-sanjeev... freeDatabase has been created and is availableCreated postgresql-globular-04015 as DATABASE_URLUse heroku addons:docs heroku-postgresql to view documentation
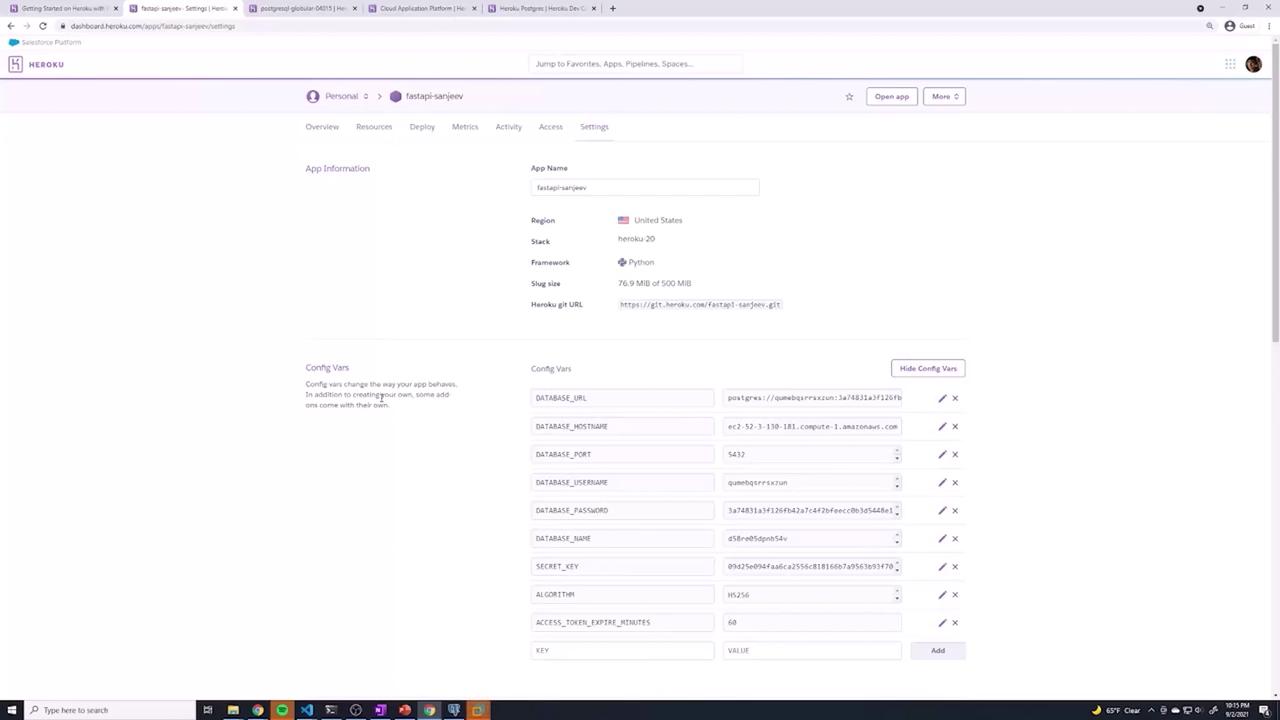
Navigate to your app’s Settings > Config Vars on the Heroku Dashboard. Notice that Heroku has automatically created a DATABASE_URL variable containing your PostgreSQL connection string.
To work with individual environment variables (hostname, port, etc.), visit the Heroku PostgreSQL dashboard to retrieve the details, then add them as separate Config Vars:
DATABASE_HOSTNAME
DATABASE_PORT (default is 5432)
DATABASE_USERNAME
DATABASE_PASSWORD
DATABASE_NAME
Plus other variables such as SECRET_KEY, ALGORITHM, and ACCESS_TOKEN_EXPIRE_MINUTES.
Below is an example snippet using Pydantic for your settings:
from pydantic import BaseSettingsclass Settings(BaseSettings): database_hostname: str database_port: int database_password: str database_name: str database_username: str secret_key: str algorithm: str access_token_expire_minutes: int class Config: env_file = ".env"settings = Settings()
After updating your Config Vars, restart your dyno:
heroku ps:restart
You can view your app’s information by running:
heroku apps:info fastapi-sanjeev
The output will include details such as your app URL (Web URL), for example:
Suppose your application uses Alembic for database migrations. In that case, your production PostgreSQL instance might start without tables. When you attempt to create a user or perform a database operation, you may encounter errors like:
sqlalchemy.exc.ProgrammingError: (psycopg2.errors.UndefinedTable) relation "users" does not exist
To update your production database schema, run the Alembic migrations using:
heroku run "alembic upgrade head"
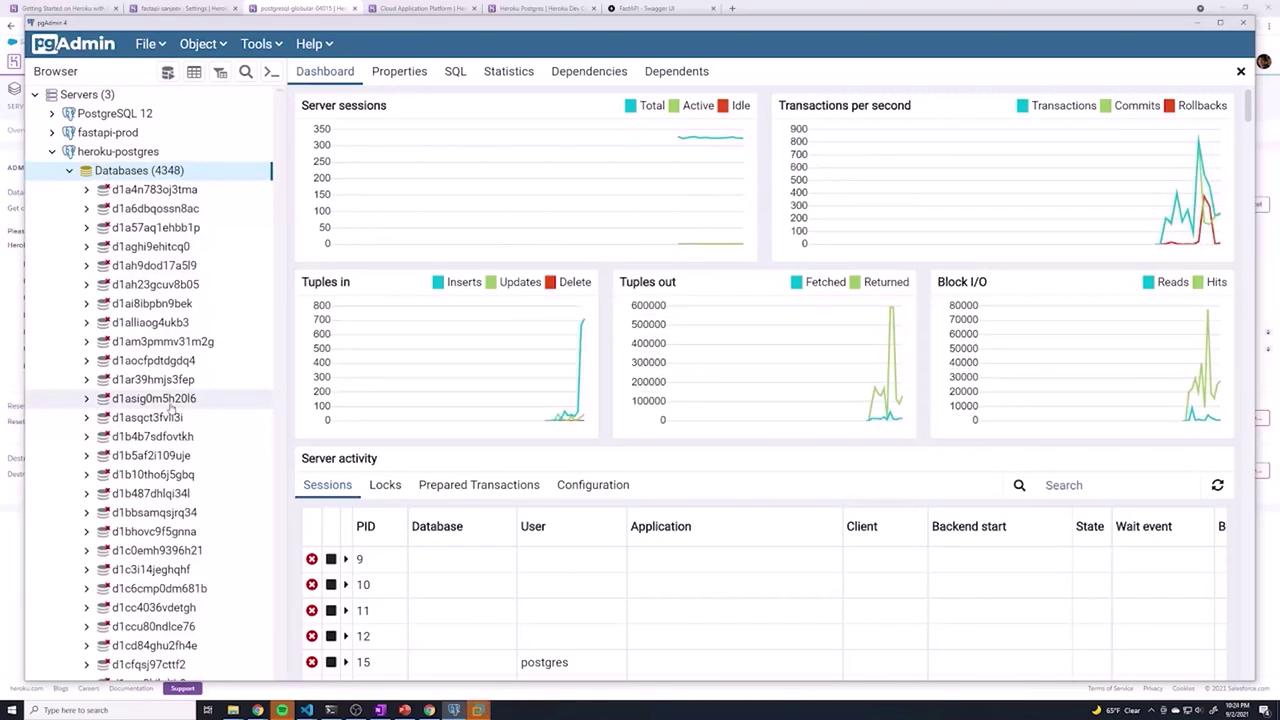
Monitor the output to ensure each migration—such as creating tables or adding columns—is applied successfully. You can verify the database schema with tools like pgAdmin afterward.Below is an image showcasing the pgAdmin interface:
After completing the migrations, restart the dynos:
heroku ps:restart
Now, your application should function correctly when accessing database tables. Test your app by navigating to its URL, or use tools like Postman. For instance, to create a new user, send a POST request with a JSON payload:
Verify the new record in your database via your preferred PostgreSQL management tool.Below is an updated Heroku dashboard image showing the app details and configuration variables:
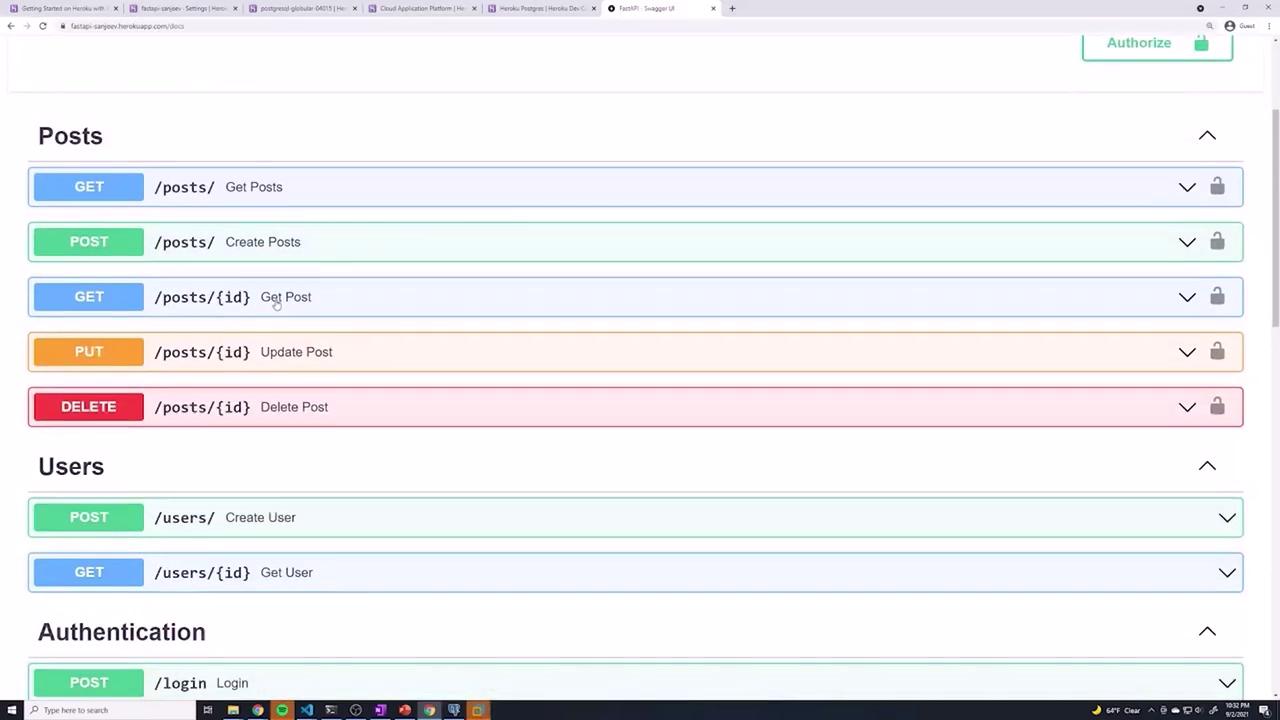
Additionally, your Swagger UI (accessible at /docs) should list all your API endpoints:
Congratulations! You have successfully deployed your FastAPI application to Heroku. You configured essential environment variables, set up a PostgreSQL database, applied Alembic migrations to update your schema, and learned how to deploy subsequent updates. Use these procedures as a foundation to further expand and enhance your application’s functionality.Happy coding!