

Creating a New Server from Scratch
To create a new server manually, follow these steps:- Right-click on the existing server and choose “Remove Server” if you want to start fresh.
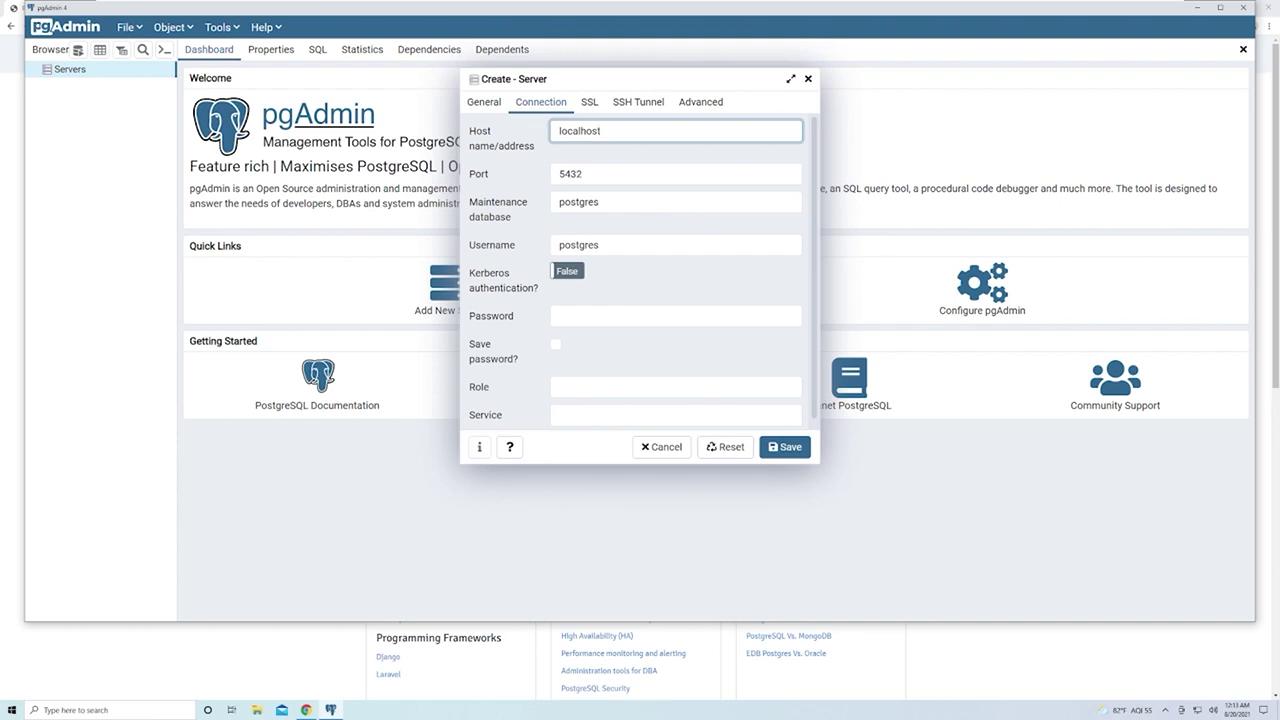
- Click “Create Server” and provide a descriptive name (e.g., “My Local PostgreSQL Instance”).
- In the connection details section:
- Enter the host as
localhost(for remote instances, use the corresponding IP address or domain name). - Provide the PostgreSQL password that you set during installation.
- Keep the default port as
5432unless your configuration differs. - Specify the database name, which is “Postgres” by default.
- The username is also “Postgres” by default. Ensure you do not confuse the database name, DBMS, and username.
- Enter the host as
- Optionally, select “Save Password” to avoid re-entering it every time.
Working with Databases and Tables
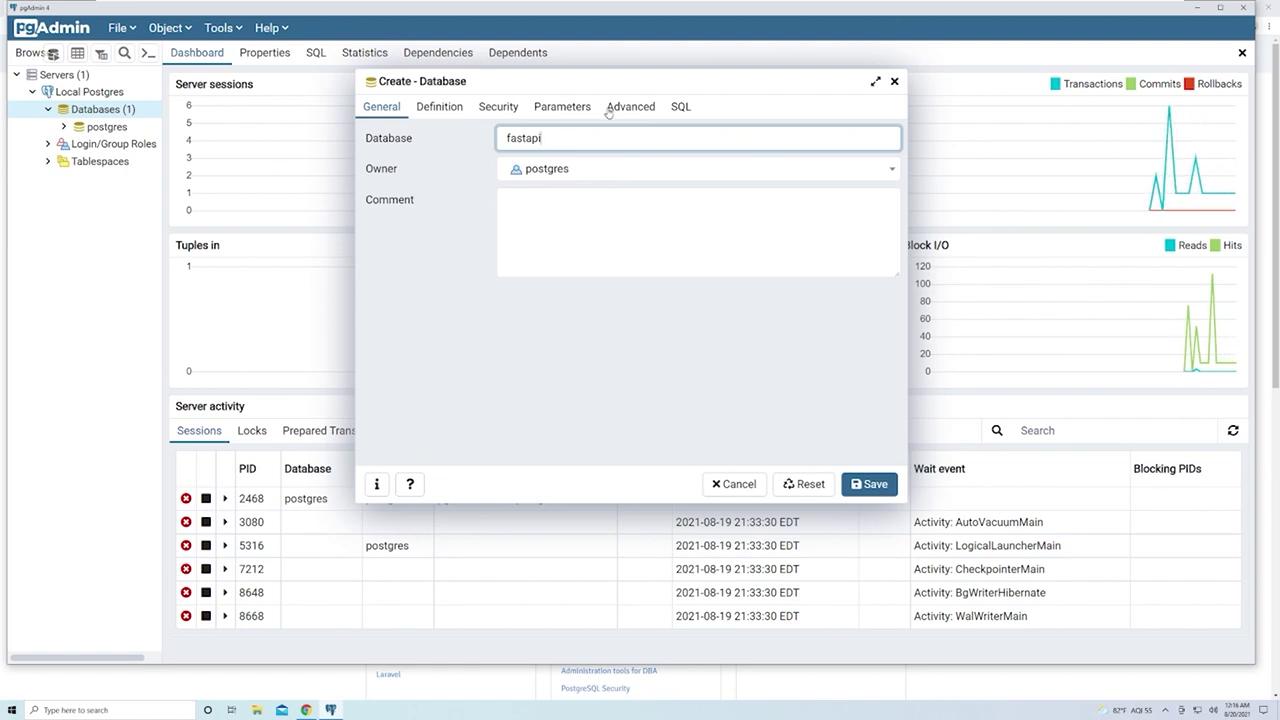
Within PgAdmin, your PostgreSQL instance includes a “Databases” section managed under the server. The default “Postgres” database is visible; however, you can create your own database as follows:- Right-click on “Databases” and select “Create” > “Database.”
- Enter a name for the new database (for example, “fastapi”).
- Review the “SQL” tab at the end to see the generated SQL: sql CREATE DATABASE fastapi WITH OWNER = postgres ENCODING = ‘UTF8’ CONNECTION LIMIT = -1;
Creating a “Products” Table
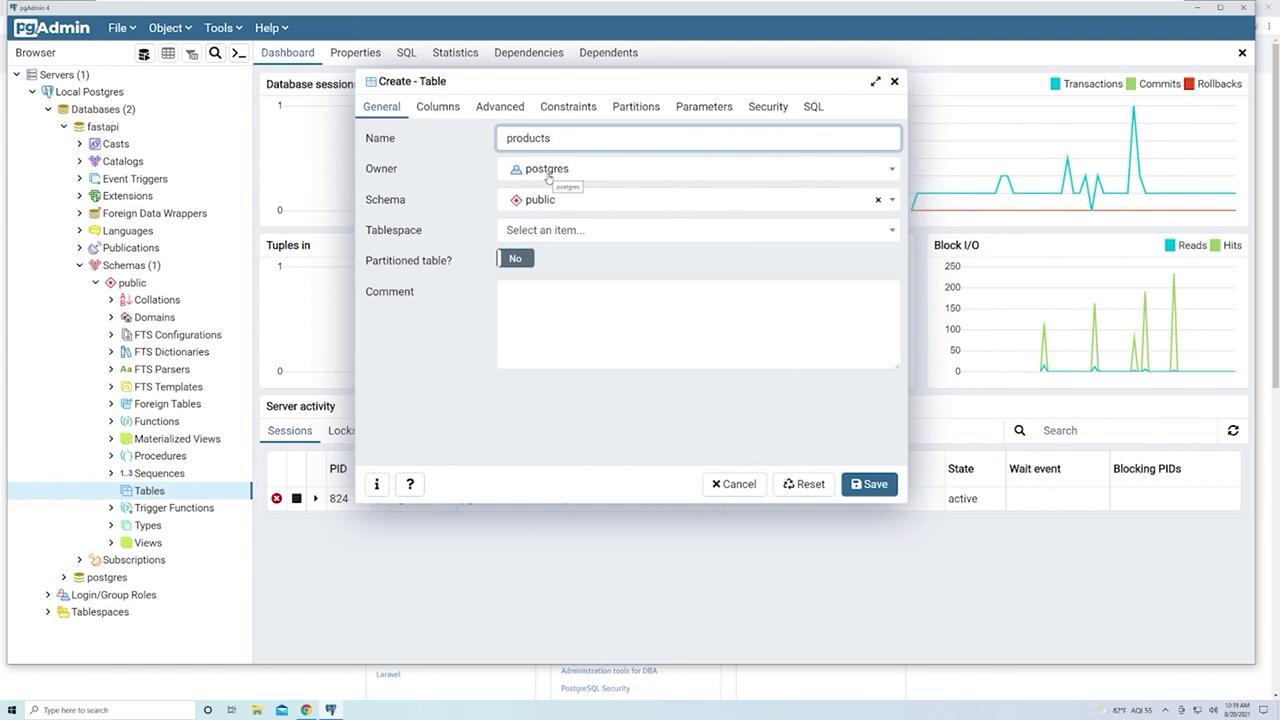
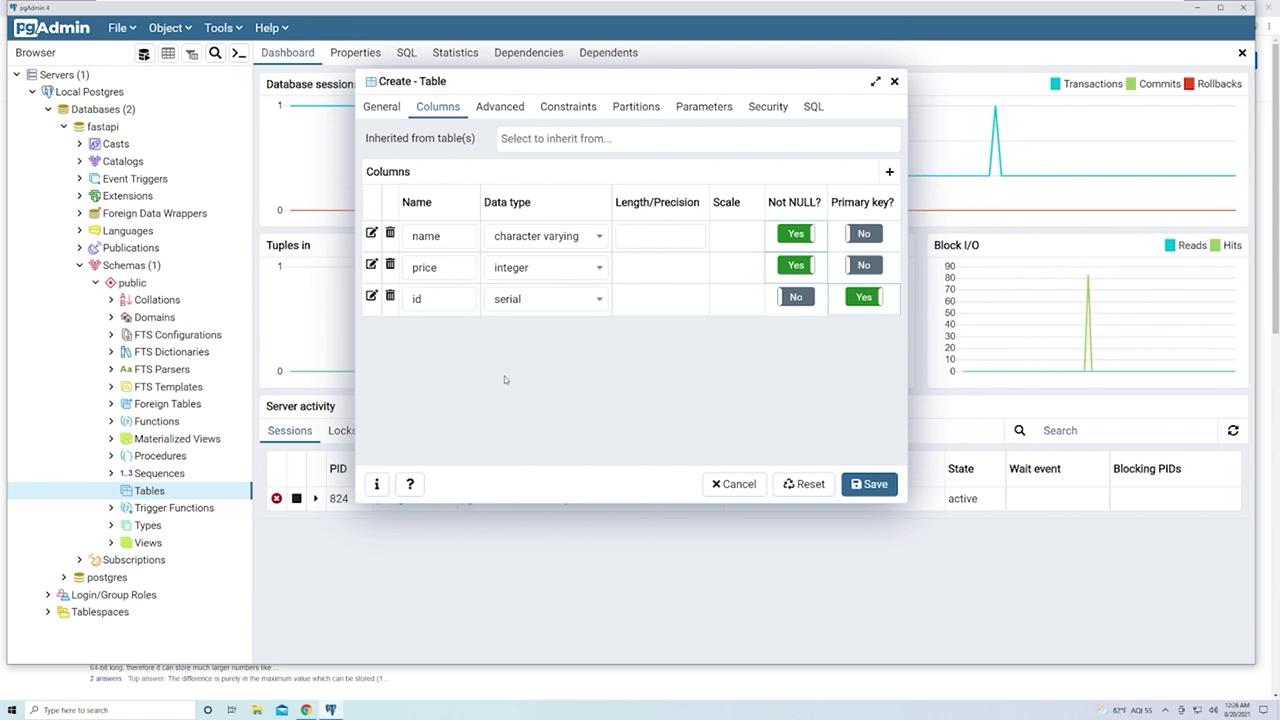
For demonstration, let’s create a “products” table to represent items in an e-commerce scenario:- Right-click on “Tables” under the “public” schema and select “Create” > “Table.”
- Set the table name to “products.”
-
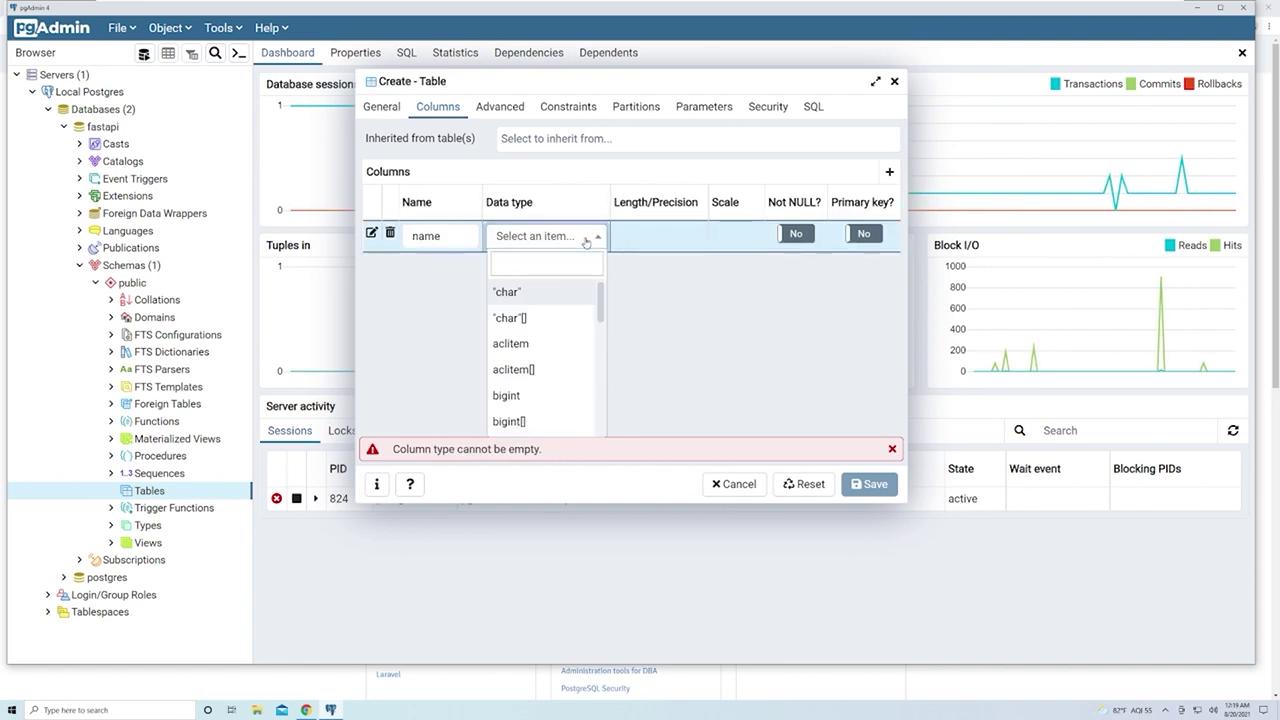
Define the following columns:
- name:
- Data type: Select “character varying” as it is commonly used for text.
- Check “Not Null” to ensure every product has a name.
- Do not mark this column as the primary key.
- name:
- price:
- Data type: Use “integer” for simplicity, even though types like
numericor floating point are more common for prices. - Check “Not Null” to ensure every product has a price.
- Note that PostgreSQL provides various integer types (smallint, integer, bigint) that differ in storage size and range.
- Data type: Use “integer” for simplicity, even though types like
- id:
- Data type: Use the “serial” data type, which auto-increments the ID starting at 1 for each new product.
- Mark this column as the primary key.

- After configuring the columns, click Save. The “products” table will now appear in the “Tables” section.
Inserting and Editing Data
To insert data into the “products” table:- Right-click on the table and choose “View/Edit Data” > “All Rows.” PgAdmin executes a query similar to: sql SELECT * FROM public.products ORDER BY “id” ASC; Initially, this will return no rows if the table is empty.
-
Insert a new product entry by providing values for the fields:
- For example, enter “TV” for the name and
200for the price. - The “id” field is left blank as it is auto-generated.
- Click the “Save Data Changes” button to commit the entry.
- For example, enter “TV” for the name and
-
You can insert additional entries such as:
- “DVD player” with a price of
80. - “Remote” with a price of
10.
- “DVD player” with a price of
Unsaved changes will appear in bold in the grid, and once saved, they revert to normal.
- If you attempt to insert a product while omitting a required non-null field (e.g., missing a price or name), PostgreSQL will return an error message indicating that null values are not permitted.
Modifying the Table Schema
Adding a Boolean Column (“is_sale”)
To modify the schema and add a new column that indicates whether an item is on sale:- Right-click on the “products” table and select “Properties.”
- Navigate to the “Columns” tab and click the plus icon to add a new column.
- Name the column “is_sale.”
- Set the data type to “Boolean.”
- Leave the “Not Null” option unchecked and set a default value of
falseso that existing rows automatically receive this value. - Save your changes and refresh the data view to see the new column with the default value.
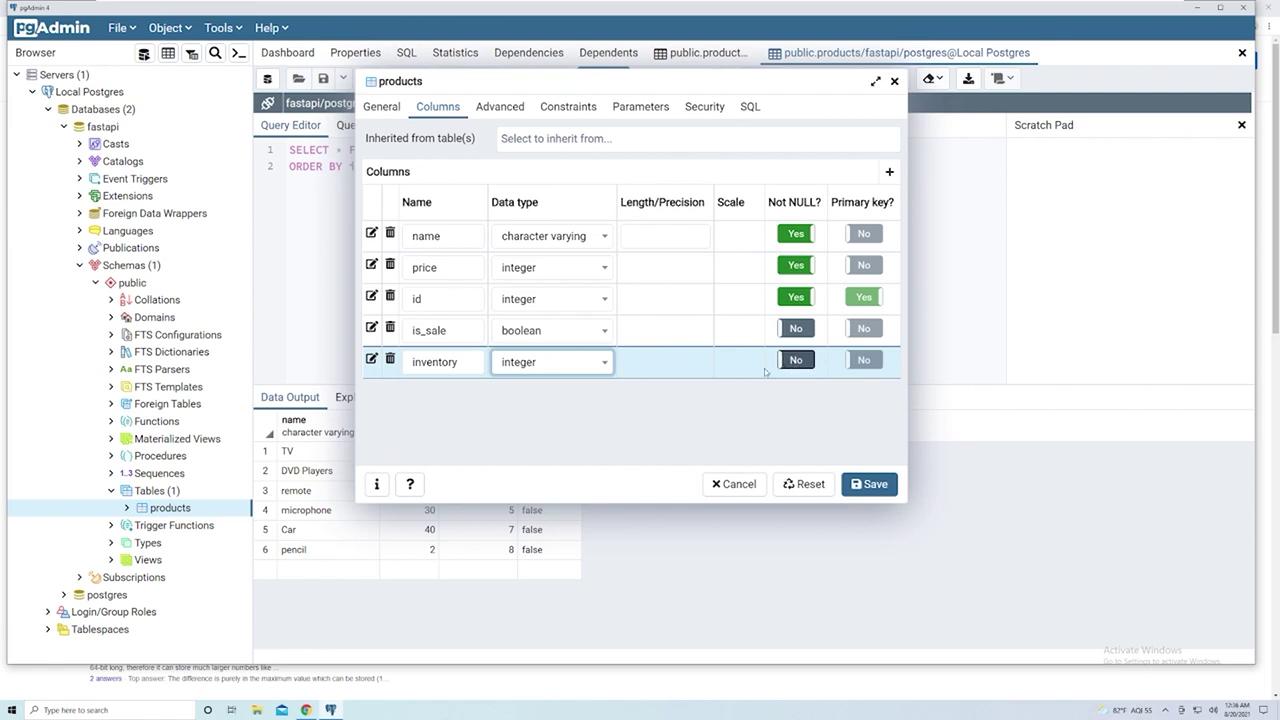
Adding an Inventory Column
Next, add a column to keep track of the inventory for each product:- In the “Properties” of the “products” table, add a new column named “inventory.”
- Set the data type to “integer.”
- Check “Not Null” to ensure every product has an inventory count.
- To prevent errors for existing rows, set the default value to
0. - Save and refresh the view to confirm that the inventory for pre-existing products is now set to zero.
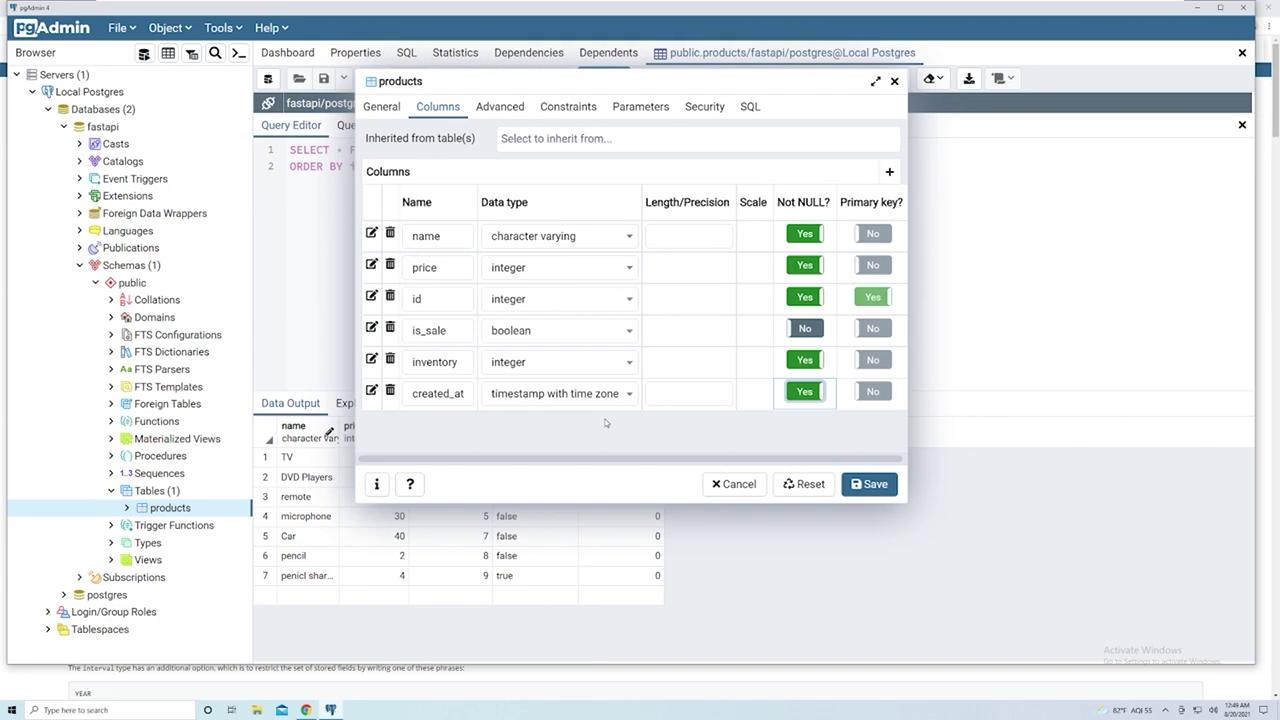
Adding a Timestamp Column (“created_at”)
Recording the creation time of each entry is a best practice. To add a timestamp column:- Right-click the “products” table, select “Properties,” and navigate to the “Columns” tab.
- Add a new column named “created_at” and set its data type to “timestamp with time zone” to capture both the date and time.
- Set the default value to
now()so PostgreSQL automatically records the creation time upon inserting a new record. - Save your changes. Note that for existing rows, PostgreSQL will update the “created_at” field with the current timestamp.
28 and an inventory of 50), and the “created_at” field will be populated automatically:
sql
SELECT * FROM public.products
ORDER BY “id” ASC;
PgAdmin’s visual interface is a powerful tool that abstracts complex SQL commands into an easy-to-use GUI, helping you get started with PostgreSQL even if you are new to SQL.
By following these steps—from creating a server and database to designing table schemas, inserting data, and modifying existing structures—you now have a solid understanding of how PgAdmin facilitates PostgreSQL management. Enjoy experimenting with your newfound skills!