Telepresence For Kubernetes
Telepresence For Kubernetes
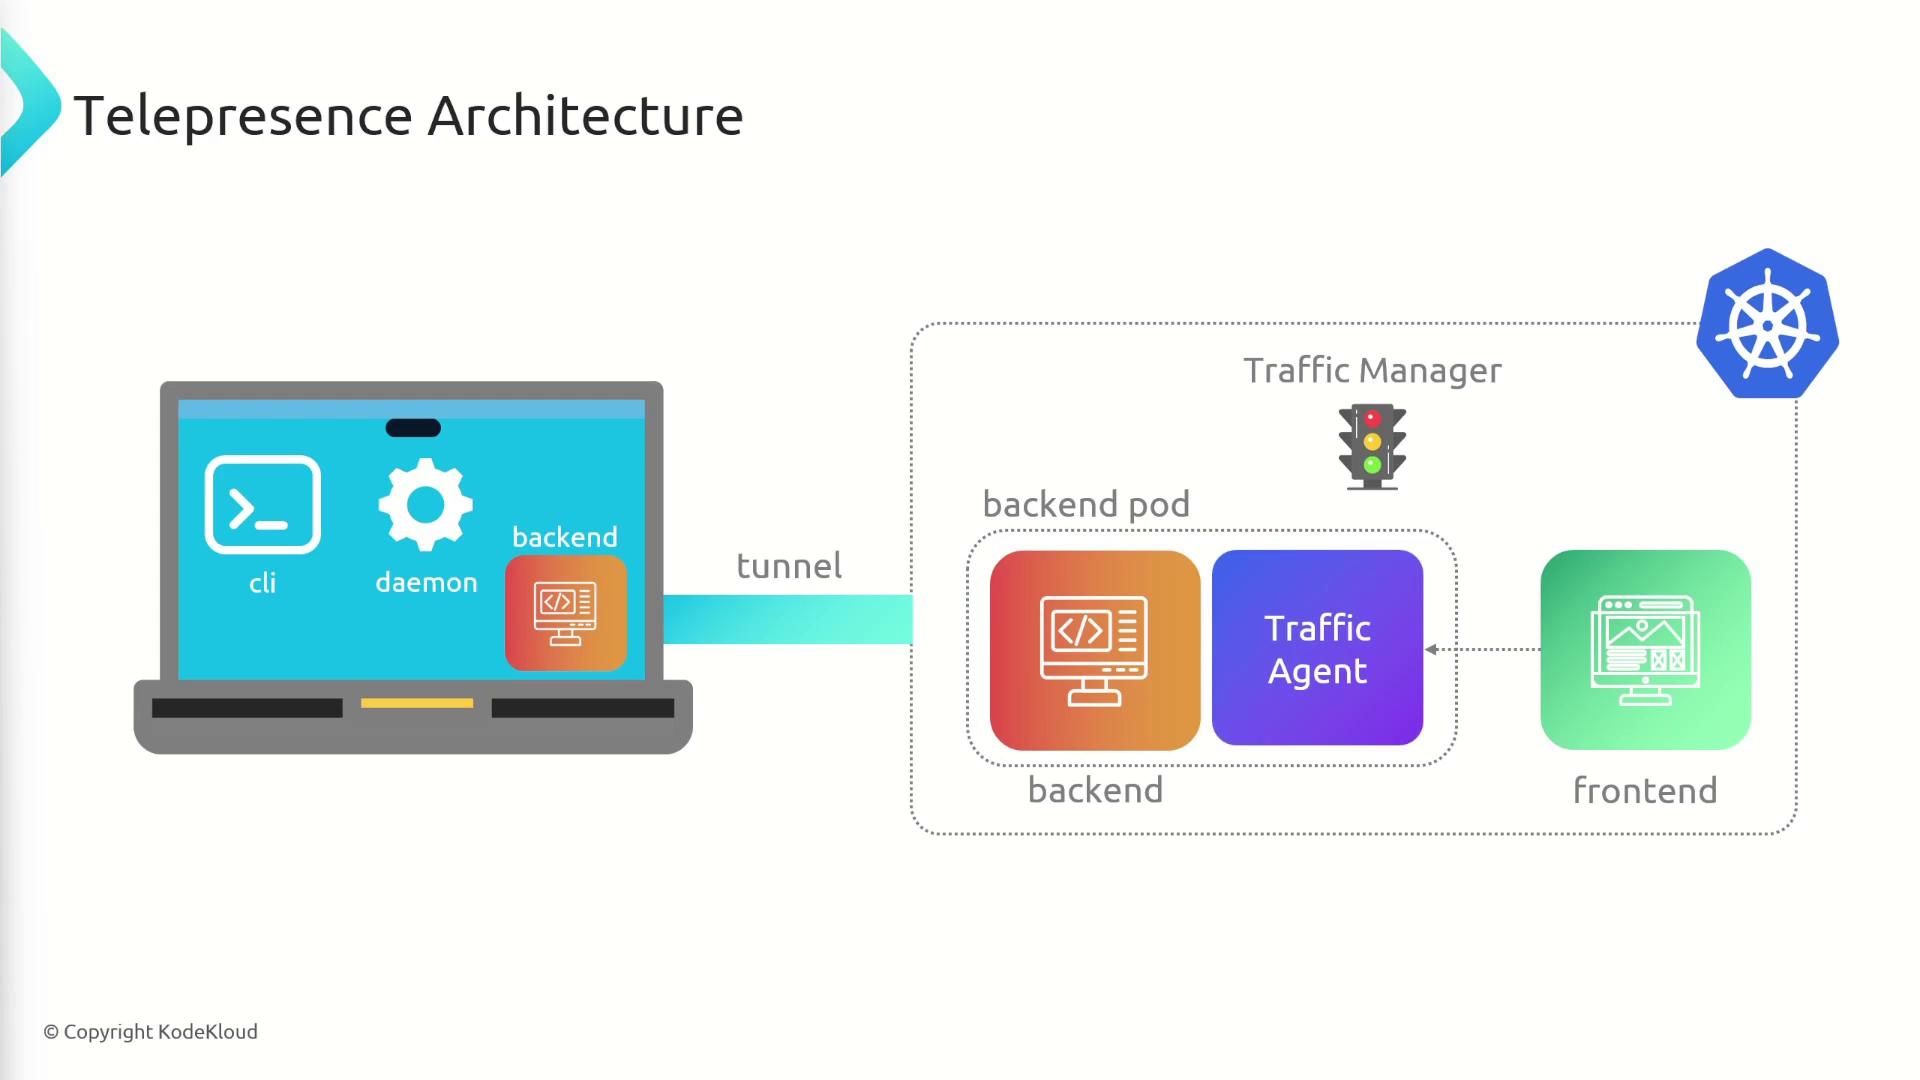
How does Telepresence Work
Telepresence lets you develop and debug services locally while connecting seamlessly to a remote Kubernetes cluster. By creating a bi-directional network tunnel, it feels as if your workstation is inside the cluster—eliminating the need to build container images or exec into pods for iterative development.
Architecture Overview
| Component | Location | Responsibility |
|---|---|---|
| Telepresence CLI | Local machine | Provides commands to connect, intercept services, and manage the Traffic Manager. |
| Traffic Manager | Kubernetes cluster | Coordinates traffic routing between the cluster and your workstation. |
| Telepresence Daemon | Local machine | Maintains a persistent tunnel and reroutes intercepted traffic to local processes. |
When you issue an intercept, the Traffic Manager injects a Traffic Agent sidecar into the target pod. Incoming requests for that pod are proxied through the agent over the tunnel to your local service.
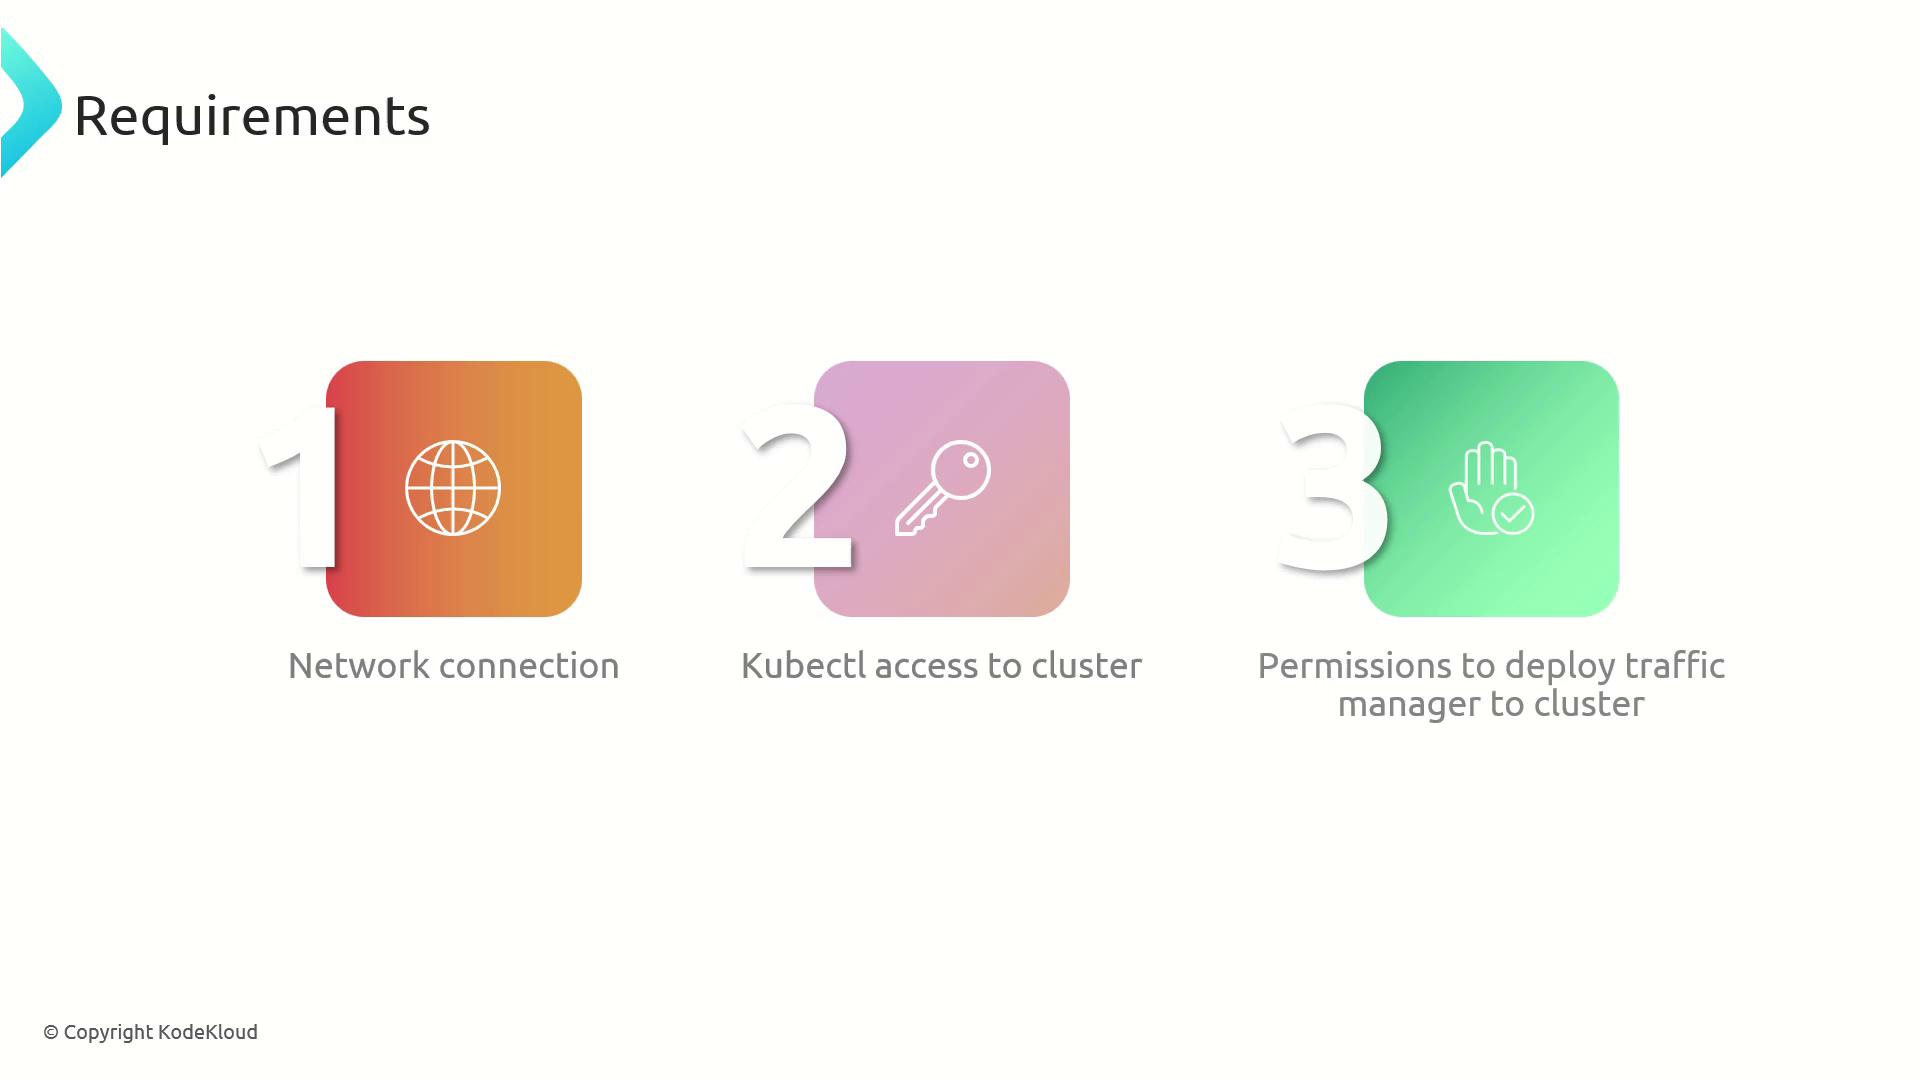
Prerequisites
Note
Before you begin, confirm you have:
- Network access to your Kubernetes cluster
kubectlconfigured with the correct context- Permissions to install or upgrade cluster components (or a colleague who can)
Installation
1. Install the Telepresence CLI
Download the latest Telepresence binary and make it executable:
sudo curl -FL \
  https://app.getambassador.io/download/tel2oss/releases/download/v2.20.0/telepresence-linux-amd64 \
  -o /usr/local/bin/telepresence
sudo chmod a+x /usr/local/bin/telepresence
2. Deploy the Traffic Manager
Use the built-in Helm support to install:
telepresence helm install
This command provisions the Traffic Manager and necessary RBAC resources in your cluster.
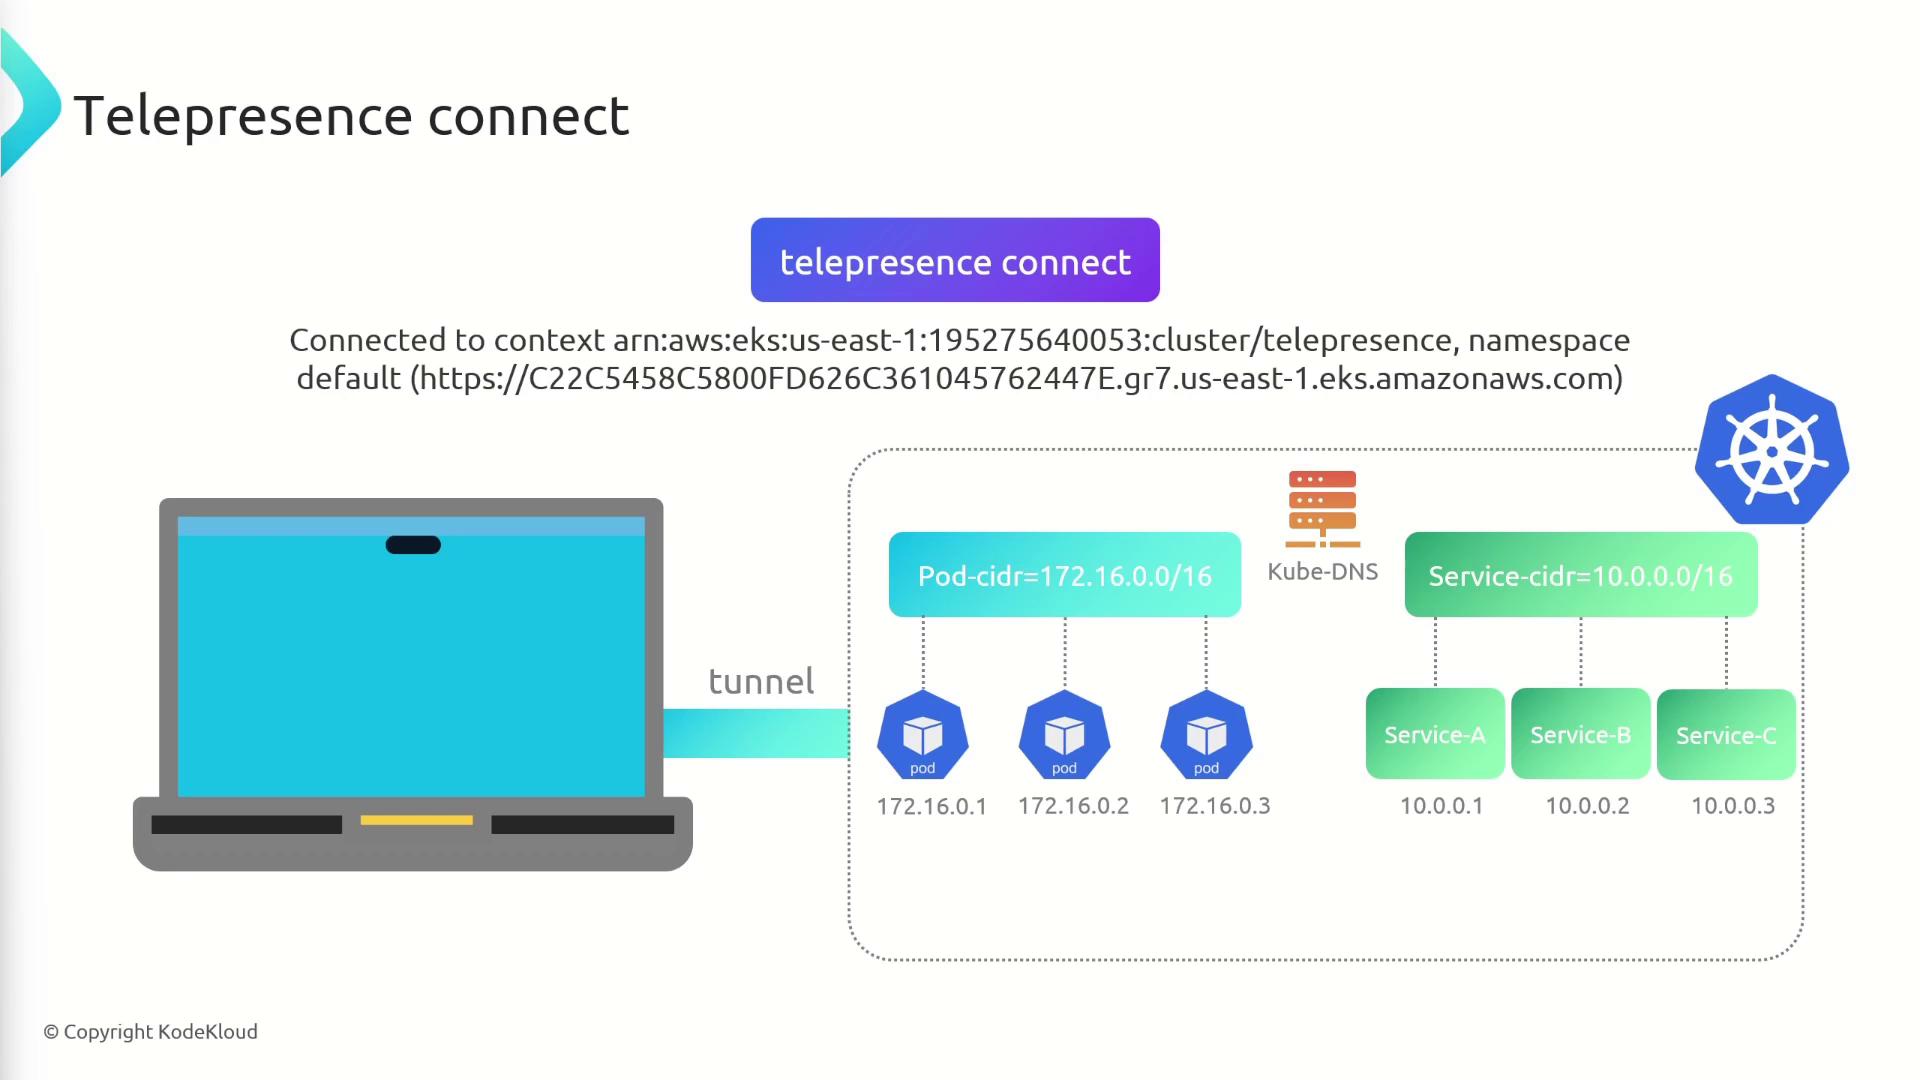
Establishing the Connection
Run the following to start the daemon and open the tunnel:
telepresence connect
This will:
- Launch the local Telepresence daemon
- Connect to the Traffic Manager in your cluster
- Configure routing so cluster pod and service IPs resolve locally
Common Telepresence Commands
| Command | Description |
|---|---|
| telepresence connect | Establishes the network tunnel |
| telepresence status | Displays current connection and routing status |
| telepresence intercept NAME | Redirects traffic for a Kubernetes service to your local process |
Verifying Your Connection
Check connection health and routing:
telepresence status
Example output:
OSS User Daemon: Running
Version              : 2.20.0
Status               : Connected
Subnets (2)          : 10.100.0.0/16, 192.168.0.0/18
...
OSS Traffic Manager: Connected
Ensure Status: Connected and the Subnets match your cluster’s pod CIDR and service network.
Local Routing
Telepresence adds local routes for cluster IP ranges. View them with:
ip route
Sample:
10.100.0.0/16 dev tel1 scope link
192.168.0.0/18 dev tel1 scope link
Traffic on these subnets is directed through the tel1 tunnel interface.
Using Cluster Services Locally
With the tunnel in place, resolve and call internal services as if you were in the cluster:
nslookup service-a
curl http://service-a:3000
curl http://172.16.0.1
This approach removes the overhead of building images or managing port-forwards during development.
Links and References
Watch Video
Watch video content