Terraform Basics Training Course
Terraform Provisioners
AWS EC2 with Terraform
In this lesson, you'll learn how to deploy an AWS EC2 instance running Ubuntu using Terraform. This guide covers instance configuration, provisioning with a startup script, setting up key-based SSH access, and configuring a security group for secure SSH connections.
Deploying an EC2 Instance with Terraform
We begin by defining an AWS instance resource in Terraform. The configuration includes two mandatory arguments for our instance resource (named "webserver"):
- AMI ID: We use the AMI for an Ubuntu instance in the US West 1 region.
- Instance Type: We select a
t2.micro
instance, a low-spec option with one CPU and 1 GB of RAM.
Optionally, tags are added to identify the instance, including a name ("webserver") and a description ("An NGINX WebServer on Ubuntu"). A Bash shell script is provided via the user_data
argument using the here-doc syntax. This script updates the package list, installs NGINX, enables it, and starts the service when the instance launches.
After configuring Terraform, run the following commands to preview and apply your changes:
terraform plan
terraform apply
Below is a sample output after running terraform apply
:
$ terraform apply
# aws_instance.webserver will be created
+ resource "aws_instance" "webserver" {
+ ami = "ami-0edab43b6fa892279"
+ instance_type = "t2.micro"
+ ipv6_address_count = (known after apply)
+ public_ip = (known after apply)
+ source_dest_check = true
+ subnet_id = (known after apply)
+ tags = {
+ "Description" = "An NGINX WebServer on Ubuntu"
+ "Name" = "webserver"
}
+ tenancy = (known after apply)
+ user_data = "527516162d9d8675a26b6ca97664226e6e2bff82"
+ volume_tags = (known after apply)
+ vpc_security_group_ids = (known after apply)
}
...
aws_instance.webserver: Creating...
aws_instance.webserver: Still creating... [20s elapsed]
aws_instance.webserver: Creation complete after 22s [id=i-0085e5d0f442f7c4f]
Apply complete! Resources: 1 added, 0 changed, 0 destroyed.
Accessing the EC2 Instance
Since the instance runs Ubuntu, SSH is the preferred method for remote access. However, the default Terraform configuration does not include an IP address, key pair, or security group settings for SSH, making direct SSH access impossible at this stage.
When launching an instance manually using the AWS Management Console, you typically create or assign an SSH key pair. In the sections below, we demonstrate how to enable this with Terraform.
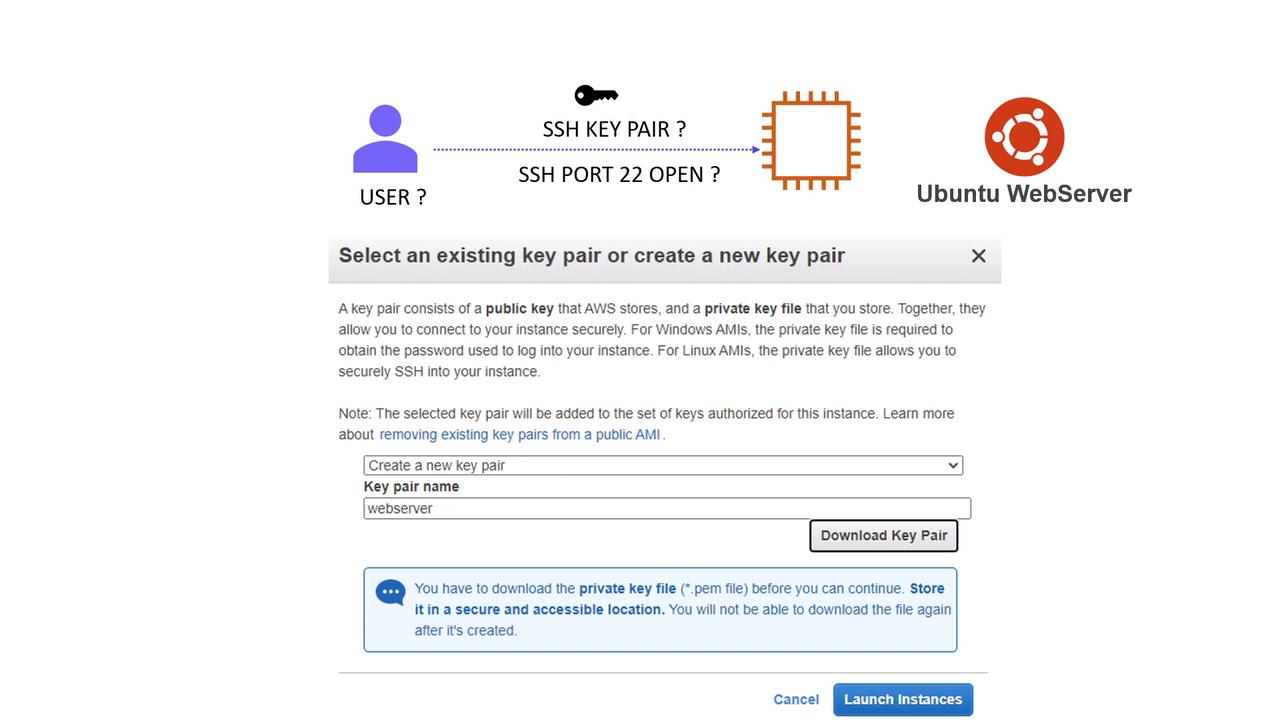
Configuring Key-Based SSH Access
To enable SSH access, add an AWS Key Pair resource that uses an existing public key file (in this example, web.pub
) from the local machine. You have the option to load the public key using the file function or simply include its content directly.
Below is the Terraform configuration that introduces the key pair resource:
resource "aws_instance" "webserver" {
ami = "ami-0edab43b6fa892279"
instance_type = "t2.micro"
tags = {
Name = "webserver"
Description = "An Nginx WebServer on Ubuntu"
}
user_data = <<-EOF
#!/bin/bash
sudo apt update
sudo apt install nginx -y
systemctl enable nginx
systemctl start nginx
EOF
}
resource "aws_key_pair" "web" {
public_key = file("/root/.ssh/web.pub")
}
Integrate the key pair into the EC2 resource by referencing its ID, as shown below:
resource "aws_instance" "webserver" {
ami = "ami-0edab43b6fa892279"
instance_type = "t2.micro"
tags = {
Name = "webserver"
Description = "An Nginx WebServer on Ubuntu"
}
user_data = <<-EOF
#!/bin/bash
sudo apt update
sudo apt install nginx -y
systemctl enable nginx
systemctl start nginx
EOF
key_name = aws_key_pair.web.id
}
resource "aws_key_pair" "web" {
public_key = file("/root/.ssh/web.pub")
}
Configuring the Security Group
To allow SSH connections (port 22) from the internet to your web server, configure a security group. In previous examples, the EC2 instance was deployed in the default VPC and subnet, with a security group named "SSH access" allowing inbound SSH connections from any source (0.0.0.0/0
). While this setup is acceptable in a demo environment, it is not recommended for production.
Below is the Terraform configuration that incorporates the security group resource:
resource "aws_instance" "webserver" {
ami = "ami-0edab43b6fa892279"
instance_type = "t2.micro"
tags = {
Name = "webserver"
Description = "An Nginx WebServer on Ubuntu"
}
user_data = <<-EOF
#!/bin/bash
sudo apt update
sudo apt install nginx -y
systemctl enable nginx
systemctl start nginx
EOF
key_name = aws_key_pair.web.id
vpc_security_group_ids = [ aws_security_group.ssh-access.id ]
}
resource "aws_key_pair" "web" {
public_key = file("/root/.ssh/web.pub")
}
resource "aws_security_group" "ssh-access" {
name = "ssh-access"
description = "Allow SSH access from the Internet"
ingress {
from_port = 22
to_port = 22
protocol = "tcp"
cidr_blocks = ["0.0.0.0/0"]
}
}
Note
Ensure that the cidr_blocks
value is exactly "0.0.0.0/0"
as shown. This setting is suitable for demonstration purposes only.
Retrieving the Instance Public IP
For convenient management and remote access, add an output variable to retrieve the public IP address of the web server instance. This IP address can be used along with your SSH private key (paired with the provided public key) to access the server.
After running terraform apply
, Terraform creates the key pair, security group, and EC2 instance. Due to configuration changes, Terraform might recreate the EC2 instance. Once complete, you can use the output public IP and your private key to establish an SSH connection from your local machine.
With these configurations, you have successfully deployed an AWS EC2 instance with key-based SSH access and a security group that allows SSH connections. This setup provides a robust starting point for deploying applications on AWS using Terraform.
Additional Resources
Happy coding and deploying!
Watch Video
Watch video content