Learn to provision a Linux EC2 instance and configure it to serve web content using Nginx through a step-by-step guide for beginners.
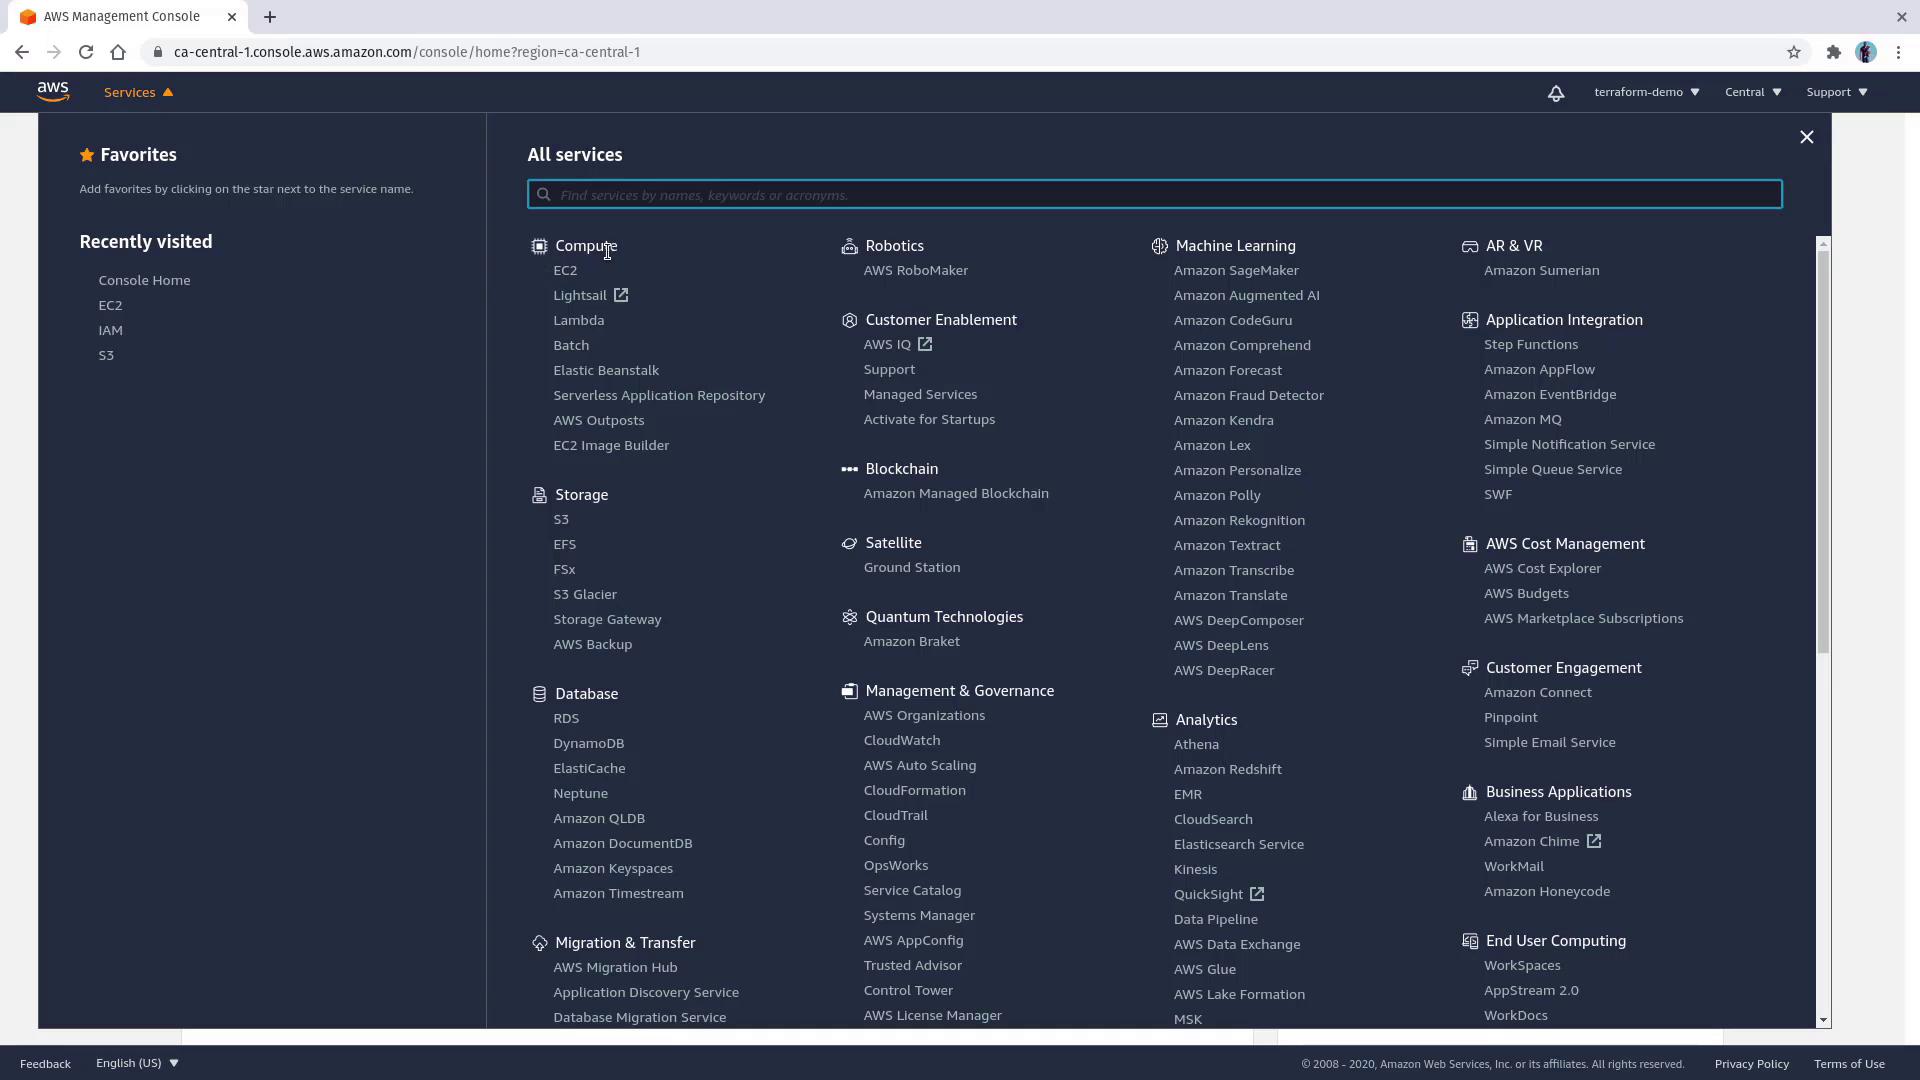
In this lesson, you will learn how to provision a Linux EC2 instance using the AWS Management Console and configure it to serve web content using Nginx. This step-by-step guide is perfect for beginners seeking a hands-on introduction to AWS EC2 deployments.Access the EC2 service from the AWS Management Console by clicking on the Services tab at the top left.
The EC2 service is grouped under the Compute category. Alternatively, you can use the service search bar on the dashboard to quickly locate EC2.
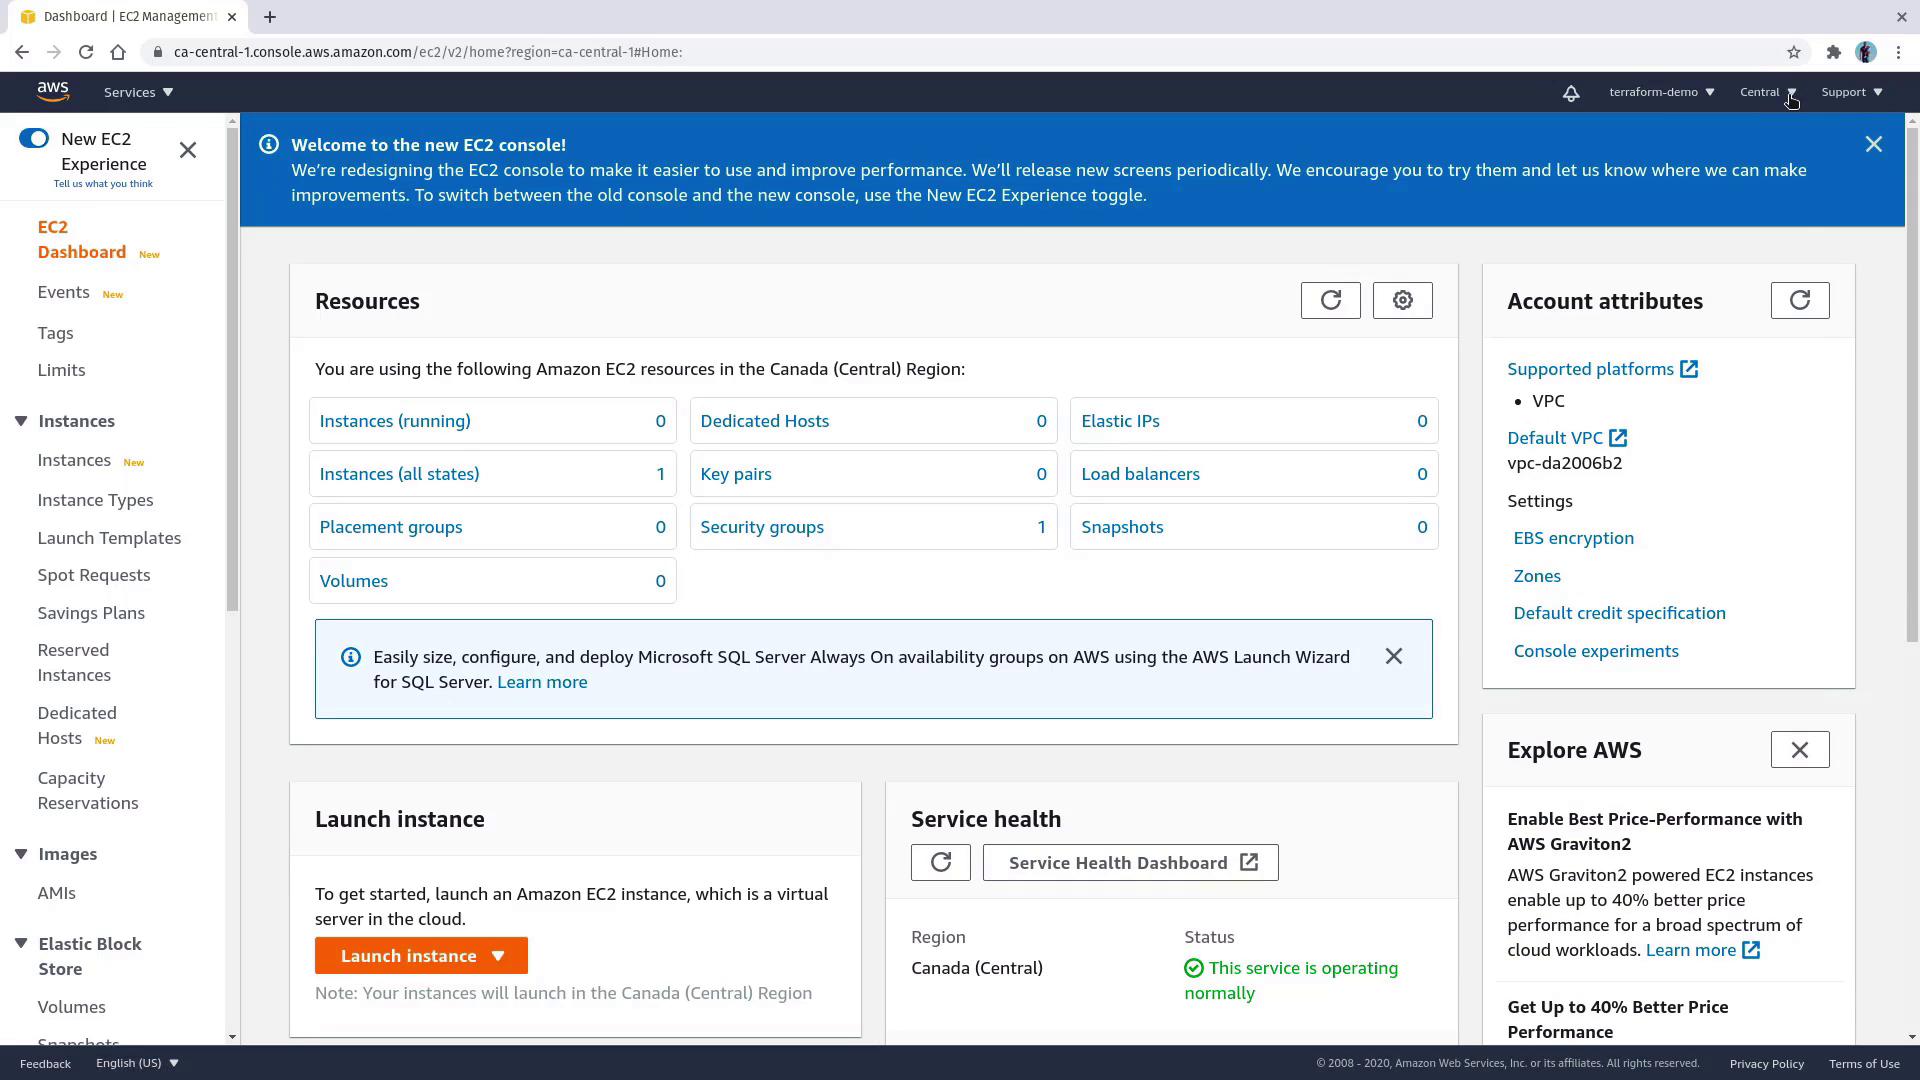
For an even faster start, click the “launch a virtual machine” link located just below the search bar.Once inside the EC2 console, ensure you are in the central Canada region; this is where your instance will be deployed.
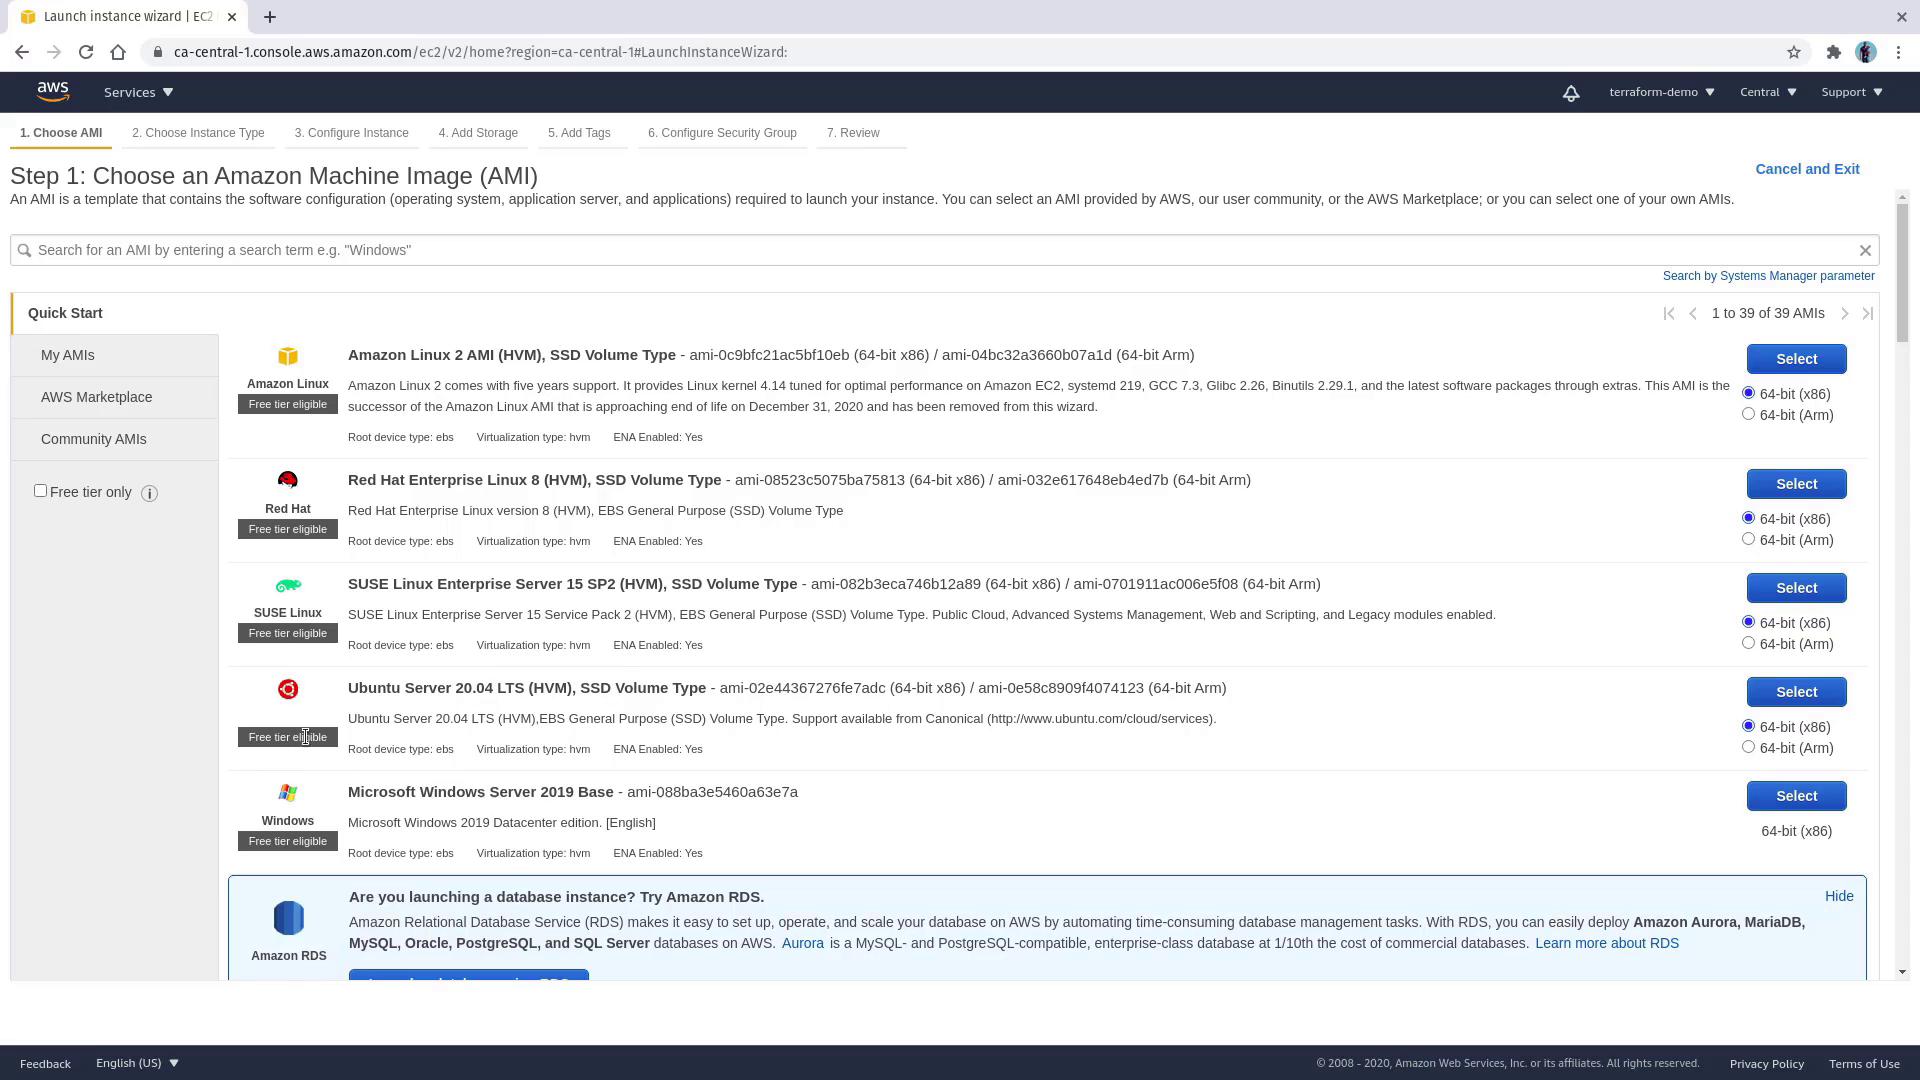
Select an Amazon Machine Image (AMI). For this demonstration, we will deploy a web server on Ubuntu. Choose the Ubuntu 20.04 AMI, which is free tier eligible.
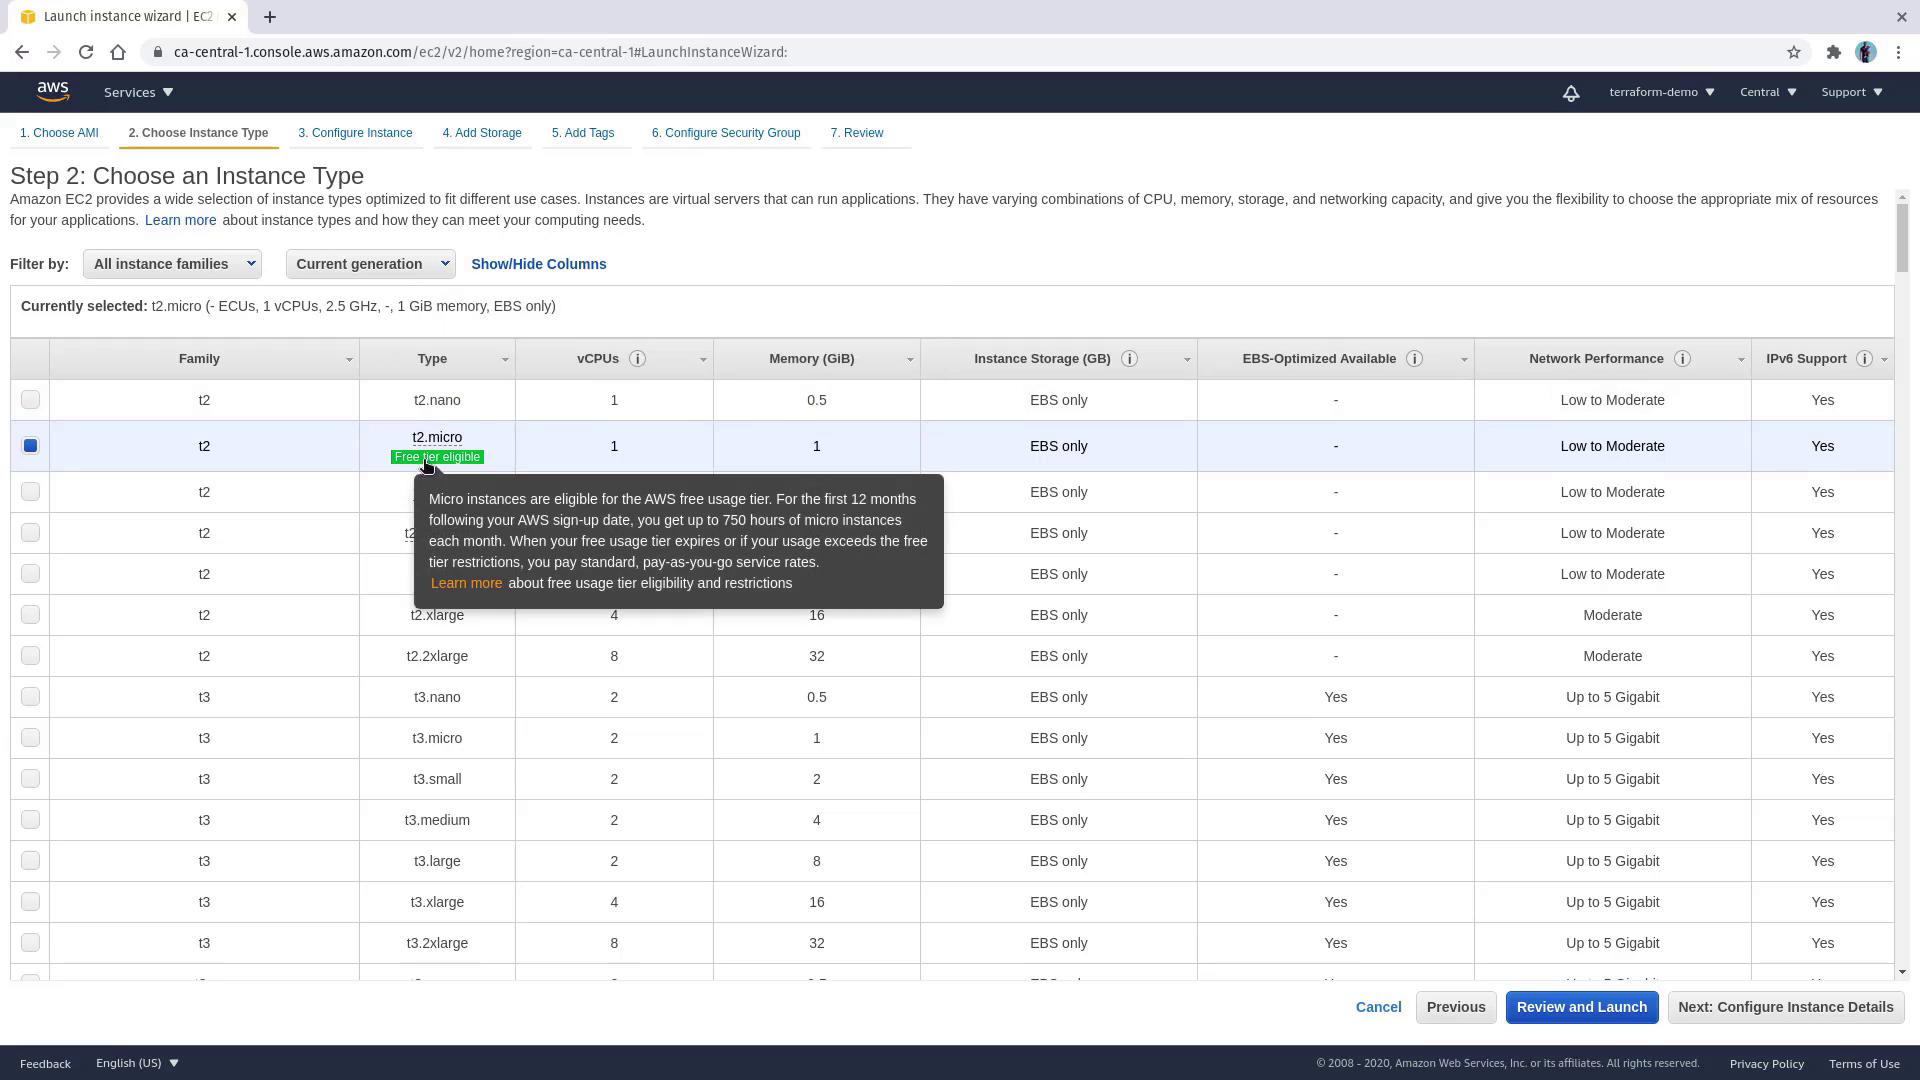
Choose an instance type; for example, select t2.micro to remain within the free tier.
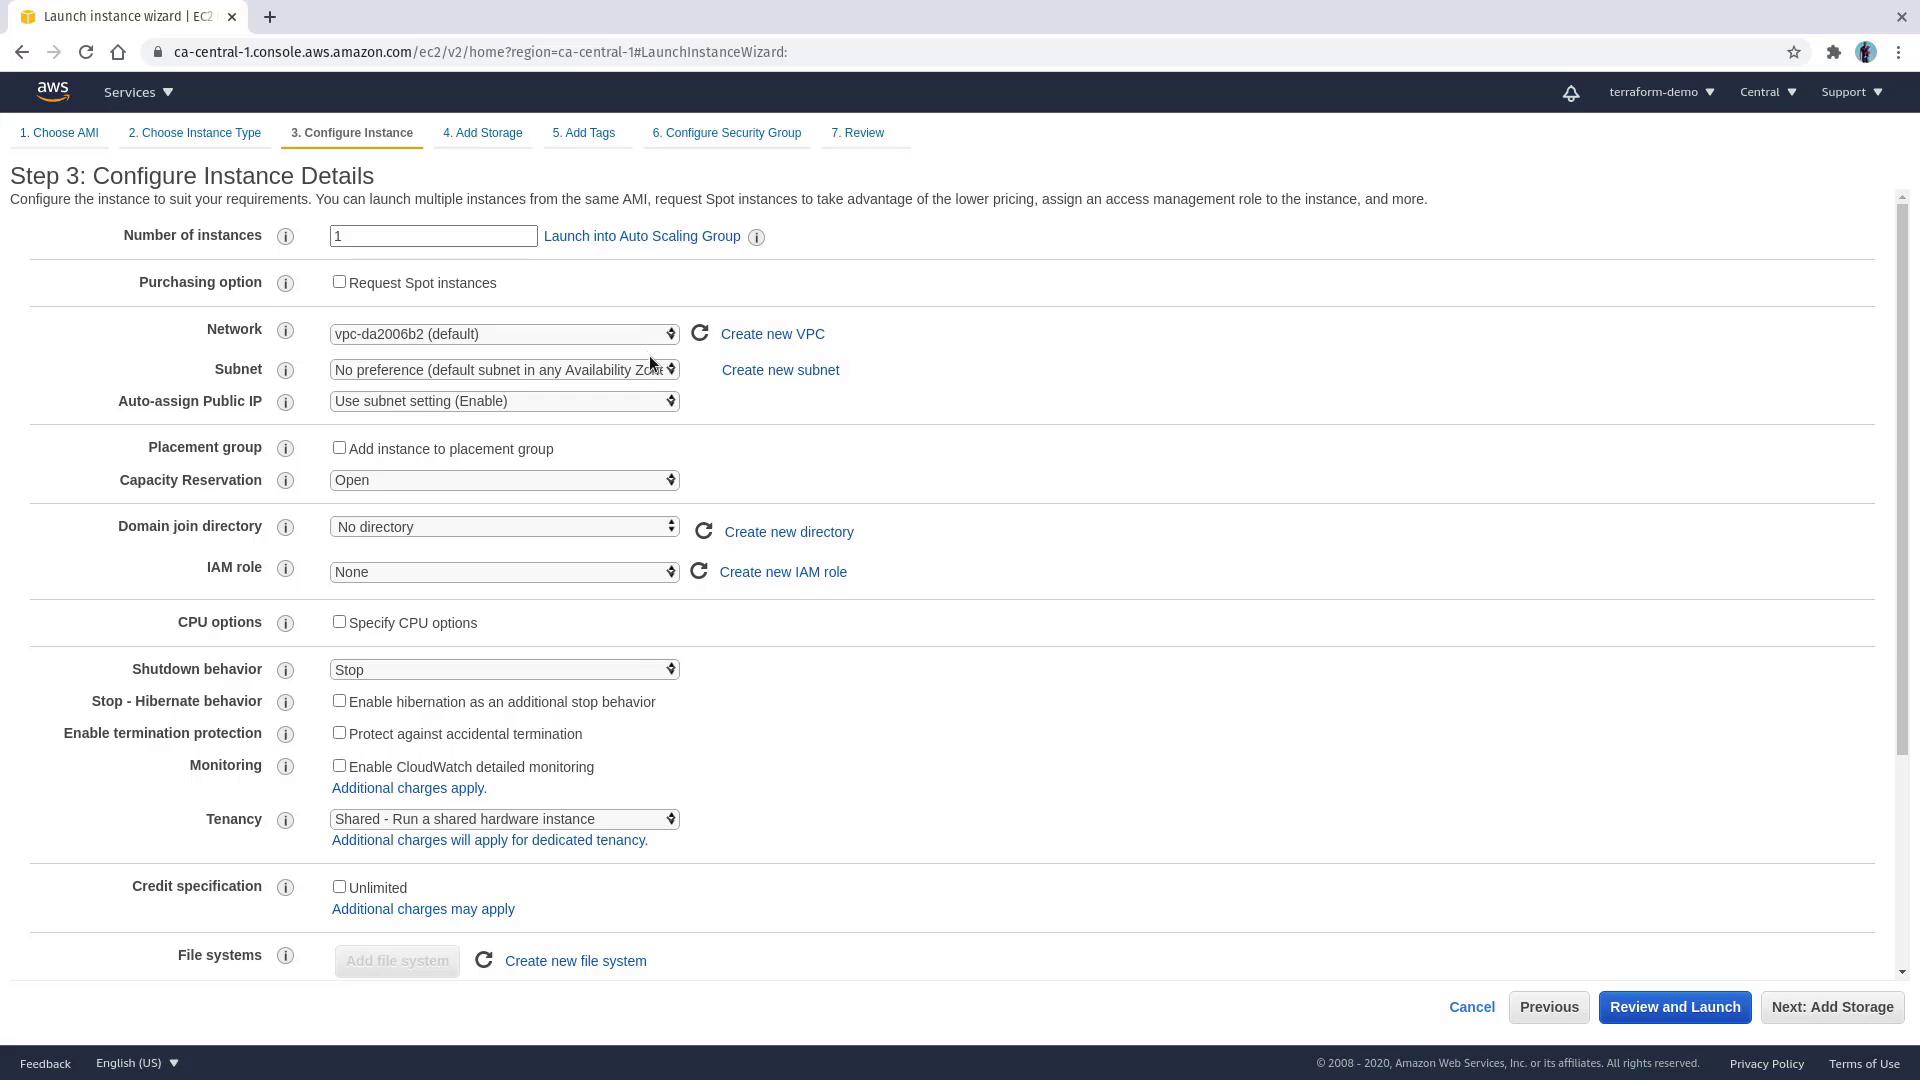
The subsequent screens allow you to configure instance parameters. For most settings, the default options are suitable. Use the default VPC for the region and select the default subnet.
To serve web content, leverage the EC2 user data feature by pasting the following shell script in the “Advanced Details” section. This script installs and configures Nginx automatically.
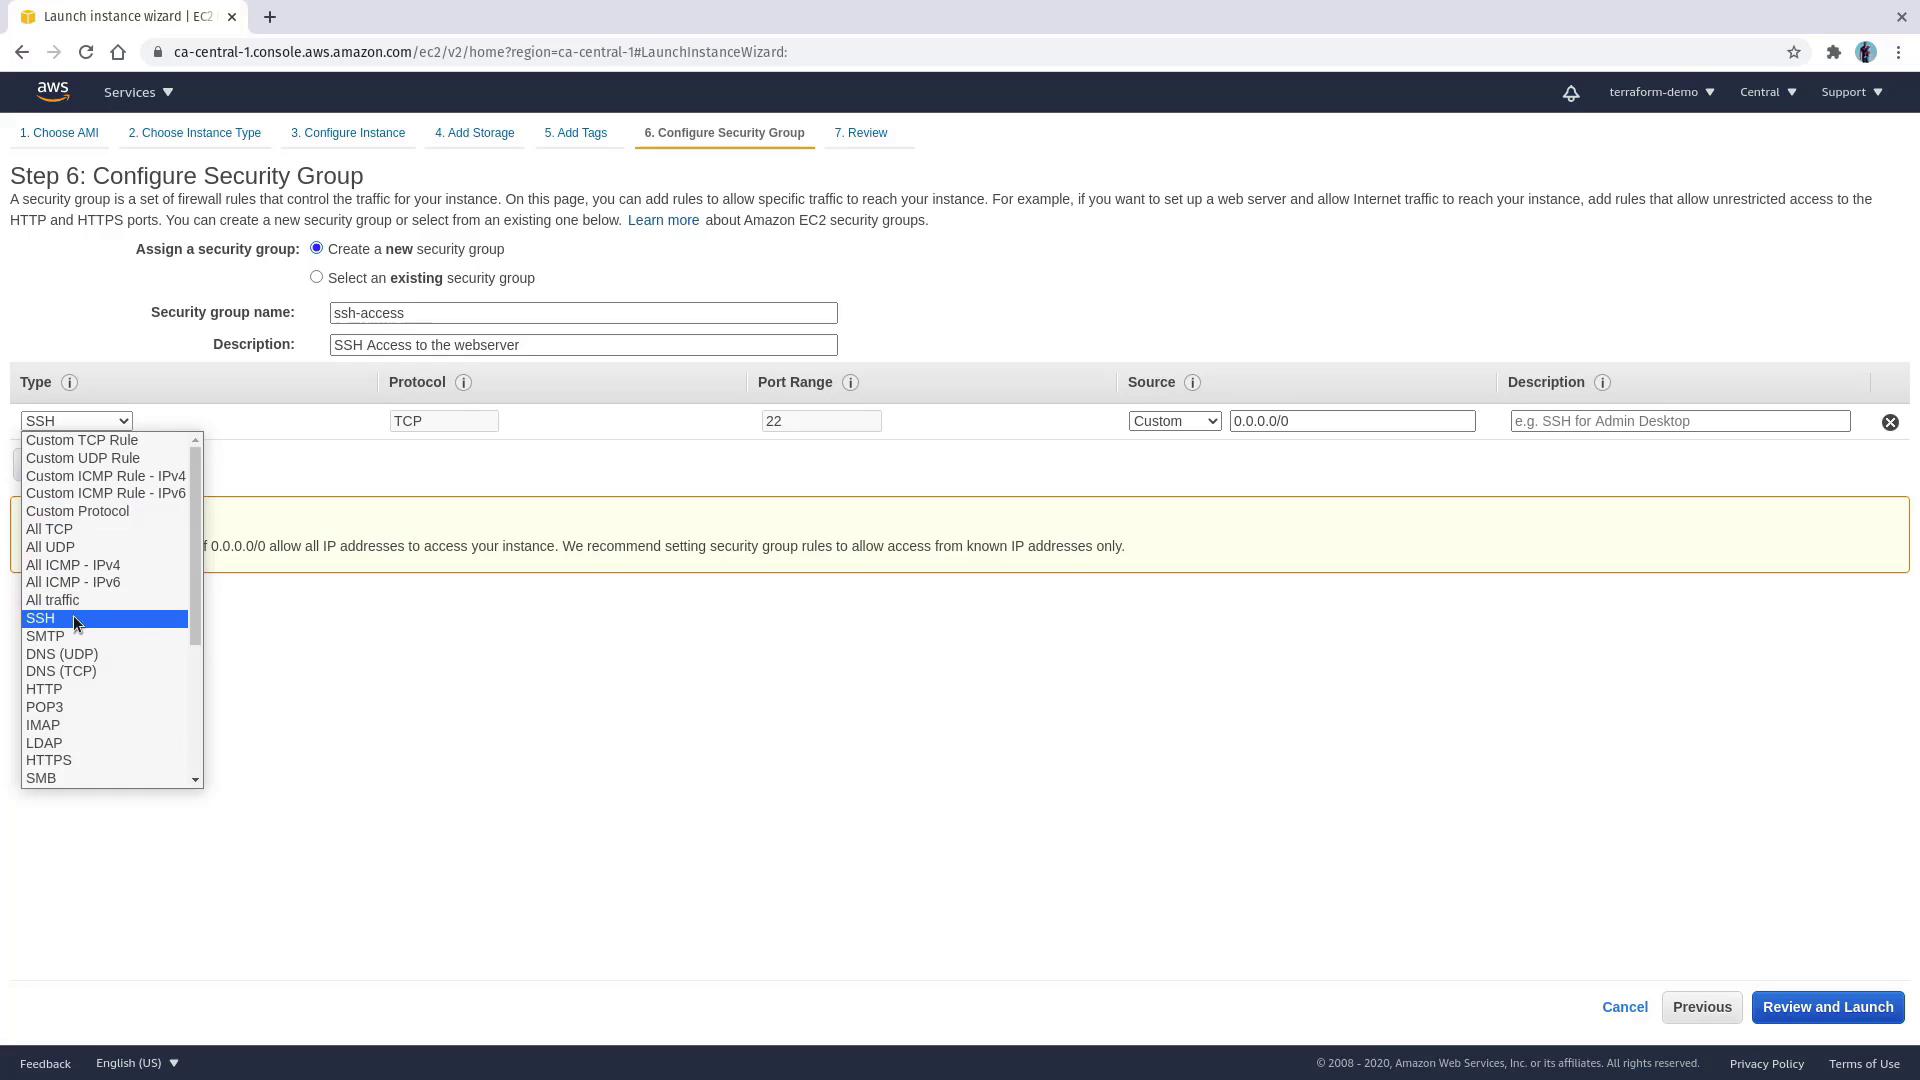
Set up the security group to allow SSH access. Create a new security group (e.g., “SSH access”) and supply a suitable description. Under rule type, select SSH with the default source set to 0.0.0.0/0. Note that while this configuration is convenient for testing, it is not recommended for production environments.
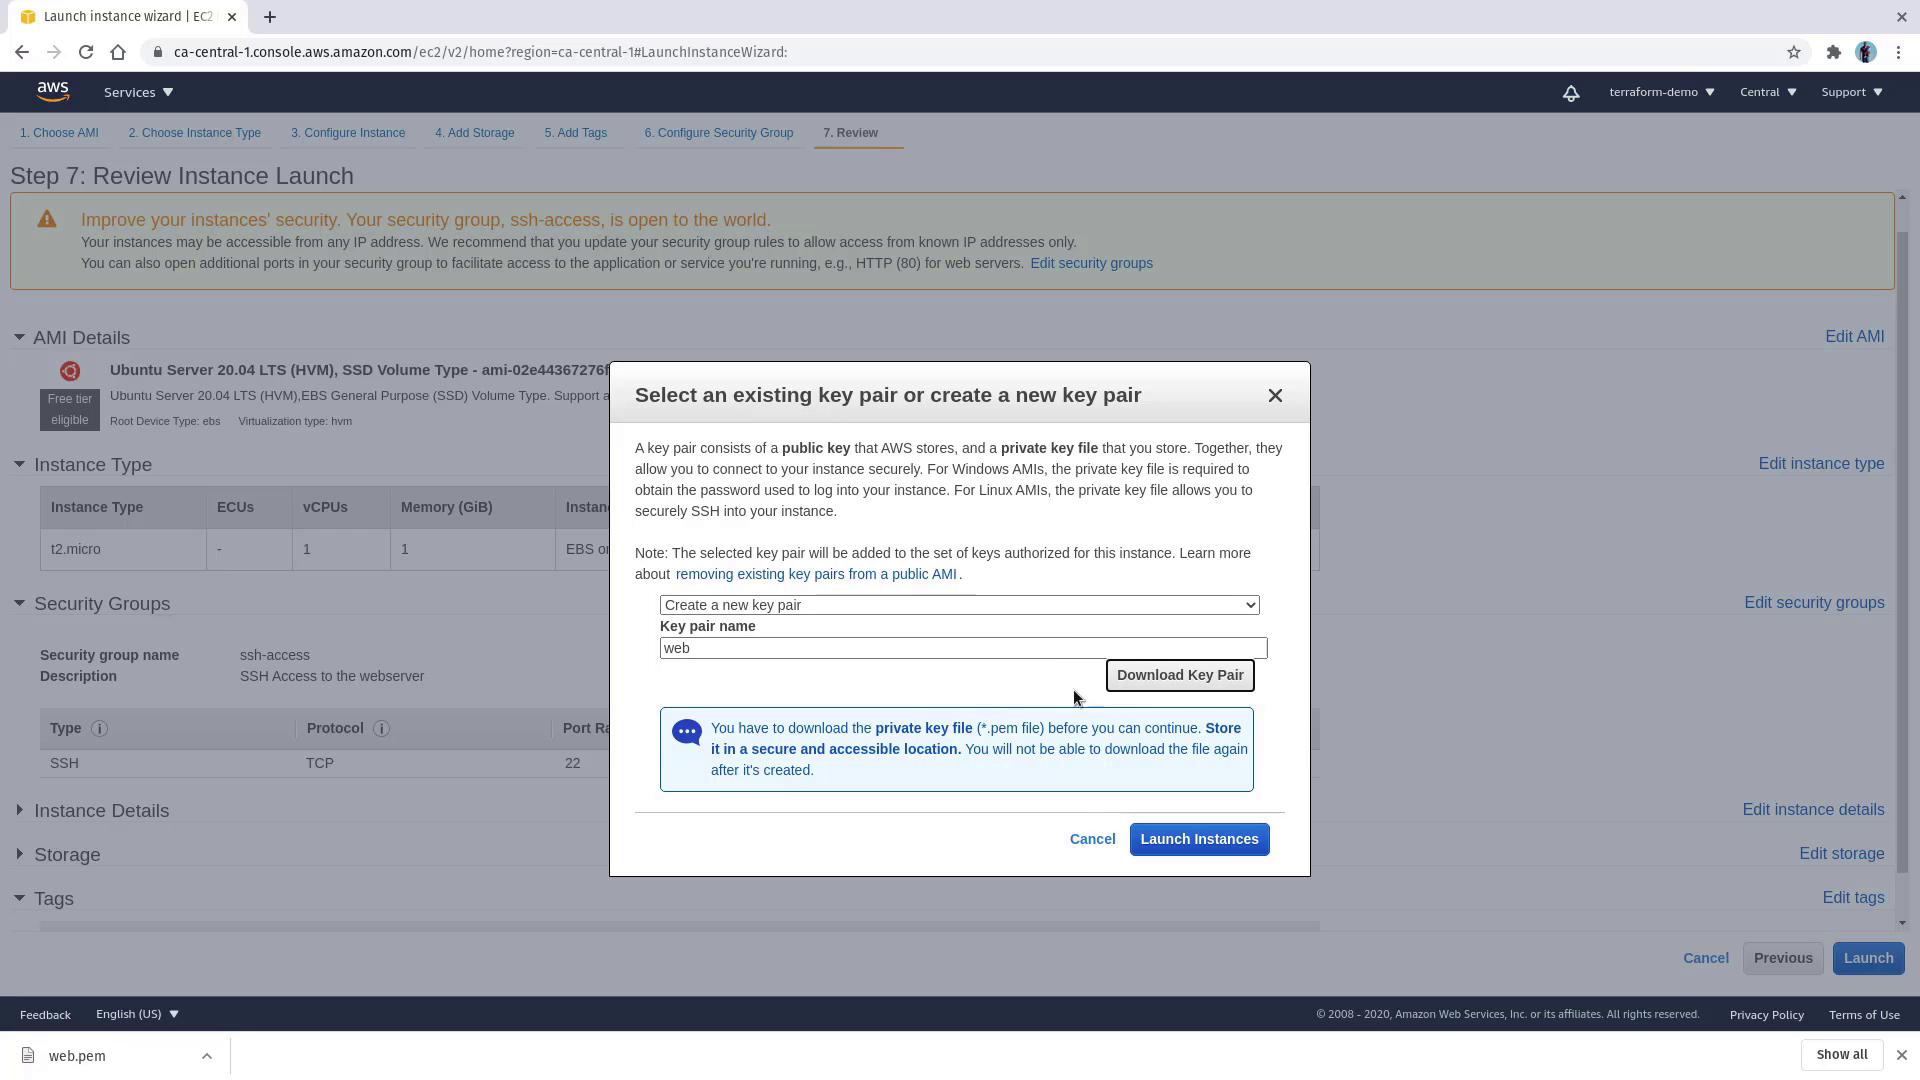
Review your instance configuration and click Launch. You will then be prompted to choose an existing key pair or create a new one. Since no key pair exists in this region, opt to create a new key pair named web and download it. This key pair is essential for SSH authentication.
It may take a few minutes for the instance to launch. Click View Instances to monitor its status. Once launched, look for the instance tagged as web server in the running state. Clicking on the instance will display essential details such as the public IP address, VPC, subnet, instance type, AMI ID, security group, and attached EBS volumes.
Open your local terminal to SSH into the instance using the downloaded key pair. Replace <PUBLIC_IP_ADDRESS> with the actual public IP copied from the console.
On your first connection attempt, you might see a warning about the host’s authenticity:
Copy
The authenticity of host '3.97.9.249 (3.97.9.249)' can't be established.ECDSA key fingerprint is SHA256:mUC8nA+kT4mFnGx46Yda1CH7LsxGtQtHd6+miQvs6I.Are you sure you want to continue connecting (yes/no/[fingerprint])? yesWarning: Permanently added '3.97.9.249' (ECDSA) to the list of known hosts.@@@@@@@@@@@@@@@@@@@@@@@@@@@@@@@@@@@@@@@@@@@@@@@@@@@@@@@@@@WARNING: UNPROTECTED PRIVATE KEY FILE!@@@@@@@@@@@@@@@@@@@@@@@@@@@@@@@@@@@@@@@@@@@@@@@@@@@@@@@@@@Permissions 0664 for '/home/yourusername/Downloads/web.pem' are too open.It is required that your private key files are NOT accessible by others.This private key will be ignored.Load key "/home/yourusername/Downloads/web.pem": bad permissionsubuntu@3.97.9.249: Permission denied (publickey).
If you receive this error about private key file permissions, ensure the key file is restricted so that only the owner can read it. Execute the following command:
After successfully connecting via SSH, verify that Nginx is running by checking its status:
Copy
systemctl status nginx
You should see an output similar to the following, confirming that Nginx is active and running:
Copy
● nginx.service - A high performance web server and a reverse proxy server Loaded: loaded (/lib/systemd/system/nginx.service; enabled; vendor preset: enabled) Active: active (running) since Thu 2020-11-19 22:14:38 UTC; 2min 45s ago Docs: man:nginx(8) Main PID: 2343 (nginx) Tasks: 2 (limit: 1164) Memory: 5.2M CGroup: /system.slice/nginx.service ├─2343 nginx: master process /usr/sbin/nginx -g daemon on; master_process on; └─2344 nginx: worker processNov 19 22:14:38 ip-172-31-18-154 systemd[1]: Starting A high performance web server and a...Nov 19 22:14:38 ip-172-31-18-154 systemd[1]: Started A high performance web server an...
This verification confirms that Nginx was successfully installed using the user data configuration.This concludes the lesson on deploying an EC2 instance using the AWS Management Console and setting up Nginx with EC2’s user data feature. For further details on AWS deployments, check out AWS EC2 Documentation.Happy deploying!