[Updated] AZ-104: Microsoft Azure Administrator
Administer Data Protection
Configuring backup Azure VM
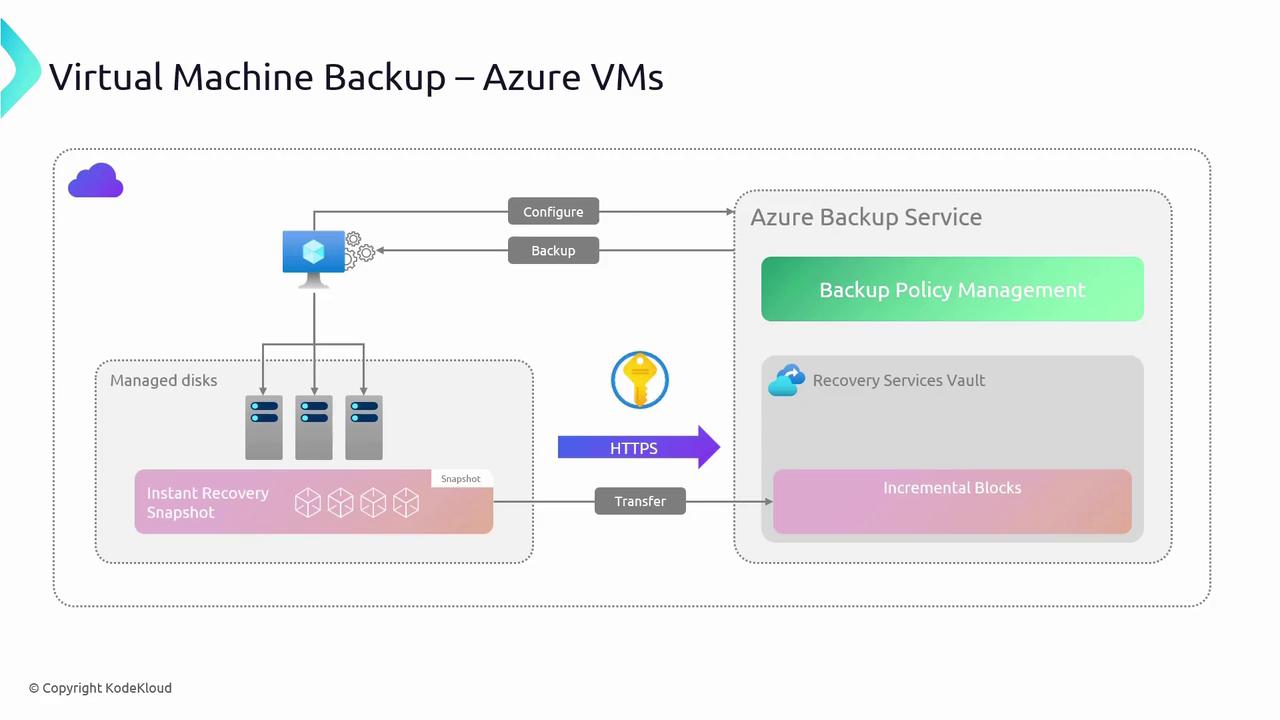
This guide explains how to configure and manage backups for Azure virtual machines (VMs) using the Azure Backup service. The service automatically deploys a backup extension on your VM (if not already installed) to orchestrate consistent backup operations. This extension coordinates snapshot creation for your VM’s managed disks. For application-consistent backups, it interacts with the Volume Shadow Copy Service (VSS) on Windows VMs or runs user-defined post scripts on Linux VMs. In doing so, it ensures that in-flight transactions and caches are fully flushed to disk before taking a snapshot.
During backup configuration, you define policies that set the backup frequency, retention periods (daily, weekly, monthly, and yearly), and establish instant restore points. For instance, you might schedule a daily backup at 7 a.m., retain that backup for 30 days, and configure additional weekly or monthly backups as needed to meet your recovery objectives.
At the scheduled backup time, the Azure Backup service sends a request to the backup extension to start the process. The extension creates a snapshot of the VM’s attached managed disk. This snapshot—representing the VM’s current state—is transferred incrementally to the Recovery Services vault over encrypted HTTPS connections. If the VM uses Azure Disk Encryption, the encryption key is also exported to assist with future restore operations.
Creating a Backup for an Azure VM
To create a backup for your Azure VM, follow these steps:
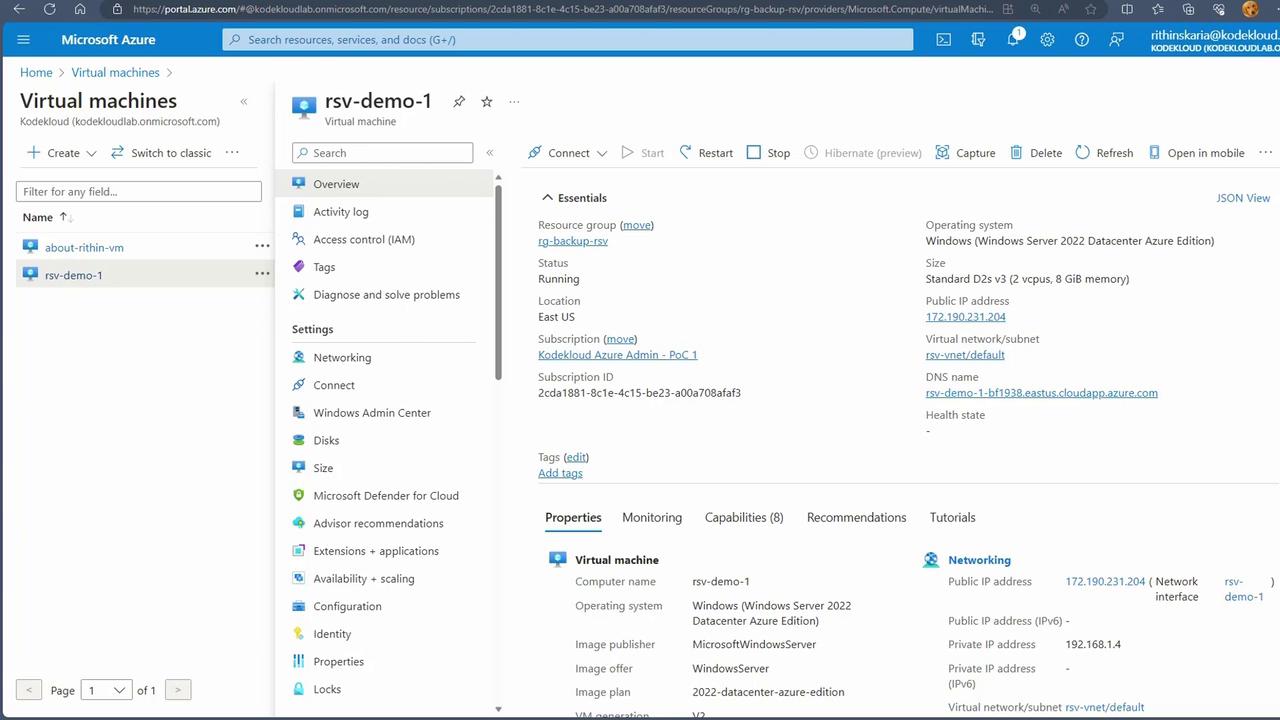
- Access Your Virtual Machine:
- Open the Azure portal and navigate to the Virtual Machines section.
- In this demonstration, we are using a VM named "RSV Demo 1," which is running a web server. Although the web server is accessible via its public IP, the focus here is solely on backup configuration.
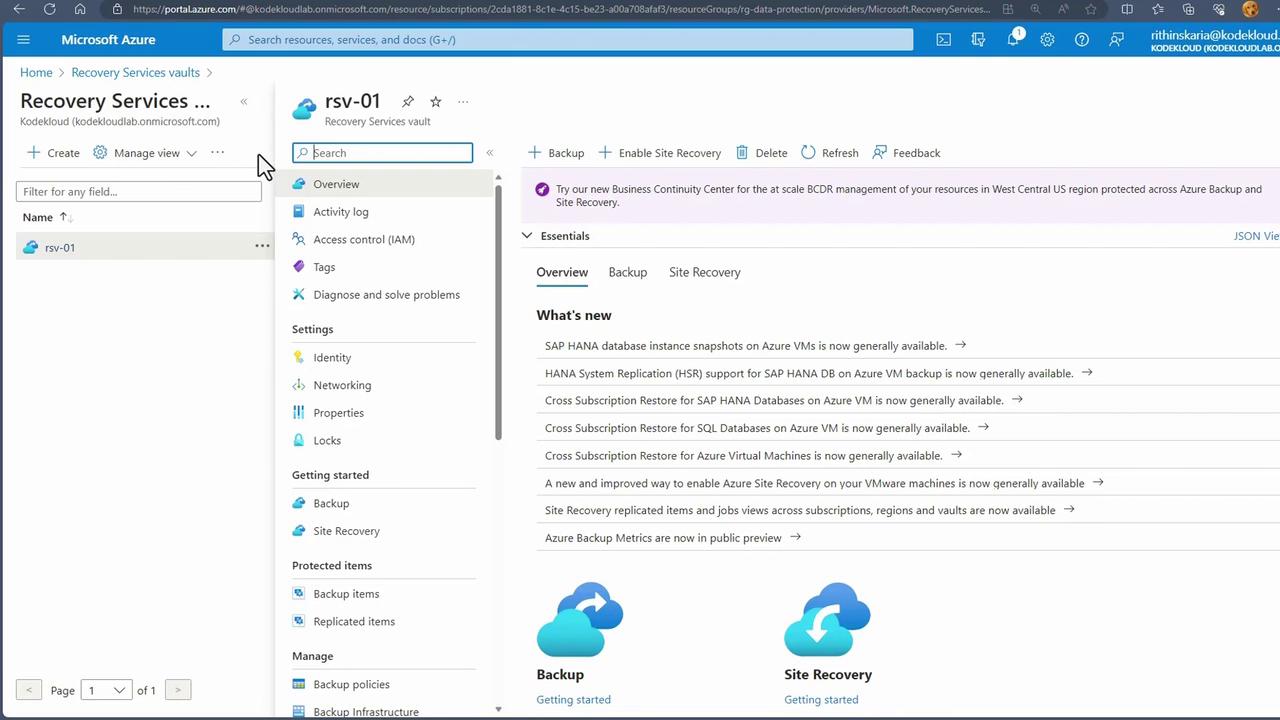
- Select or Create a Recovery Services Vault: Before enabling backup, create or choose an existing Recovery Services vault. This vault acts as the centralized storage location for your backup data. In this example, we use a previously created vault used for file and folder backups, a method that is especially beneficial when managing backups for multiple VMs.
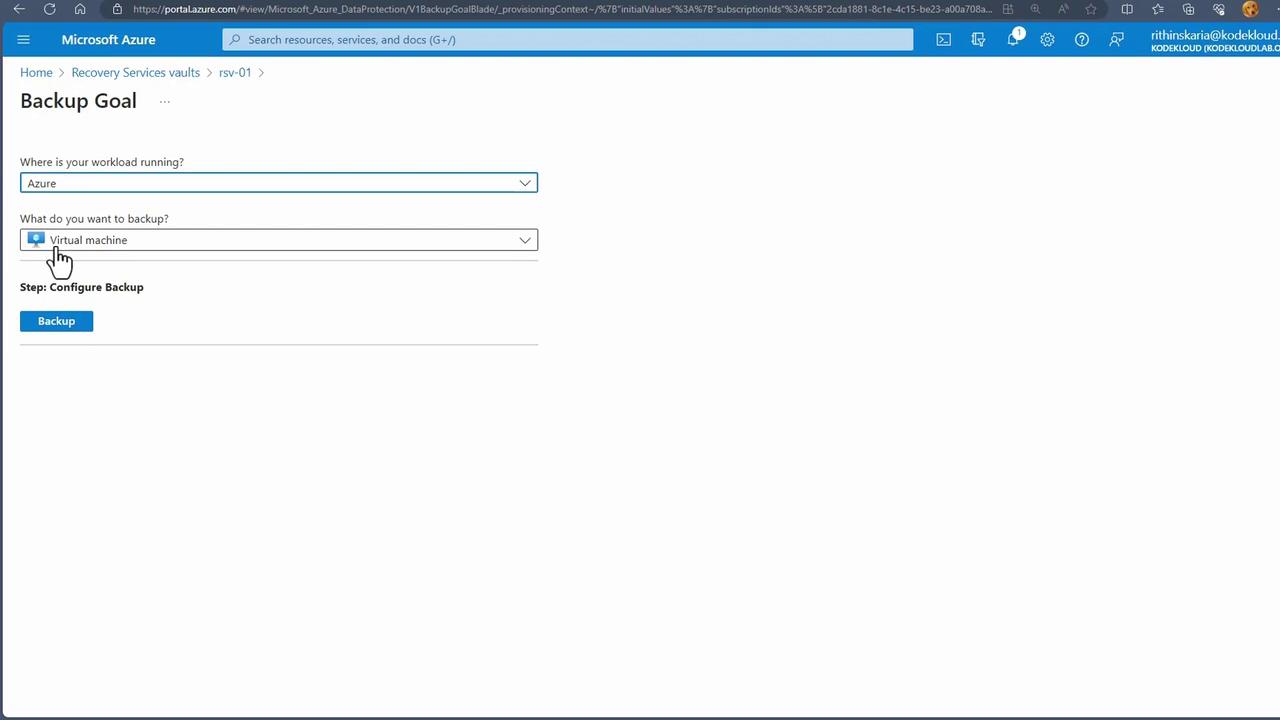
- Set Up Your Backup Goal:
- With the vault selected, set your backup goal by clicking on "Backup."
- From the options provided (such as once-a-day backups with different operational tiers and enhanced modes), choose the one that fits your scenario—in this demonstration, the standard mode is used.
Configuring the Backup Policy
1. Policy Settings
- Create a new policy (e.g., "VM Backup Policy") or modify the default policy.
- Set the backup frequency (e.g., daily at 4 a.m. with support for your local time zone).
- Define instant restore points (snapshot retention) and specify a retention period (the default might be two days).
- Configure retention for weekly, monthly, and yearly backups, determining both the scheduled backup day and the retention duration.
2. Assigning VMs to the Policy
- After configuring your policy, click OK to save it.
- Add the desired VMs to the policy. The portal will list all VMs in the selected region, allowing you to choose which ones to back up.

3. Enabling Backup
- Validate your configuration. The system checks if the backup extension can be installed on the selected VMs.
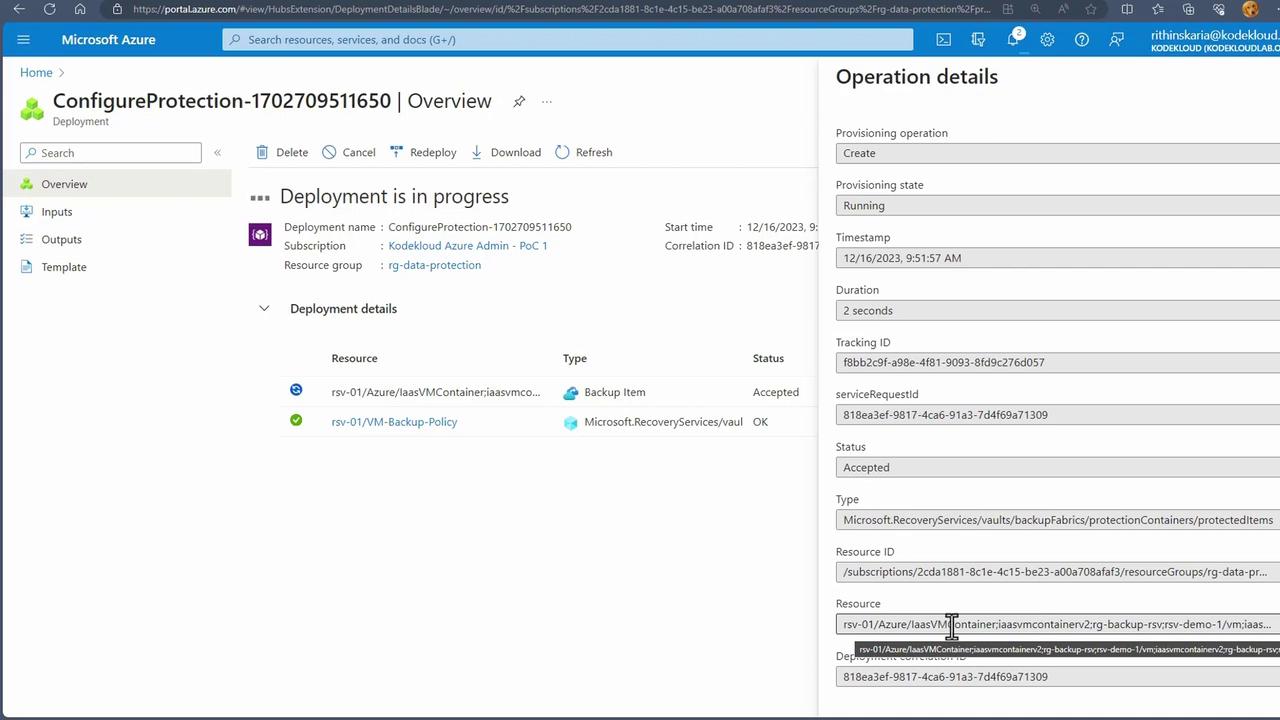
- Once validated, click on "Enable Backup" to install the backup extension, which will handle ongoing backup operations.
- The deployment details displayed in the portal will confirm the addition of the backup extension to your VM.
Initiating the First Backup
Once backup is enabled, initiate the first backup operation as follows:
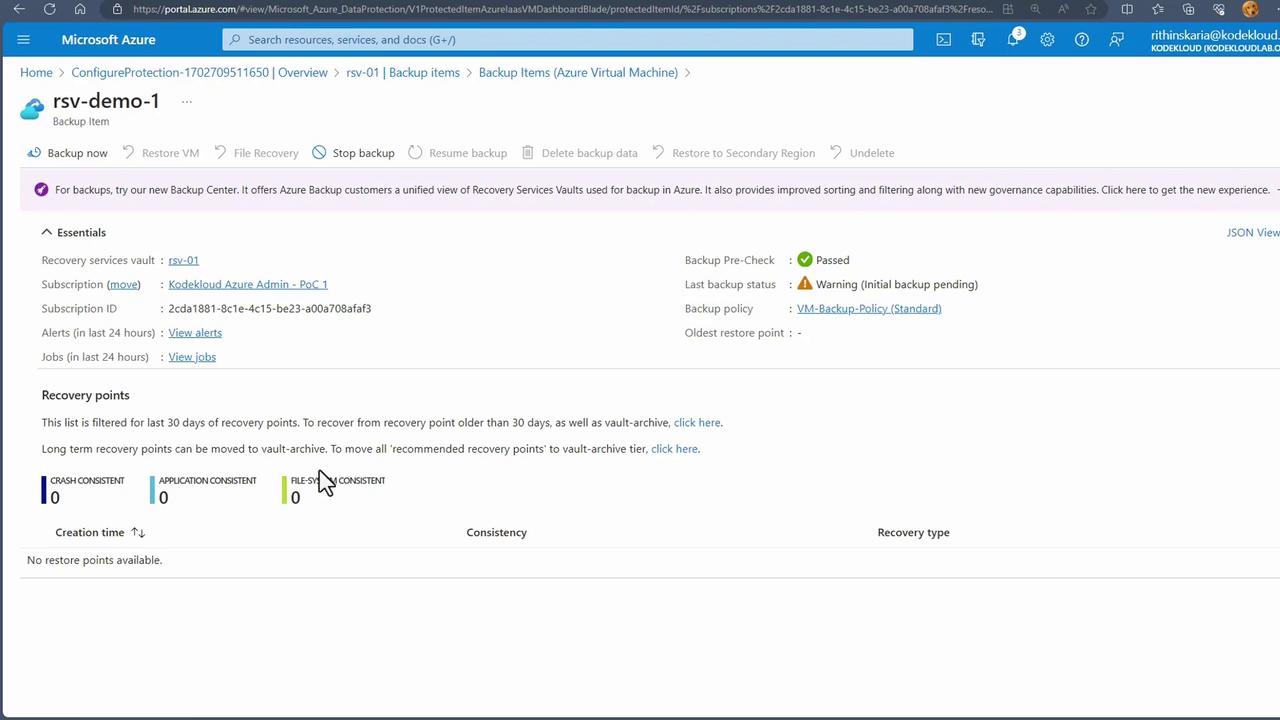
- Open the Recovery Services vault resource.
- Under the Backup Items section, locate your virtual machine (for example, "VM1").
- Click on "View Details" and then start the first backup.
This initial backup creates a restore point that you can later use either to restore the entire VM or to recover specific files.
Monitor the backup process using the job details:
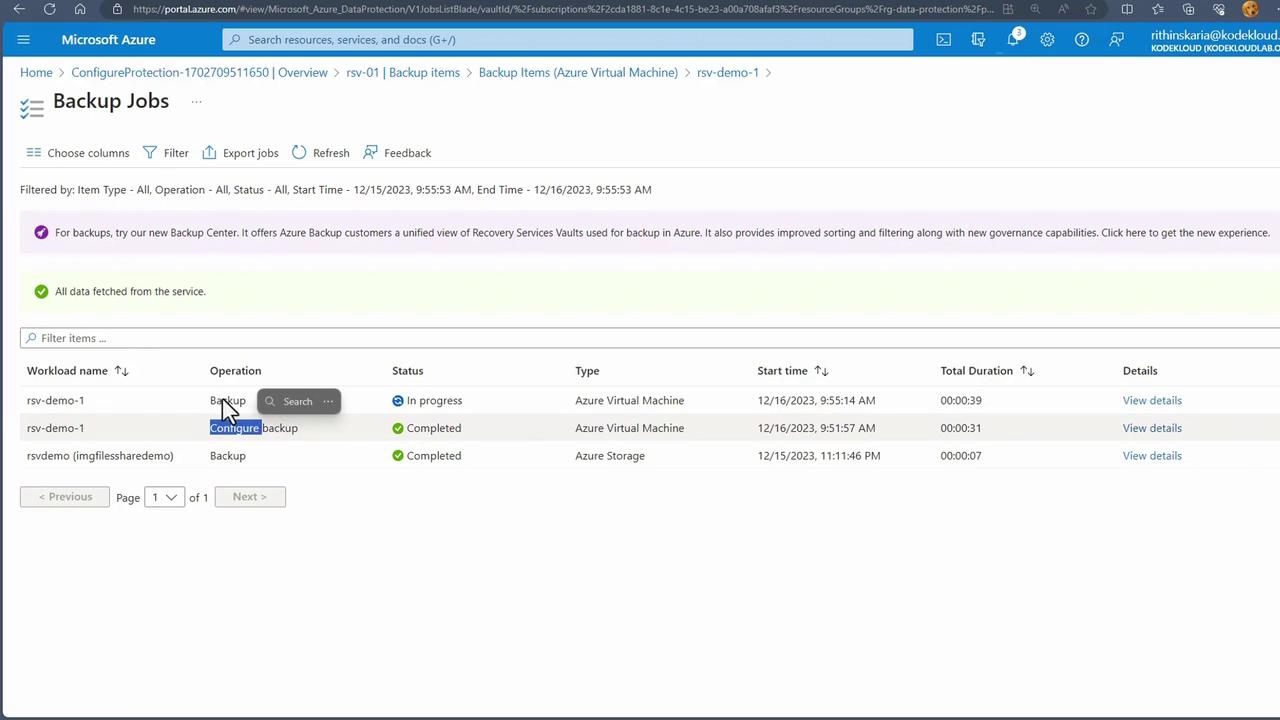
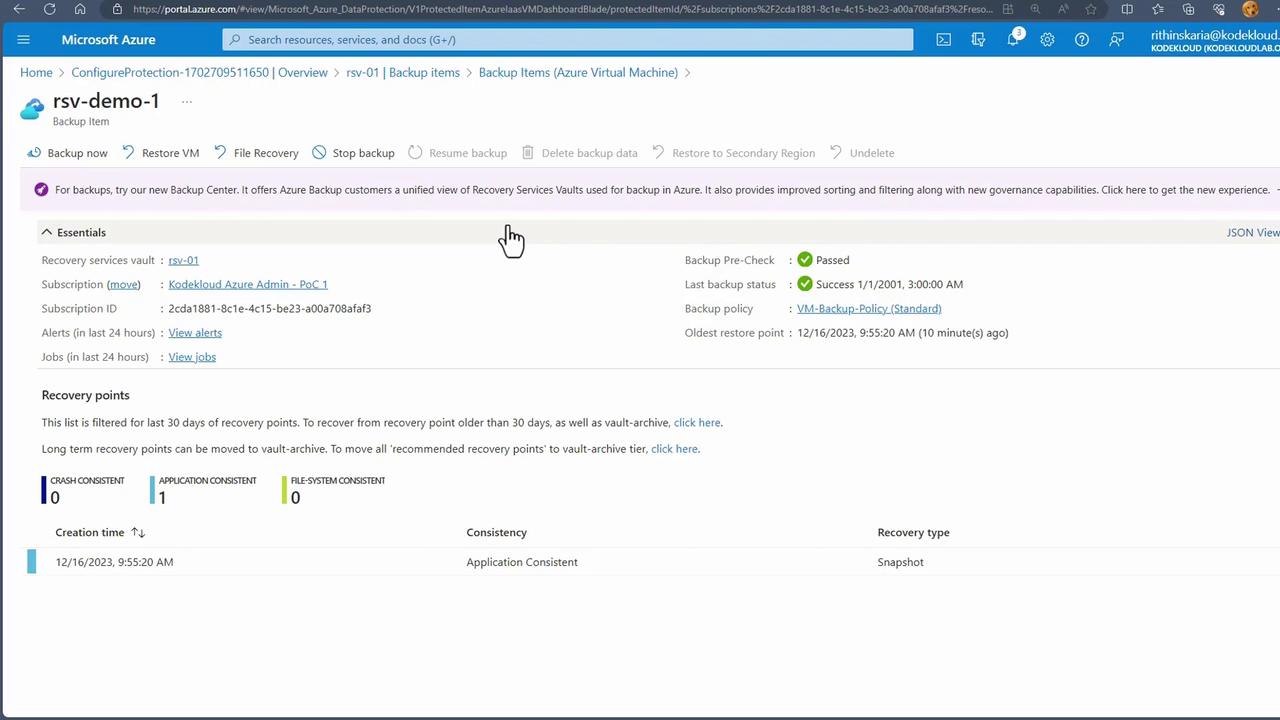
When the extension creates the snapshot, the data is securely transferred to the Recovery Services vault. Refresh the page to confirm that backup completion is successful—the most recent restore point should indicate a recently completed backup.
Restore Options
Azure Backup offers two primary restoration methods:
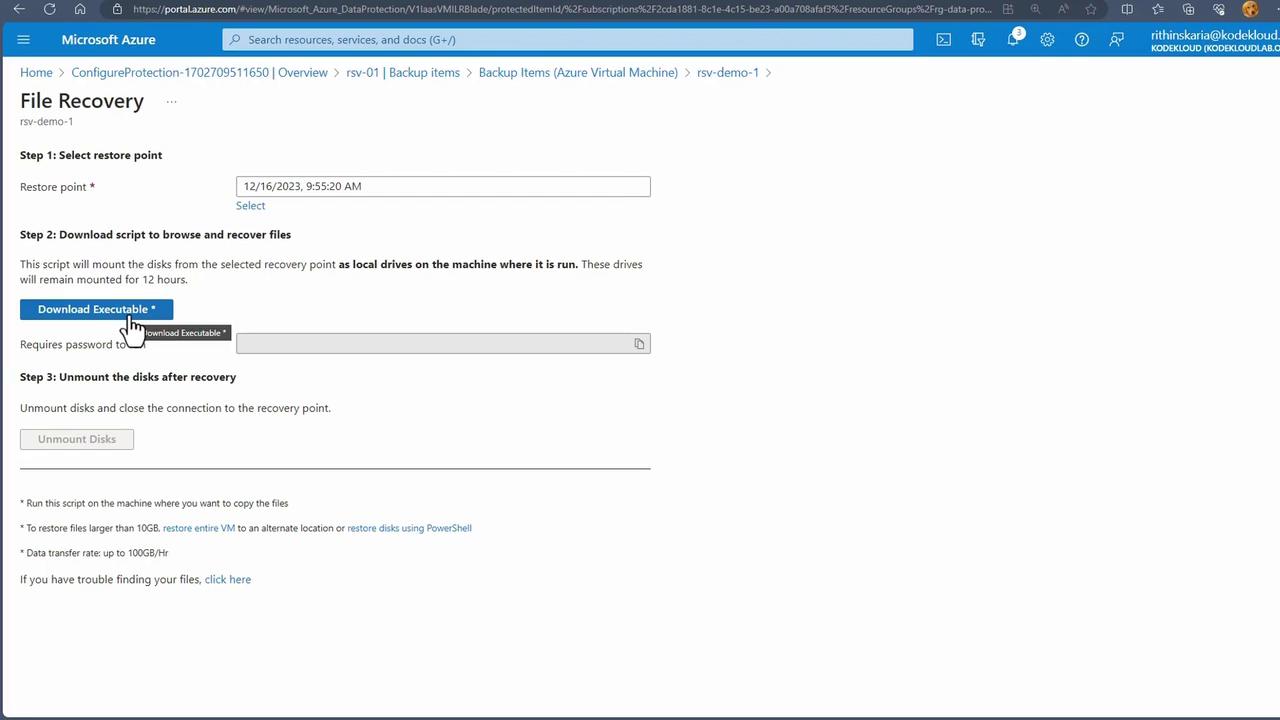
1. File Recovery
Use this option to restore individual files:
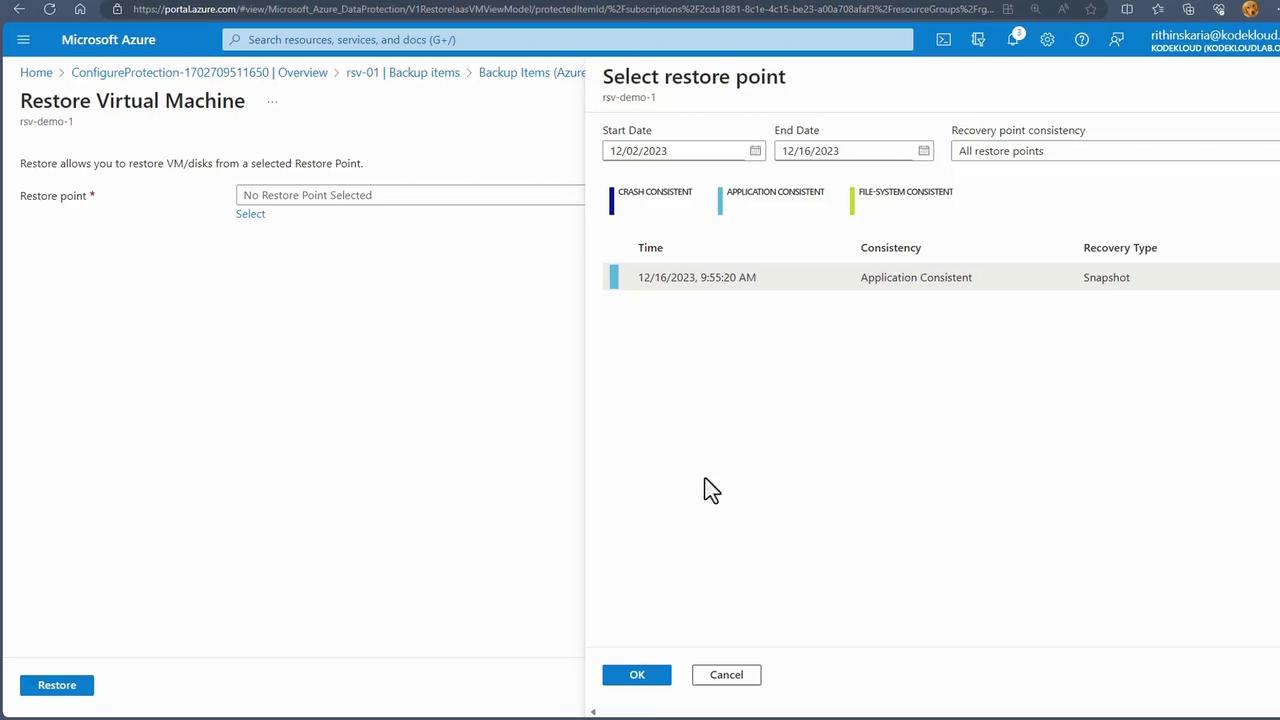
- Select the desired restore point.
- Download the file recovery executable.
- Run the executable to mount a recovery disk and extract the required files.
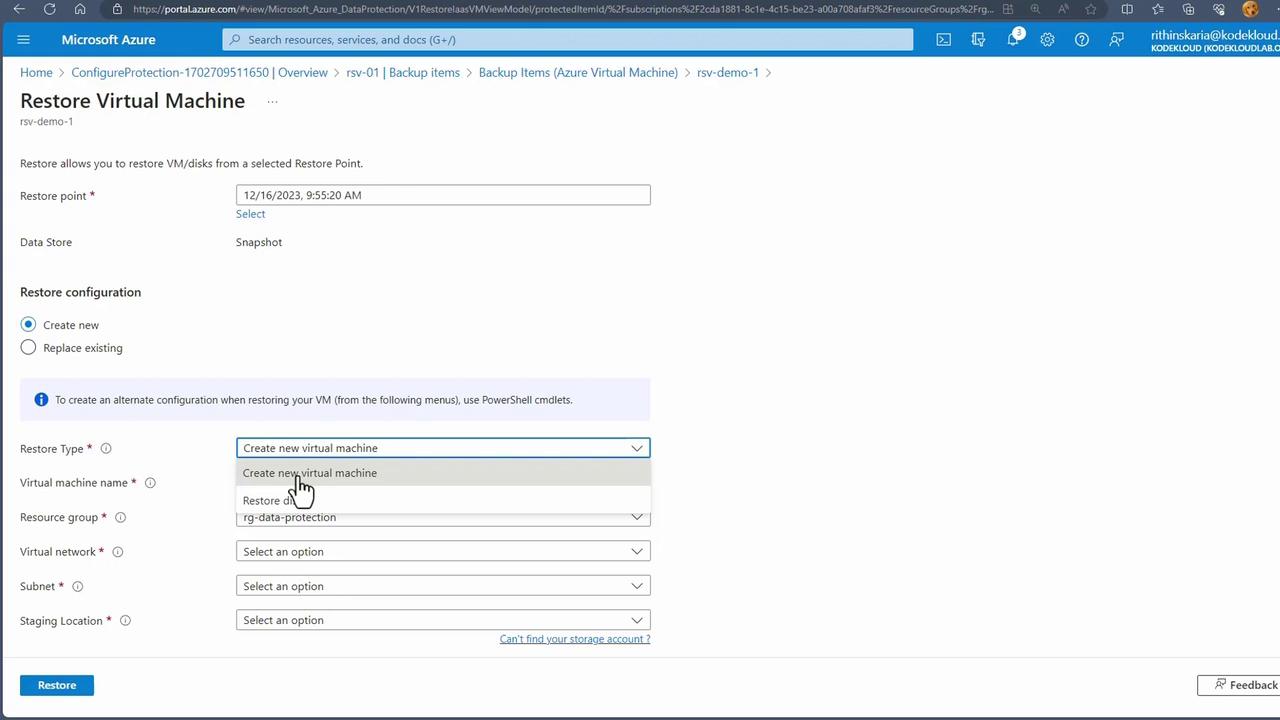
2. Virtual Machine Restore
For full VM restoration, you have multiple options:
- Create a new virtual machine from the chosen restore point. This option is ideal for testing recovery without affecting your production environment.
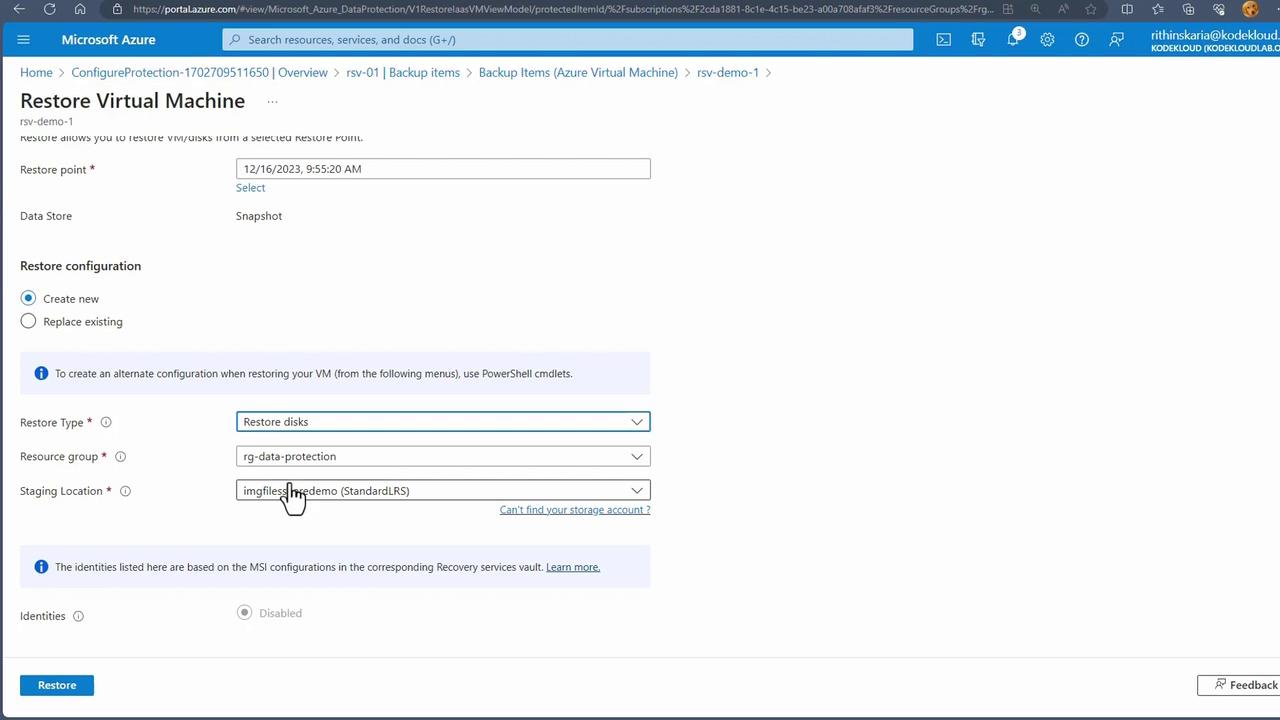
- Restore the disk to recover from corruption or issues. In this case, specify the resource group and location for a staging account; the restored disk appears as a VHD file in your storage account.
Select a restore point and then decide whether to use "Create New" or "Restore Disk" based on your scenario.
If you have an existing disk backup and wish to replace the disk, choose the "Replace Existing" option.
Additional restore details and options are available in the portal once the restore job is initiated.

Monitor the job status to determine when your new VM or restored disk is ready for use. You can later create a snapshot from the restored disk if needed.
Conclusion
In this guide, you learned how to configure Azure VM backups using the Recovery Services vault and the backup extension deployed on your VM. We covered setting up backup policies, initiating backup operations, and exploring restore options for both file-level and full VM recoveries.
Next Steps
Up next, explore how to back up and restore on-premises virtual machines to expand your data protection strategy.
Watch Video
Watch video content