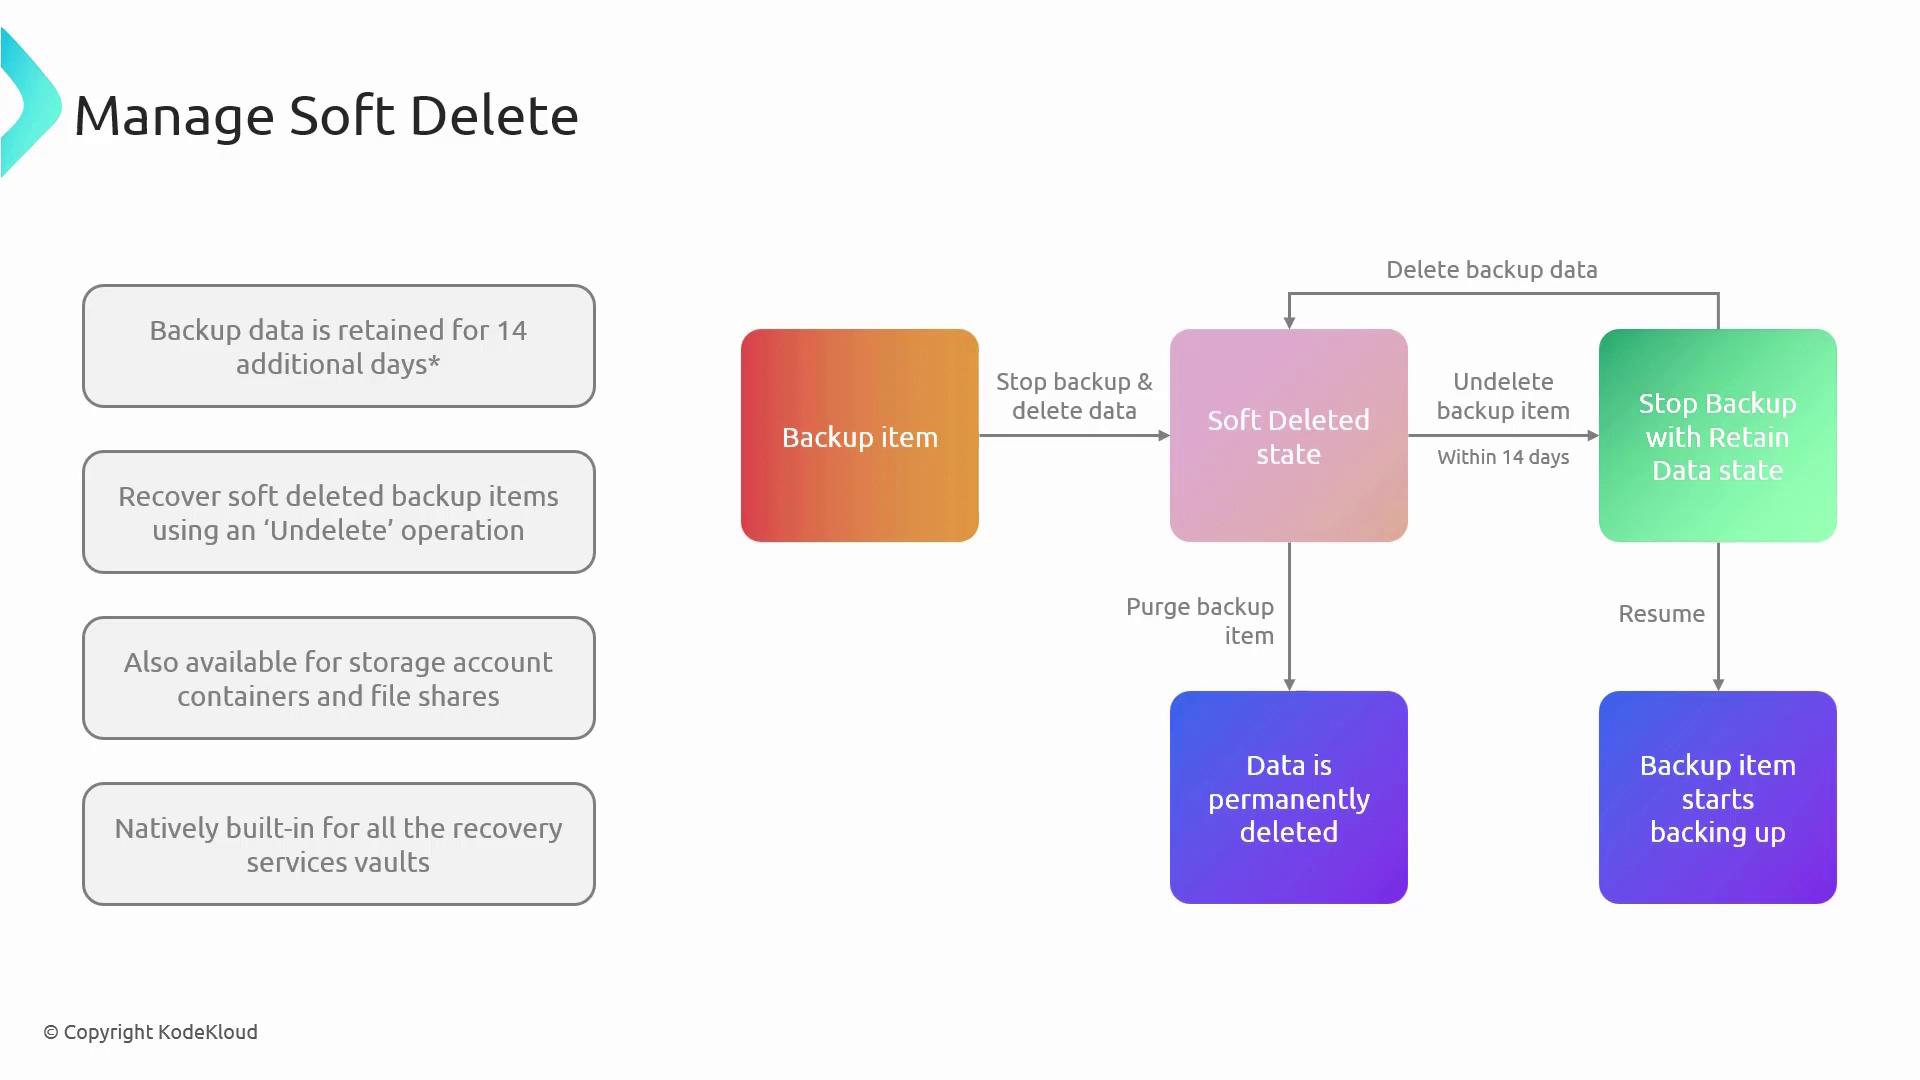
Understanding Soft Delete
When your data is securely backed up in Azure, it remains protected even if you decide to stop the backup process later. Instead of being permanently removed right away, the data enters a soft-deleted state—similar to a pause—providing you with a window to verify or recover any unintentionally deleted data. During this 14-day grace period, if you choose to stop the backup while retaining existing data, no new backups are created. However, your current backup data remains intact and available for restoration. If you later determine that the deletion should be final, you can execute a purge operation to permanently remove the data. Conversely, if you need to recover mistakenly deleted data, you can resume the backup, effectively restoring the soft-deleted backup as part of your backup strategy.While the default retention period is 14 days, you have the option to extend this period for an additional fee. This policy applies across all backup items protected within the Recovery Services vault, ensuring comprehensive data protection for both virtual machine backups and other workloads.
Configuring Soft Delete in the Azure Portal
To configure the Soft Delete feature, follow these steps:-
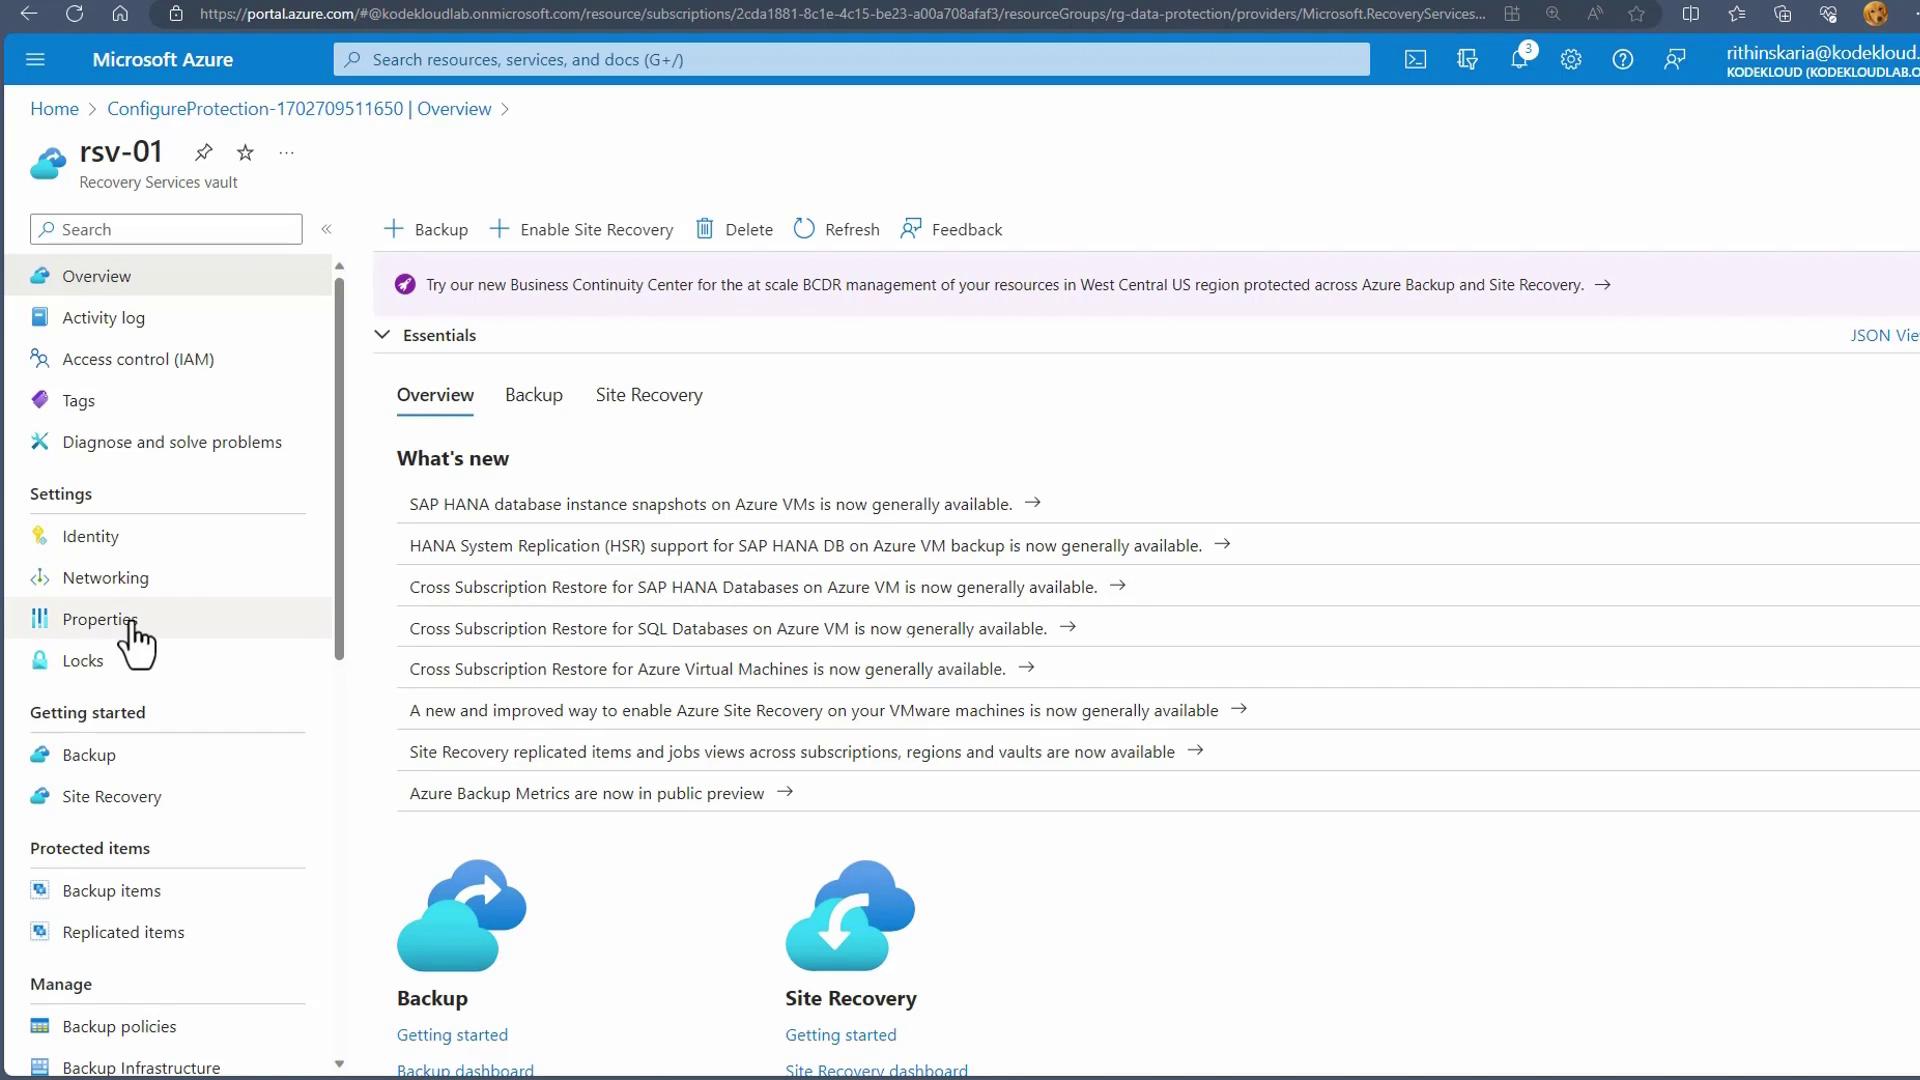
Navigate to your Recovery Services Vault:
Access the vault’s properties from the Azure portal, where you’ll find settings related to backup and site recovery. -
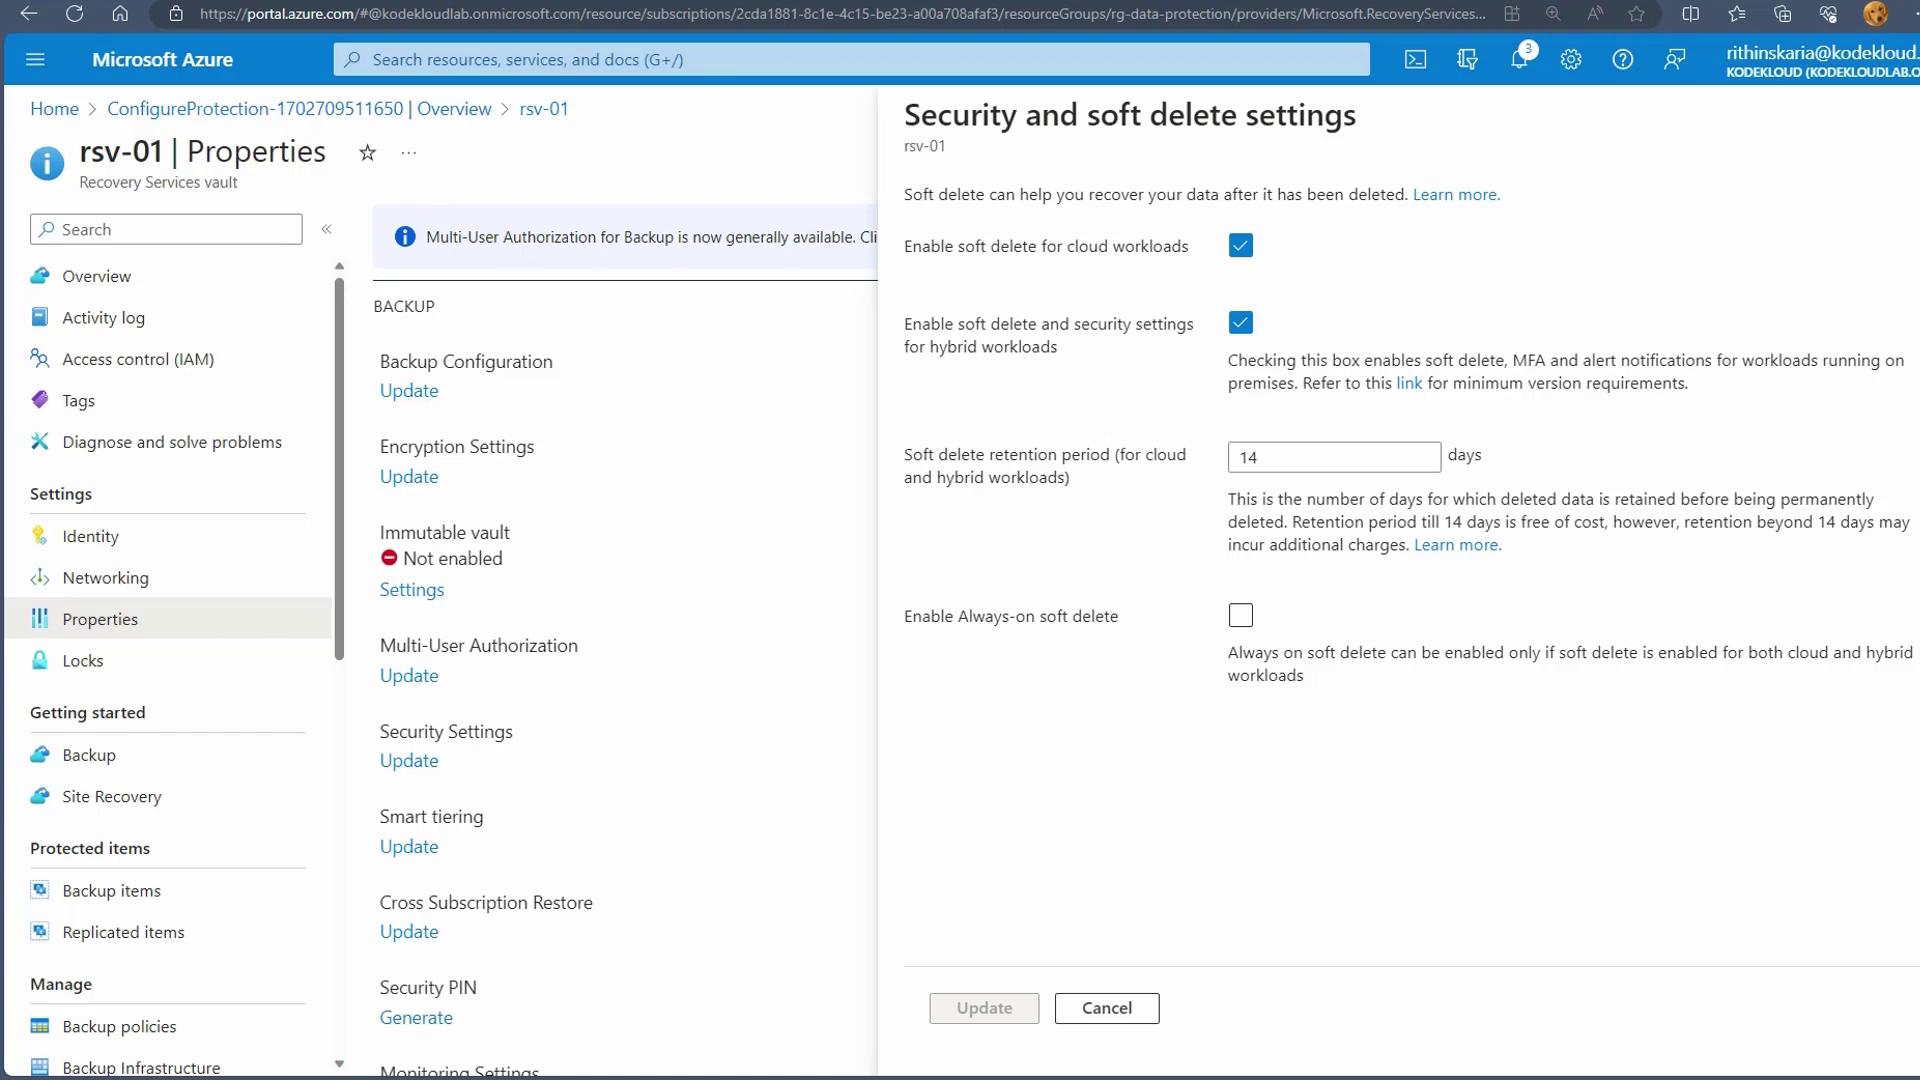
Access Security and Soft Delete Settings:
Within the vault’s properties, locate the “Security and soft delete settings” section. Here, you can enable the Soft Delete feature, adjust the retention period, and manage other related security options for both cloud and hybrid workloads. -
Adjust Settings as Needed:
Customize the soft delete configuration to align with your organizational data protection and disaster recovery strategies.
Integrating a robust backup management strategy with soft delete capabilities into your disaster recovery plan can greatly enhance your organization’s resilience against data loss.