[Updated] AZ-104: Microsoft Azure Administrator

Administer Data Protection

Azure Site Recovery

Azure Site Recovery (ASR) ensures uninterrupted business operations by replicating your virtual machine workloads to a secondary location in the event of a disaster. In this guide, you will learn how to set up disaster recovery for a single VM using ASR, along with how to perform a test failover to validate your configuration.

Consider a scenario where your primary source environment is in Region A. In this region, virtual machines operate within an availability set and use a virtual network (VNet). When these machines are enrolled in Azure Site Recovery, an extension is installed on each machine and a cache storage account is created in Region A to temporarily hold replication data. The target environment in Region B is configured with the necessary infrastructure components—including a VNet, subnet, and availability set.

Data is replicated from the source cache storage account to managed disks in Region B. During a primary site failure, new virtual machine instances are provisioned in the secondary region, and the replicated managed disks are attached. This ensures the machine continues to function in Region B with the complete data set from Region A.

The image illustrates Azure Site Recovery, showing a failover process from a source environment (Region A) to a target environment (Region B) with virtual networks, availability sets, and disks.

Note

ASR not only facilitates disaster recovery but can also be automated using REST APIs, health metrics, and load balancing solutions such as Azure Traffic Manager.


Configuring Disaster Recovery via the Azure Portal

In this section, we walk through configuring disaster recovery for a virtual machine named "RSV Demo 1" running IIS on a Windows server.

  1. Access the Virtual Machine Details

    Open the virtual machine details page in the Azure portal.

    The image shows a Microsoft Azure portal interface displaying details of a virtual machine named "rsv-demo-1," including its status, location, operating system, and IP address.

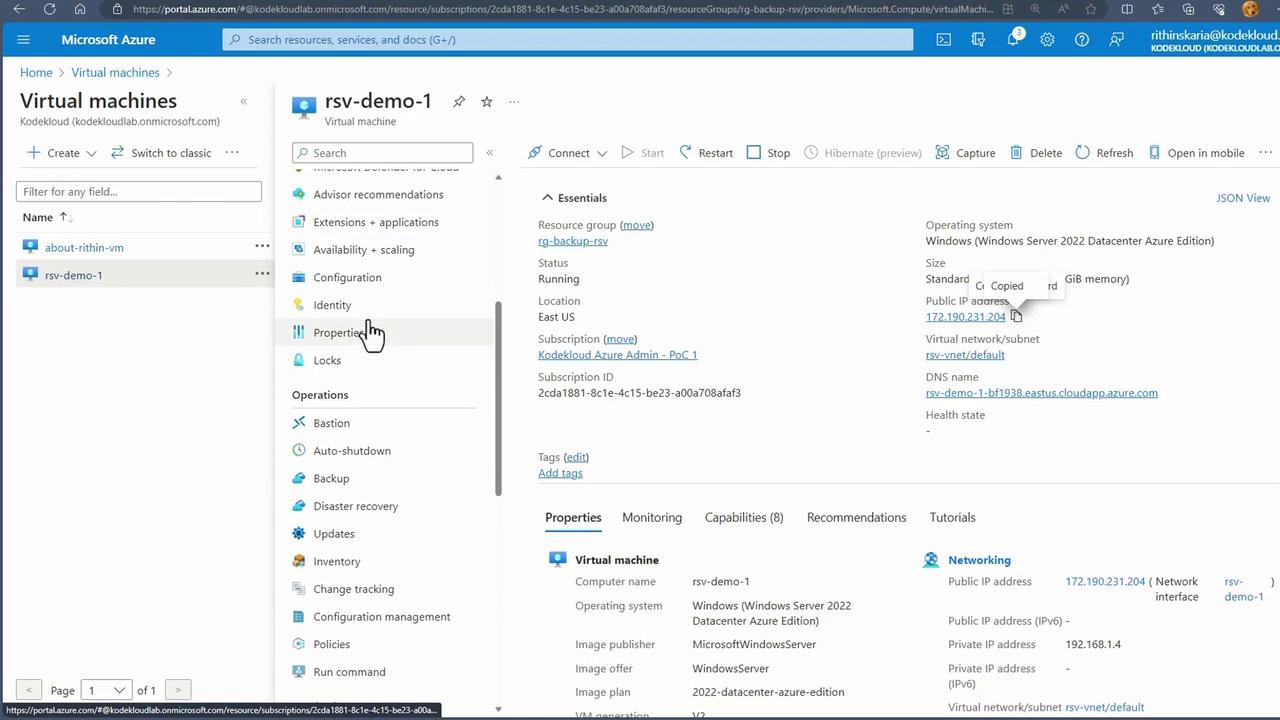
  2. Initiate Disaster Recovery Setup

    Click on the disaster recovery option. You can create a Recovery Services vault during this process. For this demonstration, review the disaster recovery map and settings.

    The image shows a Microsoft Azure portal interface for setting up disaster recovery for a virtual machine, with options for selecting a target region and a world map indicating regions.

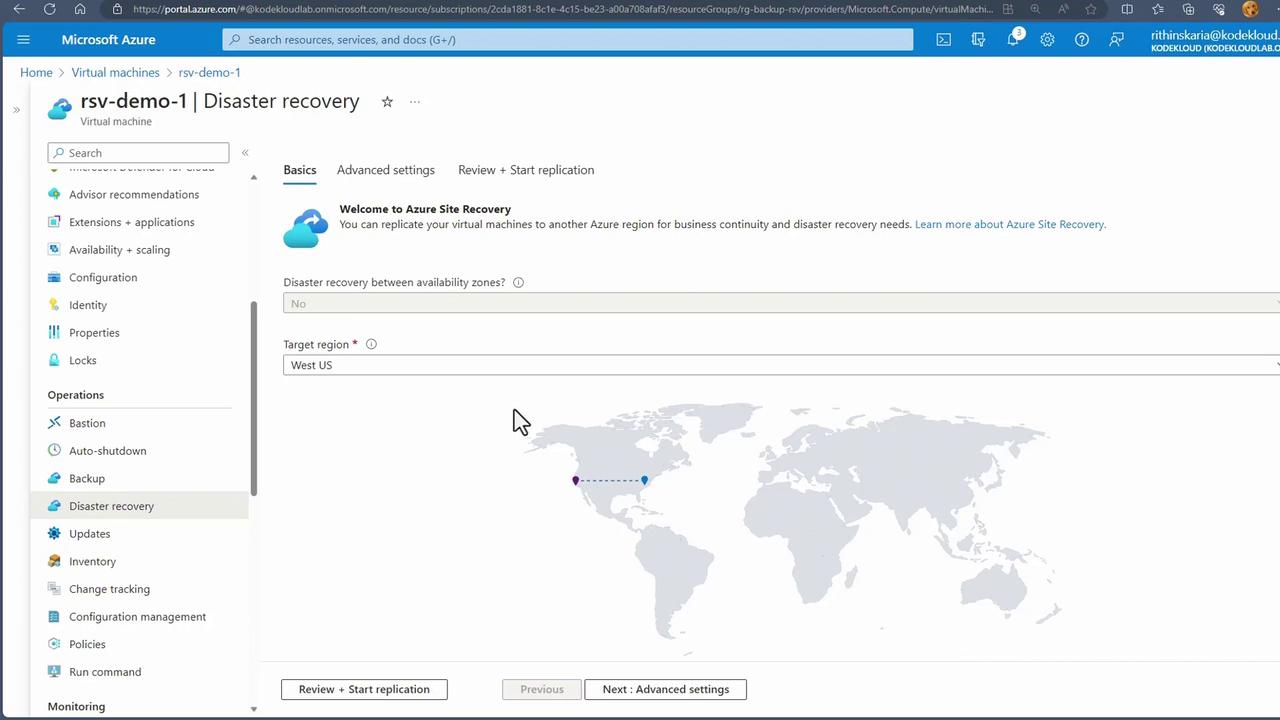
  3. Select the Target Region

    Choose a target region—for example, West US if the source is located in East US. In the advanced settings, Azure creates the necessary infrastructure (resource groups, virtual networks, and availability sets) in the target region. The target resource group may be annotated with an "ASR" suffix (e.g., "RG Backup RSV ASR").

    The image shows a Microsoft Azure portal interface for configuring disaster recovery settings for a virtual machine. It includes options for target settings, capacity reservation, and replication review.

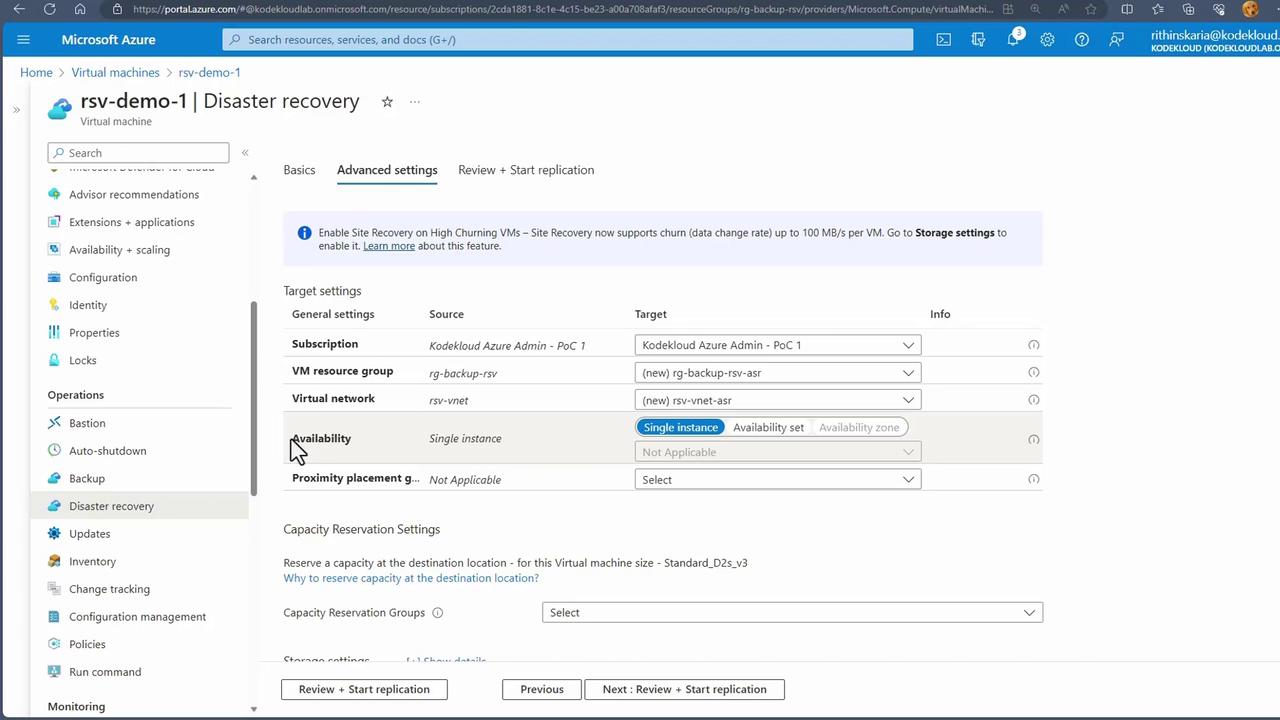
  4. Review and Configure Replication Settings

    Examine the storage options, replication settings, and extension management. Storage settings define the cache storage account. Replication options let you choose the recovery services vault, vault resource group, and replication policy. Extension settings manage the ASR extension on the virtual machine.
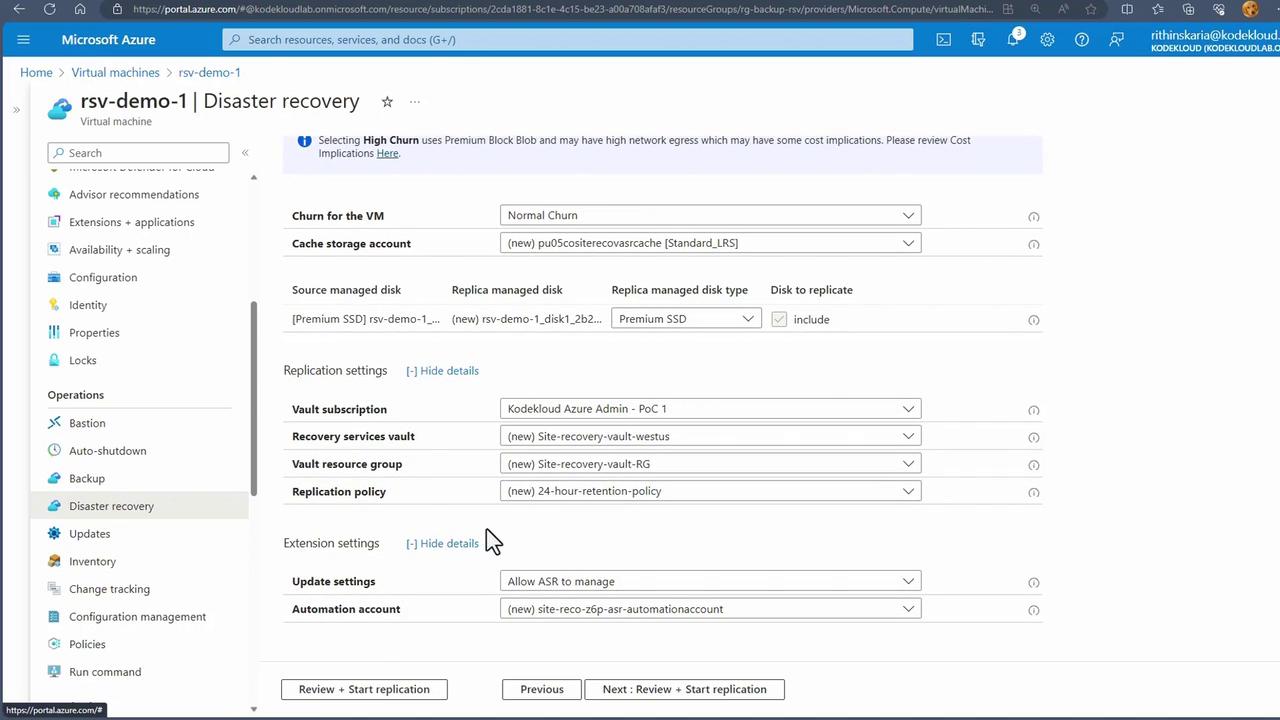
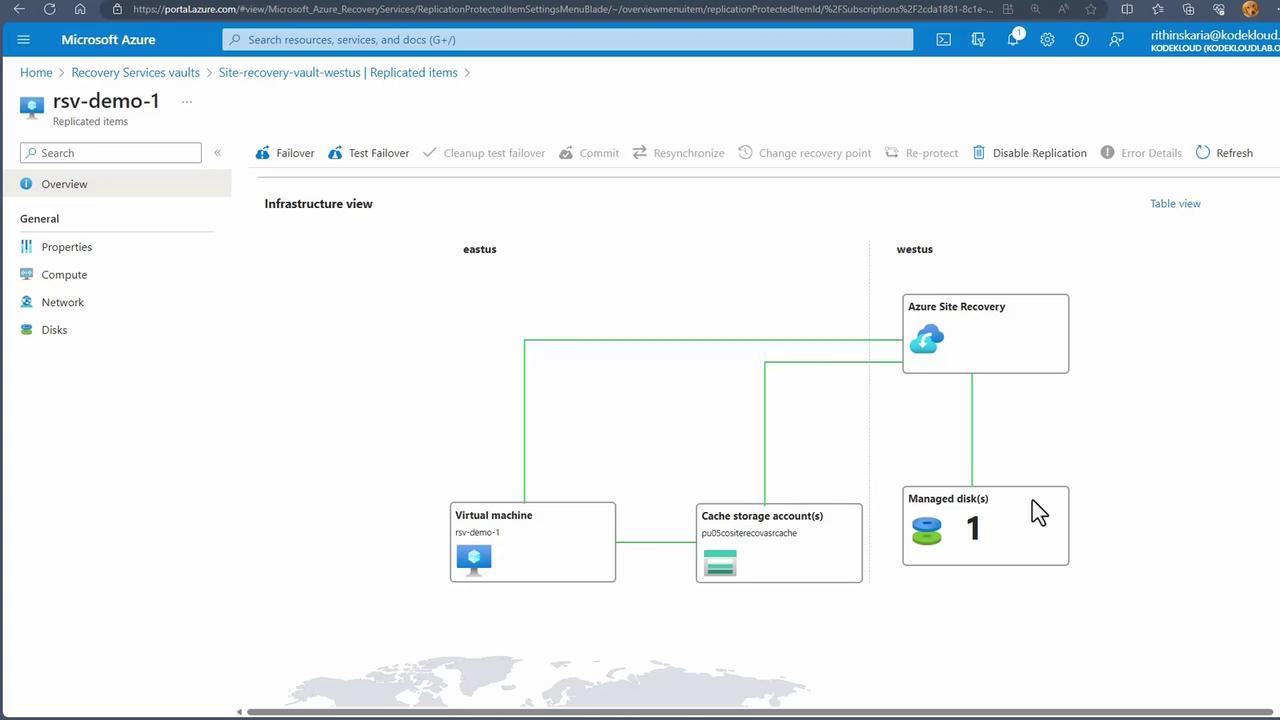
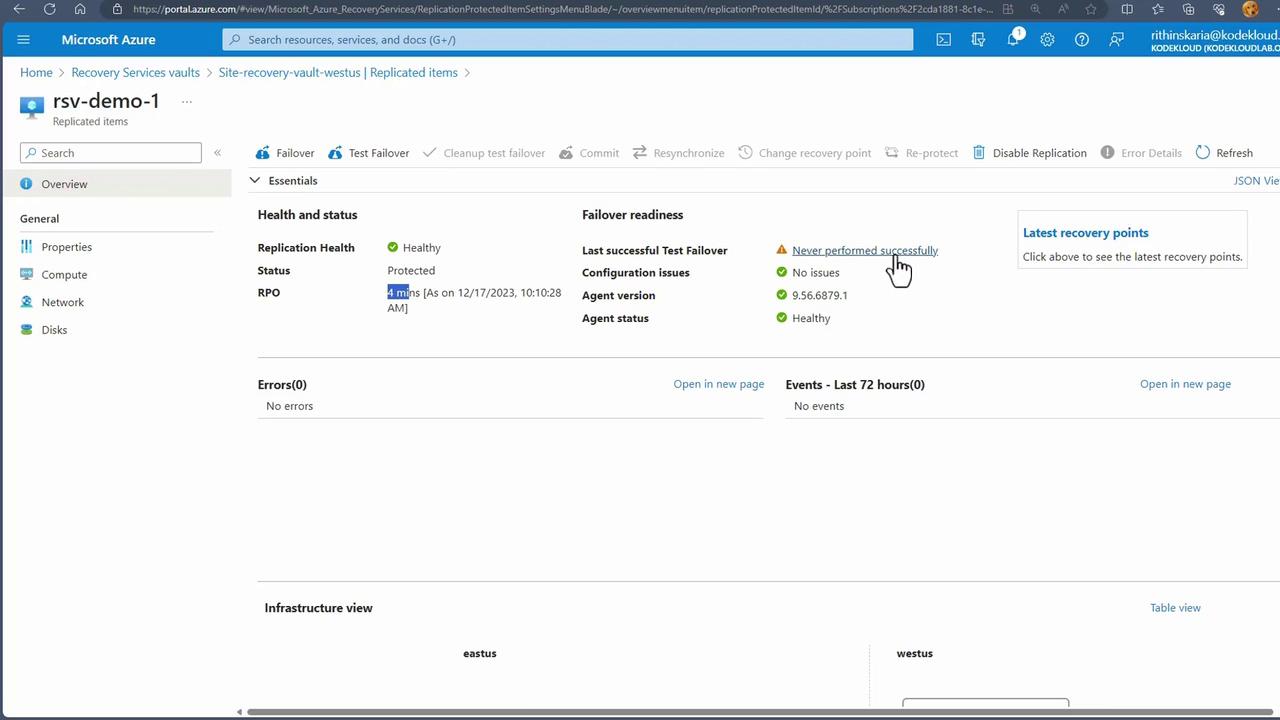
    The image shows a Microsoft Azure portal interface for configuring disaster recovery settings for a virtual machine. It includes options for churn settings, cache storage, replication settings, and extension settings.

  5. Start Replication

    Click "Review and Start Replication" to see details such as the source disk, replica disk (configured as premium SSD), and cache storage account. Confirm by clicking "Start Replication" to trigger the creation of resources in West US. The replication of data to the target region will commence once the resources are provisioned.

After the replication process completes, you can monitor key metrics like the Recovery Point Objective (RPO), replication health, and details of the underlying infrastructure.

The image shows a Microsoft Azure portal interface displaying an infrastructure view of a recovery services vault, with components like a virtual machine, cache storage account, Azure Site Recovery, and managed disks.

If you have not yet performed a test failover, continue to the next section.


Performing a Test Failover

Conducting a test failover validates that your disaster recovery setup functions correctly without affecting your production environment.

  1. Initiate the Test Failover

    In the Azure portal, select the test failover option.

    The image shows a Microsoft Azure portal interface displaying the status of a recovery services vault named "rsv-demo-1." It indicates the replication health as healthy, with no errors, but notes that a test failover has never been performed successfully.

  2. Configure Test Failover Settings

    • Choose the source region (e.g., East US) and the destination (e.g., West US).
    • Select the appropriate recovery point; typically, the latest recovery point with application consistency is recommended.
    • Pick the ASR virtual network that was created during the initial setup.
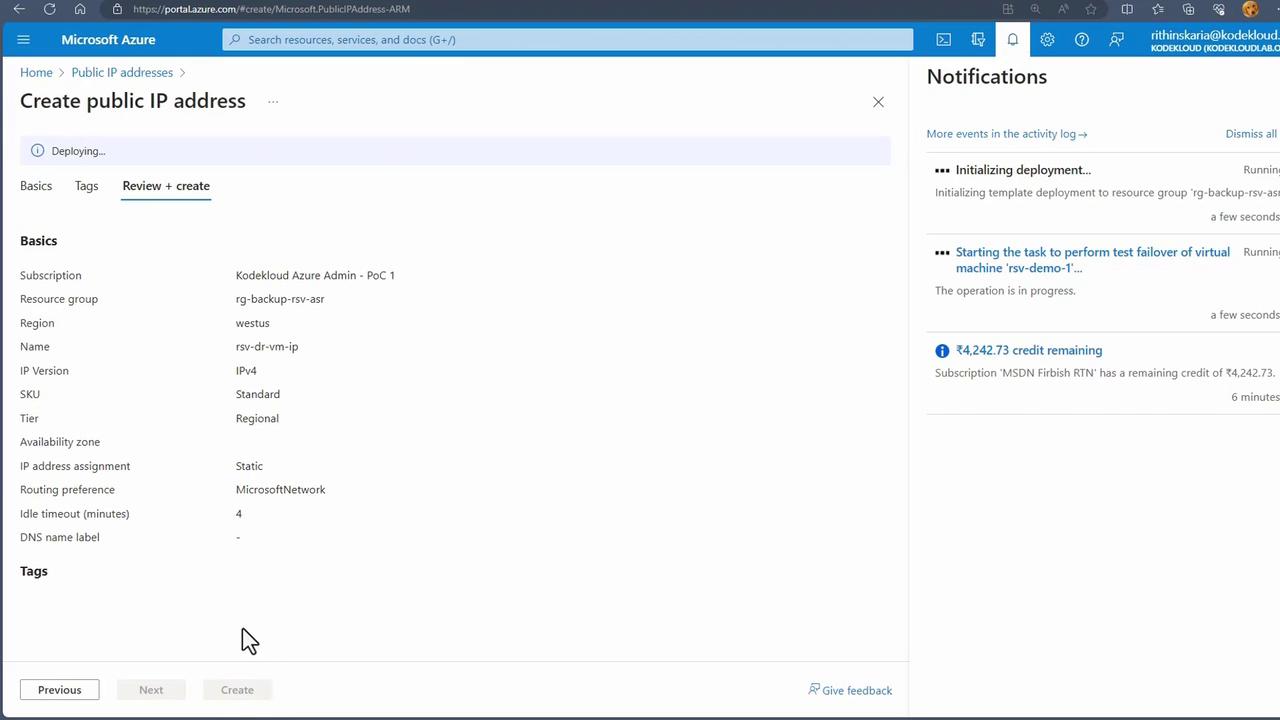
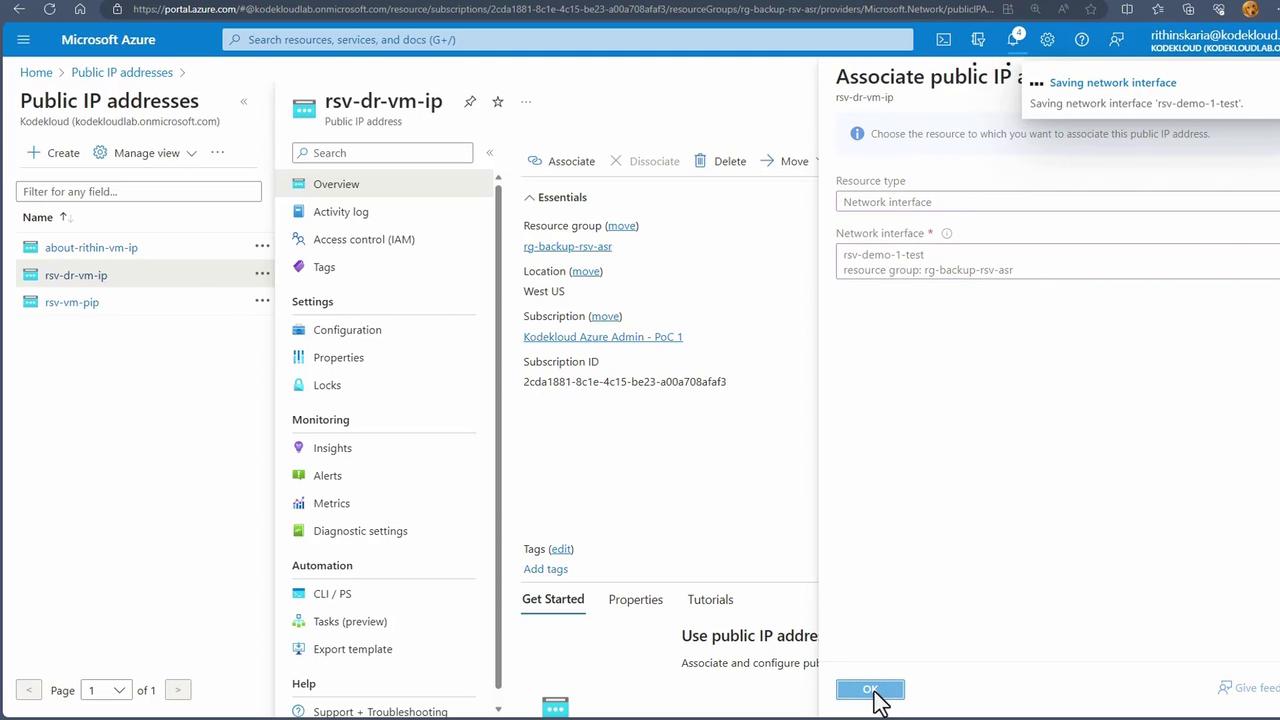
  3. Provisioning a Temporary Virtual Machine

    The test failover process creates a temporary virtual machine in the target region, attaching the relevant managed disk. To ensure connectivity, a public IP address must be available. Since this is not created automatically, you need to create a new public IP.

    The image shows a Microsoft Azure portal screen for creating a public IP address, with deployment details and notifications on the right side.

    Create a public IP (e.g., "RSVDRVMIP") in your ASR resource group and allow the test failover process to continue.

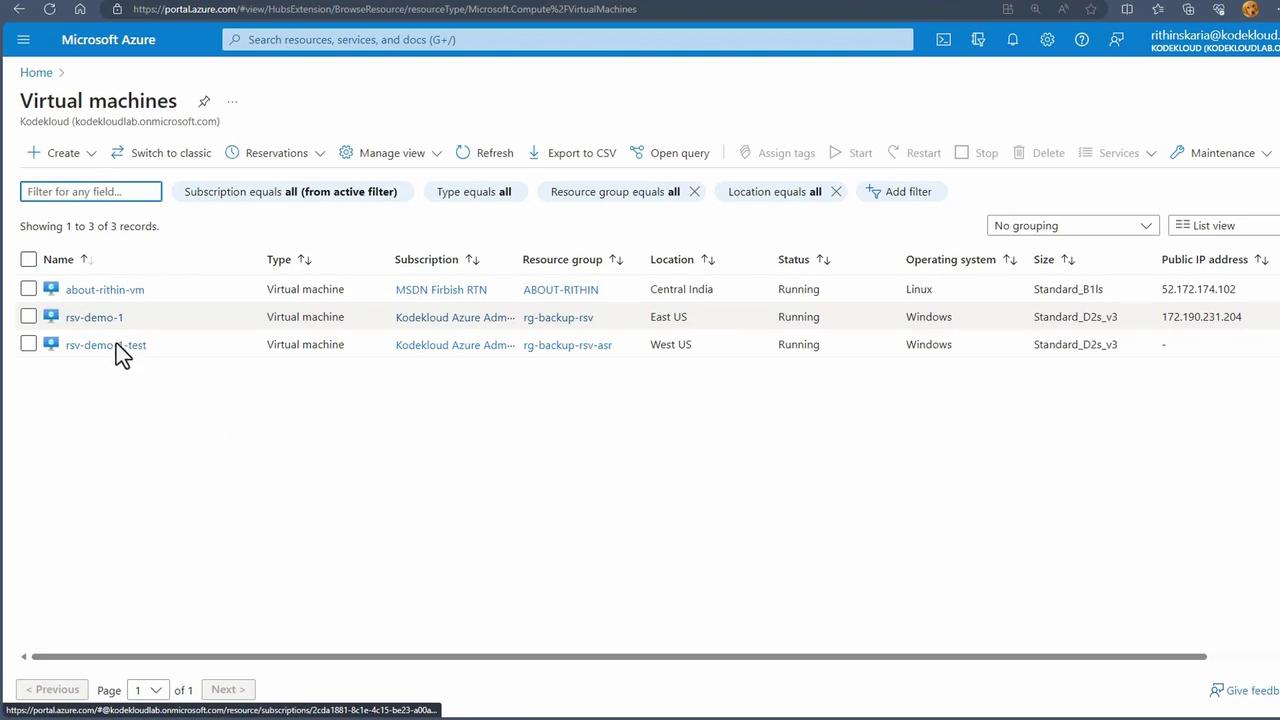
  4. Verify the Test VM Deployment

    After the virtual machine starts, monitor its status in the virtual machines list.

    The image shows a Microsoft Azure portal interface displaying a list of virtual machines, including details like name, type, subscription, location, status, operating system, size, and public IP address.

  5. Set Up Network Connectivity

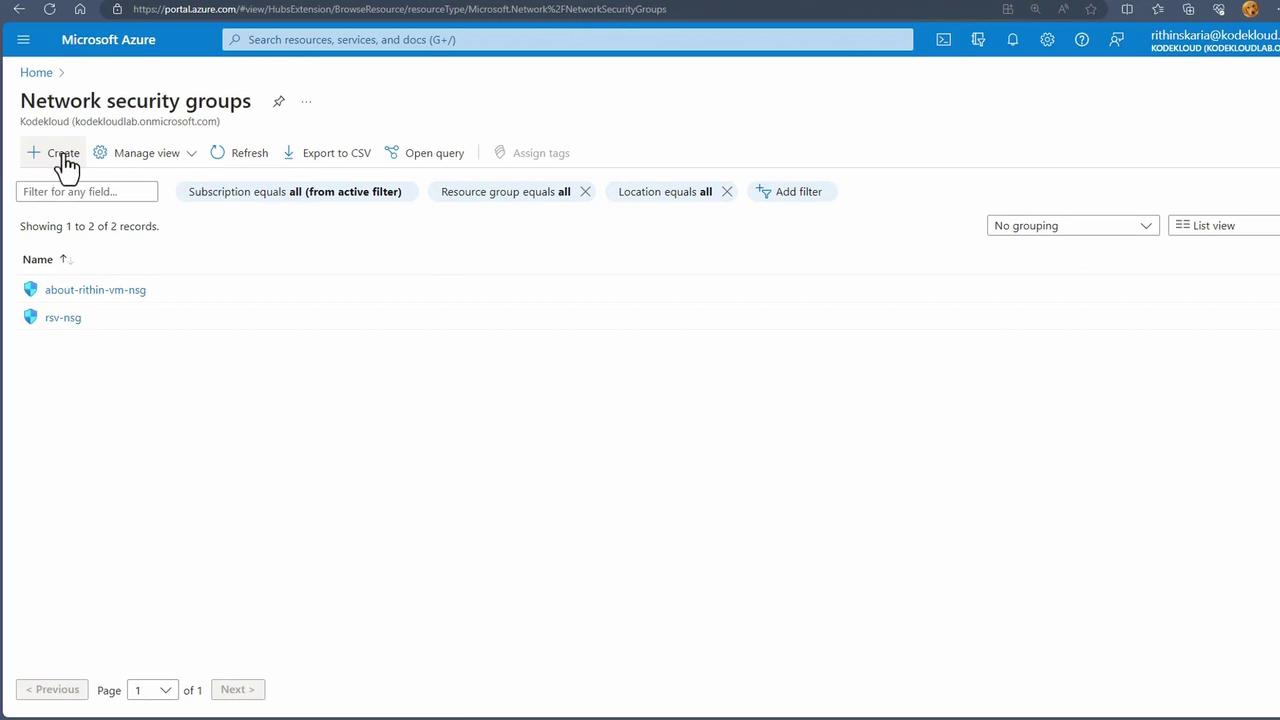
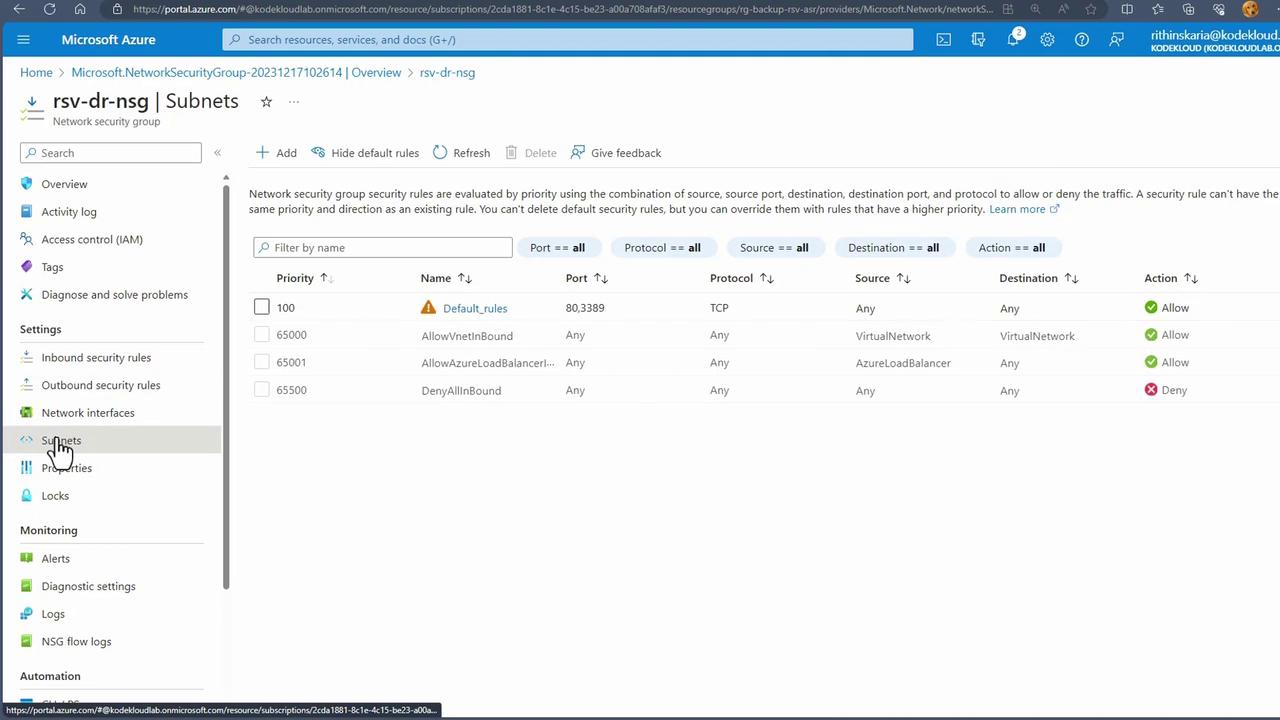
    If no Network Security Group (NSG) is attached to the test VM, proceed as follows:

    • Create an NSG in the ASR resource group.
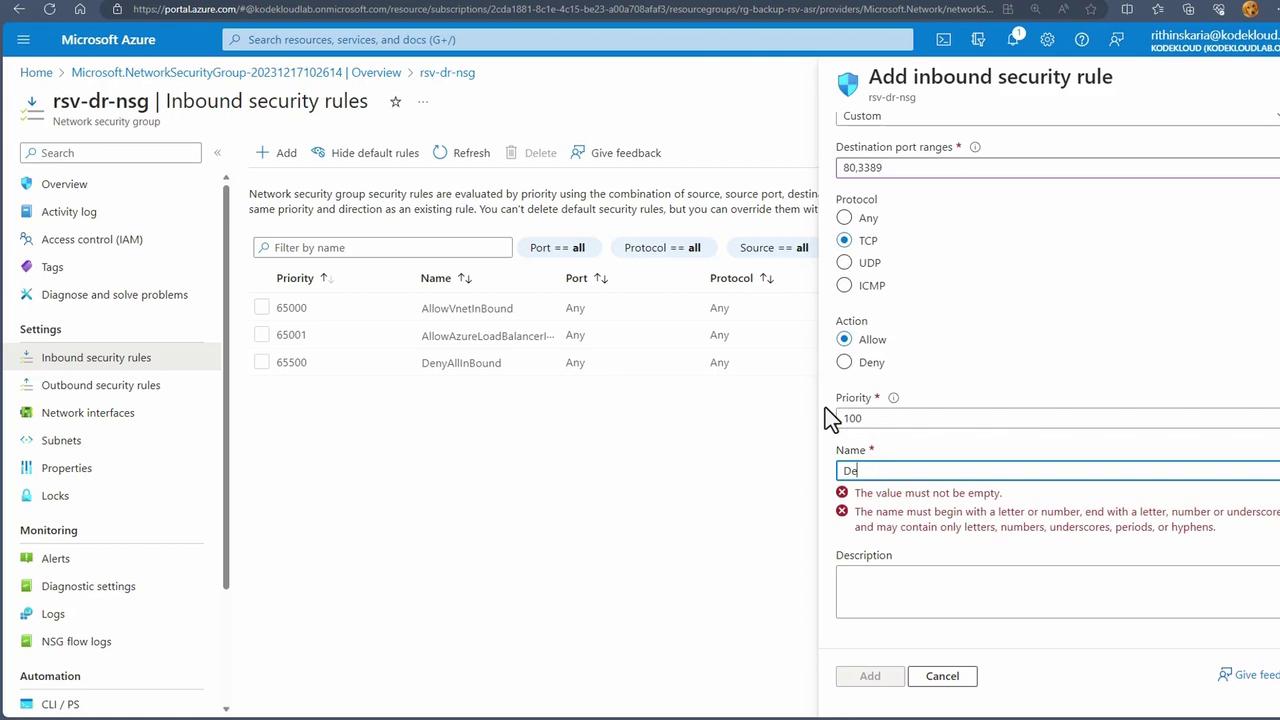
    • Add inbound security rules for required ports (e.g., TCP ports 80 and 3389).

    The image shows the Microsoft Azure portal displaying a list of network security groups. There are two entries listed: "about-rithin-vm-nsg" and "rsv-nsg."

    Next, configure the inbound security rules.

    The image shows a Microsoft Azure portal interface for creating a network security group, with fields for project and instance details such as subscription, resource group, name, and region.

    Then add the inbound security rules.

    The image shows a Microsoft Azure portal interface for managing inbound security rules in a network security group, with a form open to add a new inbound security rule.

  6. Associate NSG and Public IP

    • Associate the NSG with the DR subnet so that any VM in the subnet inherits the security rules.

      The image shows a Microsoft Azure portal interface displaying network security group settings, including a list of security rules with details like priority, name, port, protocol, source, destination, and action.

    • Finally, associate the newly created public IP address with the test VM's network interface.

      The image shows a Microsoft Azure portal interface where a public IP address is being associated with a network interface. The interface displays details like resource group, location, and subscription information.

  7. Verify the Test Failover

    Access the public IP address via a browser. If you see the IIS page (identical to production), the test failover is confirmed successful.

Test Failover Tip

A test failover does not impact your production environment. It enables you to validate that all systems, from network connectivity to replication accuracy, are functioning as expected.


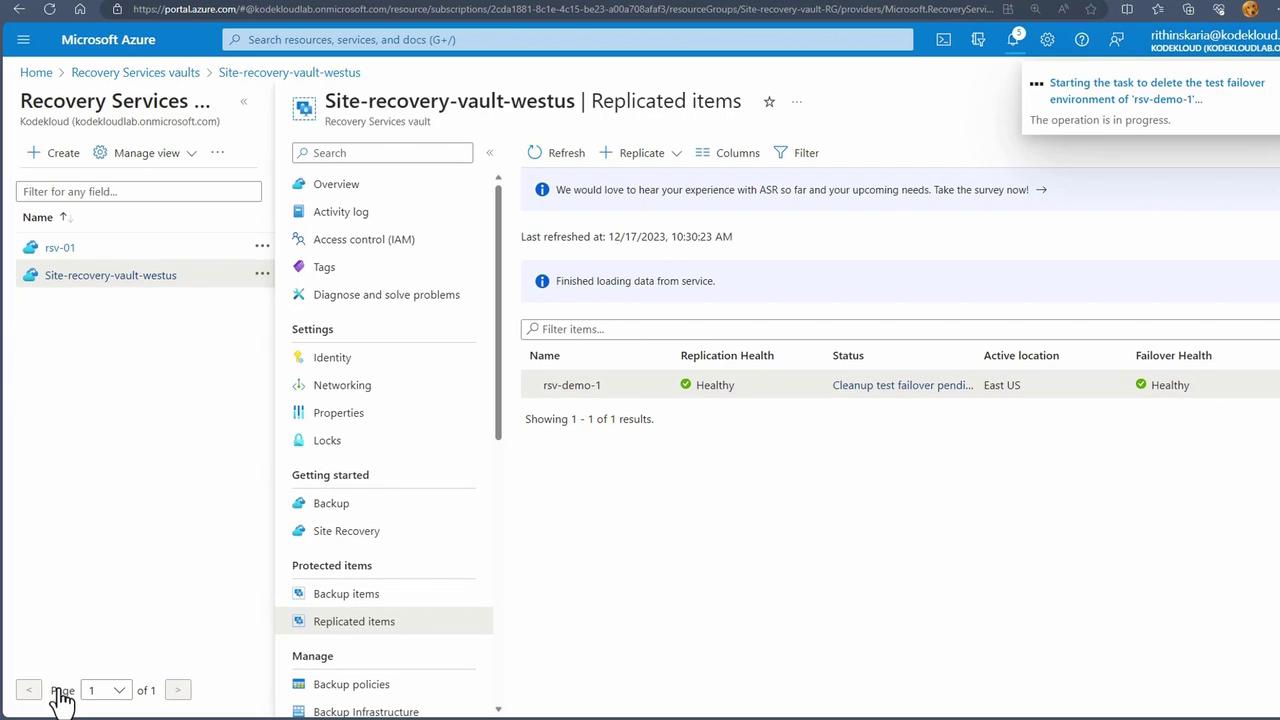
Completing the Disaster Recovery Test

After a successful test failover, it is essential to clean up the test environment:

  1. Navigate to the replicated items in the Azure portal.
  2. Select "Clean Up Test Failover Pending" to remove the test configurations.
  3. Confirm by deleting the test virtual machine when prompted.

The image shows a Microsoft Azure portal interface displaying the "Site-recovery-vault-westus" with details about replicated items, including replication health and status. A notification indicates a task to delete a test failover environment is in progress.

Following cleanup, if a full production failover is required, the option will be available once the test process is complete. A full failover permanently transfers workloads to the disaster recovery region. When the primary region is restored, you can reverse the process by re-synchronizing and committing the changes to switch back to the primary region.

Other advanced features of ASR include recovery plans, automation, and integration with Azure Traffic Manager. However, mastering the failover process is key for certification and ensuring business continuity.

This concludes our lesson on setting up and testing Azure Site Recovery for robust disaster recovery and business continuity in Microsoft Azure.

Watch Video

Watch video content

Previous
Manage Soft Delete