- Bulk Create: Upload a CSV file to rapidly add multiple new users to your directory. This is ideal for onboarding large groups of employees, ensuring a smooth setup from day one.
- Bulk Invite: Easily invite external users such as contractors, vendors, or partners. This feature sends an invitation, enabling users to sign in using either their existing Microsoft account or Microsoft Entra ID credentials.
- Bulk Delete: Remove multiple user accounts at once to keep your directory updated. This helps maintain an active directory with only current and relevant user accounts.
- Download Users: Export user data for reporting, auditing, or archival needs to promote transparency and effective record keeping.
Accessing Bulk Operations in Microsoft Entra ID
After logging into Microsoft Entra ID, go to the Users section. At the top of the page, you will find options for bulk operations including Bulk Create, Bulk Invite, and Bulk Delete. With recent updates, the Download Users option is also available here.Using Bulk Create
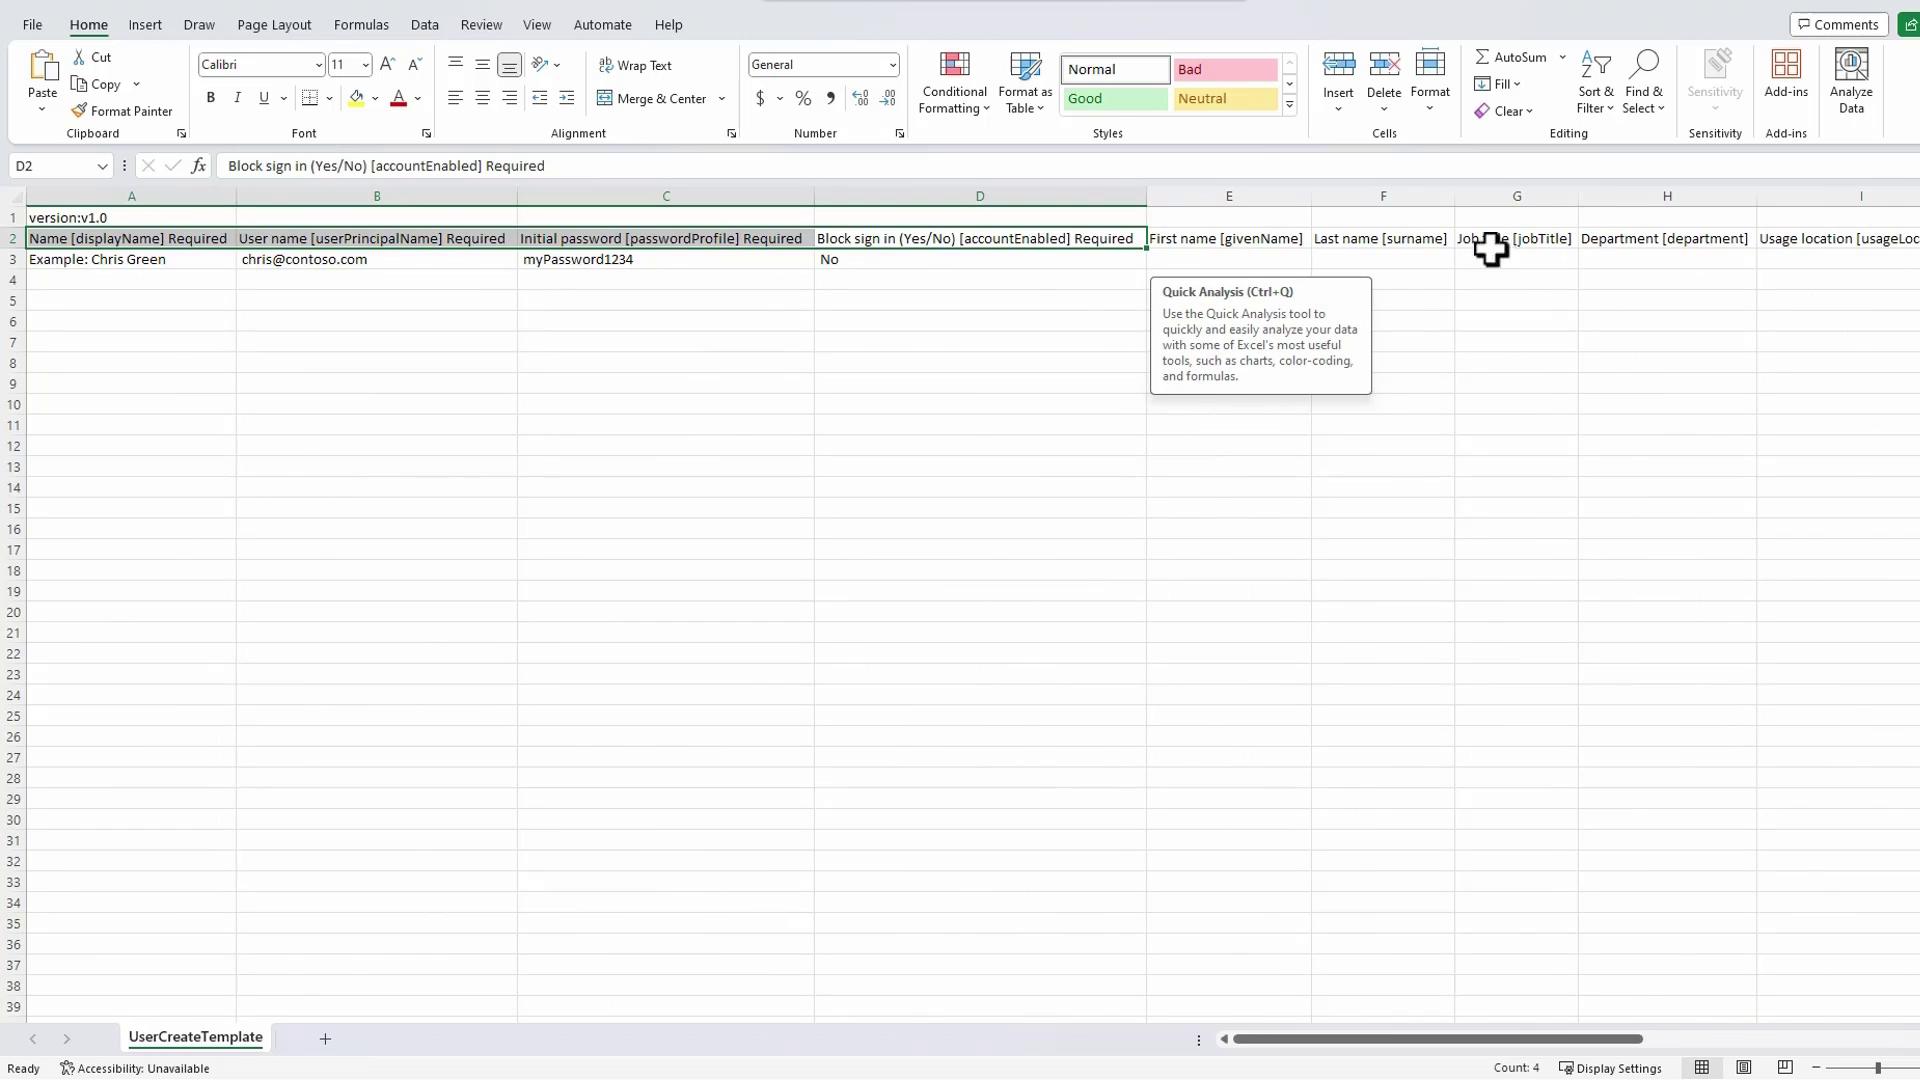
Start by selecting the Bulk Create option from the dropdown menu and download the CSV template provided.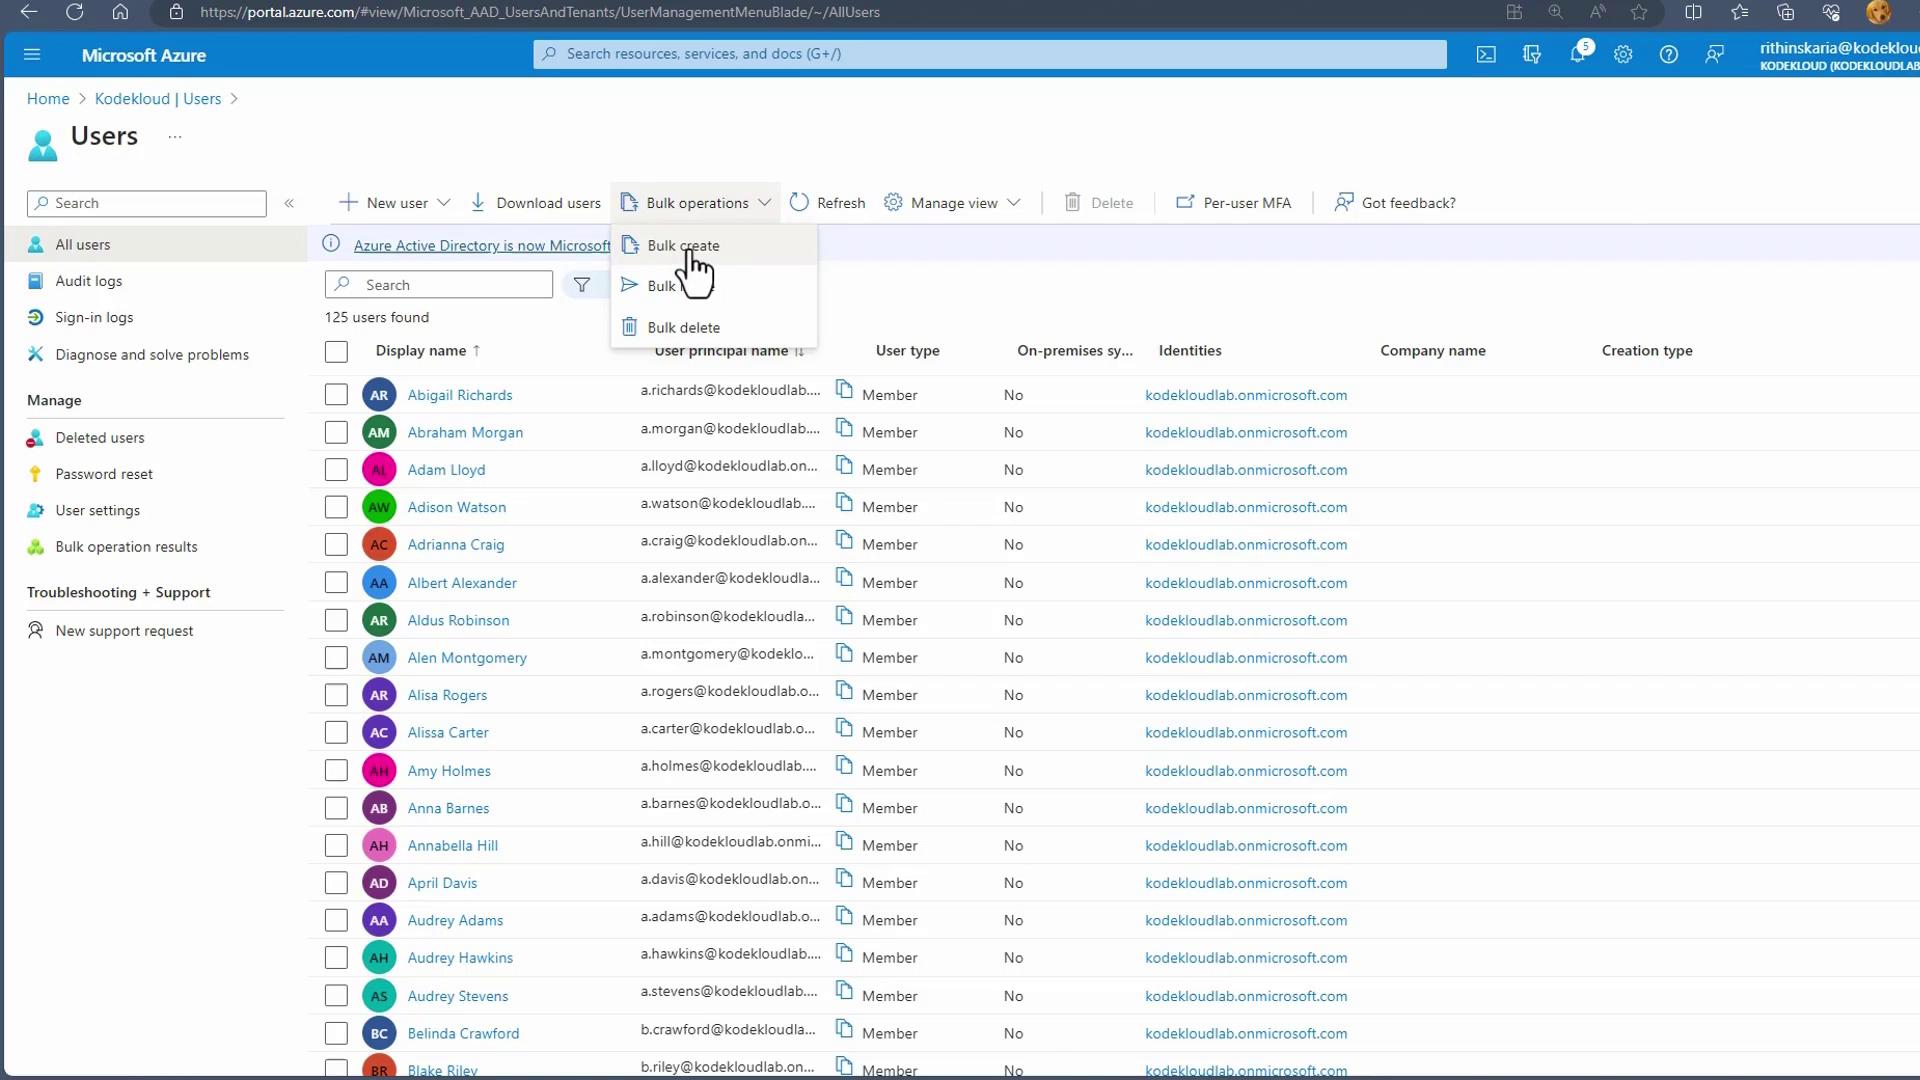
Using Bulk Invite
Bulk Invite follows a similar process to Bulk Create but simplifies user inclusion by eliminating the need for a password. Instead, invited users can sign in with their existing Microsoft account or Microsoft Entra ID credentials. The CSV template for Bulk Invite requires only the email address for each user and an optional redirection URL. After uploading your invitation CSV file, the system sends an invitation email to each address. Users with an existing Microsoft account can use their current password; new users can register during the invitation process. Administrators also have the option to customize the invitation message or manually copy the invitation link if required—for example, when users do not have an Exchange license.Take advantage of the Bulk Invite feature to reduce onboarding times for external partners and ensure secure access to your tenant.
Using Bulk Delete
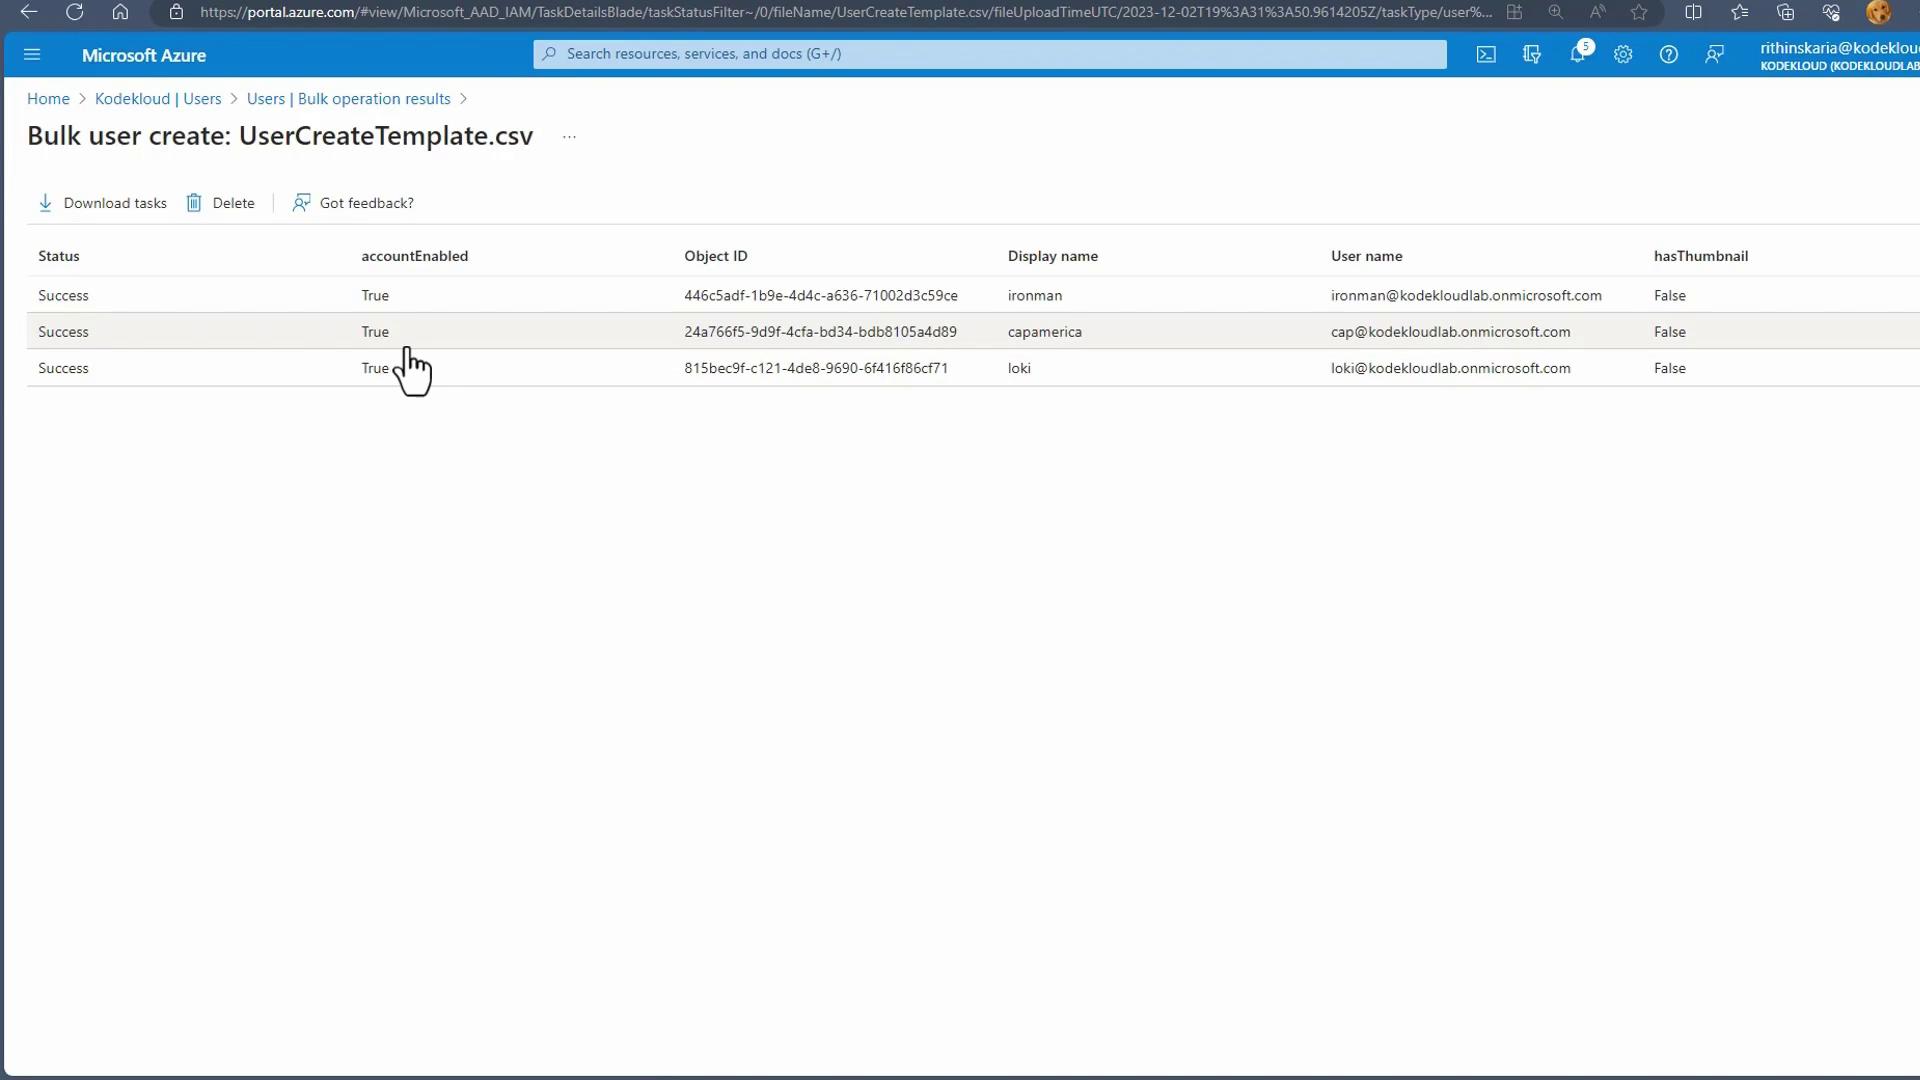
Bulk Delete lets you efficiently remove multiple user accounts. To use this feature, download the CSV template provided for deletion, which requires only the User Principal Name (UPN) for each account you intend to delete. For example, if you need to delete the users created earlier, copy their UPNs from the Bulk Create CSV file into the Bulk Delete template, save the file, and then upload it to the portal. After confirming the deletion prompt, click Submit. Review the results of the bulk deletion in the Bulk Operation Results section. The screenshot below confirms that the deletion operation was completed successfully with three successful requests.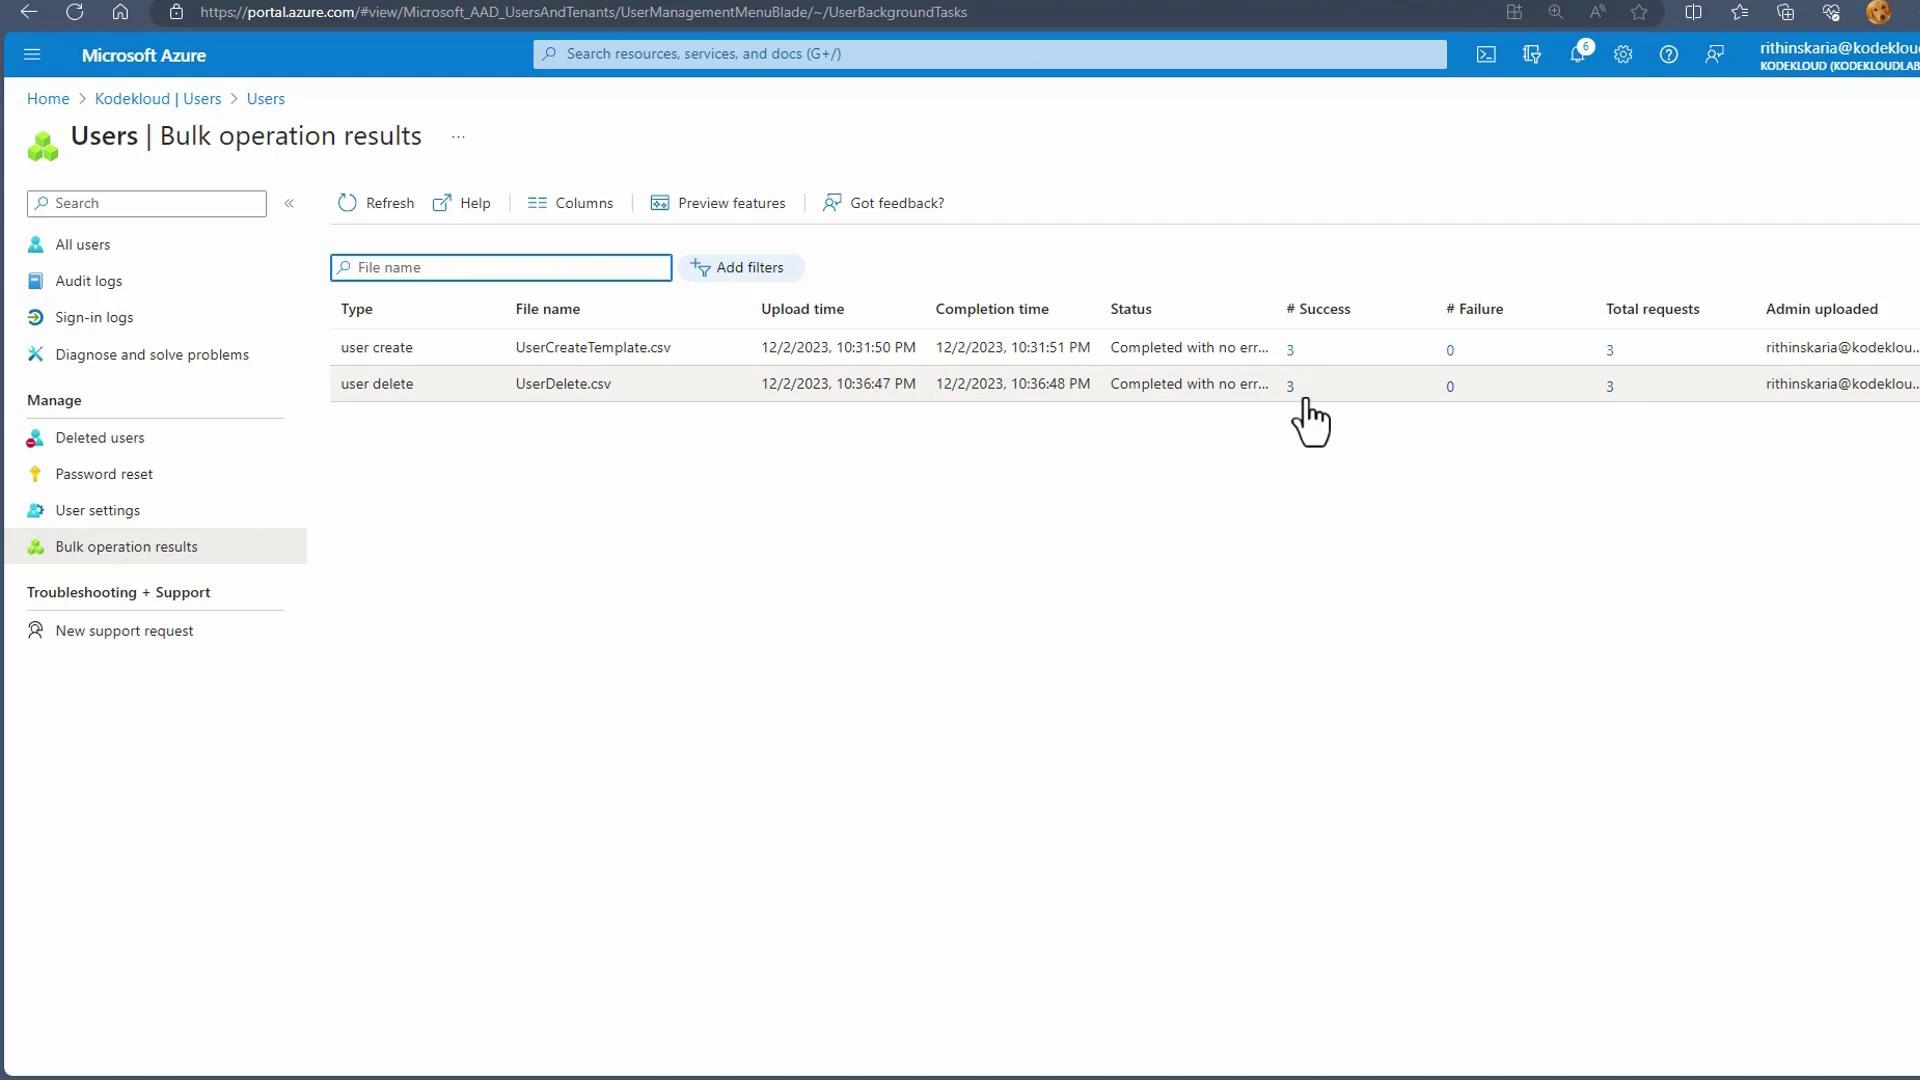
Invitation Email Preview
The invitation email sent out during a Bulk Invite includes your organization’s name, tenant information, and an option for the user to accept the invitation. Once a user clicks Accept Invitation, they gain access to your tenant.With these streamlined steps, you are now equipped to manage bulk operations in Microsoft Entra ID effectively. Up next, we will explore best practices for Group Account management. Explore more detailed guides at Microsoft Entra ID documentation. Happy managing!