Comparing Virtual Machines and Containers
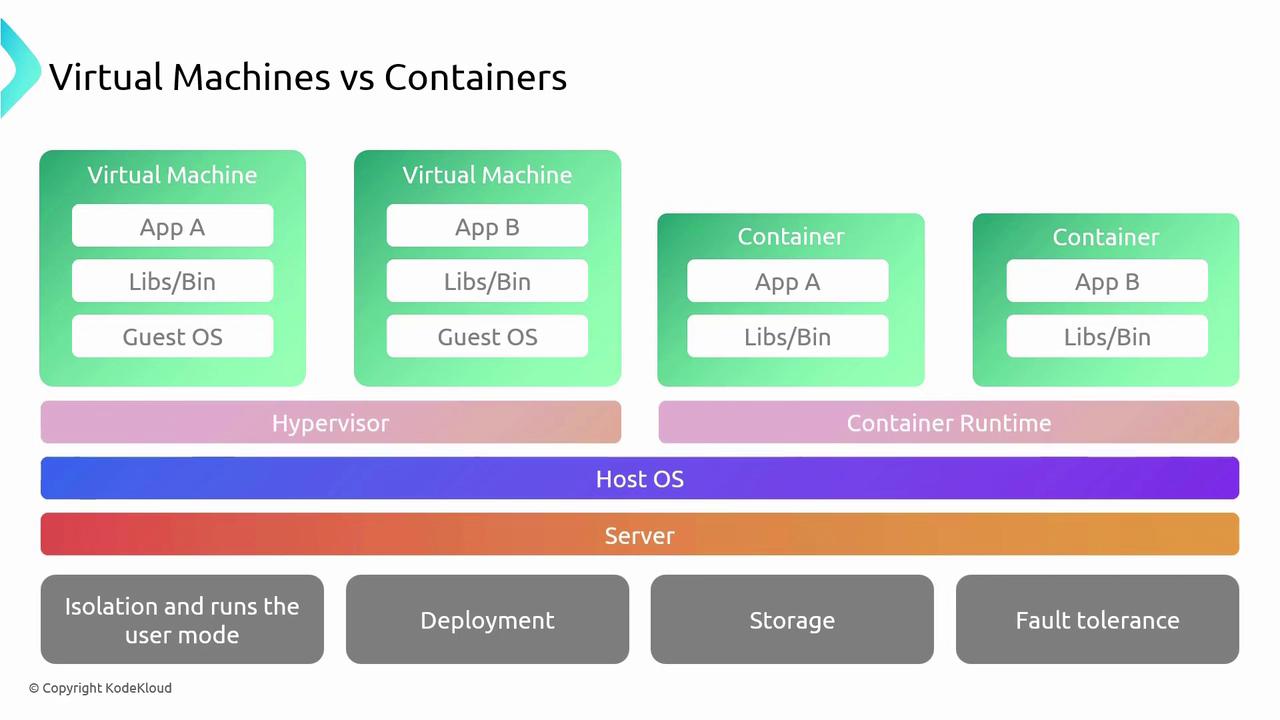
In cloud computing, both traditional VMs and modern containers serve as ways to run applications, but they follow distinct models.Virtual Machines
Virtual machines are a well-established method of virtualization. A typical VM setup includes:- Hypervisor: A server hosting the hypervisor.
- Guest Operating System: Each VM runs its own guest OS.
- Application Environment: The allocated OS contains the application along with its necessary binaries and libraries.
Containers
Containers deliver a more agile and lightweight solution by:- Sharing the Host Kernel: Containers use the host OS kernel while running in isolated user mode environments.
- Packaging Dependencies: Each container packages the application and its dependencies (libraries and binaries) without bundling an entire operating system.
- Efficient Runtime: Managed by a container runtime, containers are significantly smaller and faster to start compared to VMs.
Detailed Comparison
| Feature | Virtual Machines | Containers |
|---|---|---|
| Isolation & Execution | Hardware-level isolation using a hypervisor and guest OS | OS-level isolation with the host OS kernel simplifies management |
| Deployment | Involves provisioning an entire OS, configuring storage, and networking | Image-based deployment that encapsulates all dependencies for rapid scaling |
| Storage | Uses block storage with its own file system | Supports ephemeral storage or persistent storage via volumes |
| Fault Tolerance | Achieved through replication, failover clustering, or availability sets | Utilizes orchestration tools (e.g., Kubernetes) for automatic recovery |
Containers provide faster startup times and efficient resource usage, which makes them ideal for dynamic scaling and microservices architectures compared to traditional VMs.
Azure Container Instances Overview
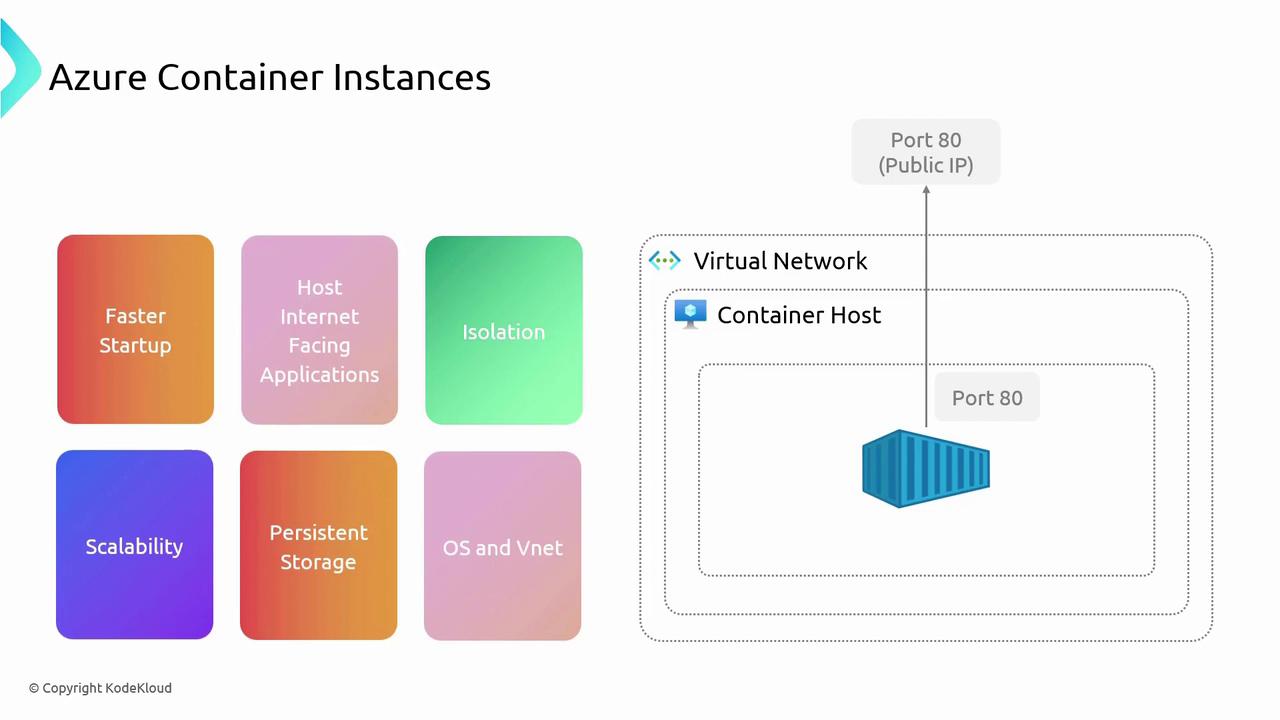
Azure Container Instances abstracts the infrastructure complexity, allowing you to run containerized applications without managing VMs. Under the hood, ACI leverages a virtual network and container host, equipped with a container runtime that simplifies container execution. Key advantages of ACI include:- Fast Startup:
Containers on ACI start in seconds, enabling rapid deployments—ideal for web applications, APIs, and event-driven workloads. - Strong Isolation:
Each container instance operates in an isolated environment, ensuring processes remain secure and independent. - Scalability:
ACI supports dynamic scaling by increasing the number of container instances as workload demands rise. - Persistent Storage:
ACI allows you to mount Azure Storage volumes (such as Azure Files or Azure Disk) to facilitate persistent storage even though container instances are typically ephemeral. - Flexible Networking:
Configure ACI for public or private networking, with features like port mapping, public IP assignment, and integration with Azure Virtual Networks for secure communications. - Multi-OS Support:
Depending on your container image, ACI supports both Windows and Linux containers.
Deploying a Container Instance in Azure
Follow these steps to deploy a container instance using the Azure Portal:-
Launch the Azure Portal and Search for Container Instances:
Open the Azure Portal, type “Container Instances” in the search bar, and click Create. -
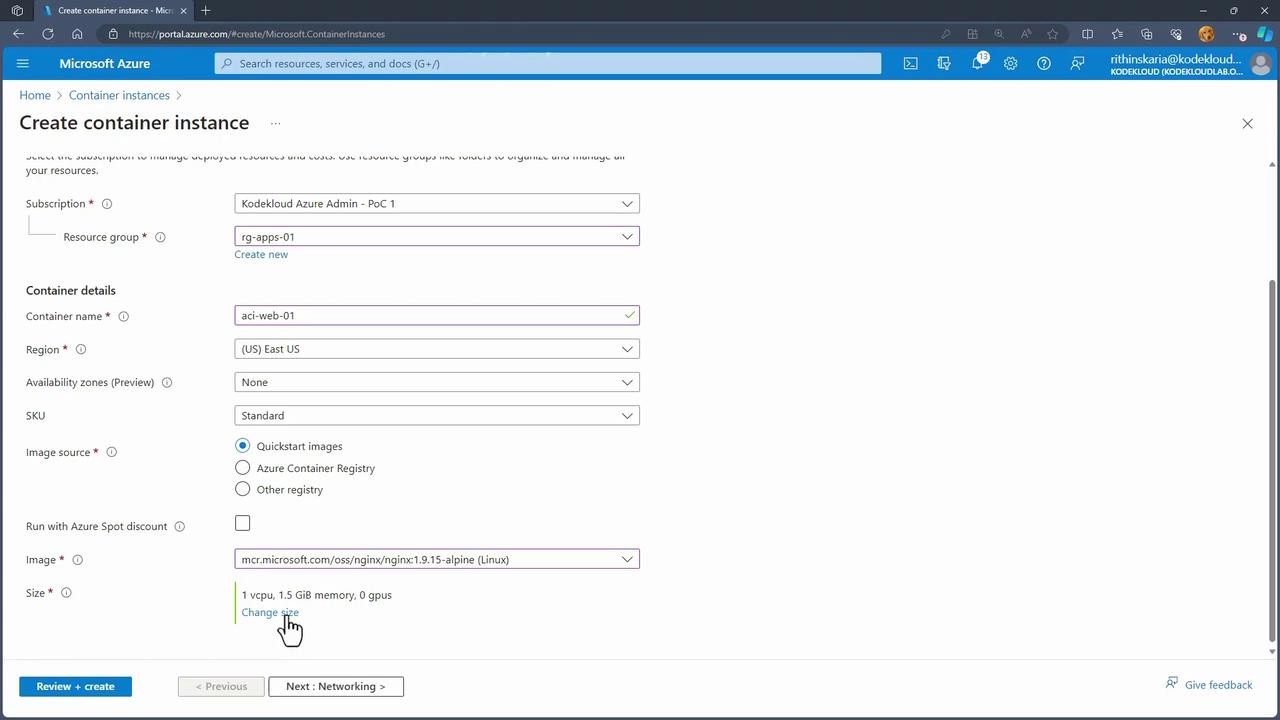
Configure Basic Settings:
- Resource Group: Choose an existing resource group or create a new one (e.g., “ACI Web 0.1”).
- Availability Zone: Optionally specify an availability zone (such as East US Availability Zones currently in preview).
- SKU: Choose the appropriate SKU (standard or confidential containers; this example uses standard).
-
Select Your Container Image:
Use a preconfigured image like Hello World, or pull an image from Azure Container Registry, Docker Hub, or another registry. For this walkthrough, select the NGINX image. -
Set Container Sizing and Advanced Options:
Determine the container size and configure additional settings, like enabling GPU support if necessary.
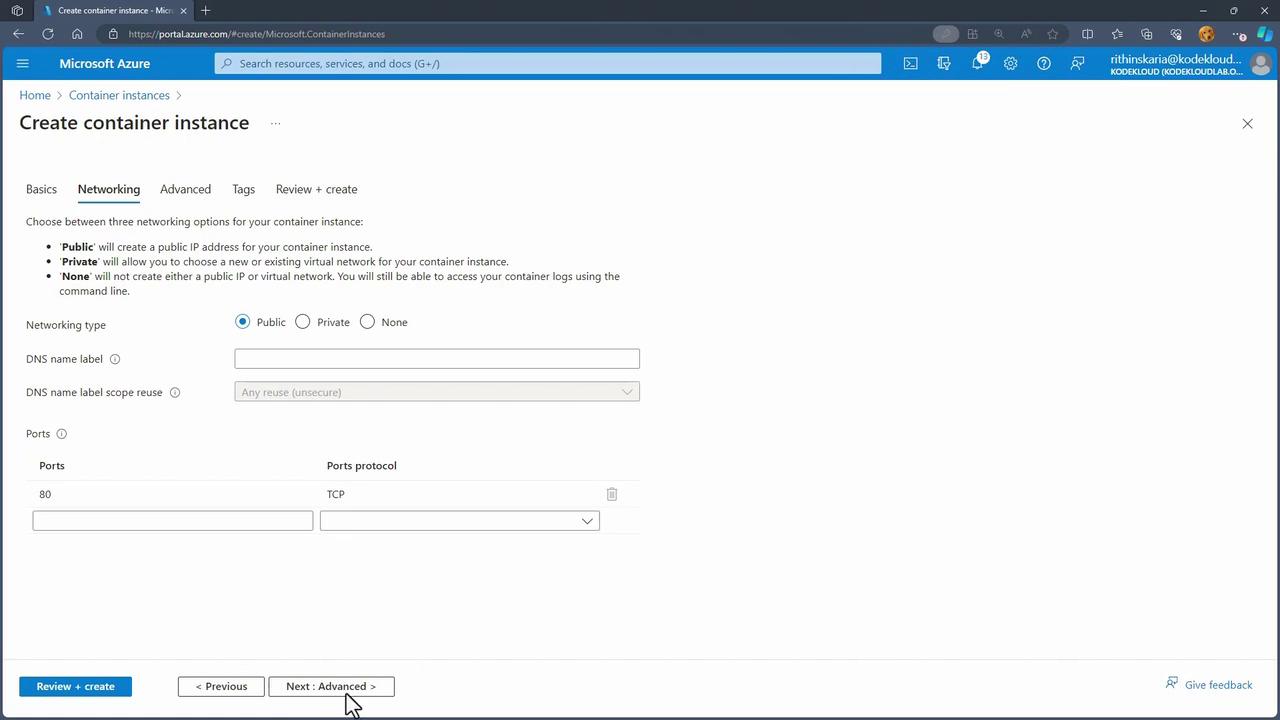
- Configure Networking Options:
- Decide on the networking type (public, private, or none).
- Optionally set a DNS label and specify open port numbers.
- Adjust the container restart policy based on your requirements.
-
Override Commands (Optional):
If necessary, customize startup commands or scripts to run when the container launches. -
Review and Create:
Verify your settings and click Review and Create. Once validation is complete, click Create to deploy your container. Deployments typically complete within 15 to 20 seconds. -
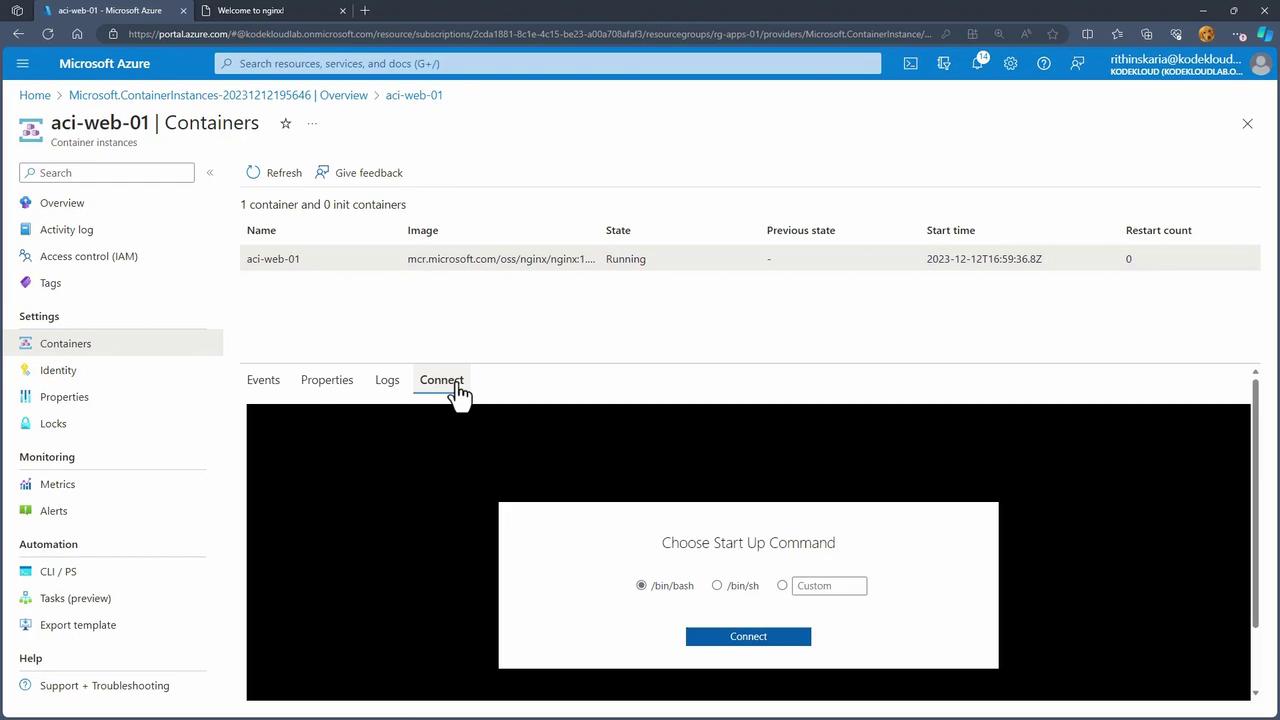
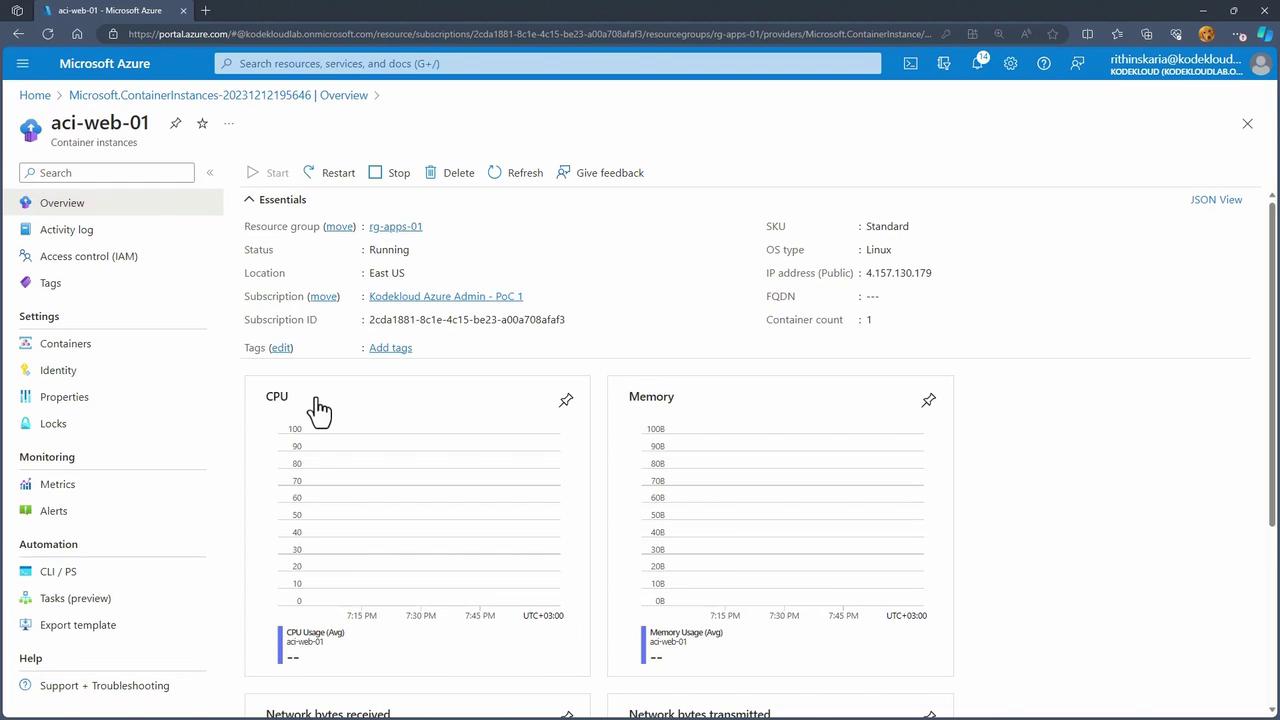
Access the Container Instance:
When the deployment finishes, select Go to resource. You’ll find details of your container instance, including its public IP address for direct access. For example, visiting the NGINX welcome page confirms the container is running smoothly.
- Interact with the Container:
Review logs and connect to your container using the integrated terminal. For example, you can navigate directories within a running NGINX container as shown below:
While modifying files (e.g., index.html) is acceptable for demonstration purposes, container updates in production environments are typically managed through image updates and redeployments rather than direct SSH modifications.