Learn to streamline development workflows using CI/CD and deployment slots for Azure App Service, covering automated deployments, environment management, and rollback strategies.
Learn how to streamline your development workflow using Continuous Integration/Continuous Deployment (CI/CD) and deployment slots for Azure App Service. This guide covers best practices for automated deployments, managing multiple environments, and ensuring smooth rollbacks.
CI/CD enhances code quality and accelerates delivery by automating integration and deployment processes. Azure App Service supports two primary deployment methods that help teams minimize downtime and improve reliability:
Automated Deployment
Developers push new code—including features, patches, and bug fixes—to repositories such as GitHub, Bitbucket, Local Git, or Azure Repos. When integrated with CI/CD, these updates are automatically propagated to the App Service with minimal impact on end users.
Manual Deployment
Developers store code in remote cloud storage services (e.g., OneDrive or Dropbox) or external Git repositories, then manually trigger updates to the App Service.
As of September 30, 2023, integrations for Microsoft OneDrive and Dropbox have been retired for Azure App Service and Azure Functions. Ensure any cascading deployments are disabled since these options no longer appear in the Azure portal.
To configure CI/CD for your web app in Azure App Service, follow these steps:
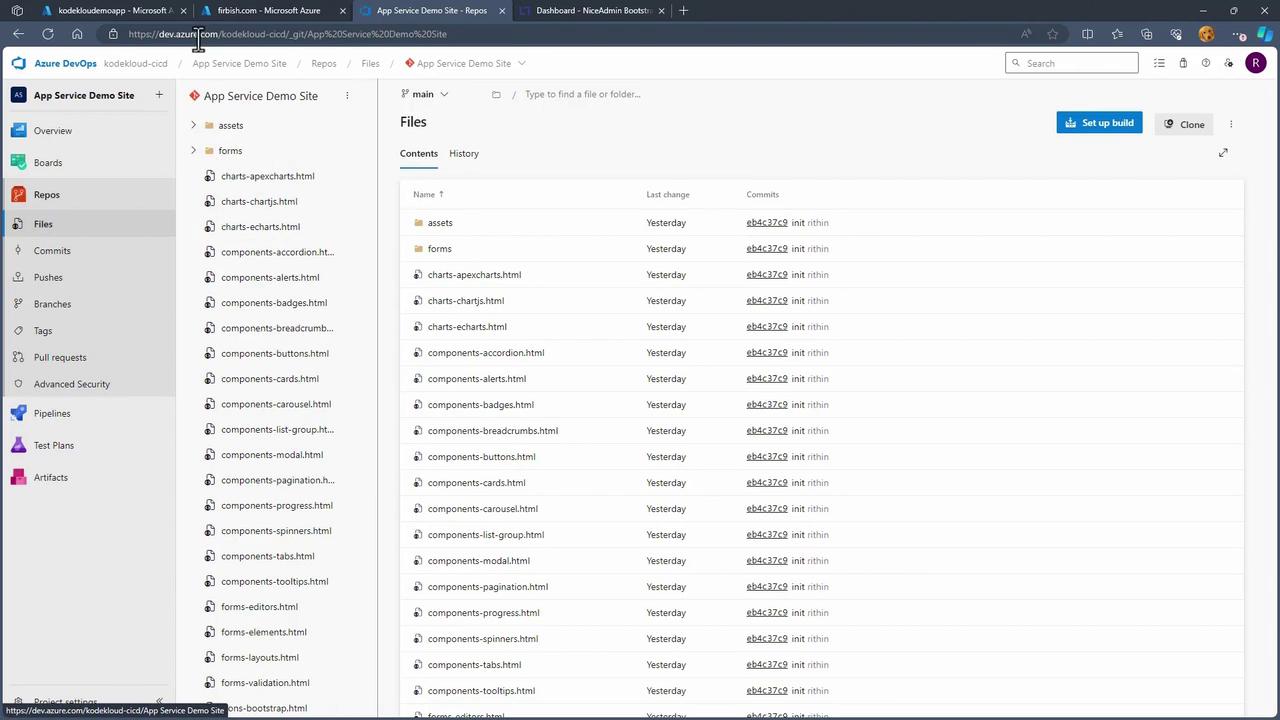
Browse Code in the Azure Portal
Start by exploring your code directly within the Azure portal. Below is an example of an HTML snippet from an application deployed earlier:
<link href="assets/css/style.css" rel="stylesheet"><!--Template Name: NiceAdminUpdated: Nov 17 2023 with Bootstrap v5.3.2Template URL: https://bootstrapmade.com/nice-admin-bootstrap-admin-html-template/Author: BootstrapMade.comLicense: https://bootstrapmade.com/license/-->
Review Git Terminal Logs
The following sample log snippets illustrate common Git operations during CI/CD processes:
2023-12-17 10:19:49 | git status -z -uall [77ms]2023-12-17 10:18:17 | git diff --cached --files --stage C:\Users\RithinSkaria\App Service Demo Site\index.html [672ms]2023-12-17 10:18:17 | git show --textconv :index.html [609ms]
These operations can be collectively referred to as the “code cloud dashboard.” Subsequent Git logs after saving changes might appear as follows:
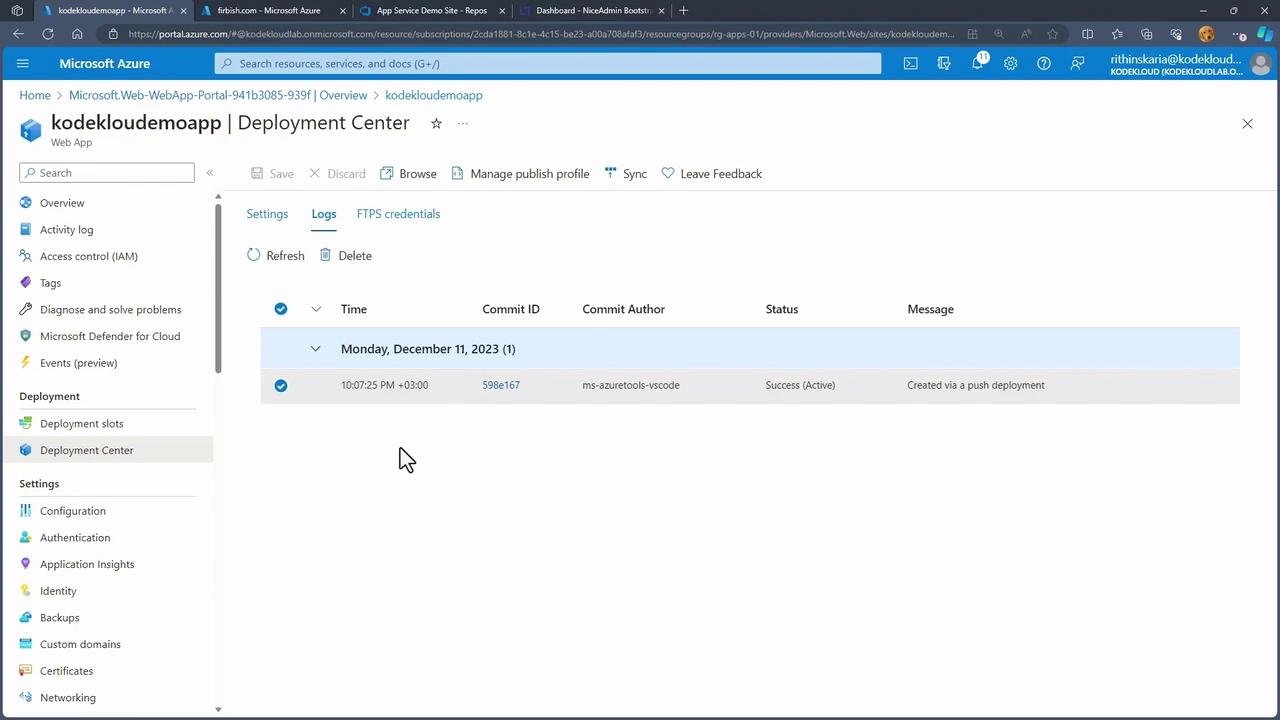
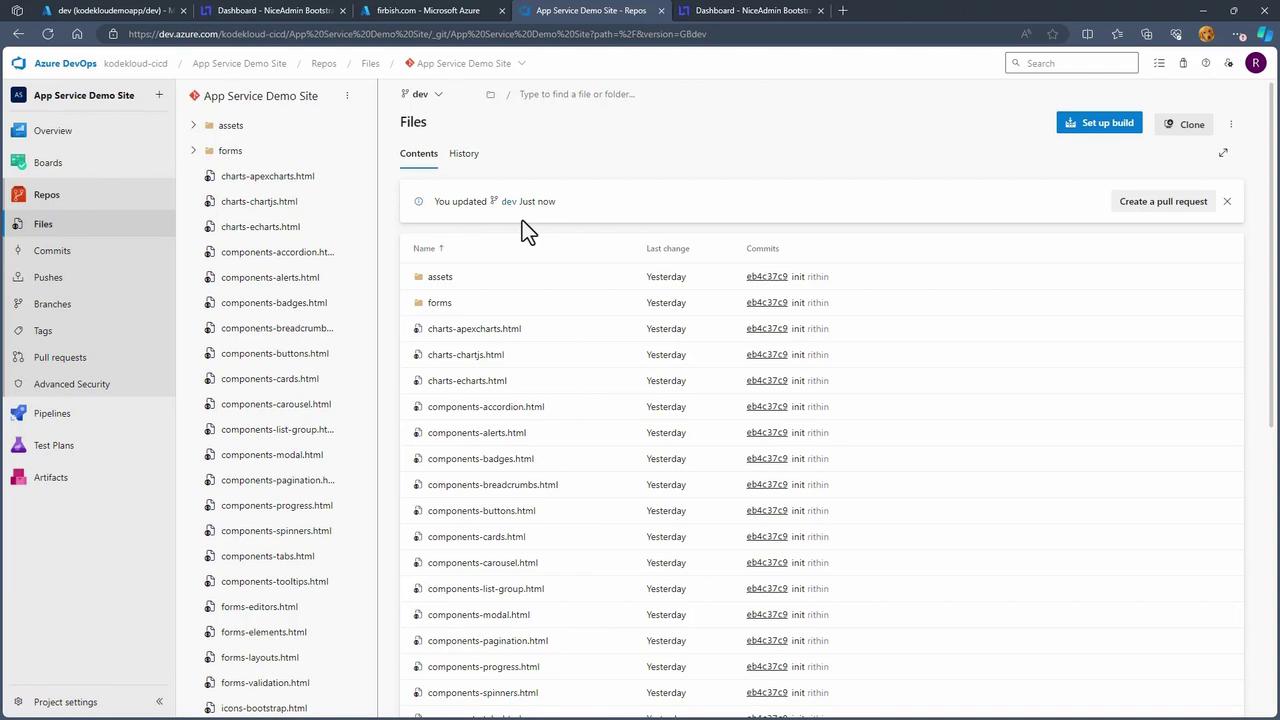
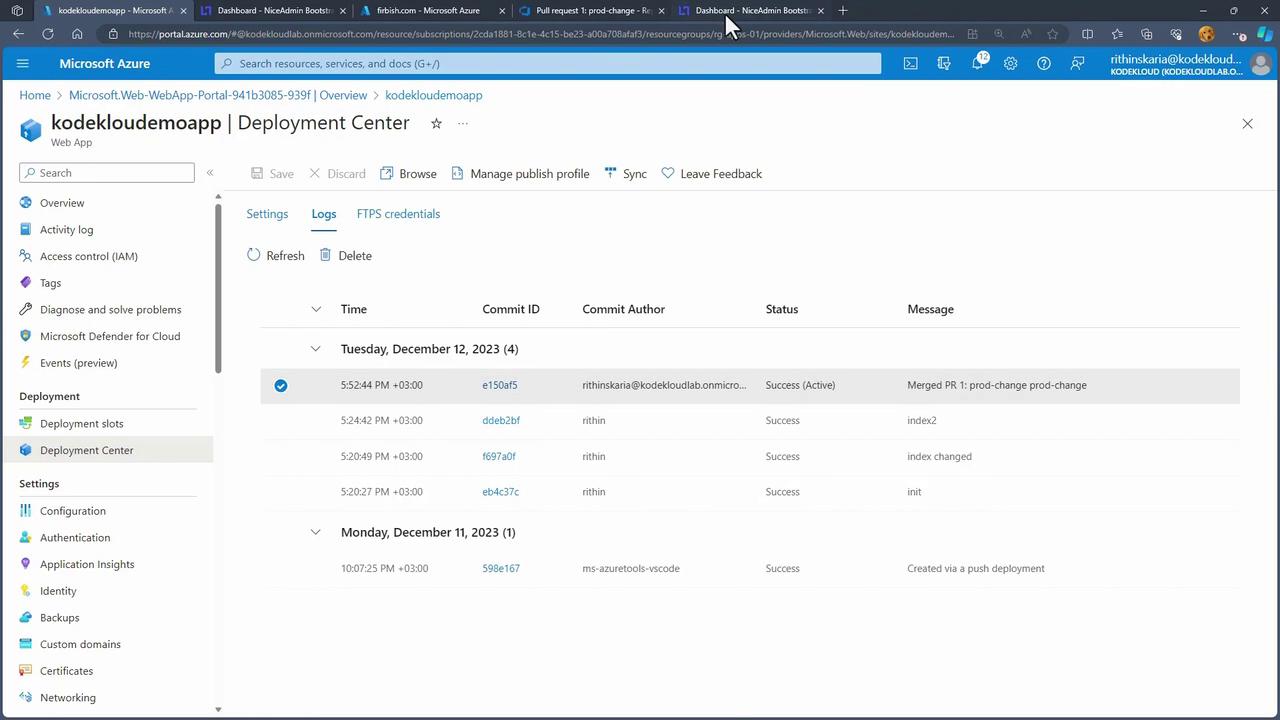
Since the repository is linked to Azure Repos, you can directly view it in the portal. When you commit changes, they automatically reflect on your App Service. For example, after configuring CI/CD through the Deployment Center, you may observe a log entry like the one below:
Within Deployment Center, select Azure Repos (or alternatives like GitHub or Bitbucket), then choose the organization, project, repository, and branch as needed. After saving your configuration, inspect the deployment logs:
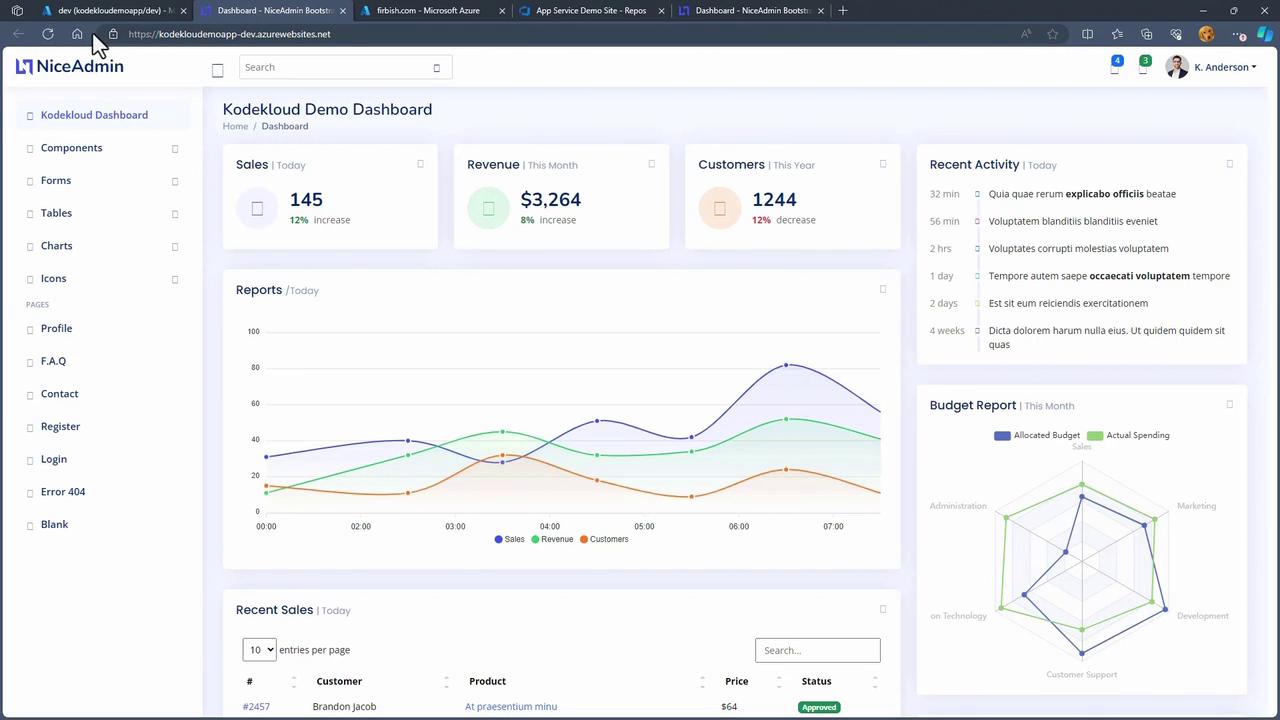
Changes made in Visual Studio Code—such as modifications to the index.html file—are automatically tracked, committed, and synchronized with your repository. Refreshing the Azure repository confirms the push, and your web app reflects these updates. Consider the following Git log outputs during development:
After committing these changes, the updated repository synchronizes with the App Service. The production environment remains unchanged until you merge into the main branch or manually swap deployment slots.For instance, a further commit updating the production dashboard might include the following HTML snippet:
After syncing with the Azure portal, these changes are deployed successfully. Note that if you use separate branches (e.g., development vs. production), the production App Service remains on the older version until a merge or slot swap occurs.
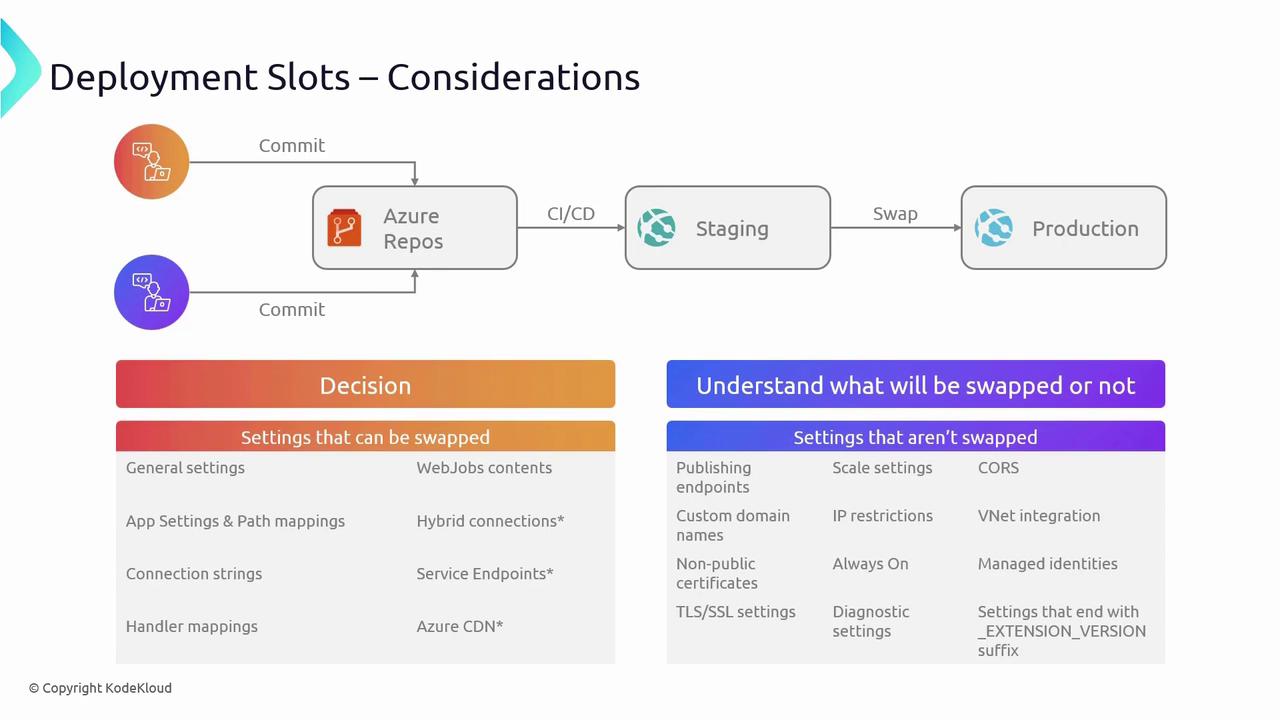
Deployment slots enable you to create multiple environments (such as staging, QA, UAT, or development) within a single Azure App Service. Testing new code in a staging slot prior to a production swap minimizes downtime and avoids performance issues like cold starts.Key features of deployment slots include:
Environment Separation:
Each slot represents an environment—production, QA, or development—allowing for isolated testing and validation.
Auto Swap:
Automatically swap slots when validations are successful to eliminate service disruptions.
Rollback Capability:
Quickly revert to a previous version by swapping back to the last known good configuration.
Service Plan Limitations:
Free, Shared, and Basic: Deployment slots are not supported.
Standard: Supports up to 5 slots.
Premium and Isolated: Support up to 20 slots.
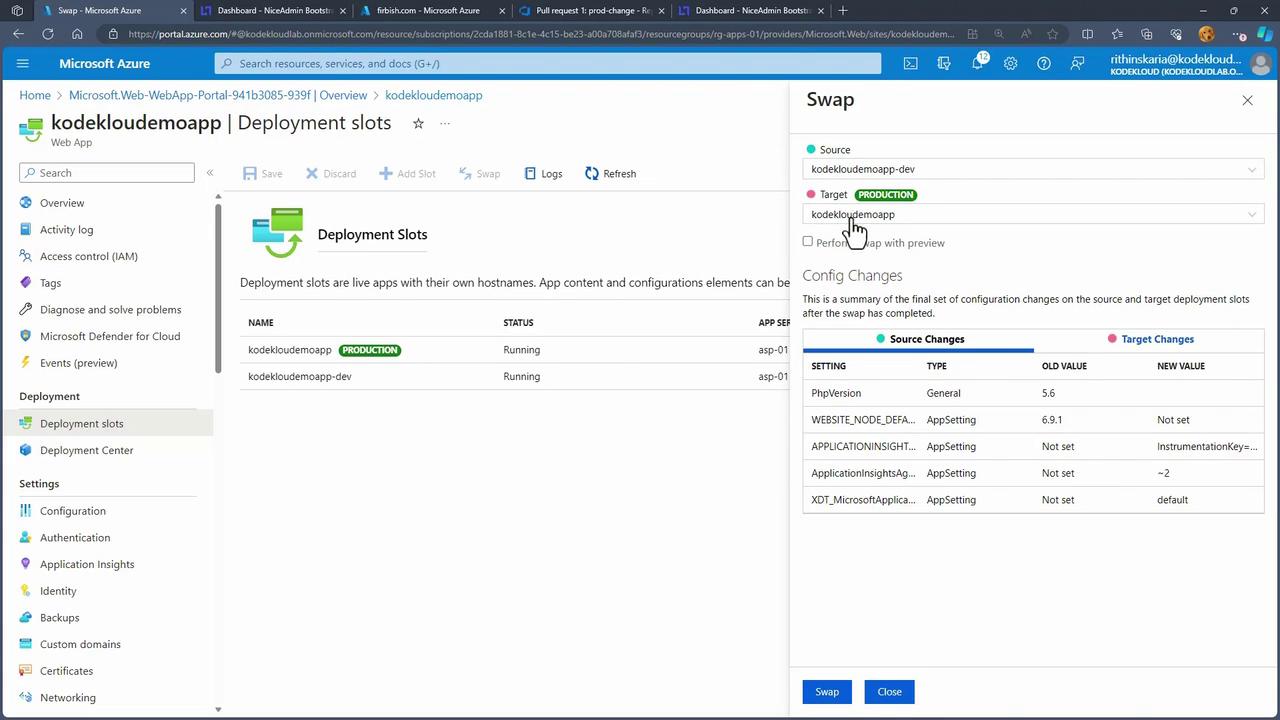
When creating a deployment slot, decide whether to clone the app configuration (from production or another slot) or start fresh. Understand which settings swap and which do not. Generally, swappable settings include general settings, WebJob contents, app settings, path mappings, hybrid connections, connection strings, service endpoints, handler mappings, and Azure CDN configurations. Non-swappable settings include publishing endpoints, scale settings, CORS, custom domains, IP restrictions, VNet integration, non-public certificates, always-on configuration, managed identities, TLS/SSL settings, diagnostic settings, and any setting ending with an extension version suffix.
A common workflow involves committing code to a development branch, validating the changes via CI/CD, and then creating a pull request to merge into the main (production) branch. This triggers a production deployment automatically.
You can configure separate deployment slots for different branches to facilitate parallel development. For example, create a “dev” branch in Azure Repos containing the same content as the main branch, and then add a corresponding deployment slot in your App Service.
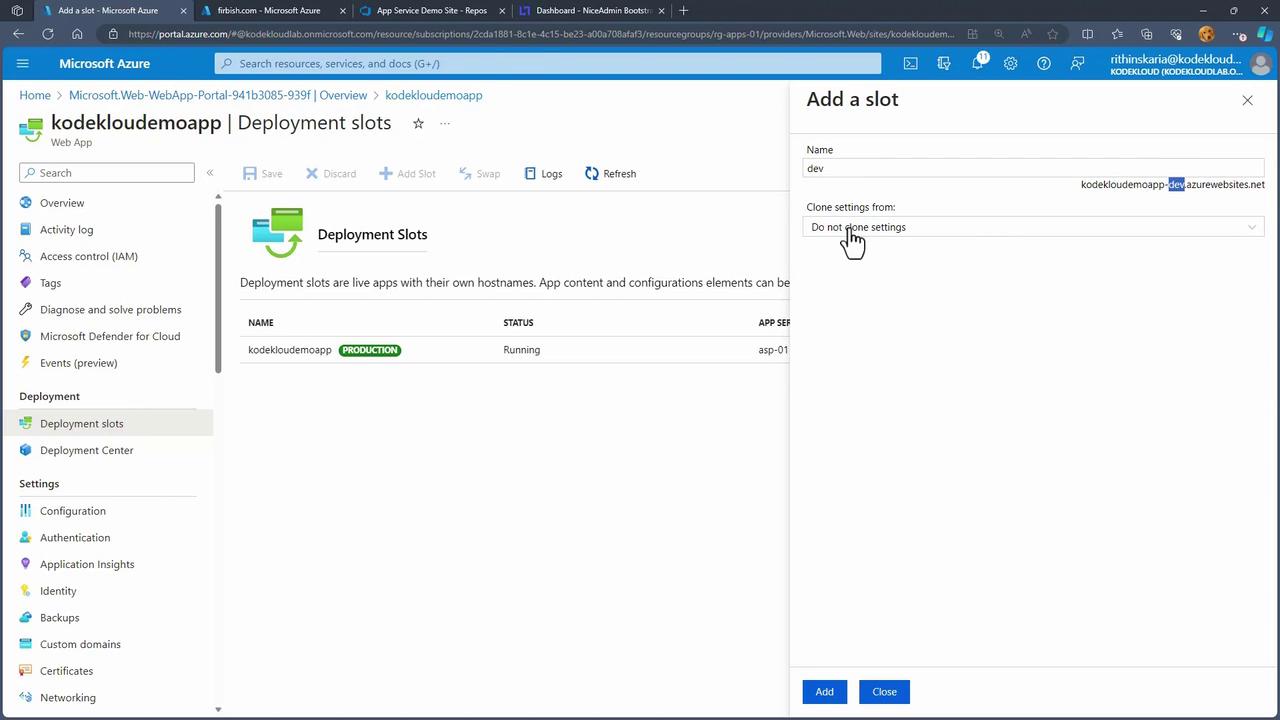
Open the Azure portal and navigate to your App Service.
Under Deployment Center, add a new slot (e.g., “dev”).
When prompted, choose whether to clone the settings from the production app.
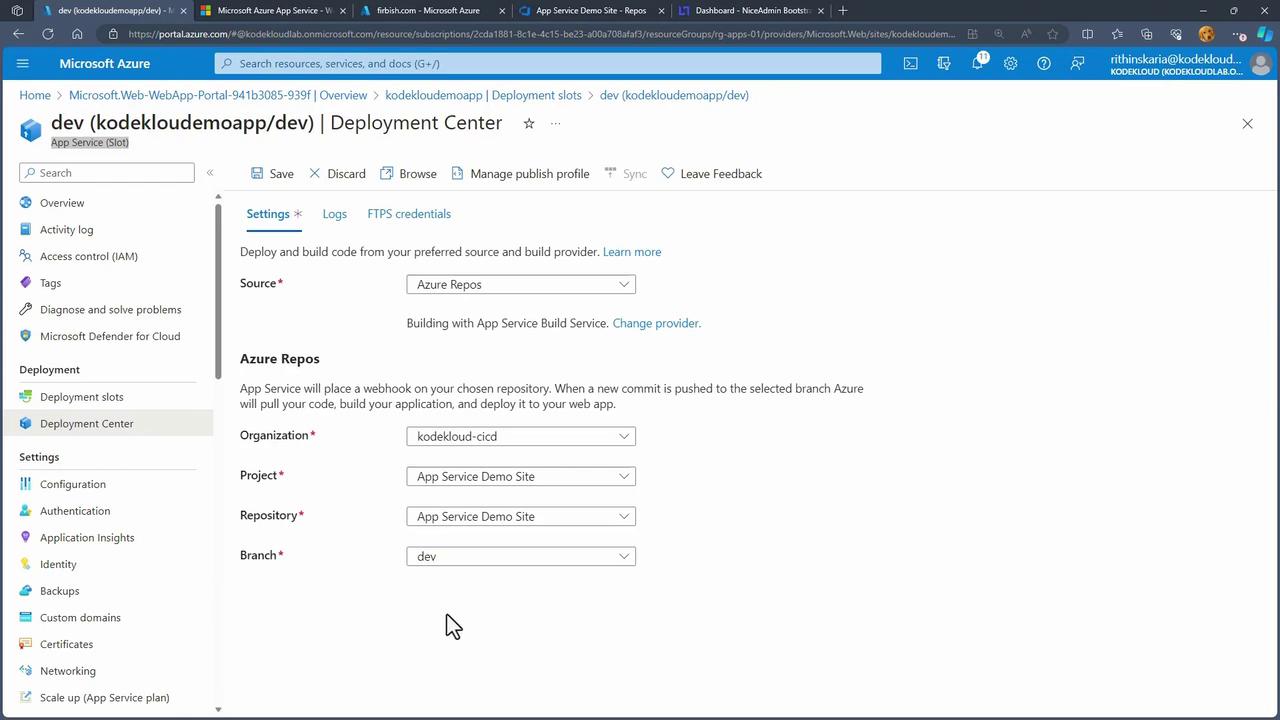
Configure CI/CD for the new slot to pull code from the “dev” branch. After saving, you will see a pending deployment log entry:
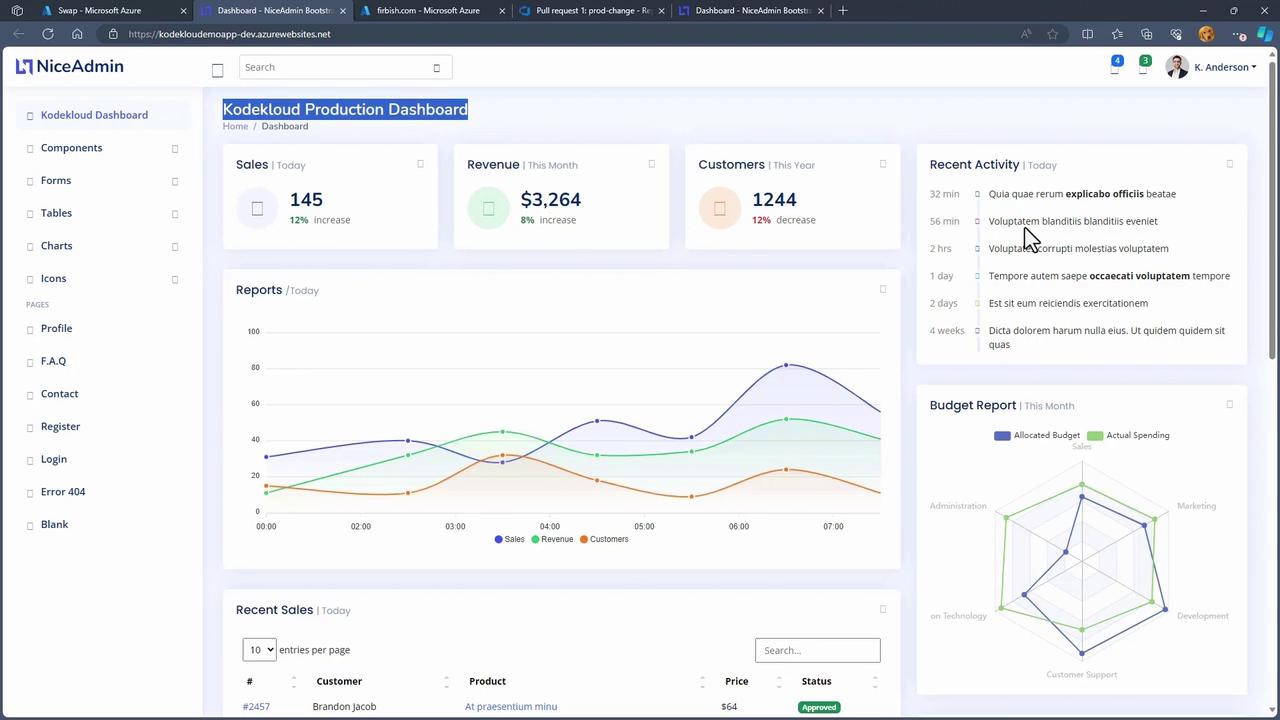
Once the CI/CD process completes for the “dev” slot, preview the changes by refreshing the slot’s URL. Changes committed to the development branch will only affect the “dev” slot until merged with the main branch or manually swapped.In Visual Studio Code, switching to the “dev” branch and committing changes might generate Git logs like:
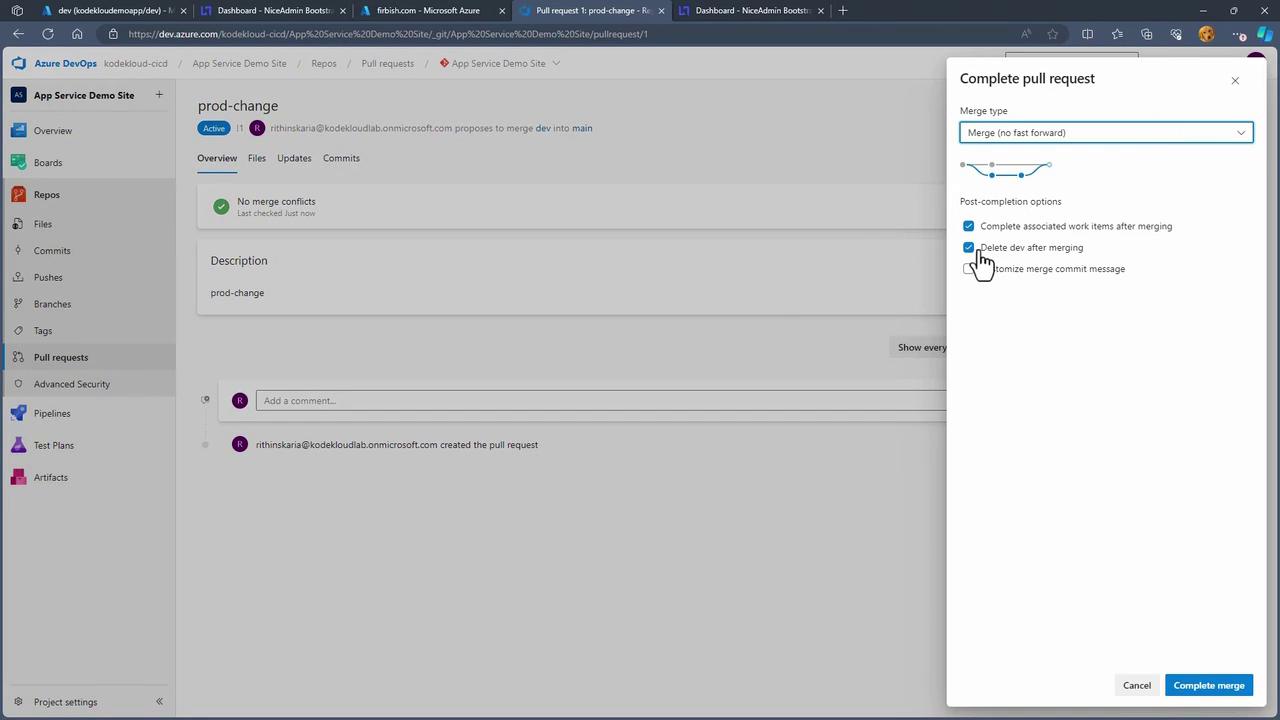
Once you push these changes to the “dev” branch, you can later merge them into the main branch through a pull request:
If you choose not to create a pull request, you can swap the deployment slots directly. Swapping exchanges the contents of the “dev” and production slots, enabling a quick rollback if needed.
After additional commits—such as adding a version marker “build 1.0” in the “dev” slot—and verifying deployment logs, perform the swap:
Swapping pushes the new code from the “dev” slot into production while moving the old production code into the “dev” slot. This method enables quick rollbacks in case of deployment issues.After a successful swap, both production and development slots display the updated builds. For example, refreshing the production site will show the updated “build 1.0” dashboard, while the development slot reverts to its previous state.
This guide demonstrated setting up CI/CD with Azure App Service and using deployment slots to efficiently manage multiple environments. These techniques not only streamline deployments but also ensure seamless testing and safe rollbacks to maintain production stability.Next, explore Azure Container Instances in our upcoming lesson for containerized deployment solutions.