AWS - IAM

Introduction to AWS Identity and Access Management

Demo Creating IAM Role

In this step-by-step guide, you'll learn how to create an AWS Identity and Access Management (IAM) role that grants an Amazon EC2 instance permission to read objects from an S3 bucket named company1-logs. By leveraging IAM roles, you avoid hardcoding credentials on your server and follow AWS best practices for secure access management.

Prerequisites

  • An AWS account with administrative privileges
  • A running EC2 instance
  • An existing S3 bucket named company1-logs

Step 1: Create the IAM Role

  1. Open the IAM console, select Roles, then click Create role.

  2. On Select trusted entity, choose AWS service.
    The image shows an AWS IAM console screen for creating a role, specifically the step to select a trusted entity type, with options like AWS service, AWS account, Web identity, SAML 2.0 federation, and custom trust policy.

  3. Under Use cases for other AWS services, select EC2.
    The image shows an AWS IAM console screen where a user is selecting a use case for creating a role, with options related to EC2 services.

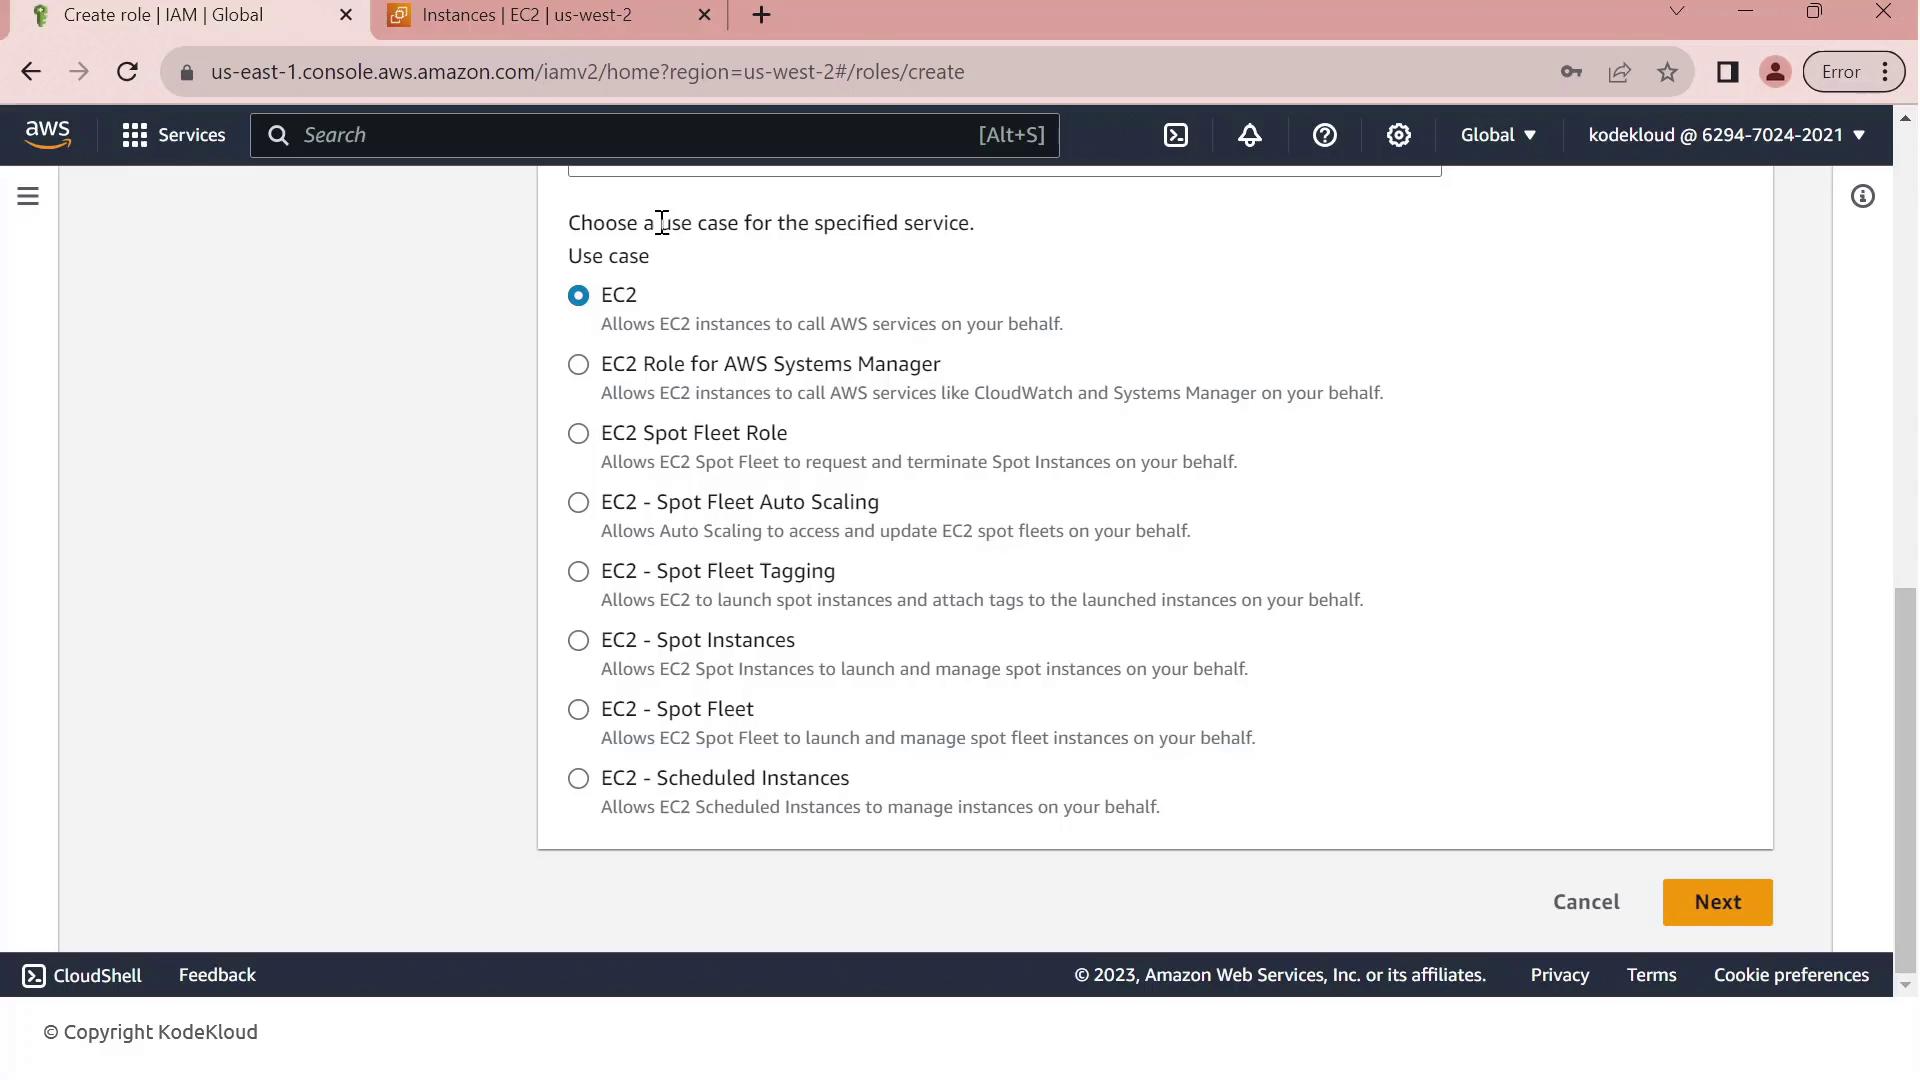
  4. Click Next to move to the permissions page.

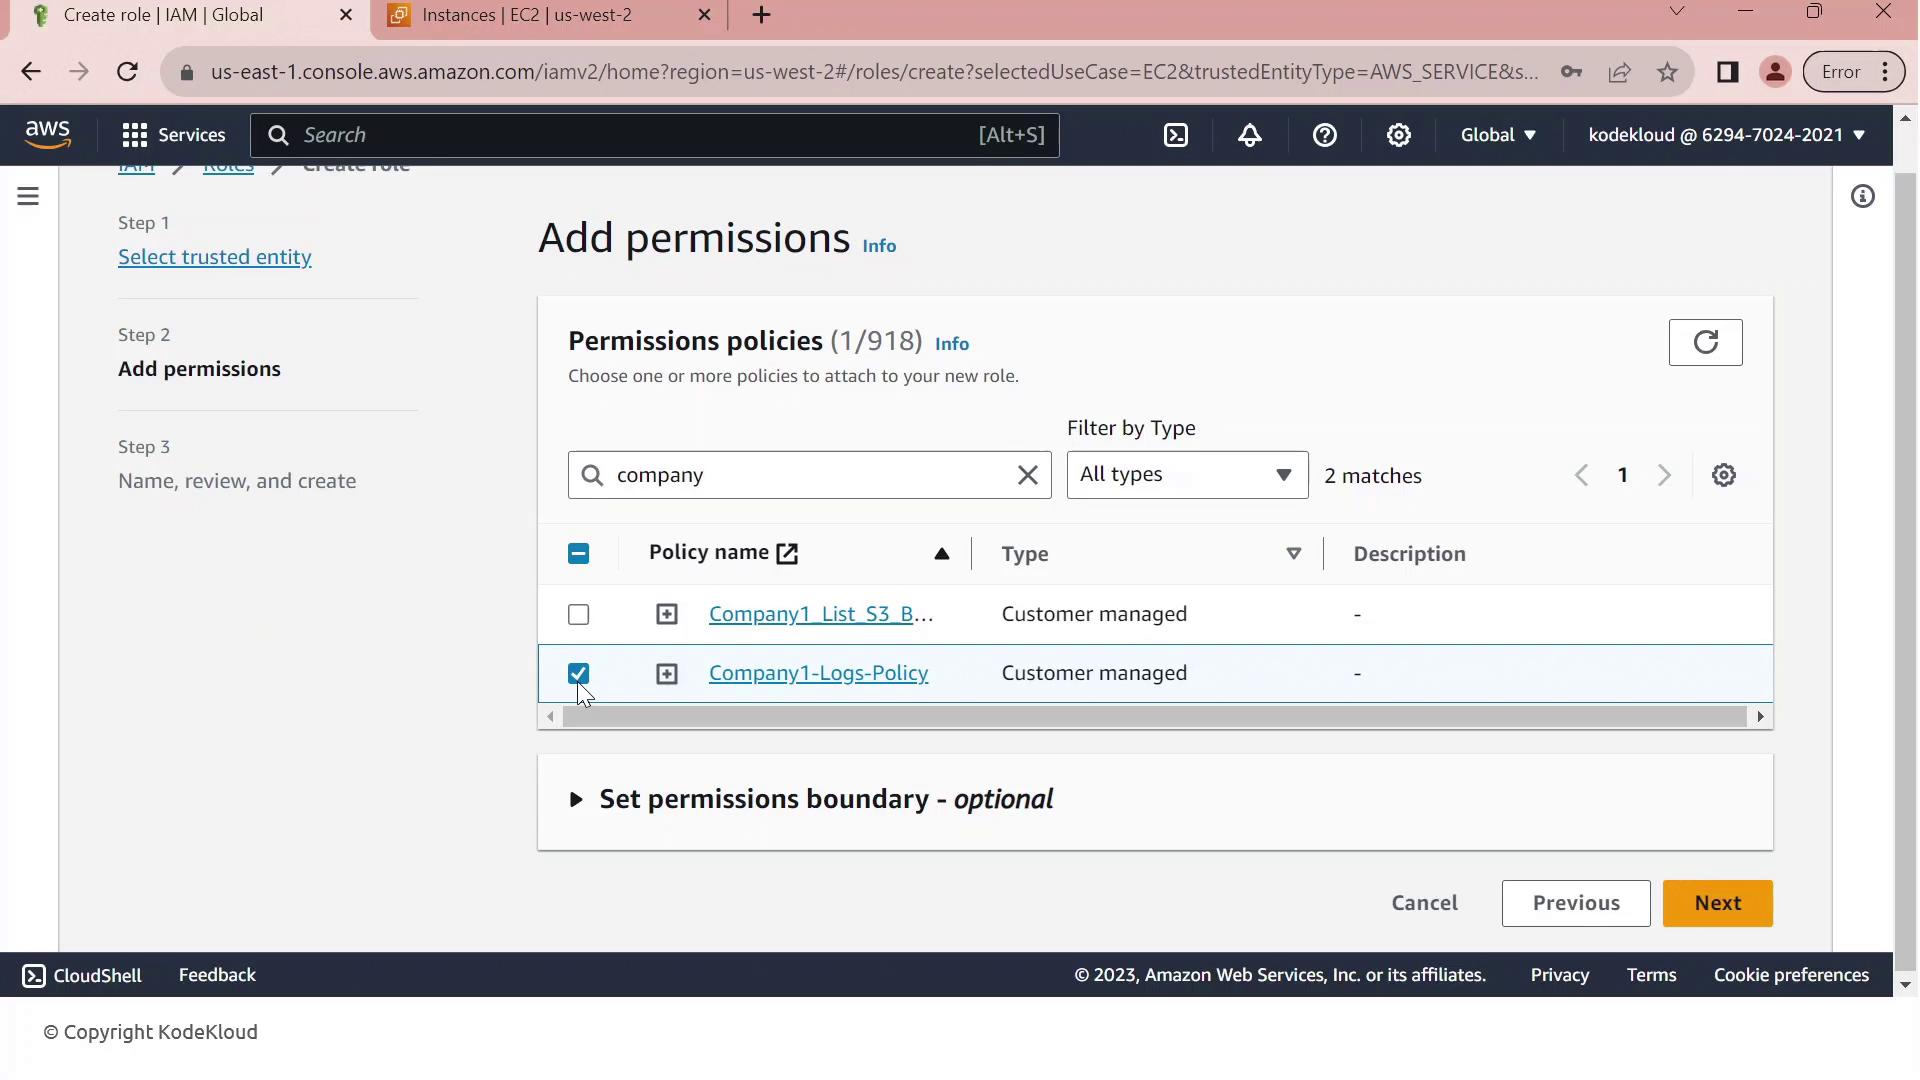
  5. In Permissions, search for company1 and select the Company1 logs policy which grants s3:GetObject access to the company1-logs bucket.
    The image shows an AWS IAM console screen where permissions are being added to a role. Two customer-managed policies are listed, with one selected.

  6. Click Next, then enter a Role name (e.g., Company1-Logs-Role) and an optional description.
    The image shows an AWS IAM console screen where a role is being created, with fields for role name and description filled in. The role name is "Company1-Logs-Role," and the description mentions allowing EC2 instances to call AWS services.

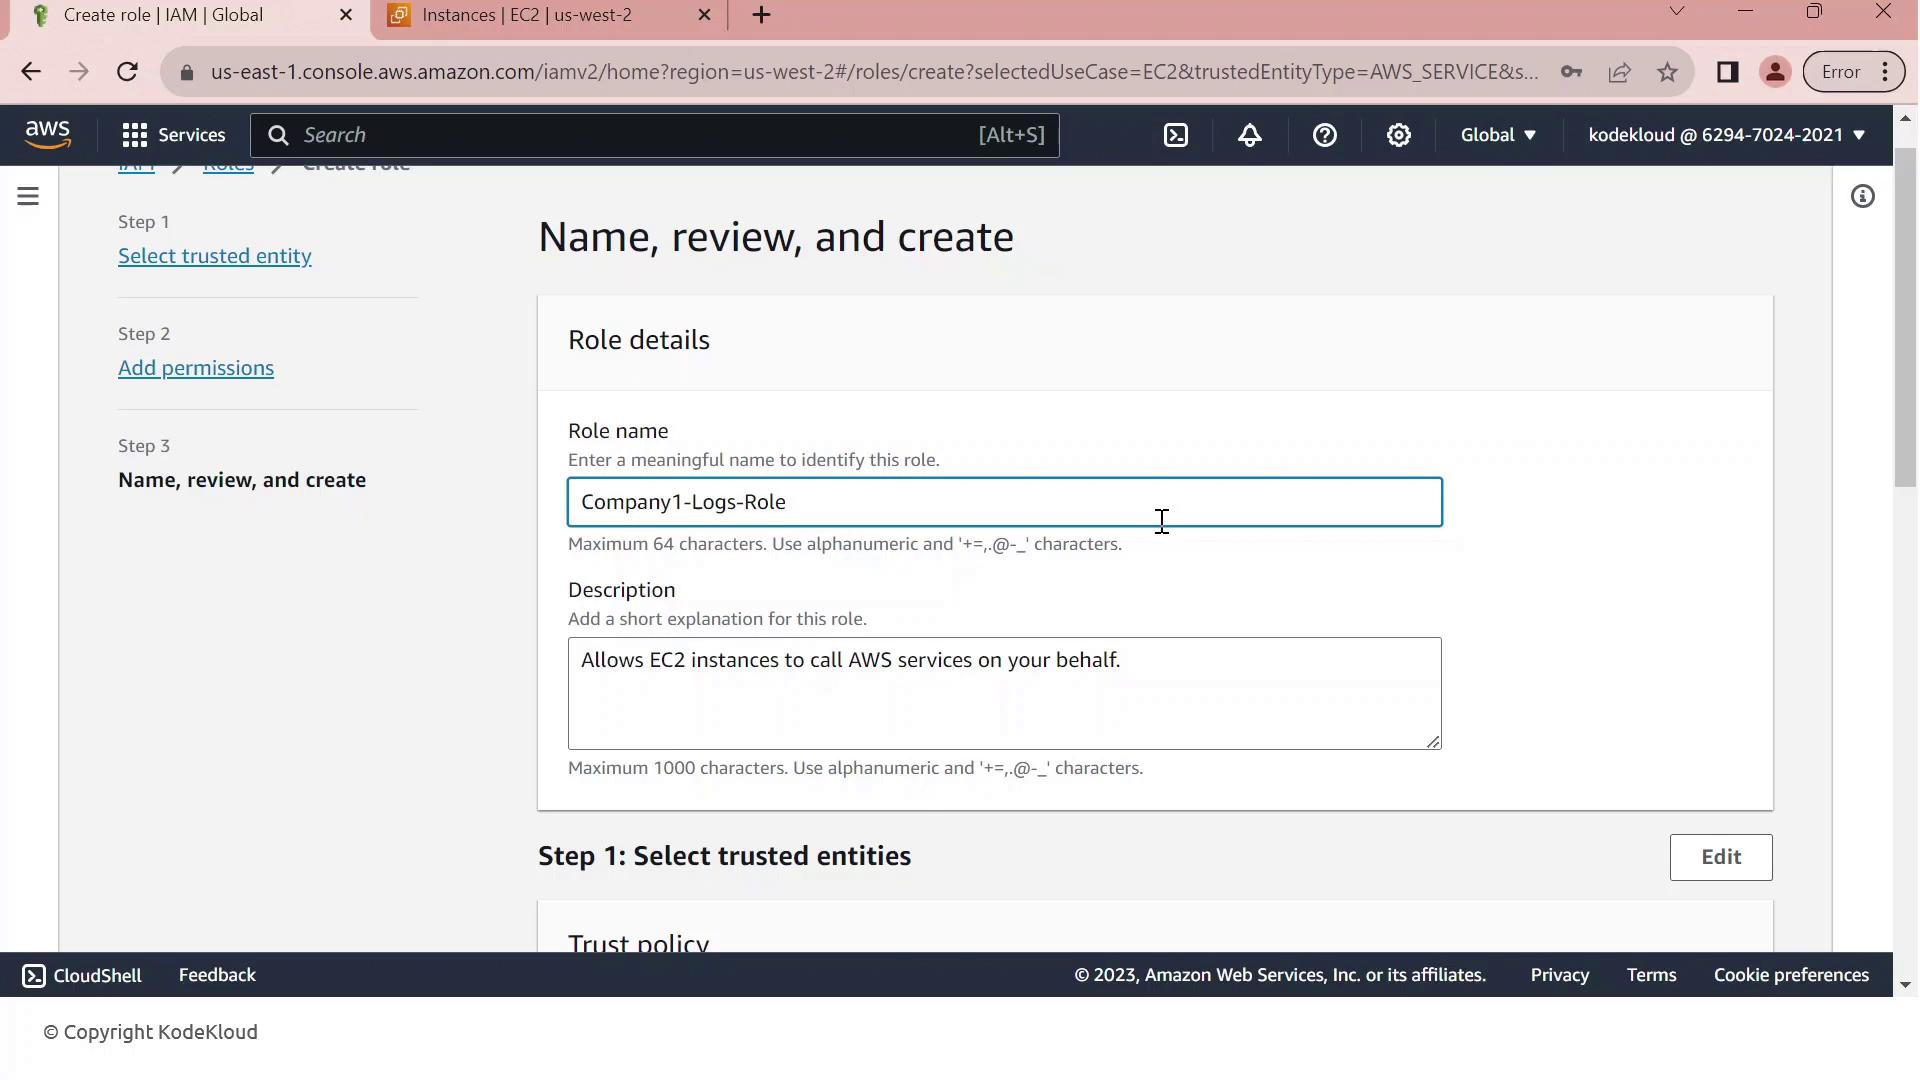
  7. Review the Trust relationship to ensure EC2 can assume this role. It should resemble:

    {
      "Version": "2012-10-17",
      "Statement": [
        {
          "Effect": "Allow",
          "Action": ["sts:AssumeRole"],
          "Principal": {"Service": ["ec2.amazonaws.com"]}
        }
      ]
    }
    
  8. (Optional) Add tags to categorize your role, then click Create role.

Note

You’ve successfully created an IAM role that EC2 instances can assume to access S3 resources securely.

Step 2: Attach the IAM Role to Your EC2 Instance

  1. Go to the EC2 console, select Instances, and choose your running instance.
  2. From the Actions menu, select Security > Modify IAM role.
  3. In the IAM role dropdown, pick Company1-Logs-Role.
    The image shows an AWS console interface for modifying an IAM role attached to an EC2 instance. It includes a dropdown to select an IAM role and a warning about removing existing roles.
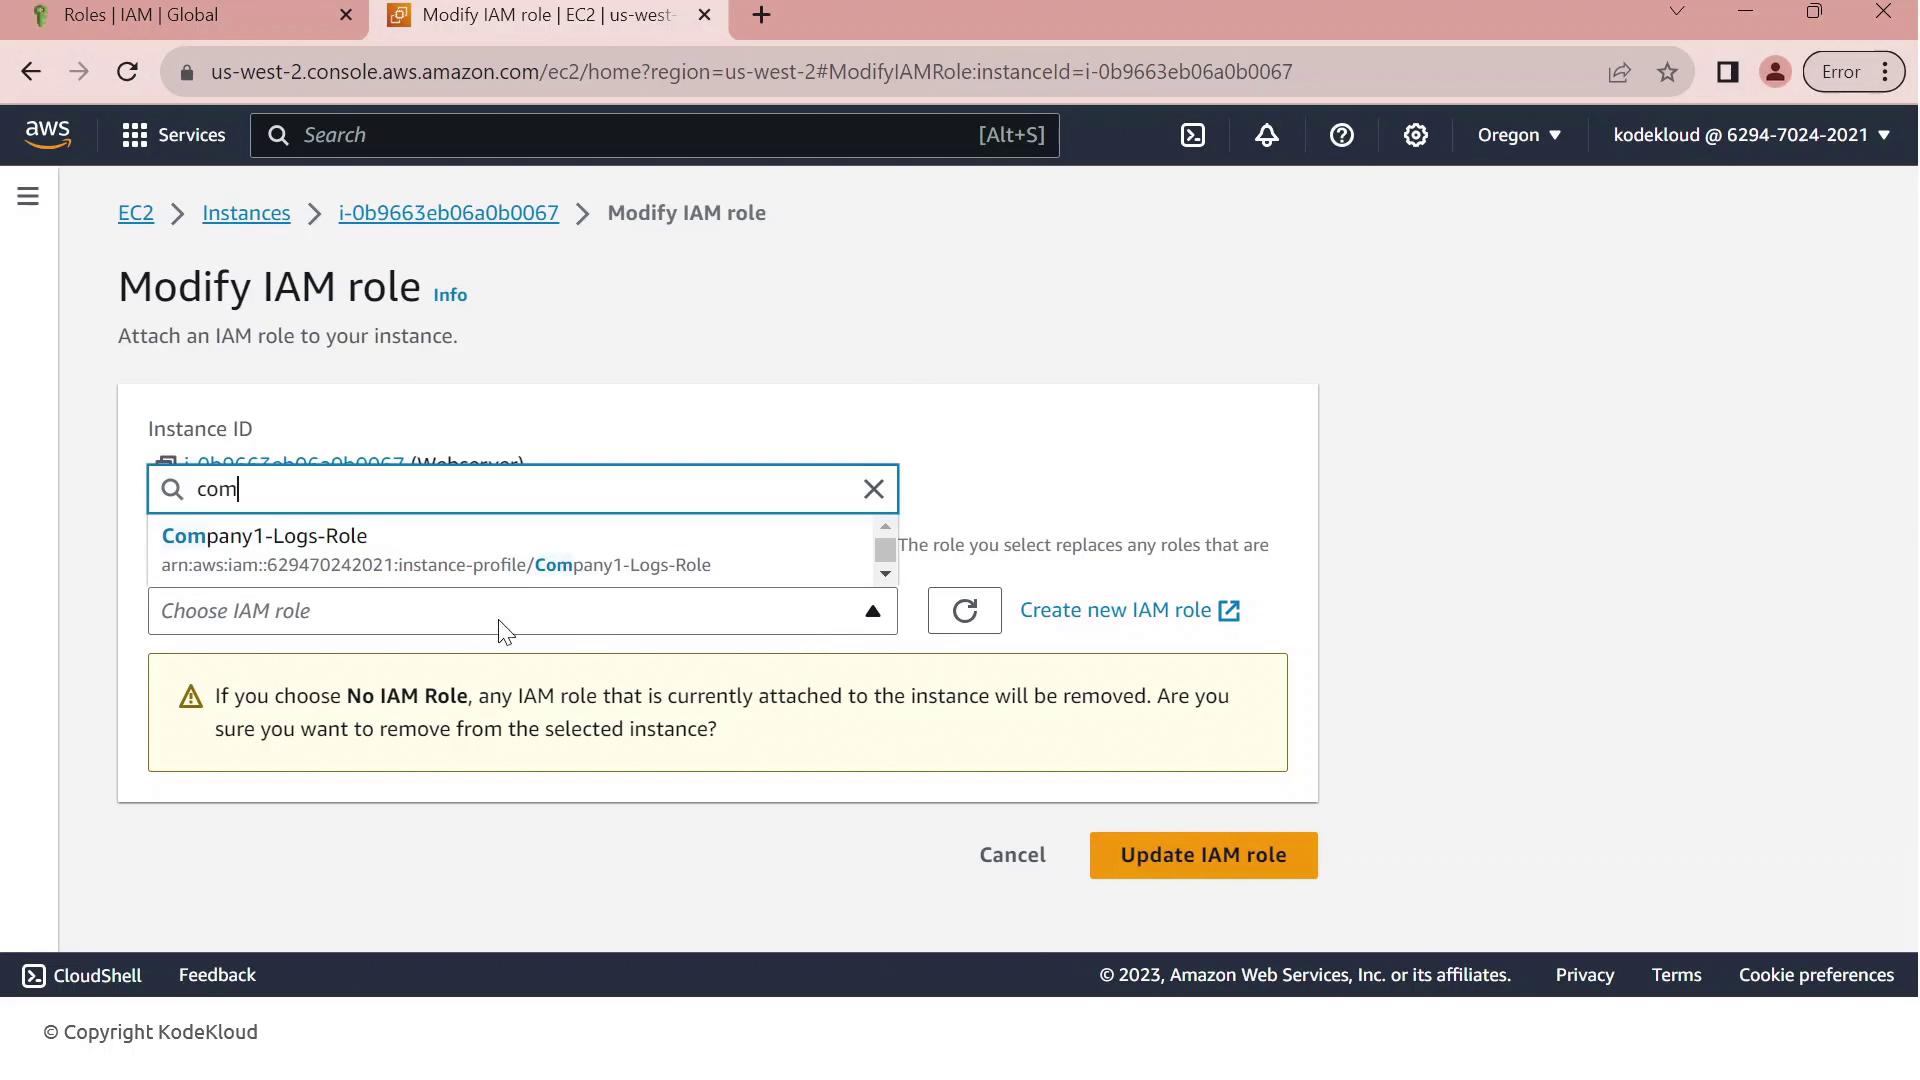
  4. Click Update IAM role to apply the change.

Warning

If your EC2 instance already has an IAM role attached, updating it will replace the existing role and associated permissions. Ensure this change aligns with your security policies.

Your EC2 instance now inherits the permissions defined in Company1-Logs-Role, allowing it to securely read log files from the company1-logs bucket without embedded credentials.

References

Watch Video

Watch video content

Previous
IAM Roles