Table of Contents
- Inspecting the Default VPC
- Default VPC Across Regions
- Subnets by Availability Zone
- Resource Map Visualization
- Internet Gateway & Default Route
- Launching a Test EC2 Instance
- Connecting via SSH & Testing Connectivity
- Links and References
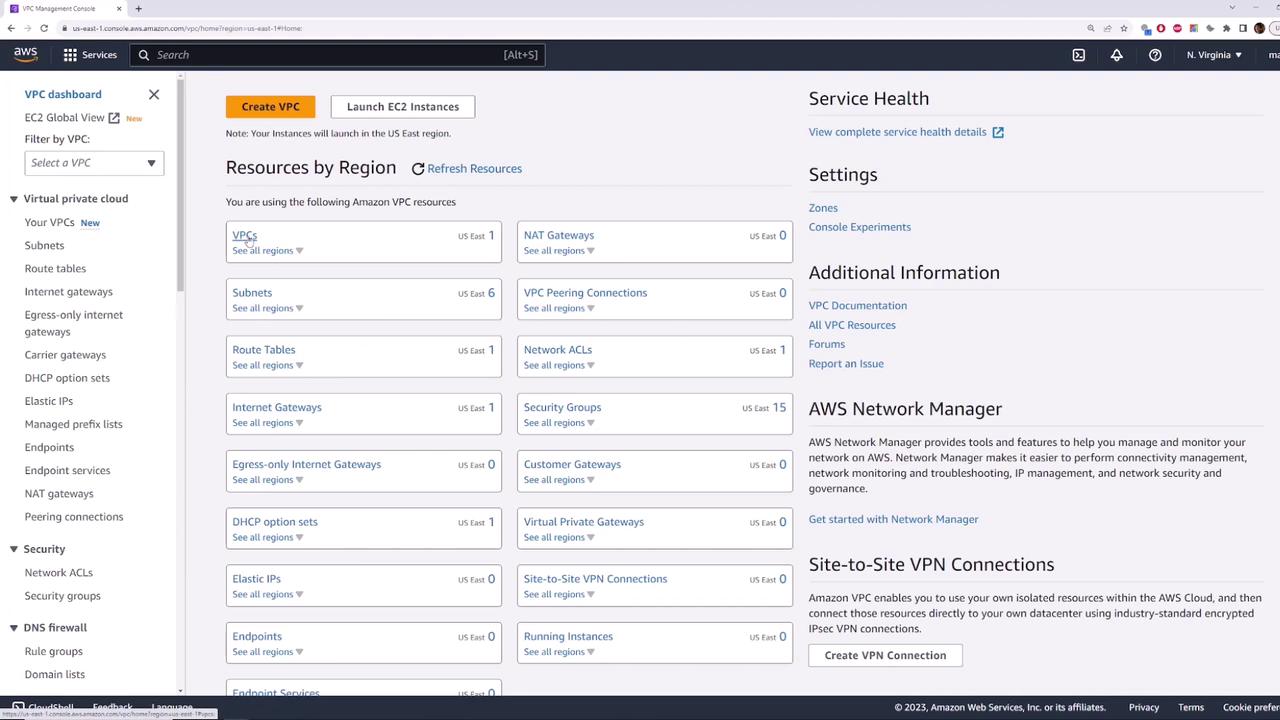
Inspecting the Default VPC
- Sign in to the AWS Management Console.
- Navigate to VPC (search “VPC” or select from recently visited services).
- Click VPCs in the sidebar and locate the one marked Default VPC.
- State: available
- CIDR block:
172.31.0.0/16 - Default VPC: Yes
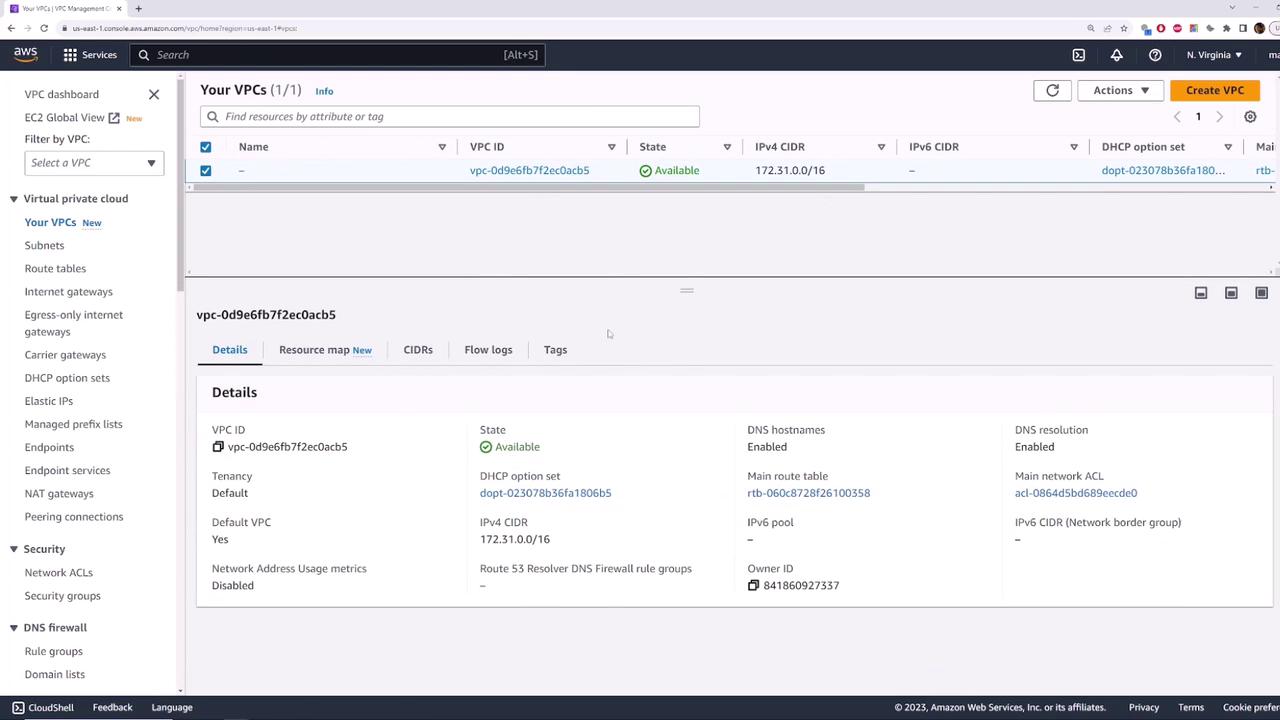
Every AWS region automatically gets one default VPC with the same
172.31.0.0/16 CIDR block.Default VPC Across Regions
AWS creates an identical default VPC in each region. To verify:- Switch your region (e.g., from US East (N. Virginia) to US East (Ohio)).
- Open VPCs—you’ll again see one default VPC with the same settings and CIDR block.
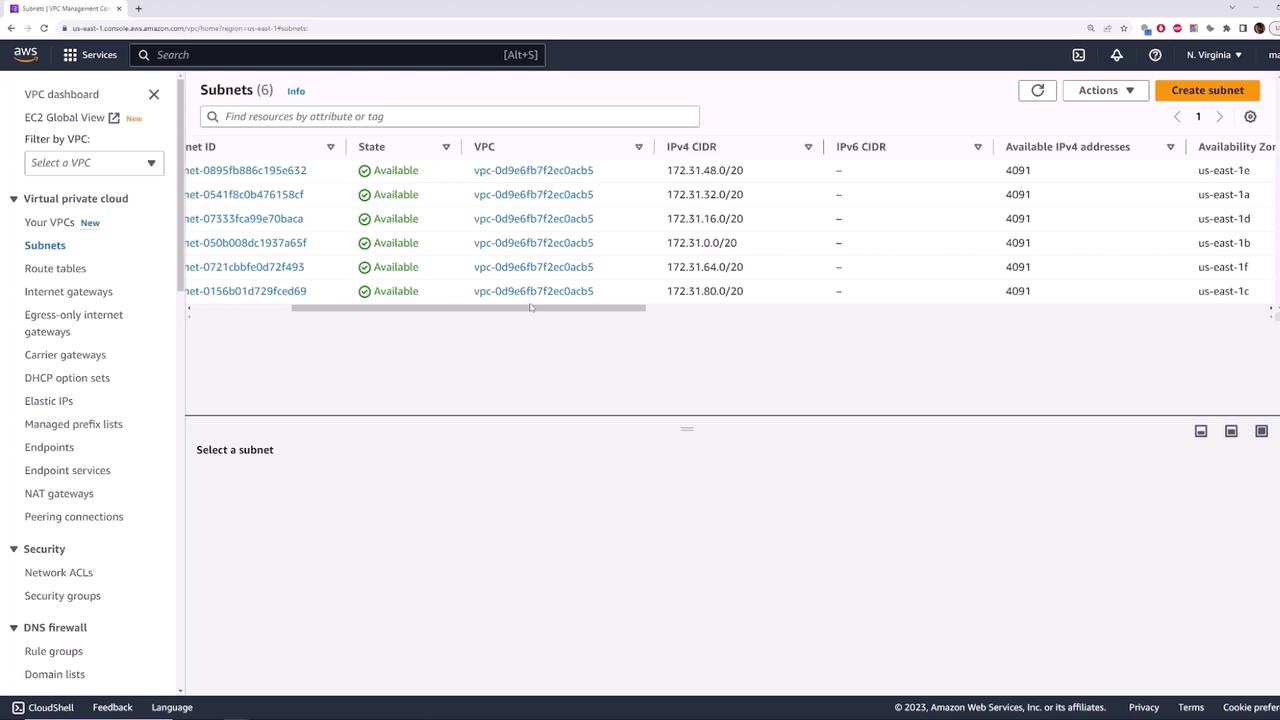
Subnets by Availability Zone
Within a default VPC, AWS provisions one subnet per Availability Zone (AZ). In us-east-1 there are six AZs, so you get six subnets.| Availability Zone | Subnet CIDR |
|---|---|
| us-east-1a | 172.31.0.0/20 |
| us-east-1b | 172.31.16.0/20 |
| us-east-1c | 172.31.32.0/20 |
| us-east-1d | 172.31.48.0/20 |
| us-east-1e | 172.31.64.0/20 |
| us-east-1f | 172.31.80.0/20 |
Resource Map Visualization
Use the Resource Map view to see the relationships between subnets, route tables, and the Internet Gateway.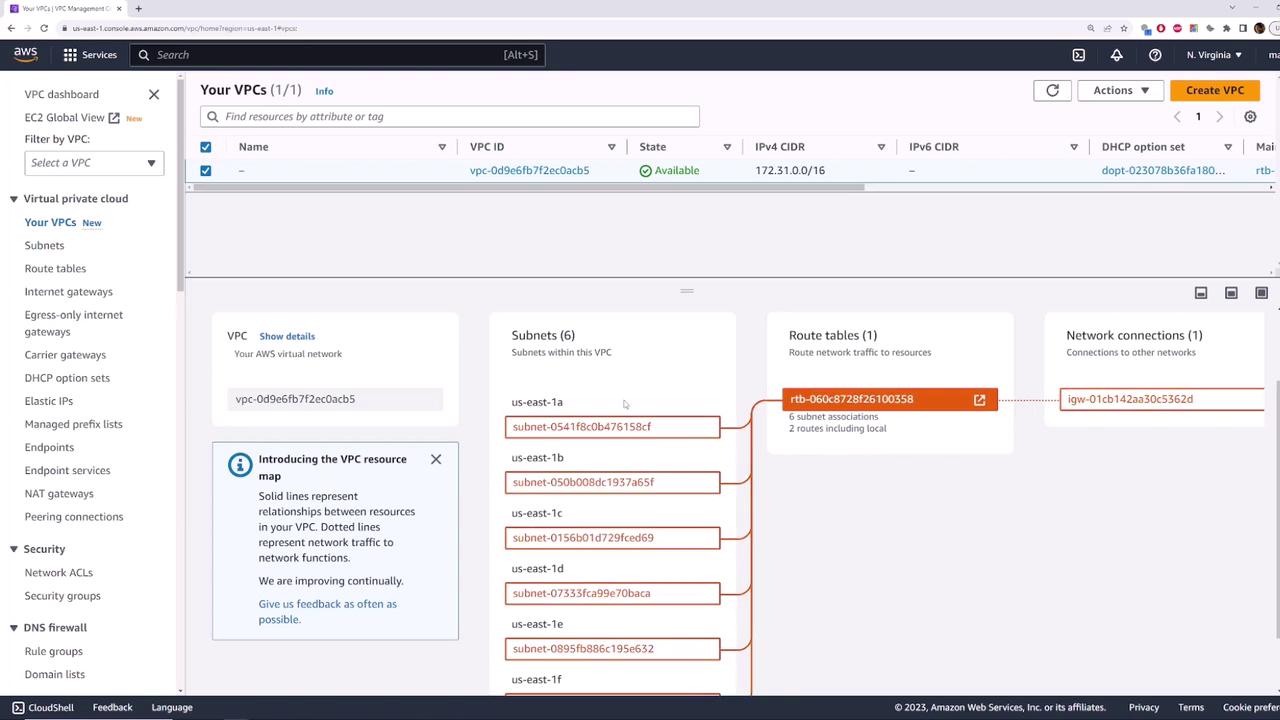
Internet Gateway & Default Route
- A Default Internet Gateway is attached to your default VPC.
- The main route table includes an
0.0.0.0/0route targeting the Internet Gateway. - Each default subnet has Auto-assign Public IPv4 enabled.
Launching a Test EC2 Instance
Let’s launch a Linux instance into the default VPC to validate internet connectivity.- Go to the EC2 console and click Launch Instance.
- Select Amazon Linux 2 AMI and t2.micro.
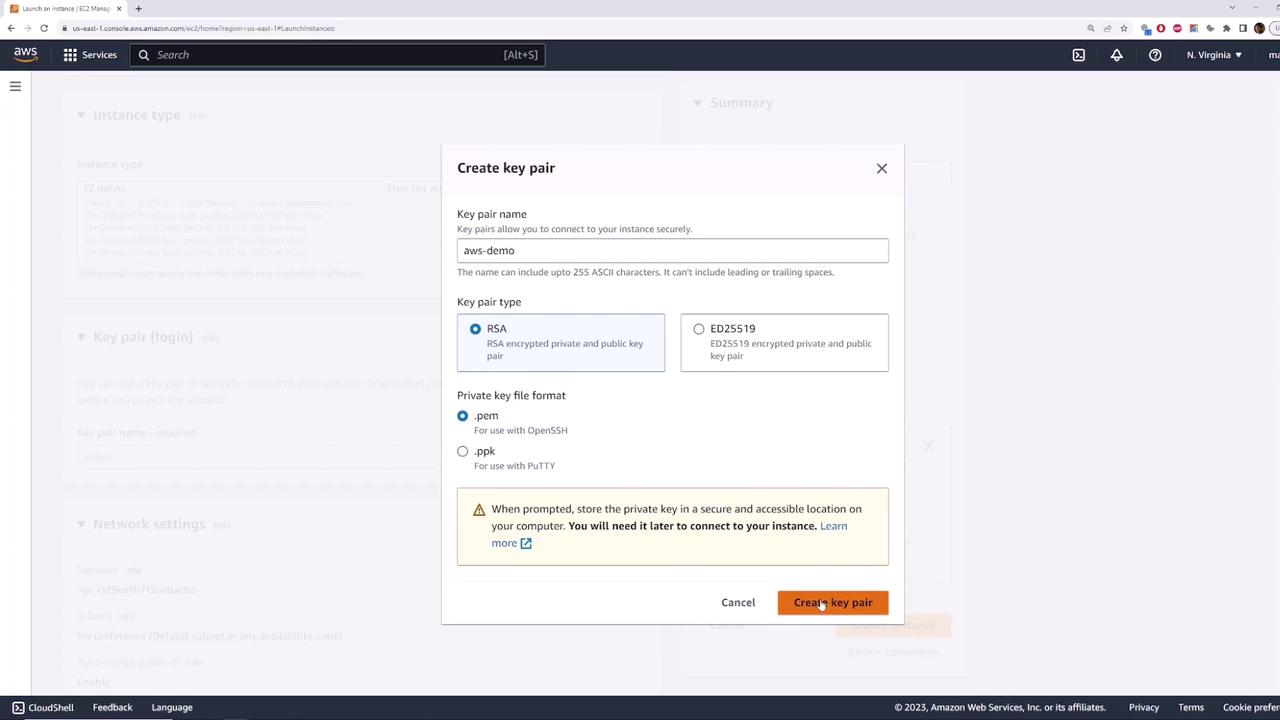
- Click Next until Key Pair—create a new key named
aws-demoand download the.pemfile.
- In Configure Security Group, allow SSH (port 22) from your IP.
- Under Configure Instance, ensure:
- Network: Default VPC (
172.31.0.0/16) - Subnet: e.g., us-east-1b
- Auto-assign Public IP: Enabled
- Network: Default VPC (
- Review and Launch.
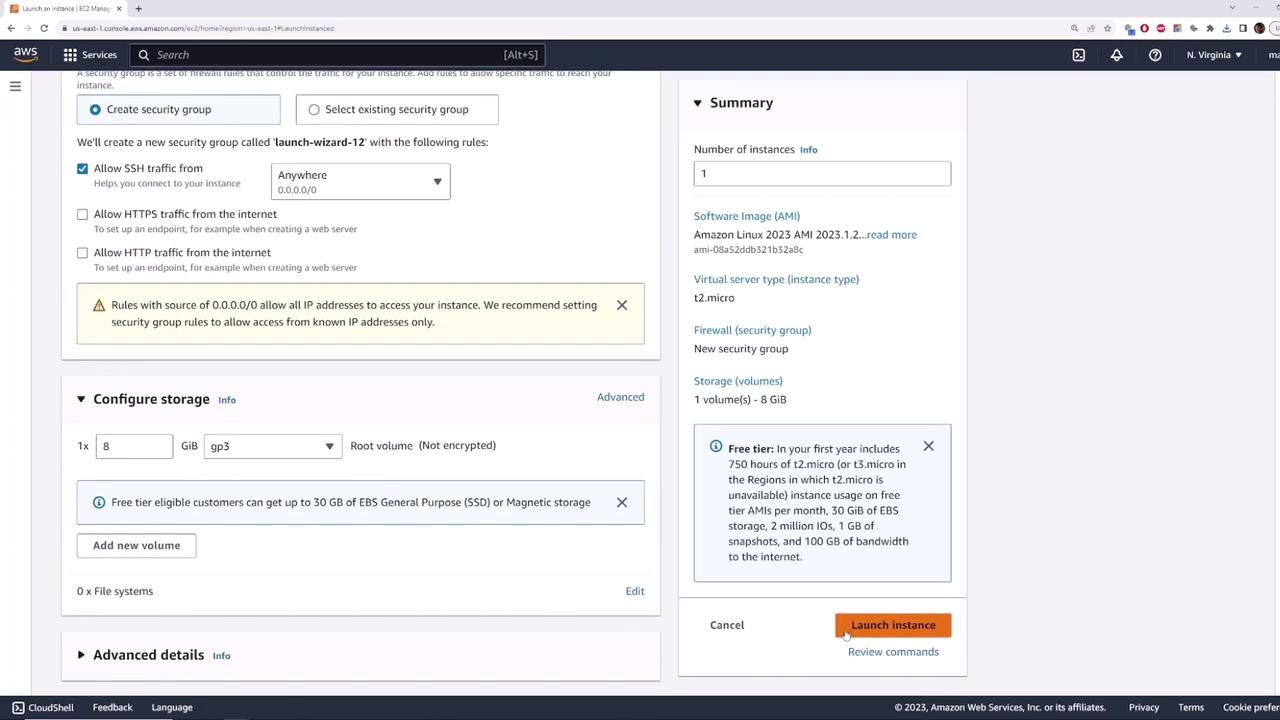
Terminate your test instance when finished to avoid unexpected charges.