Table of Contents
- Overview of Security Groups vs NACLs
- 1. Preparing the Security Group
- 2. Verifying Subnet Membership
- 3. Inspecting the Default Network ACL
- 4. Testing Initial Connectivity
- 5. Restricting Inbound NACL Rules to SSH Only
- 6. Allowing HTTP and HTTPS Traffic
- 7. Demonstrating Stateless Behavior
- 8. Using Explicit Deny Rules
- Conclusion
- References
Overview of Security Groups vs NACLs
| Feature | Security Groups | Network ACLs (NACLs) |
|---|---|---|
| Statefulness | Stateful | Stateless |
| Scope | Instance-level | Subnet-level |
| Rule Types | Allow only | Allow & Deny |
| Evaluation Order | All rules evaluated | First-match by rule number |
Use security groups for fine-grained, instance-level controls and NACLs for broader subnet-level filtering.
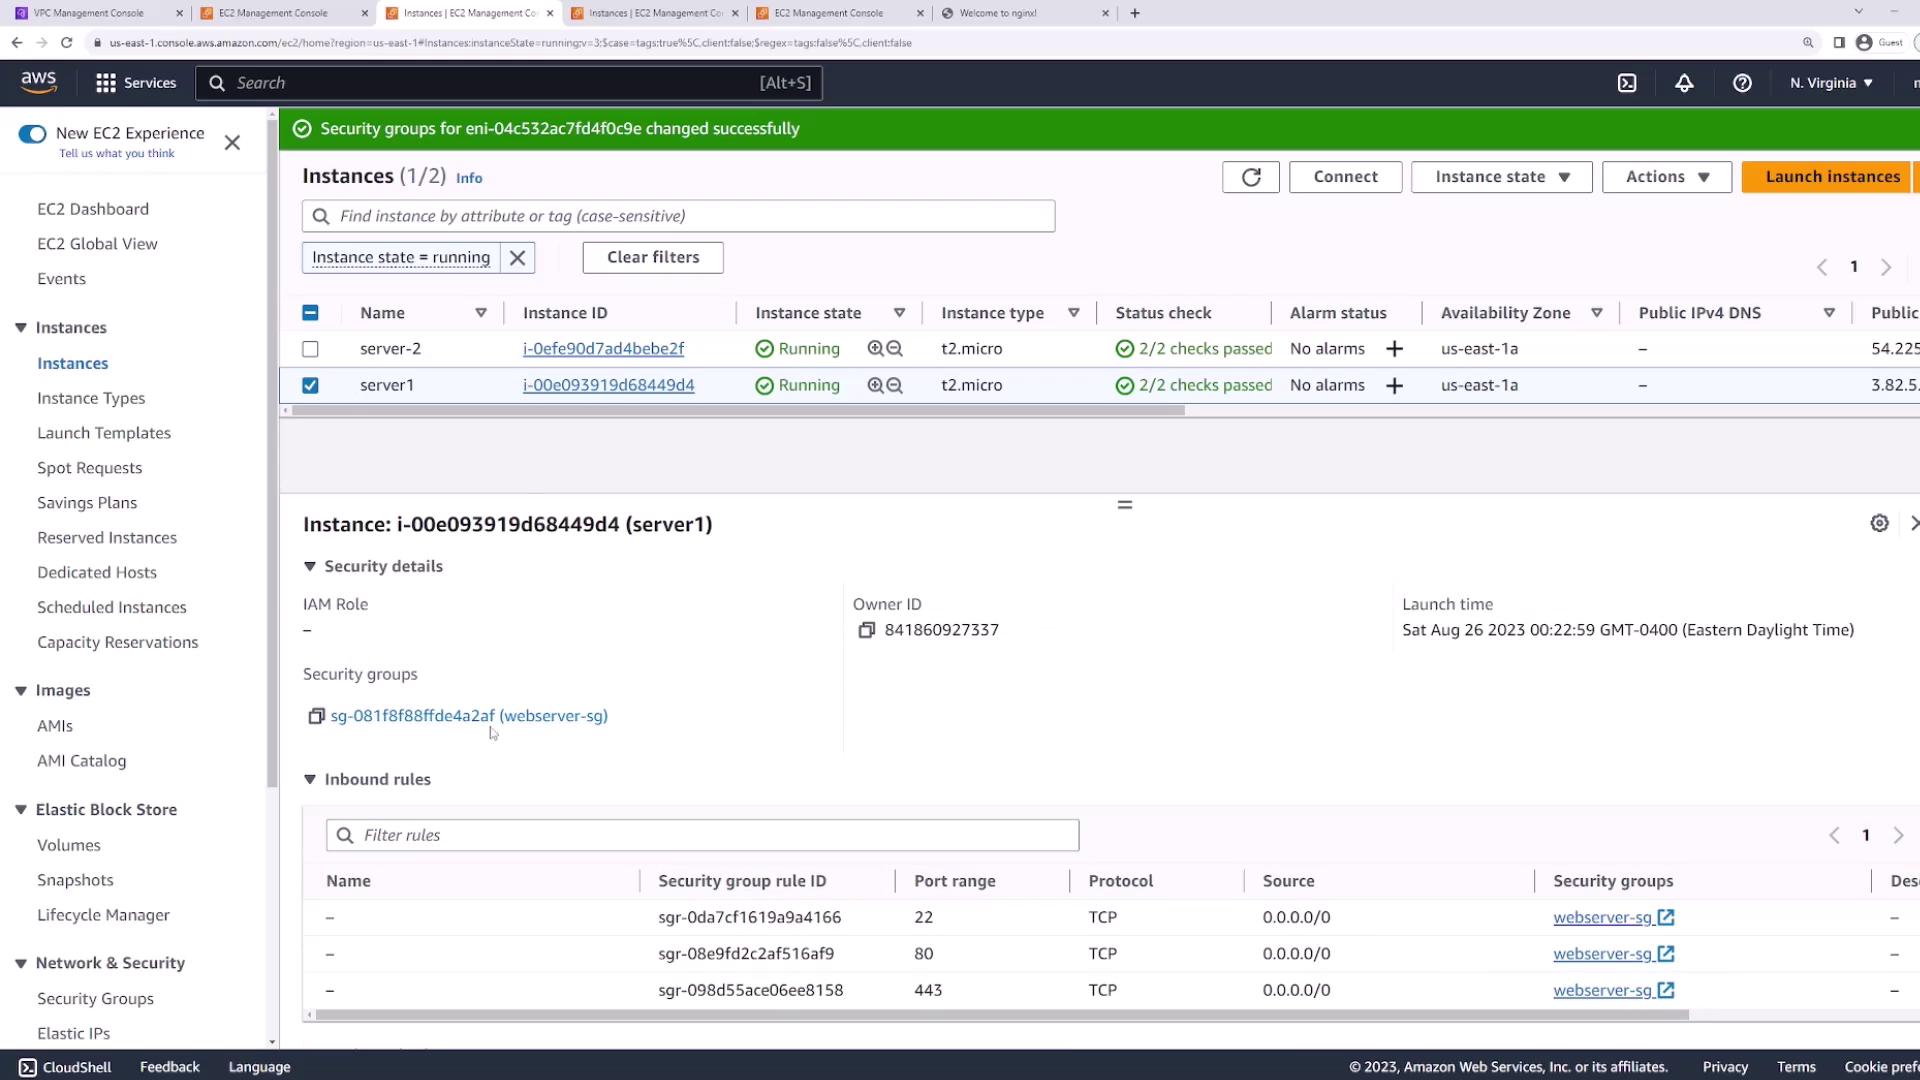
1. Preparing the Security Group
Before testing NACL behavior, make sure your EC2 security group is wide open so it won’t block any traffic.- In the AWS Management Console, go to EC2 → Instances, select your servers.
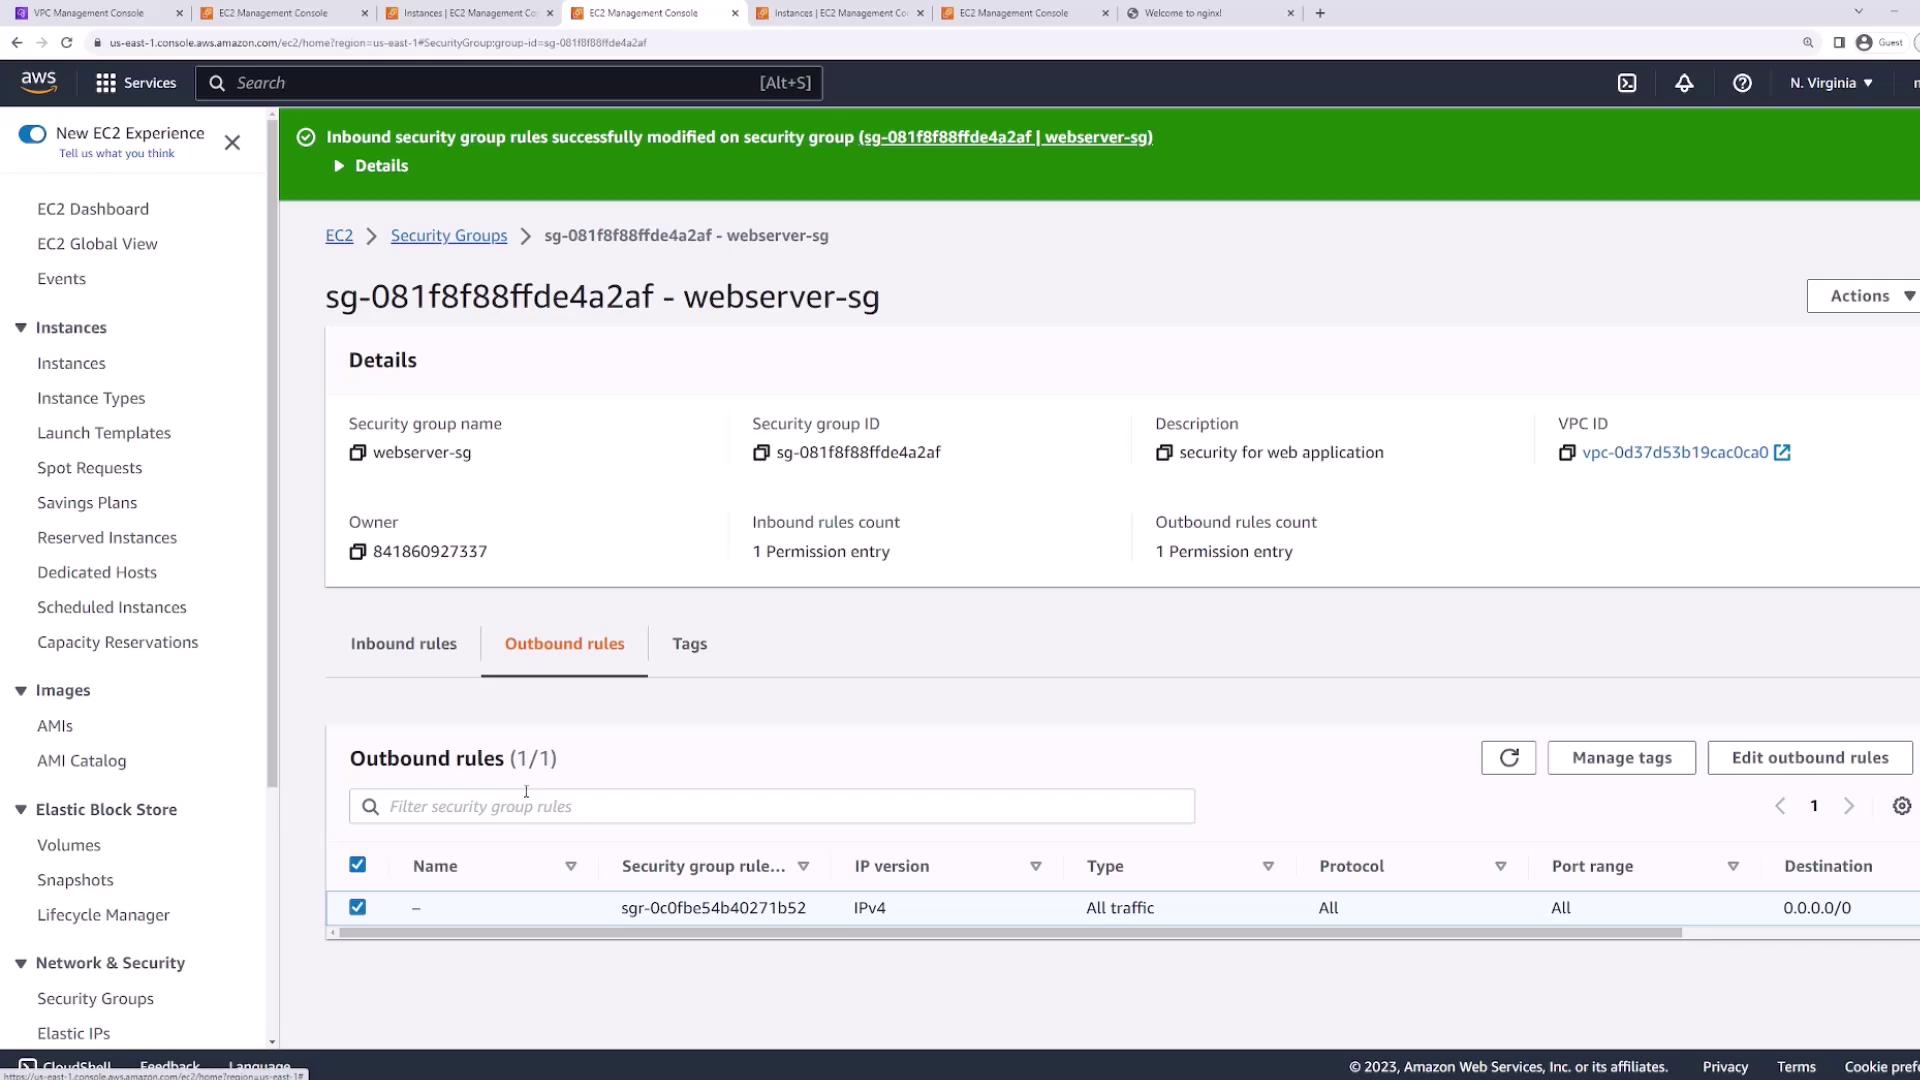
- Under Security → Security Groups, click Change security groups.
- Attach the
webserver-sgsecurity group to both instances. - Edit Inbound and Outbound rules to allow all traffic (All protocols, All ports, Source/Destination
0.0.0.0/0).
2. Verifying Subnet Membership
Both instances must reside in the same subnet to observe NACL behavior:- Select your instance in EC2 → Networking tab.
- Copy the Subnet ID (e.g.,
subnet-e1683).
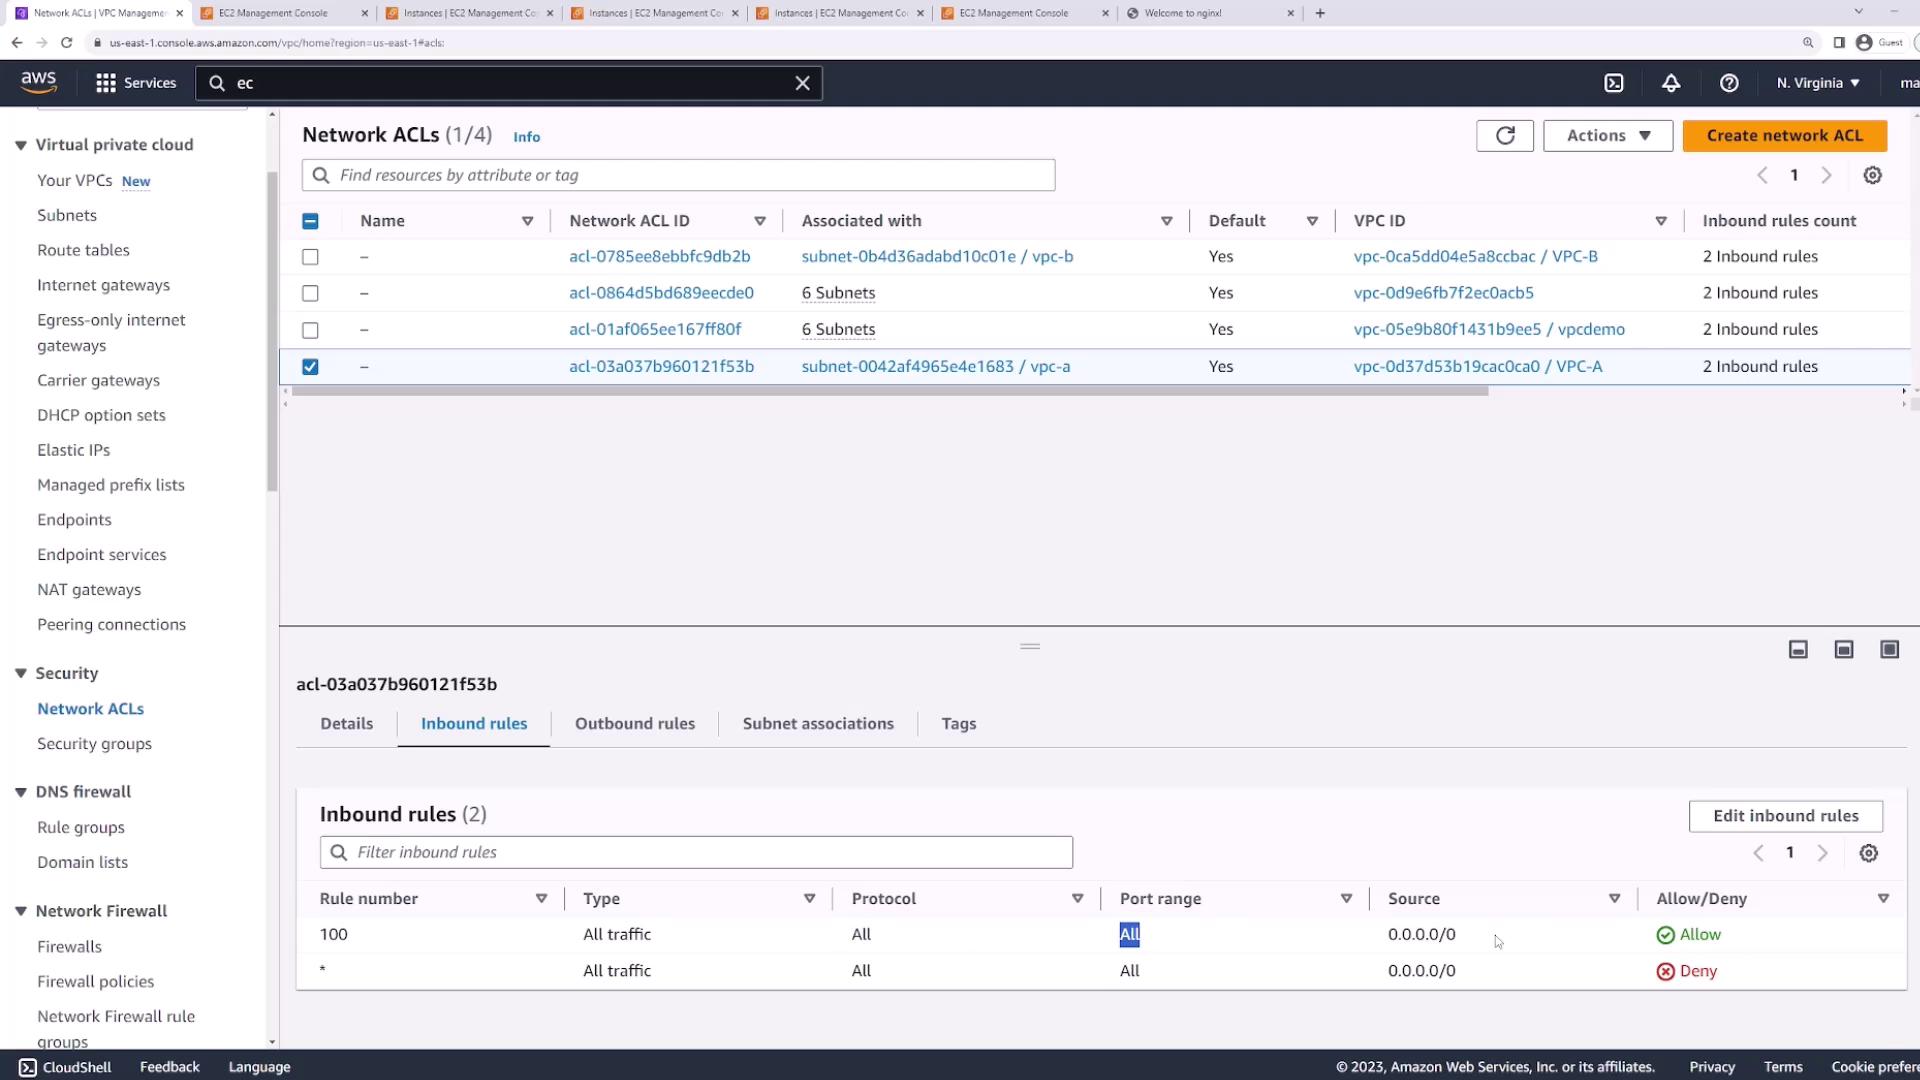
3. Inspecting the Default Network ACL
Navigate to VPC → Security → Network ACLs. Select the default ACL for your VPC and review its inbound rules:- Rule 100: Allow all traffic (All protocols, All ports,
0.0.0.0/0) - Rule *: Deny all traffic
4. Testing Initial Connectivity
With the security group and default NACL wide open, verify connectivity:5. Restricting Inbound NACL Rules to SSH Only
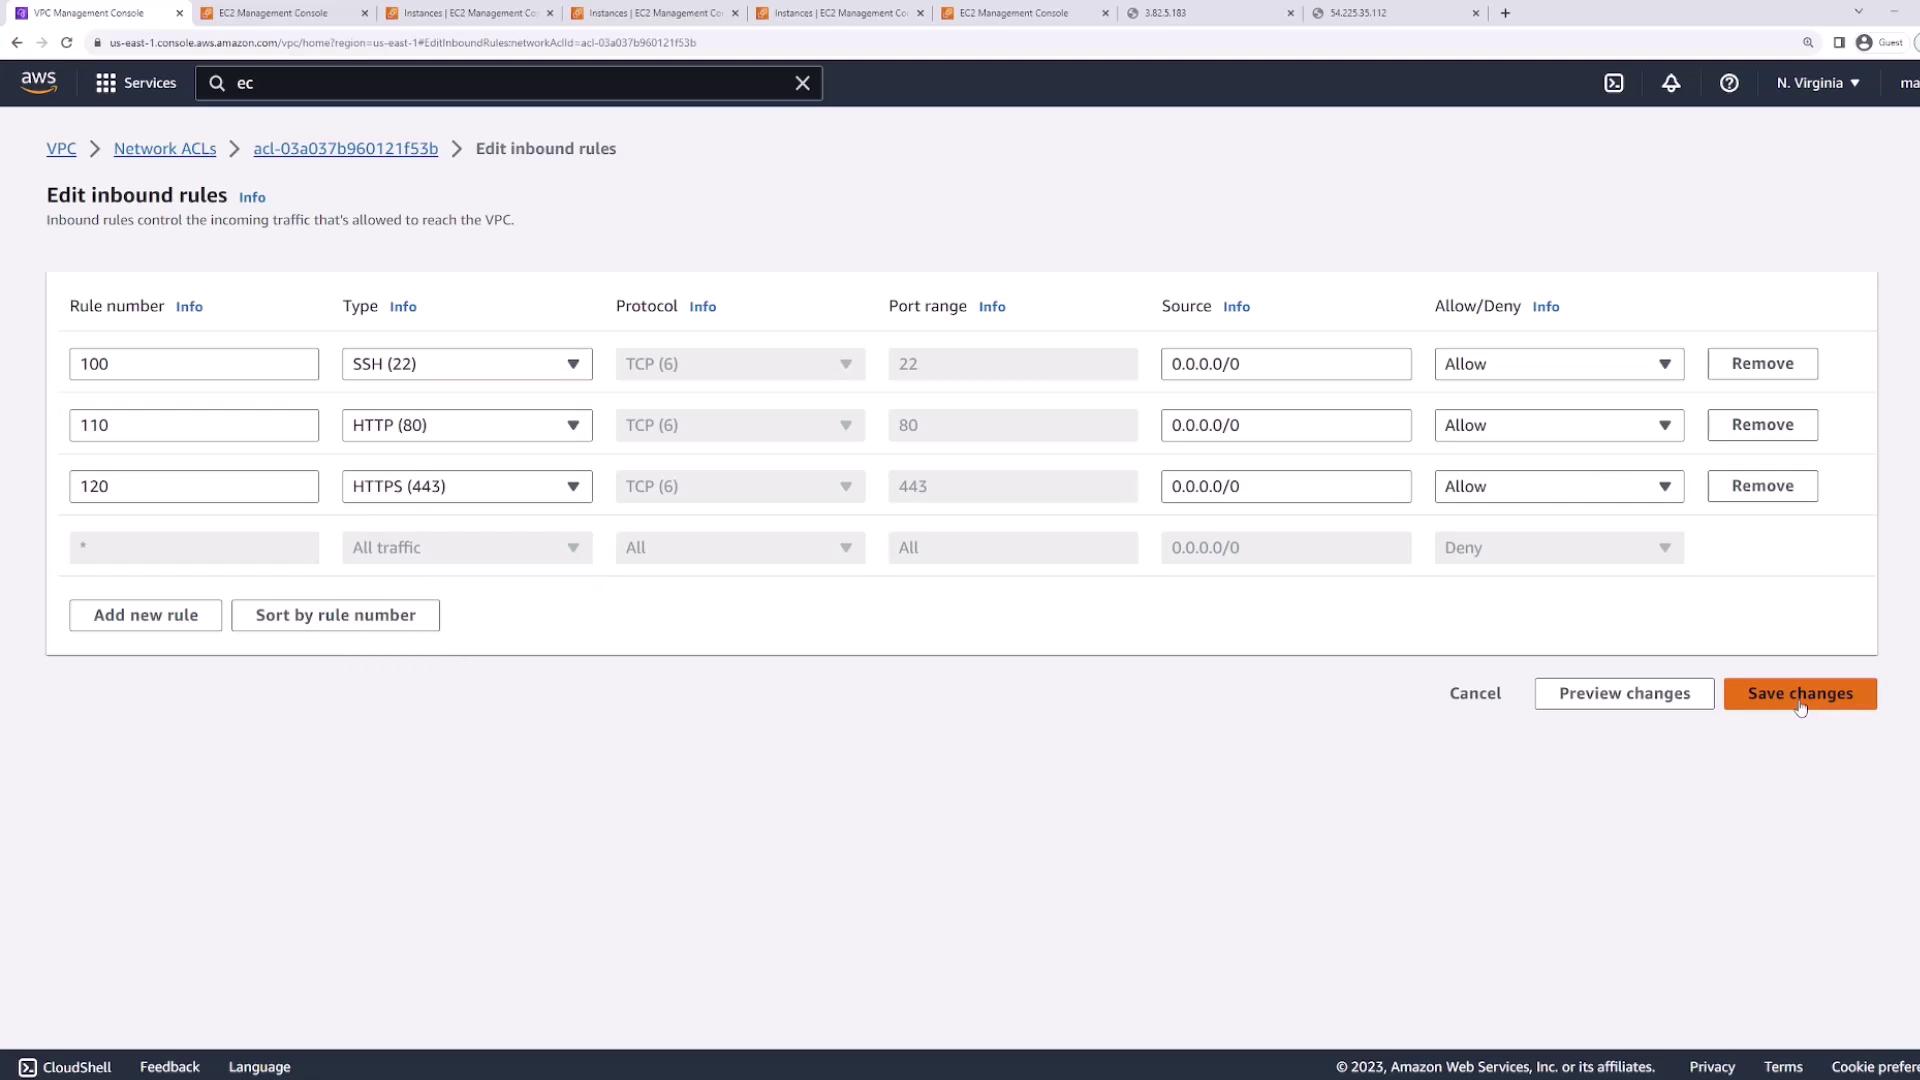
Now lock down the NACL so only SSH (port 22) is allowed inbound:- In VPC → Network ACLs, select your ACL.
- Edit Inbound Rules:
- Change Rule 100 to allow only SSH (TCP port 22) from
0.0.0.0/0. - The default deny will now block everything else.
- Change Rule 100 to allow only SSH (TCP port 22) from
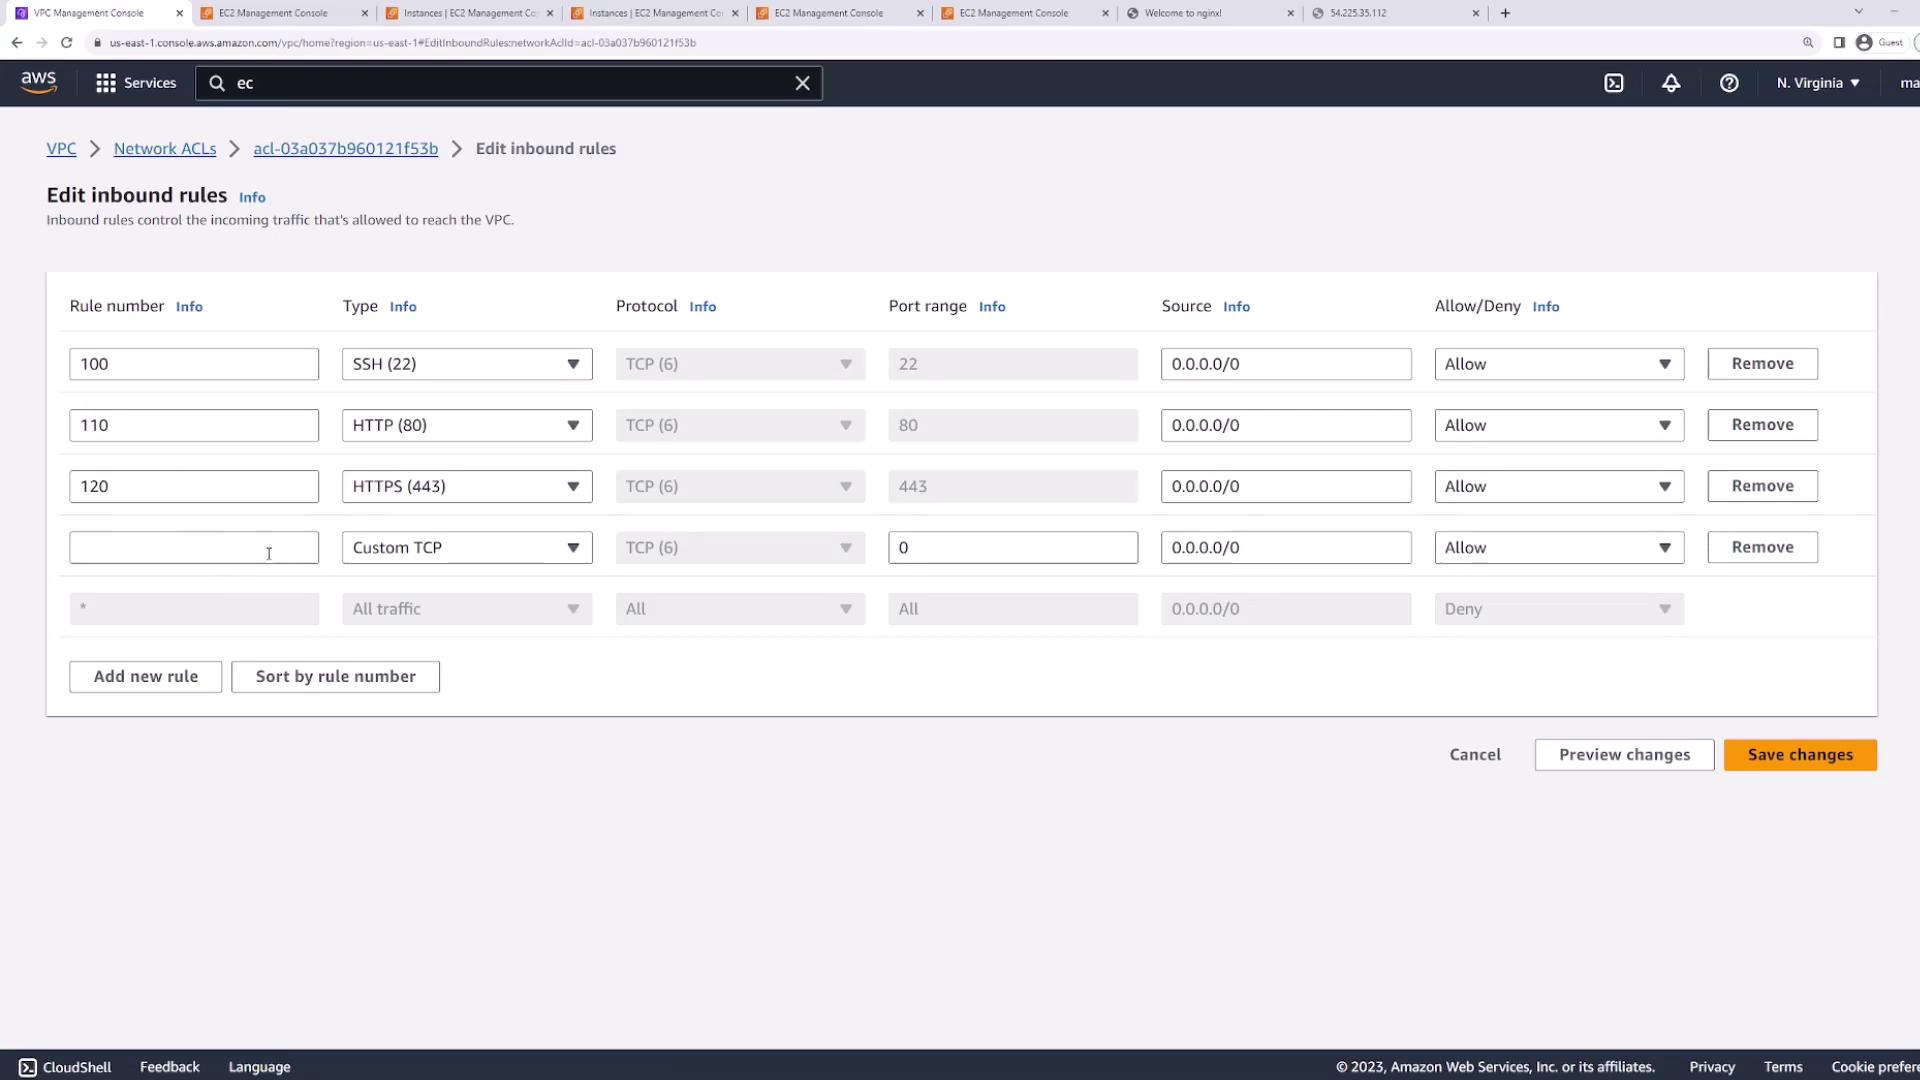
6. Allowing HTTP and HTTPS Traffic
To re-enable web traffic, add two inbound rules after SSH:- Rule 101: Allow HTTP (TCP 80) from
0.0.0.0/0 - Rule 120: Allow HTTPS (TCP 443) from
0.0.0.0/0
If your second server doesn’t serve HTTP yet, install and start NGINX:Refresh your browser on both instances’ IPs to confirm HTTP works.
7. Demonstrating Stateless Behavior
NACLs are stateless, so return traffic must be explicitly allowed. Even with outbound rules open, inbound return packets for ephemeral ports are blocked:- Rule 130: Allow all traffic (for the duration of your download)
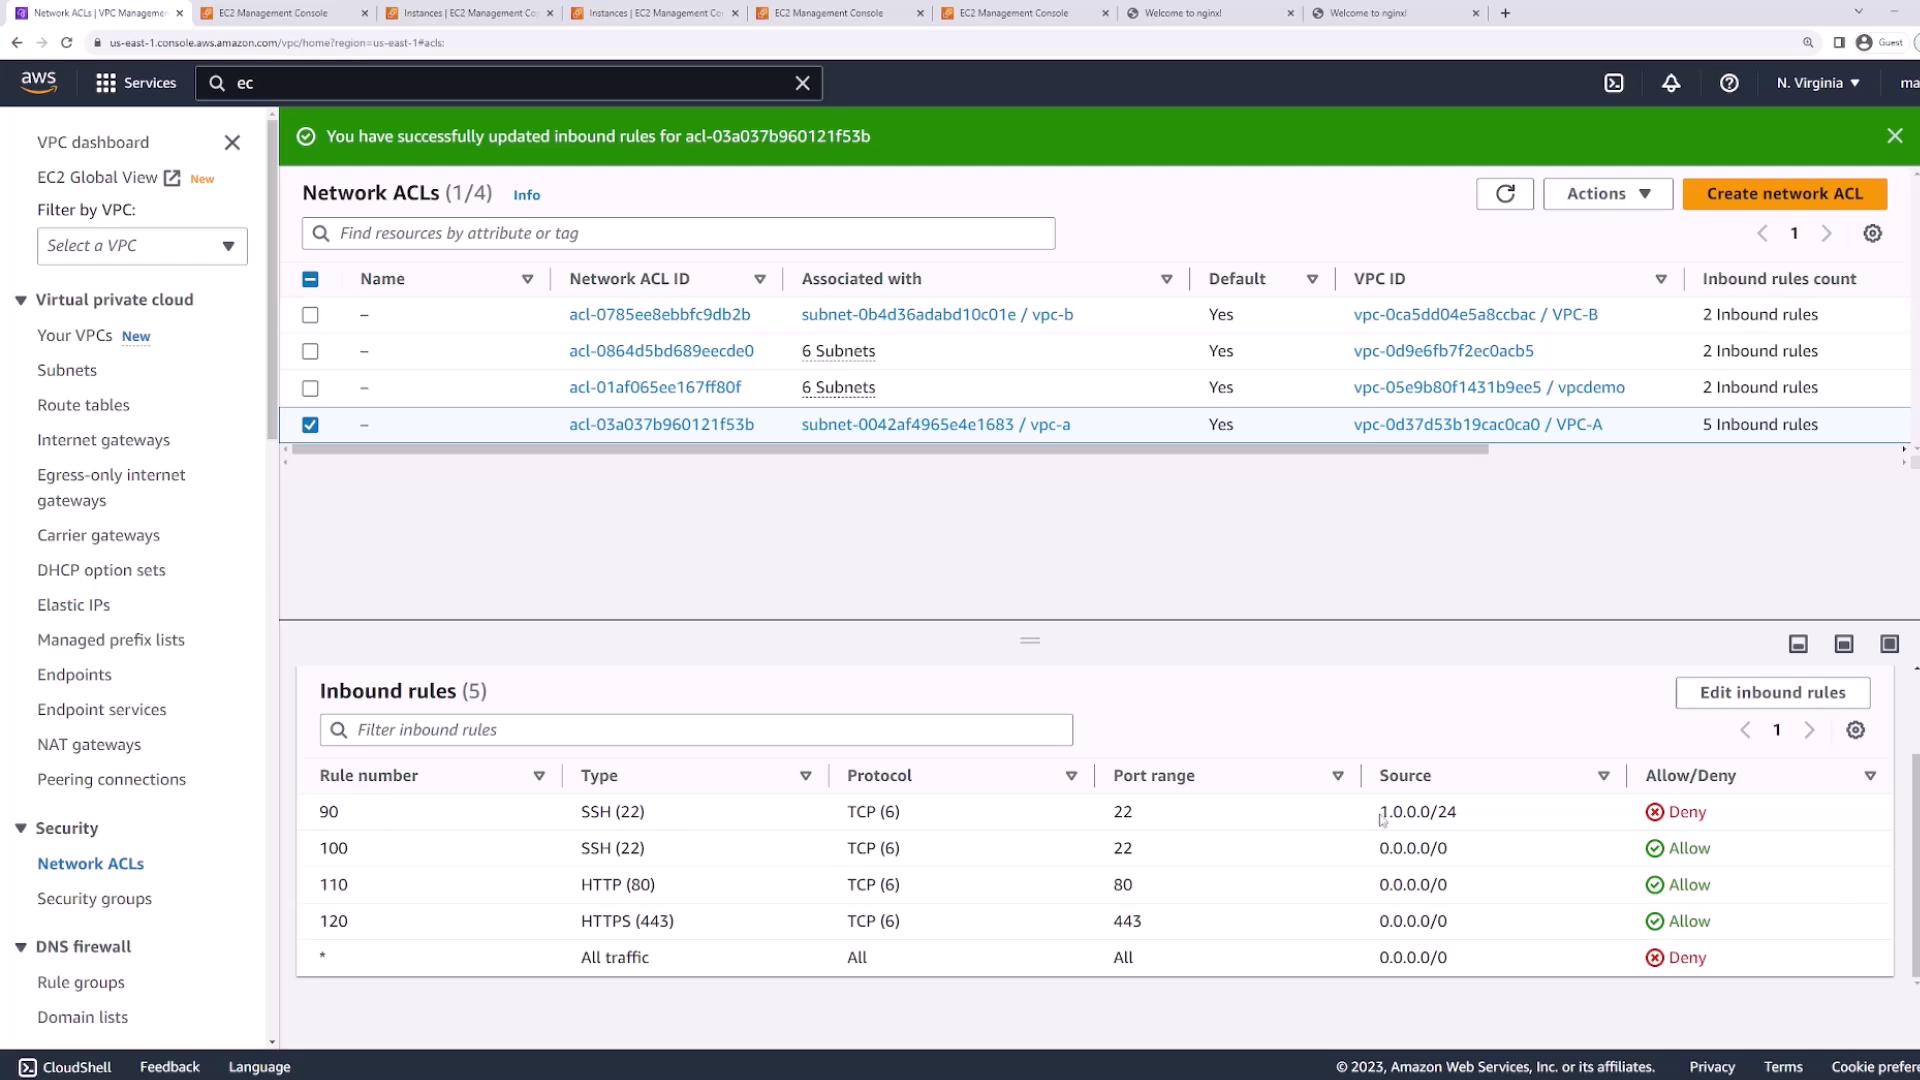
8. Using Explicit Deny Rules
Unlike security groups, NACLs support explicit Deny entries. For example, to block SSH from a specific CIDR:- Create Rule 90: Deny TCP port 22 from
1.0.0.0/24. - Keep Rule 100: Allow TCP port 22 from
0.0.0.0/0(evaluated after rule 90).
- SSH from
1.0.0.0/24is denied by rule 90. - SSH from all other IPs is allowed by rule 100.
Conclusion
In this demo we covered:- Security groups are stateful and instance-level.
- NACLs are stateless and subnet-level.
- NACLs support both Allow and Deny, evaluated in ascending order.