1. Install the Kubernetes Plugin
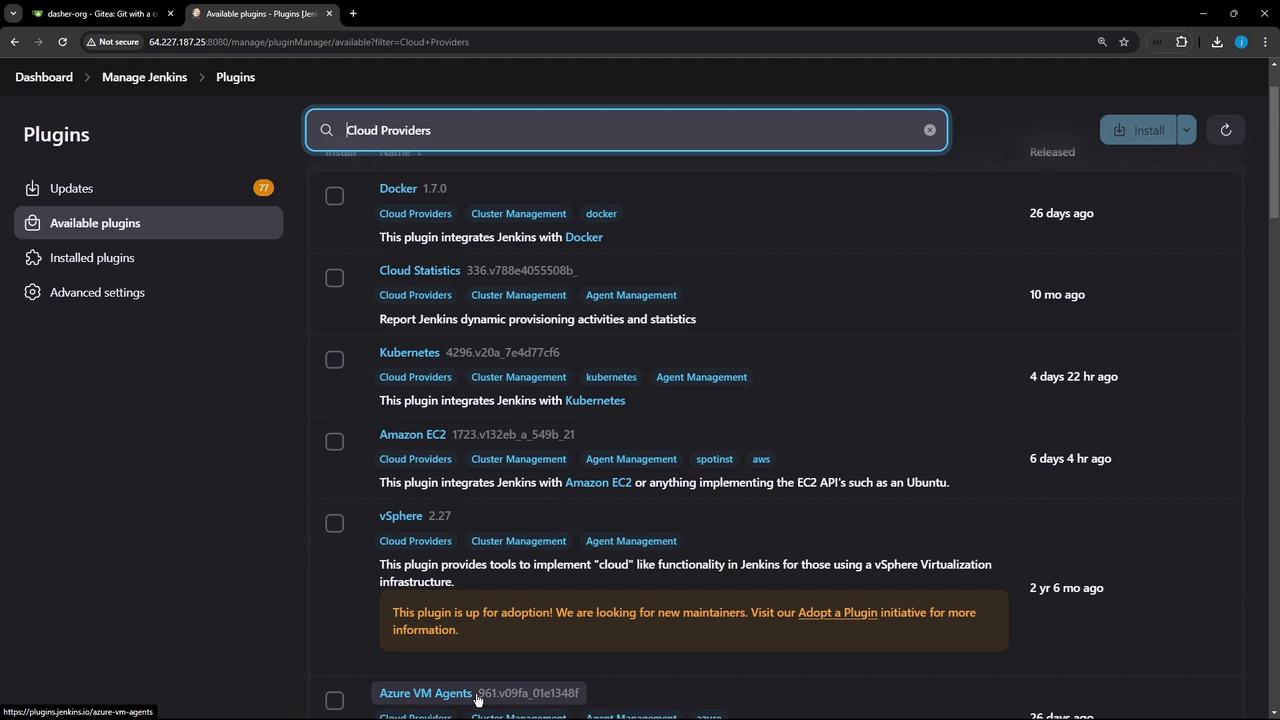
- In Jenkins, go to Manage Jenkins → Manage Plugins.
- Under the Available tab, filter for Cloud plugins.
- Find Kubernetes and click Install without restart.
-
To install via CLI (pin to a specific version):
-
To upload an
.hpimanually, switch to the Advanced tab and enter: - Restart Jenkins after installation.
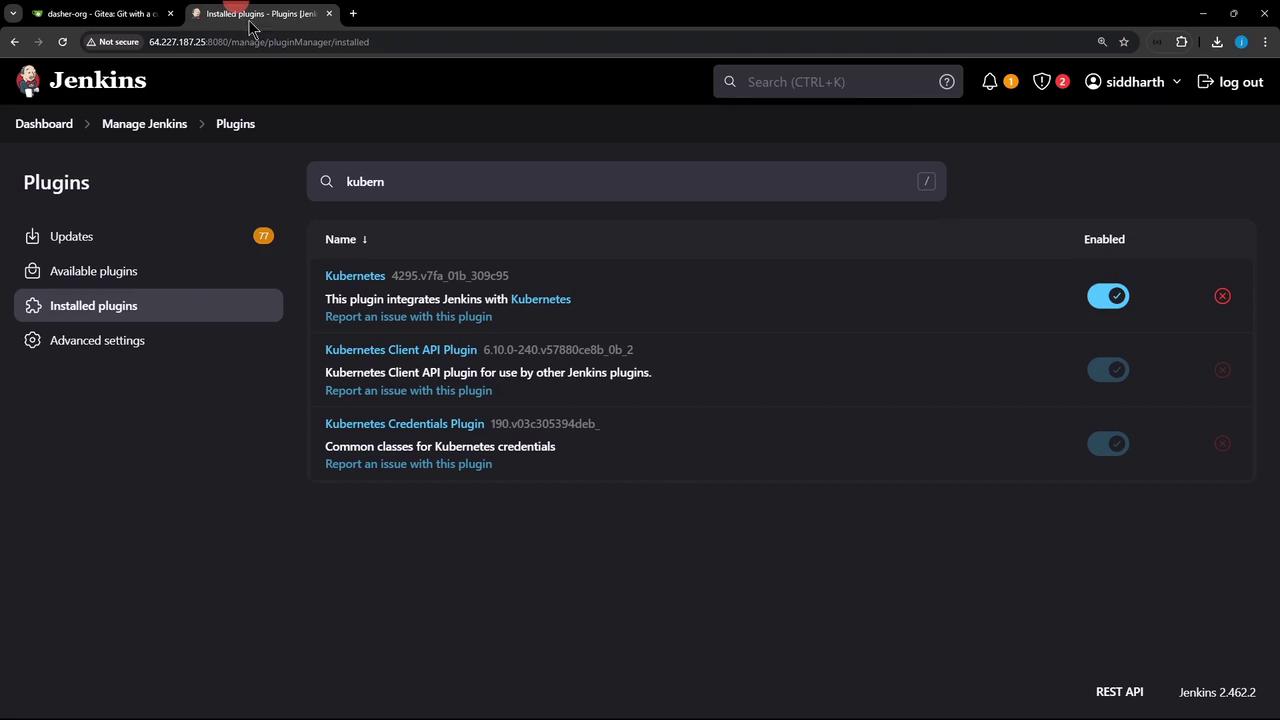
2. Verify Plugin Installation
After Jenkins restarts:- Go to Manage Jenkins → Manage Plugins → Installed.
- Search for “Kubernetes” to confirm the plugin is active.
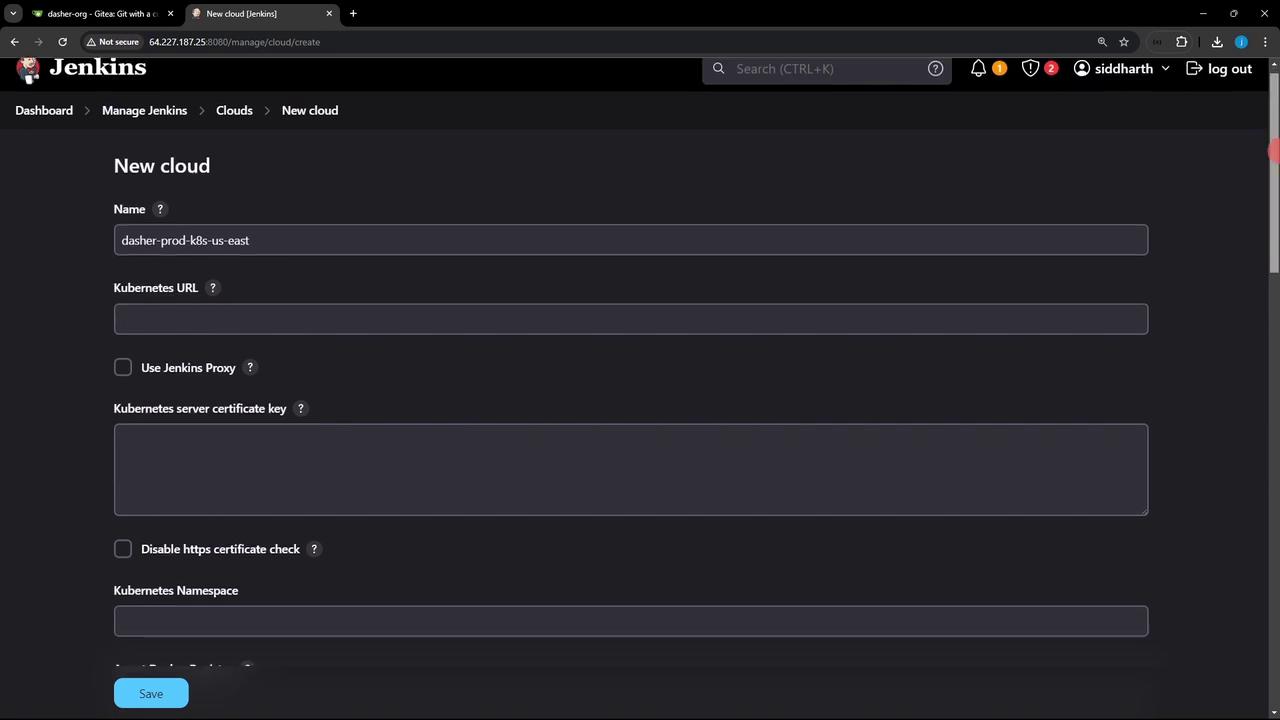
3. Add a Kubernetes Cloud
- Navigate to Manage Jenkins → Manage Nodes and Clouds → Configure Clouds.
- Click Add a new cloud (➕) and choose Kubernetes.
- Give it a name (e.g.,
prod-k8s-us-east). Leave other fields blank for now; you’ll configure credentials next.
4. (Option A) Use a Full Kubeconfig File
Using a full kubeconfig grants admin-level access. Do not use this in production.
-
Verify your nodes:
-
Export the raw config:
-
In Jenkins Credentials, add a Secret file credential and upload
kubeconfig.yaml. - In the cloud settings, select this credential under Kubernetes Namespace and Test Connection.
After testing, remove this credential and follow the least-privilege approach below.
5. Create a Dedicated Namespace and Service Account
Use the least-privilege principle:- Kind: Secret text
- Secret: Paste the token
- ID:
jenkins-service-account-token
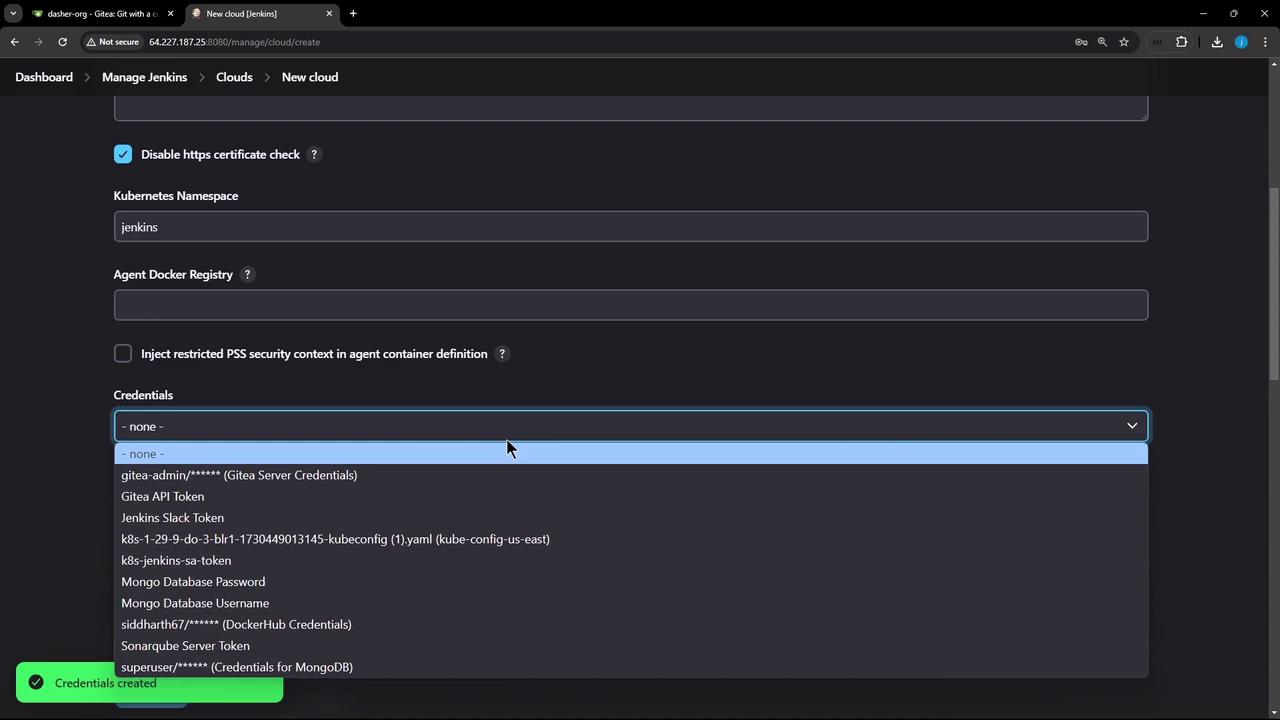
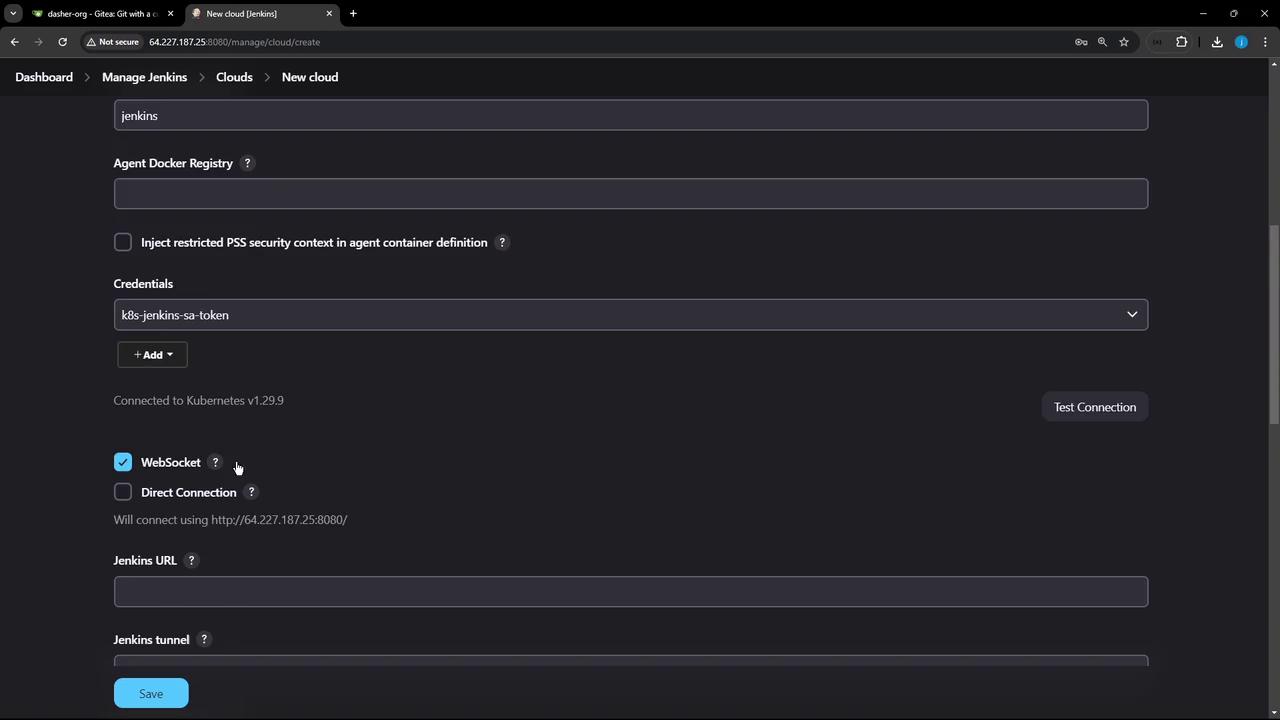
6. Configure the Cloud with Token Credentials
- In the Kubernetes cloud settings:
- Kubernetes URL: Your cluster endpoint (e.g.,
https://<cluster-endpoint>) - Credentials:
jenkins-service-account-token - Kubernetes Namespace:
jenkins
- Kubernetes URL: Your cluster endpoint (e.g.,
- Click Test Connection.

7. Grant Namespace Permissions
Bind theadmin role to your service account in the jenkins namespace:
8. Advanced Connection Settings
- TCP (JNLP) Ports: Default agent communication.
- WebSocket: Use if TCP ports are blocked.
- Direct Connection: Override Jenkins URL (for proxies or gateways).
| Setting | Use Case |
|---|---|
| TCP (JNLP) | Standard agent connections |
| WebSocket | In restrictive network environments |
| Direct Connection | Custom URL for Jenkins server behind a proxy or ingress |
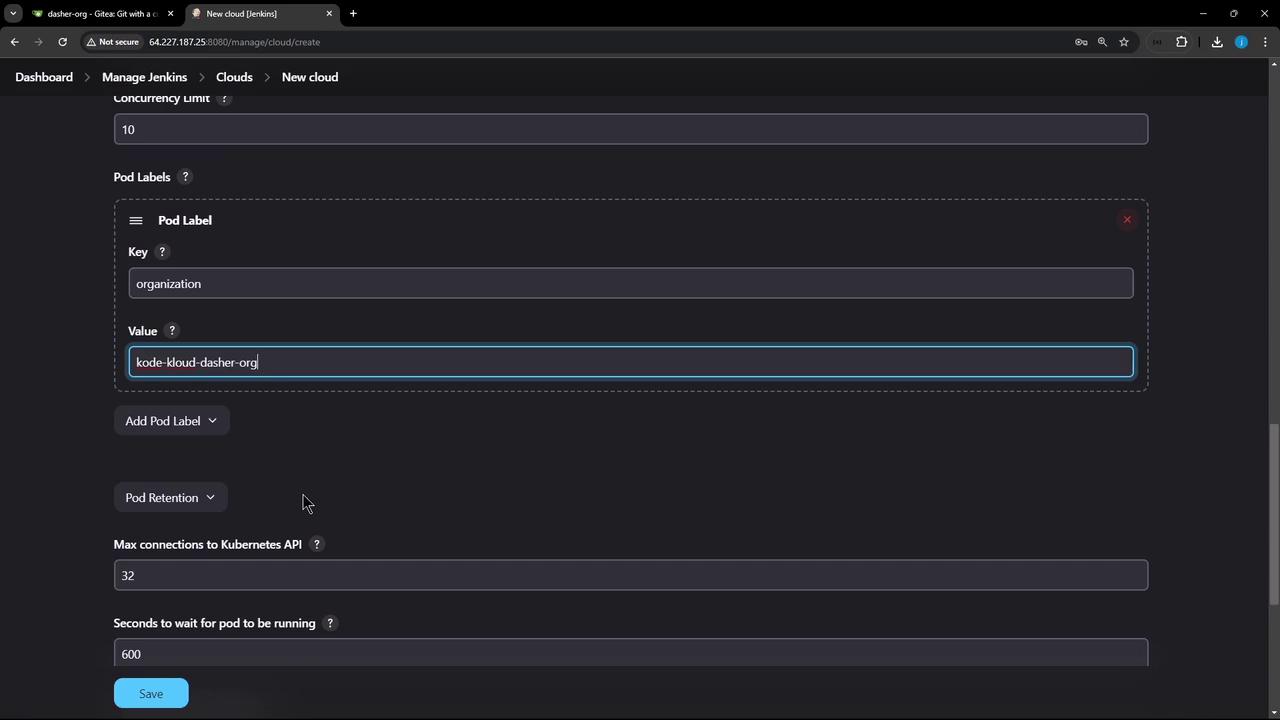
9. Define Pod Templates and Retention
- Set a Pod Label (e.g.,
organization=KodeKloudAzureArc). - Add Container Templates for your build tools and environments.
- Configure Pod Retention:
| Retention Option | Behavior |
|---|---|
| Never | Delete pods once builds finish |
| On failure | Keep pods only if the build fails |
| Always | Never delete pods (for debugging) |
10. Finalize and Save
Review your settings, then click Save. Your Jenkins instance can now dynamically provision Kubernetes agents for pipelines.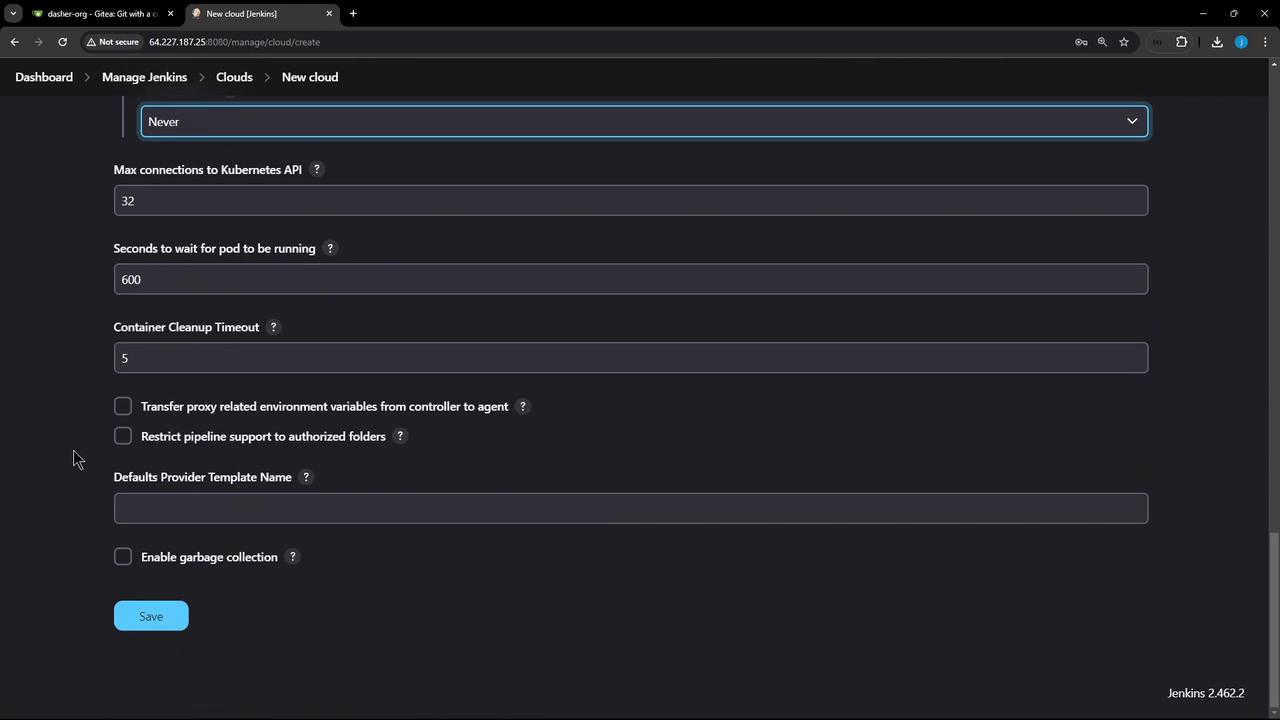
Now you’re ready to run CI/CD pipelines using Kubernetes-based agents. For more details, see the Jenkins Kubernetes Plugin Documentation and the Kubernetes Service Account Concepts.