Certified Backstage Associate (CBA)
Templates
Demo Creating a Template
In this walkthrough, we'll build a reusable Backstage template for provisioning a Node.js API using Express.js. By standardizing your project setup, every new API automatically includes:
- Linting with ESLint
- Formatting with Prettier
- Testing with Jest
- CI/CD via GitHub Actions
- Express.js as the API framework
Tool | Purpose | Example Command |
---|---|---|
ESLint | Linting | npm run lint |
Prettier | Code formatting | npm run format |
Jest | Automated testing | npm run test |
GitHub Actions | CI/CD | .github/workflows/ci.yml |
Express.js | API framework | npm install express |
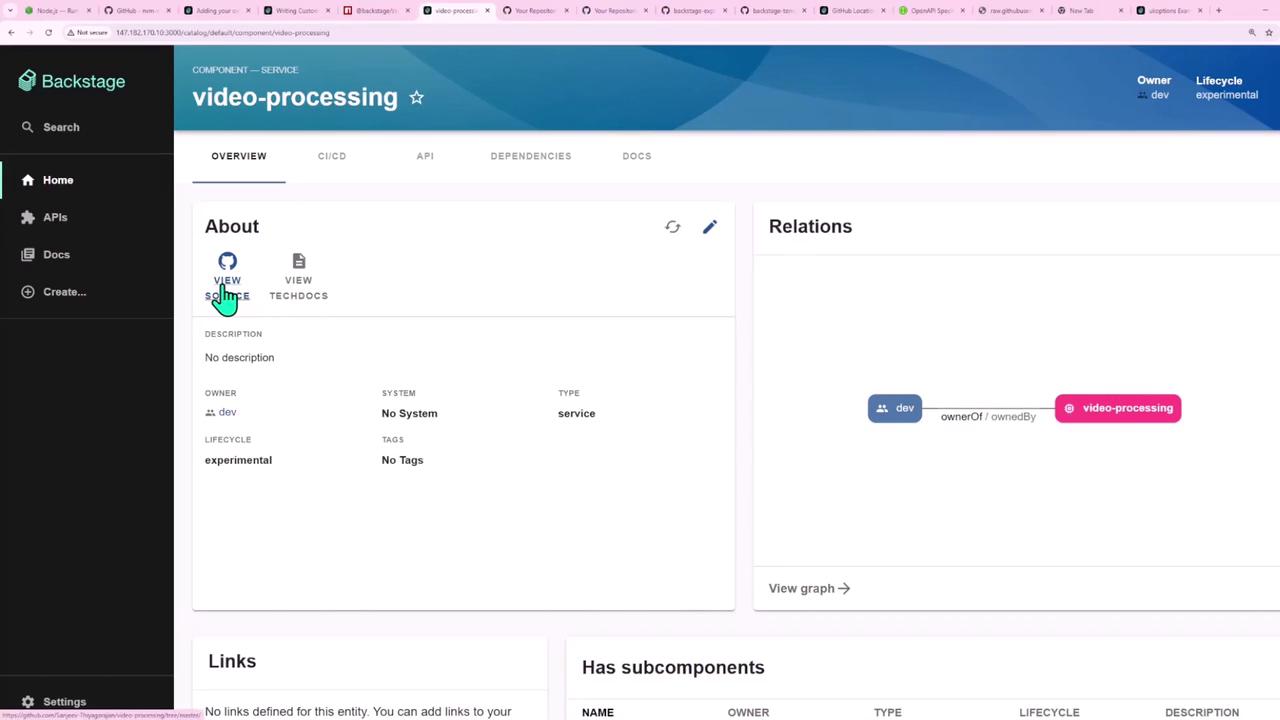
High-Level Workflow
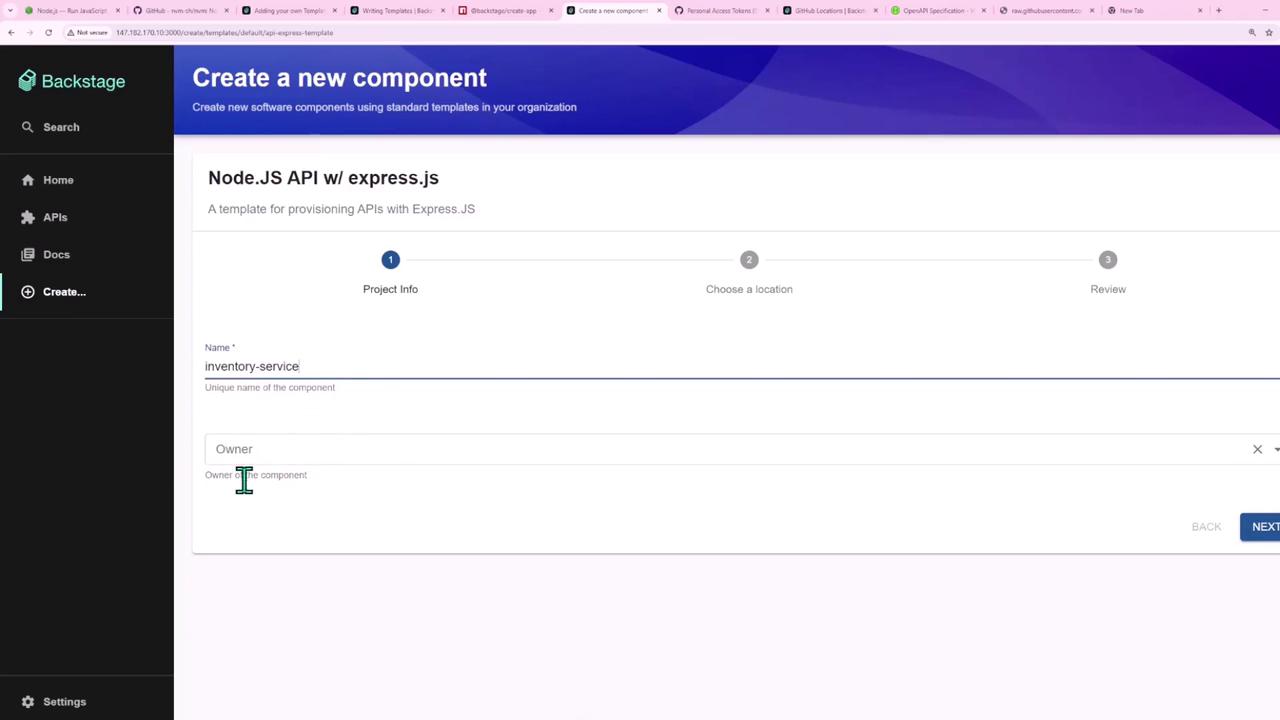
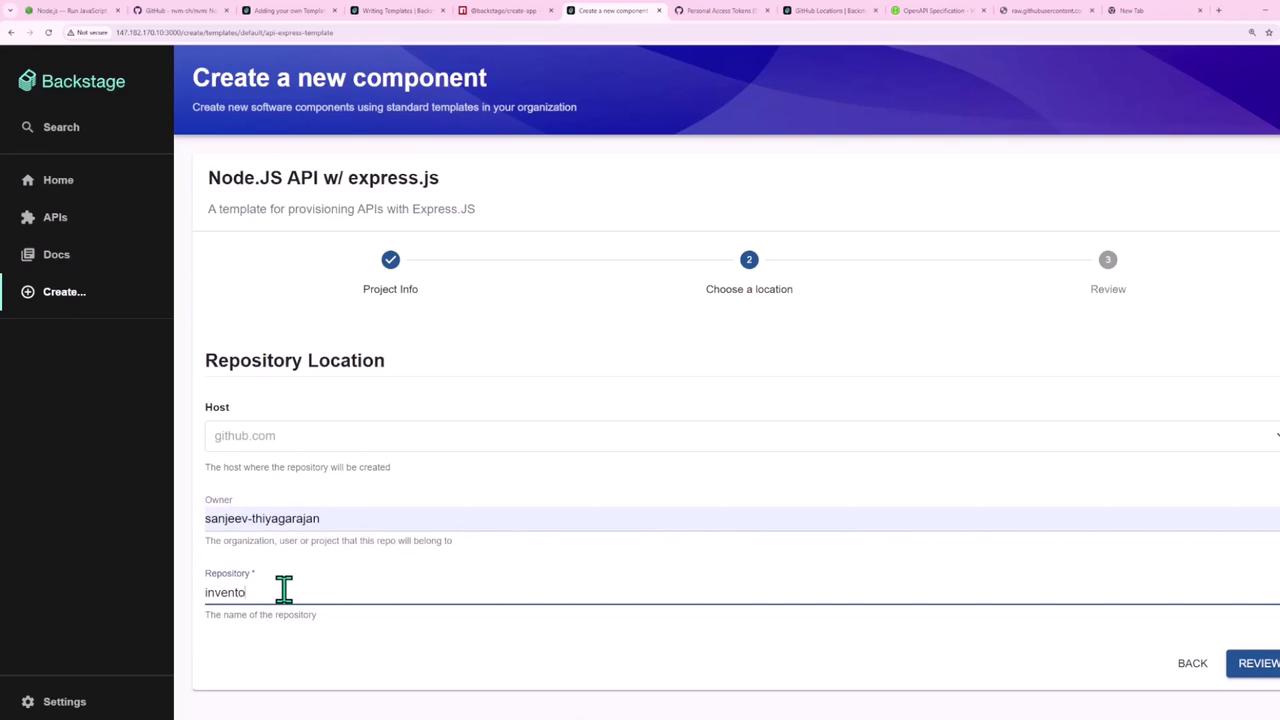
The platform team maintains a blueprint repository containing a template.yaml
. When a developer fills out a form in Backstage:
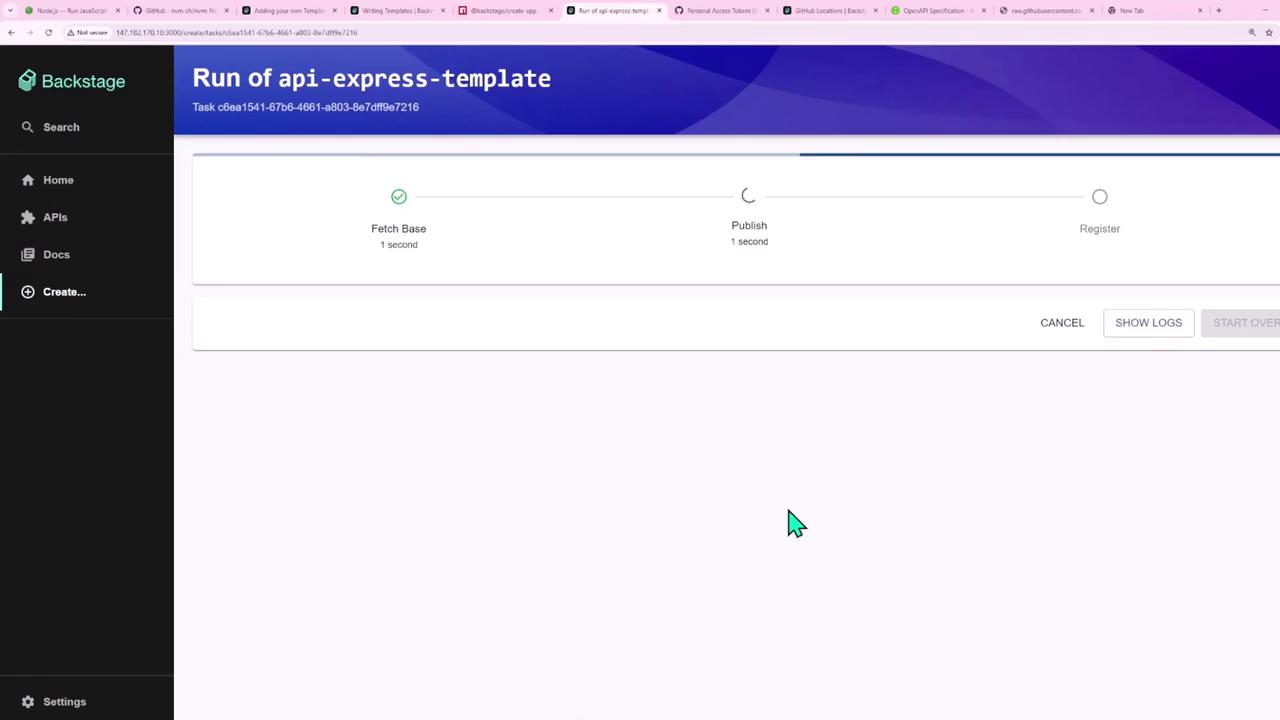
- Backstage fetches the project skeleton.
- It injects parameters (name, owner, repo URL).
- A new GitHub repository is created and registered automatically.
1. Project Skeleton
Your blueprint (“Backstage Express API blueprint”) provides starter code:
- package.json with scripts for start, dev, test, format, lint
- .nvmrc (Node.js version:
v20.11.0
) - .gitignore (ignoring
node_modules/
) - src/ directory with a minimal Express endpoint
- .github/workflows/ci.yml for GitHub Actions
In the IDE, it looks like this:
package.json
{
"name": "project-name",
"version": "1.0.0",
"description": "",
"main": "index.js",
"scripts": {
"start": "node src/index.js",
"dev": "nodemon src/index.js",
"test": "jest",
"test:ci": "jest --ci",
"format": "prettier --write .",
"format:check": "prettier --check .",
"lint": "eslint .",
"lint:fix": "eslint --fix ."
},
"type": "module",
"keywords": [],
"author": ""
}
Node Version
Make sure to update .nvmrc when your team upgrades Node.js:
v20.11.0
Express API (src/index.js
)
import express from 'express';
const app = express();
app.get('/', (req, res) => {
res.send('Hello from your Express API!');
});
const port = process.env.PORT ?? 4000;
app.listen(port, () => {
console.log(`API listening on port ${port}`);
});
GitHub Actions Workflow (.github/workflows/ci.yml
)
name: CI
on:
push:
branches: [ main ]
pull_request:
branches: [ main ]
jobs:
quality-checks:
runs-on: ubuntu-latest
steps:
- name: Checkout code
uses: actions/checkout@v4
- name: Setup Node.js
uses: actions/setup-node@v4
with:
node-version-file: .nvmrc
cache: npm
- name: Install dependencies
run: npm ci
- name: Run ESLint
run: npm run lint
- name: Check formatting with Prettier
run: npm run format:check
- name: Run tests
run: npm run test:ci
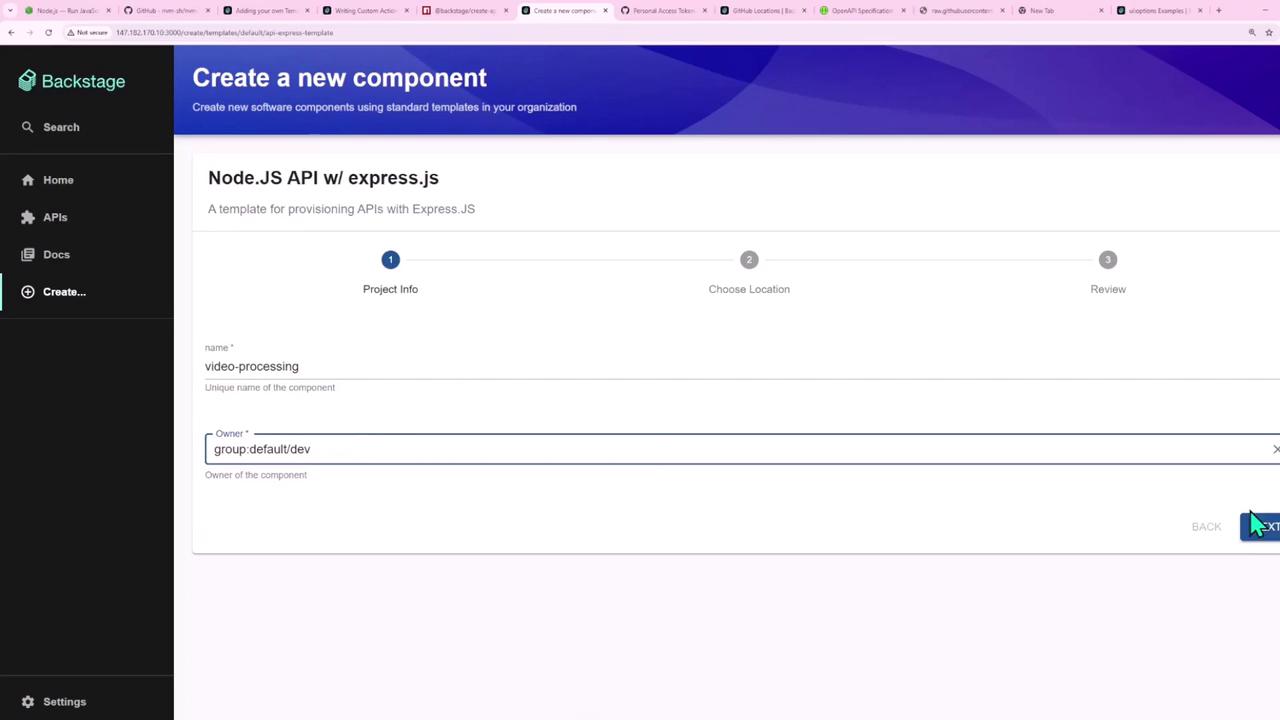
2. Developer Experience
Developers select the Node.js + Express template in Backstage’s Create UI, fill in project fields, and click Create. Everything else is automated.
Backstage shows real-time progress:
Once complete, the GitHub repository is created:
Backstage also registers the component automatically:
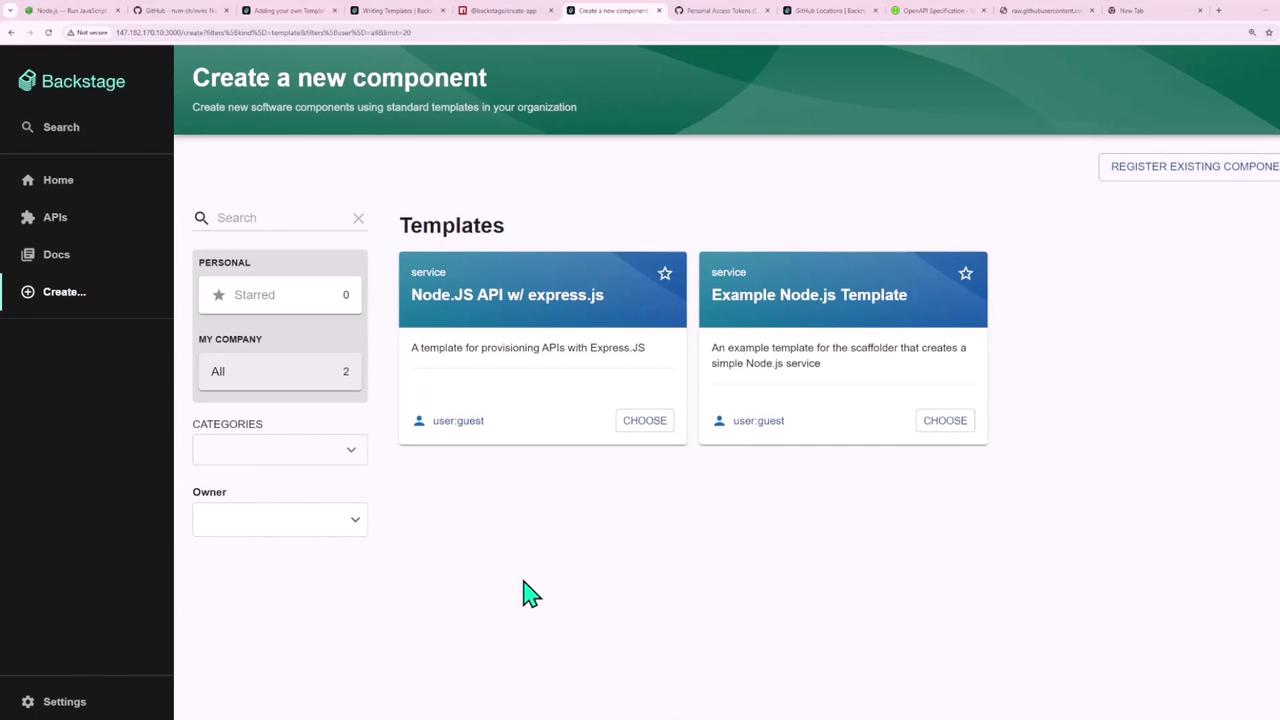
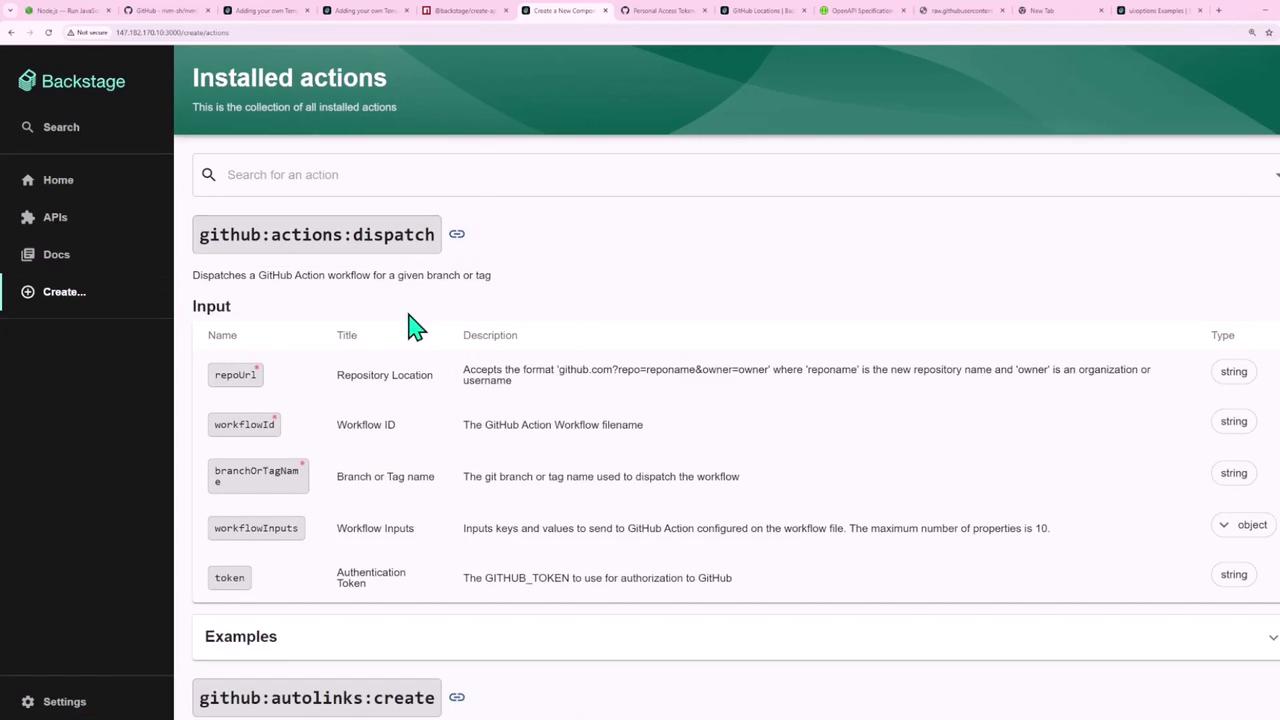
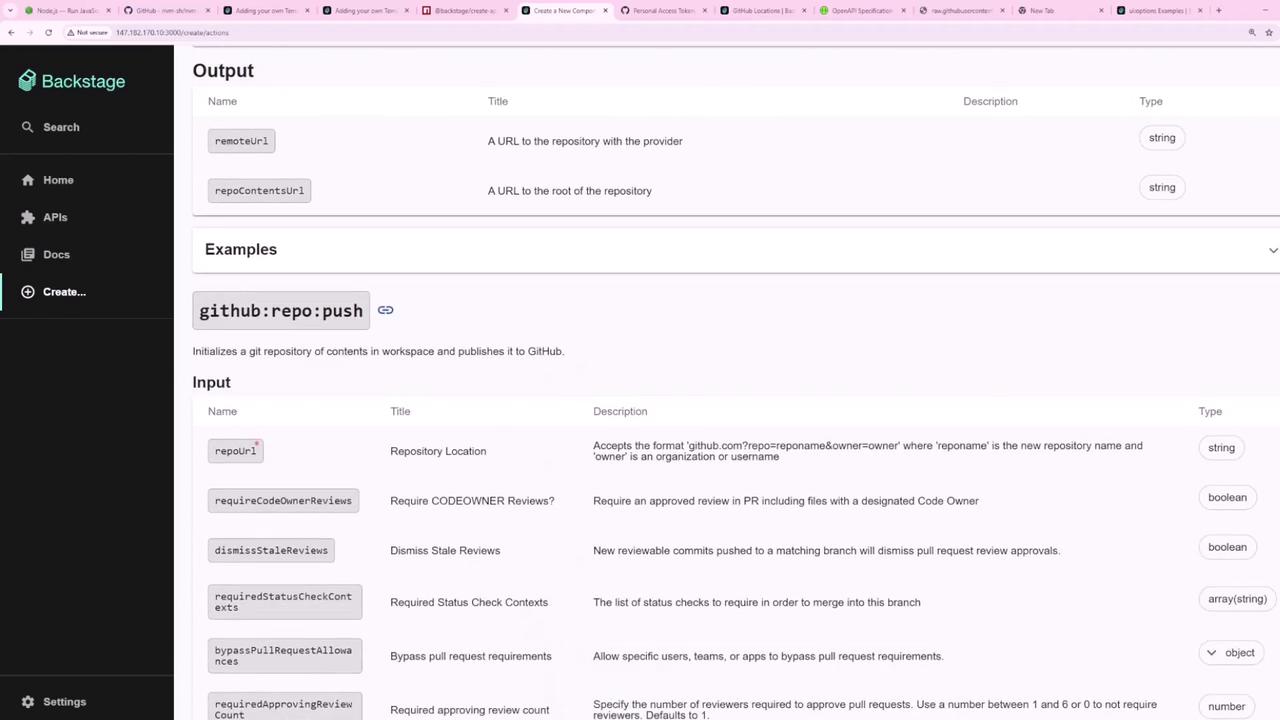
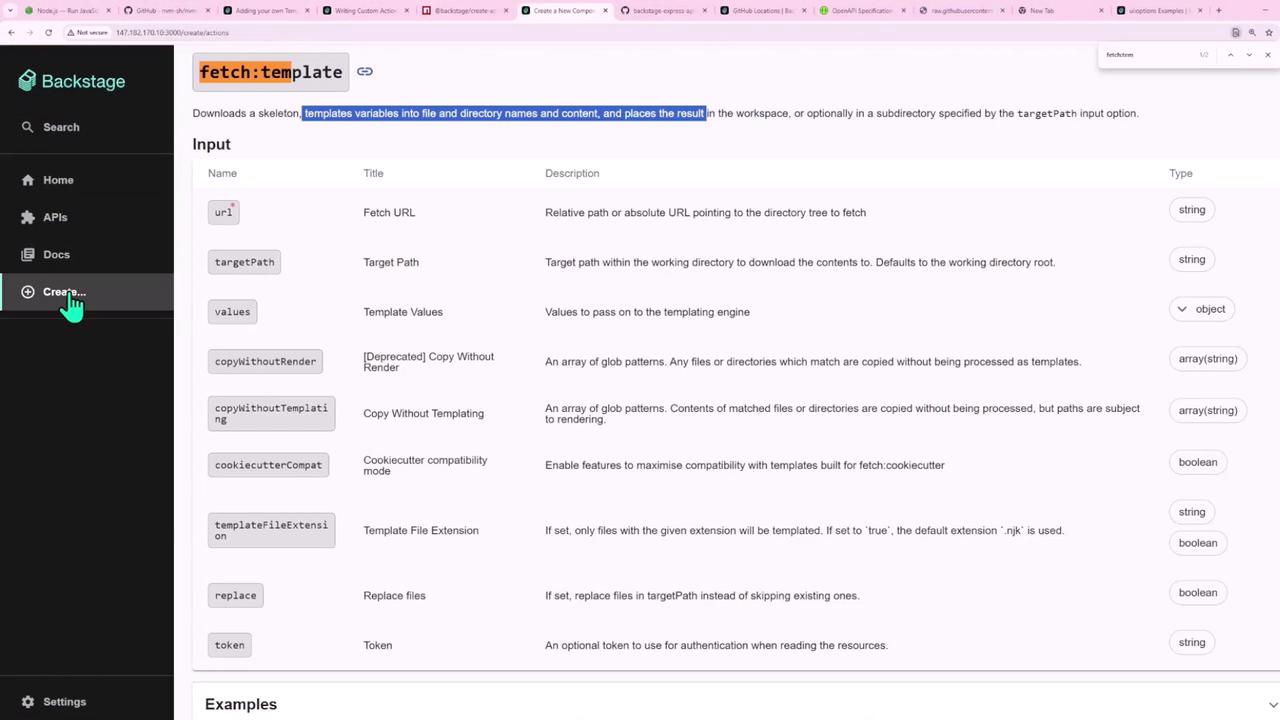
3. Exploring Built-in Actions
Backstage Scaffolder comes with many pre-built actions. For example:
Action | Purpose |
---|---|
github:actions:dispatch | Trigger a GitHub Actions workflow |
github:repo:push | Push generated code to a GitHub repository |
fetch:template | Fetch and render a template repository |
You can preview parameters for fetch:template
in the form playground:
4. Registering the Template
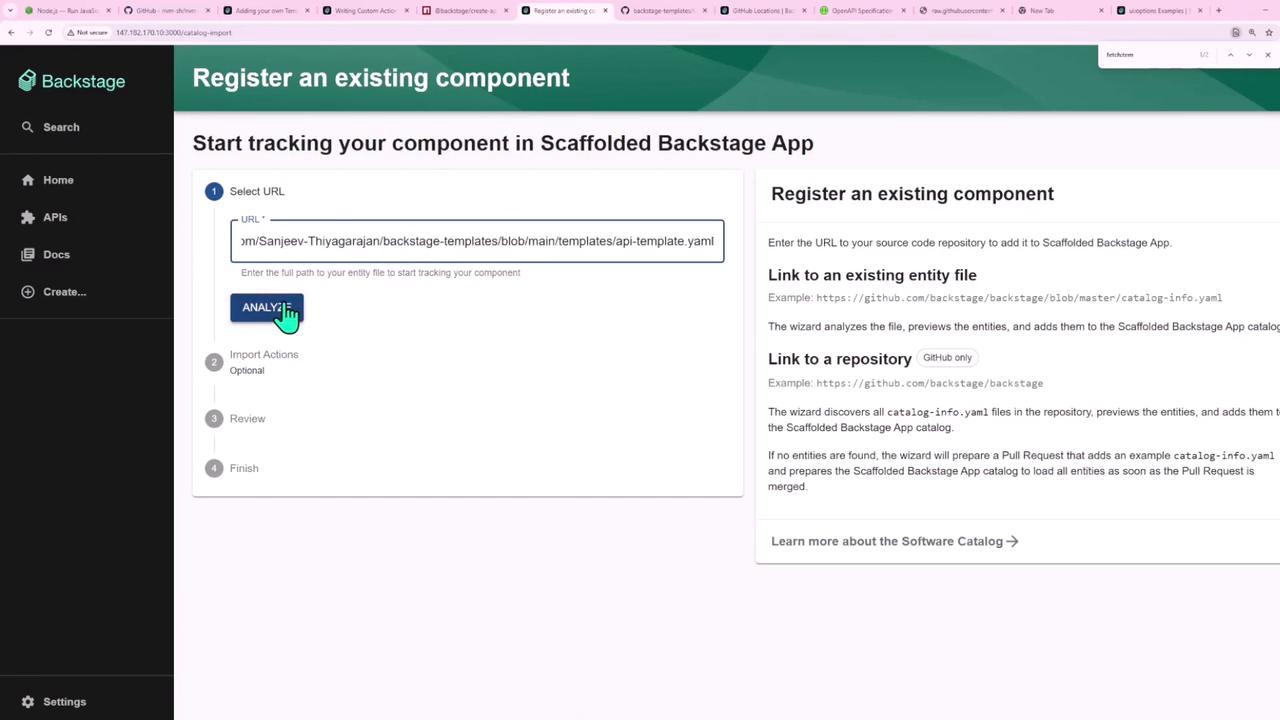
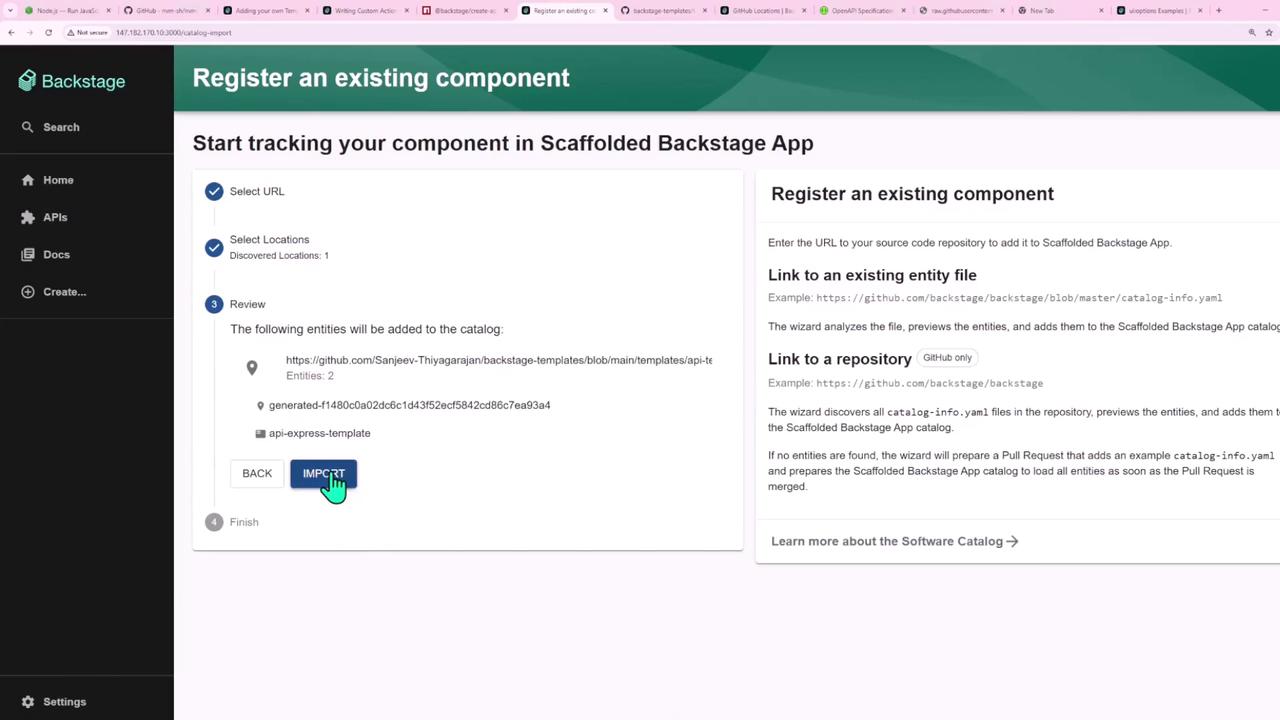
Register your template.yaml
so Backstage displays it in the Create UI. You have two options:
- UI Registration: Paste the URL of your template YAML.
- Import: Select Import and choose from your templates repository.
5. Using the Template
Once registered, your Node.js + Express template appears in Create. Select it, fill in details, and click Create:
After creation, view your new service dashboard:
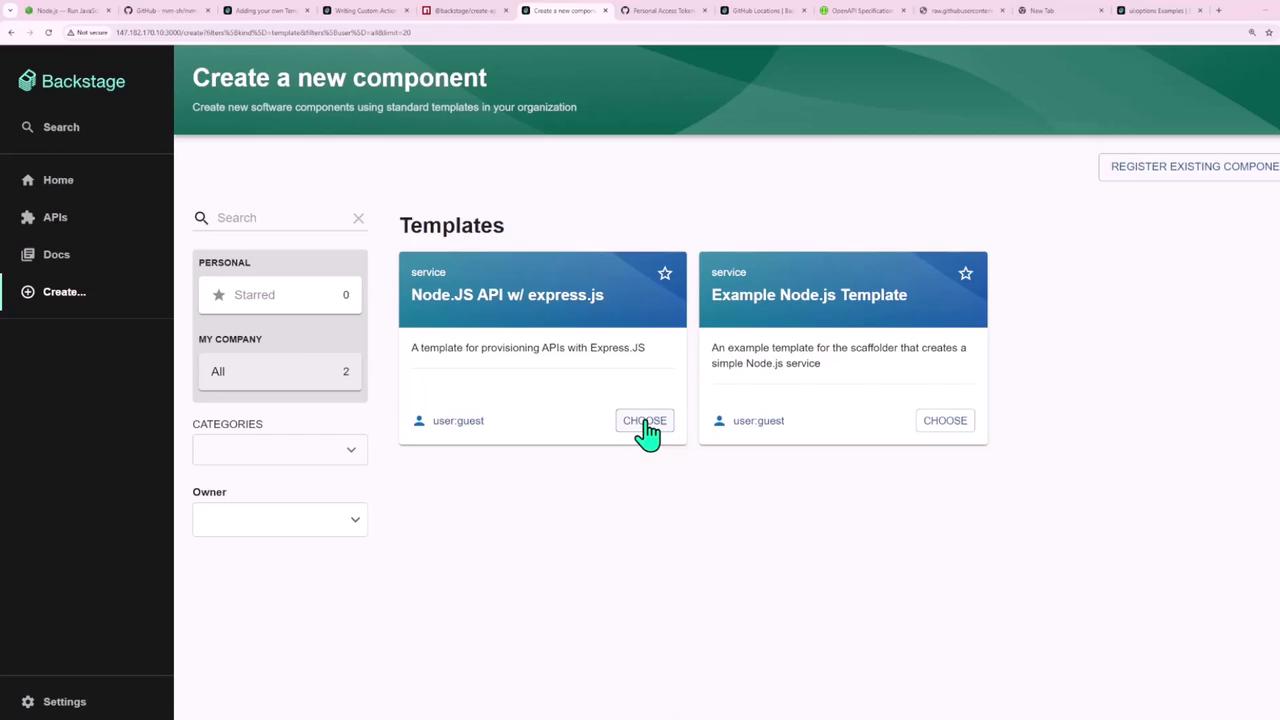
6. Template YAML Example
Here’s a complete template.yaml
that ties everything together:
apiVersion: backstage.io/v1beta3
kind: Template
metadata:
name: api-express-template
title: Node.js API w/ Express.js
description: A template for provisioning Express.js APIs with built-in CI/CD and code quality tools
spec:
owner: user:guest
type: service
parameters:
- title: Project Info
required:
- name
- owner
properties:
name:
title: Name
type: string
description: Unique component name
ui:
autofocus: true
owner:
title: Owner
type: string
description: Component owner
ui:
field: OwnerPicker
options:
catalogFilter:
kind: [User, Group]
- title: Choose Location
required:
- repoUrl
properties:
repoUrl:
title: Repository Location
type: string
ui:
field: RepoUrlPicker
options:
allowedHosts:
- github.com
steps:
- id: fetch-base
name: Fetch Base
action: fetch:template
input:
url: https://github.com/Sanjeev-Thiyagarajan/backstage-express-api-blueprint
values:
name: ${{ parameters.name }}
owner: ${{ parameters.owner }}
- id: publish
name: Publish to GitHub
action: publish:github
input:
allowedHosts: ['github.com']
description: Project ${{ parameters.name }}
repoUrl: ${{ parameters.repoUrl }}
- id: register
name: Register Component
action: catalog:register
input:
repoContentsUrl: ${{ steps.publish.output.repoContentsUrl }}
catalogInfoPath: /catalog-info.yaml
output:
links:
- title: Repository
url: ${{ steps.publish.output.remoteUrl }}
- title: Open in Catalog
icon: catalog
entityRef: ${{ steps.register.output.entityRef }}
Templating Values
In your skeleton’s package.json
and catalog-info.yaml
, reference parameters using the values
object:
{
"name": "${{ values.name }}",
"version": "1.0.0"
}
apiVersion: backstage.io/v1alpha1
kind: Component
metadata:
name: '${{ values.name | dump }}'
spec:
type: service
owner: '${{ values.owner }}'
lifecycle: experimental
Links and References
- Backstage Scaffolder Concepts
- Backstage Template API
- GitHub Actions Documentation
- Node.js Official Site
- Express.js Guide
Watch Video
Watch video content