
High-Level Workflow
- Platform team generates starter code for a Node.js + Express API that includes ESLint, Prettier, Jest, CI/CD, and more.
- They commit this blueprint to GitHub (e.g.,
backstage-express-api-blueprint) and add atemplate.yaml. - Developers in Backstage run the template: fill out a form (project name, repo location), Backstage pulls the blueprint, injects the values, and publishes a new repo (e.g.,
demo-app). - The template then registers the new service in the Backstage catalog.

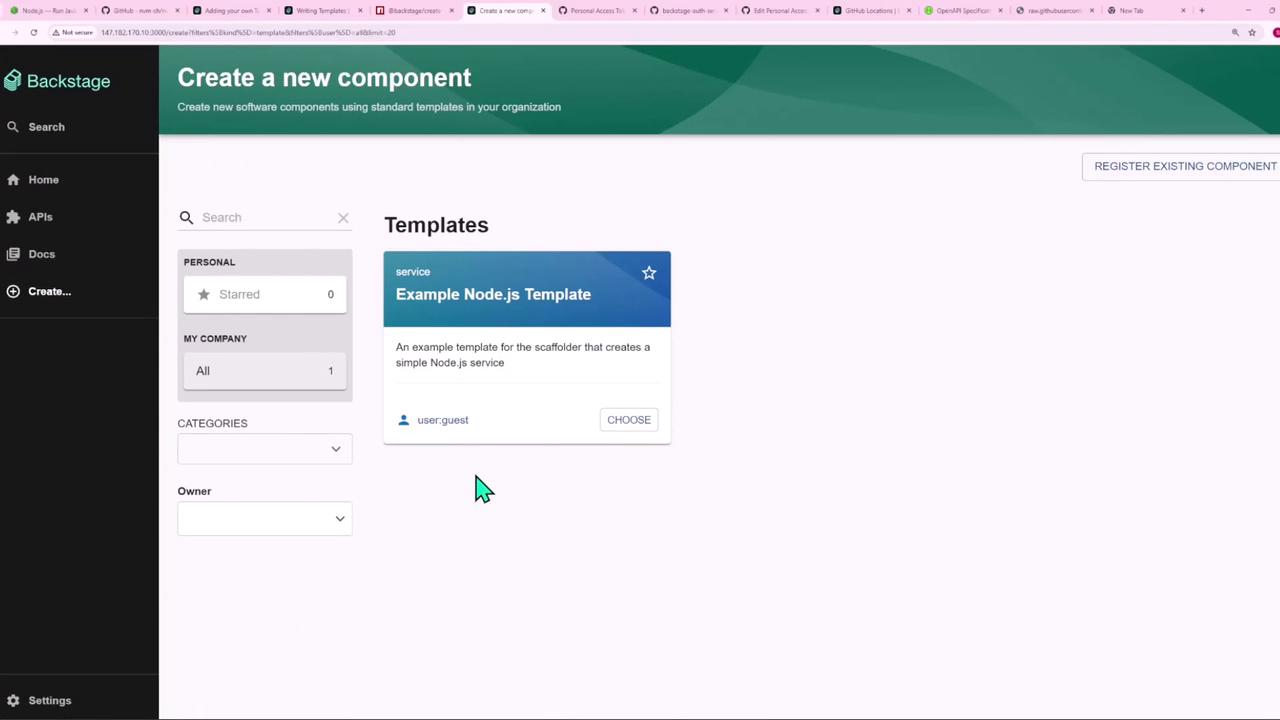
Exploring the Built-In Example
Once your Backstage app is running, go to Create → Software Component to find the Example Node.js Template, which comes pre-installed.
app-config.yaml under catalog locations:
examples/template/template.yaml file defines that template in the UI.
Template Definition (template.yaml)
Below is a consolidated view of the example-nodejs-template (scaffolder.backstage.io/v1beta3):
1. Form Parameters
- Name
A single-line text input that is autofocused. - Repository Location
Uses aRepoUrlPickerUI component, restricted togithub.com.
The
RepoUrlPicker helps enforce allowed hosts and prevents typos in repo URLs.2. Content Blueprint
Inside the./content folder of the template repo, you’ll find these files:
- package.json
- index.js
- catalog-info.yaml
fetch:template action copies these files into the new project and replaces template variables.
3. Publishing to GitHub
Thepublish:github step creates a new repository and pushes the generated code:
- allowedHosts: Whitelist of Git hosts
- description: Repo description incorporating the component name
- repoUrl: Target location from form input
| Action ID | Action | Purpose |
|---|---|---|
| fetch-base | fetch:template | Pull and render the content blueprint |
| publish | publish:github | Create the repo and push code to GitHub |
| register | catalog:register | Register the new service in Backstage |
Ensure your GitHub token has
repo and workflow scopes for successful publishing.4. Registering in Backstage
With the files published, thecatalog:register action makes the new service visible in your catalog by pointing to its catalog-info.yaml:
5. Template Outputs
When the template runs successfully, Backstage displays quick-access links:- Repository → Navigate to the GitHub repo
- Open in catalog → View the newly registered component
With a few clicks, you’ve spun up a fully configured Node.js service—complete with ESLint, Prettier, Jest, GitHub Actions CI/CD, and automatic catalog registration. Next, we’ll create our own custom template from scratch.