DevOps Pre-Requisite Course
Lab Setup
Demo Install VirtualBox on MacOS
Welcome to this guide. In this tutorial, you will learn how to set up a lab environment by installing VirtualBox on macOS, deploying virtual machines (VMs), and configuring a pre-built CentOS VM.
─────────────────────────────
Step 1: Downloading and Installing VirtualBox
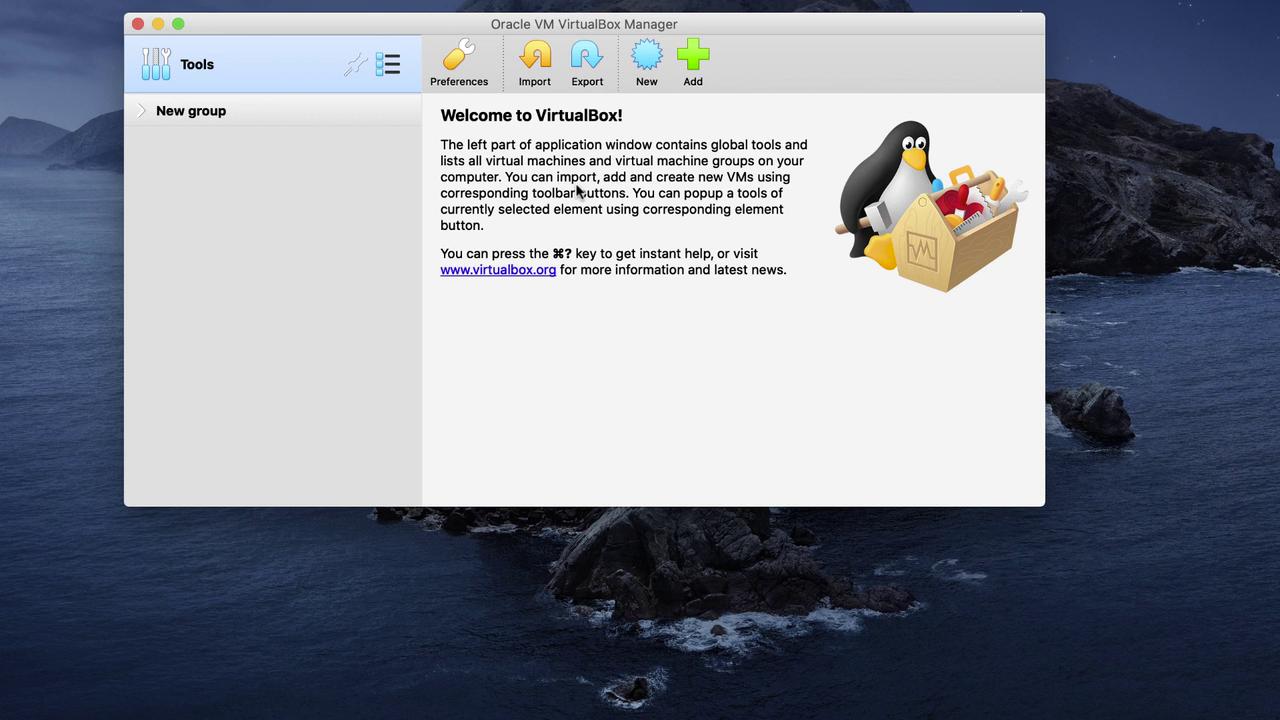
Start by visiting the VirtualBox website. On the download page, select the macOS version and download the installer. After the download is complete, run the executable and follow the installation wizard instructions.
Once the installation finishes, launch the Oracle VM VirtualBox interface. You should see a screen similar to the image below:
─────────────────────────────
Step 2: Deploying Virtual Machines
There are two primary methods to deploy virtual machines:
Option A: Create a new VM and install an operating system by attaching a CD (or ISO image) and following the installation instructions.
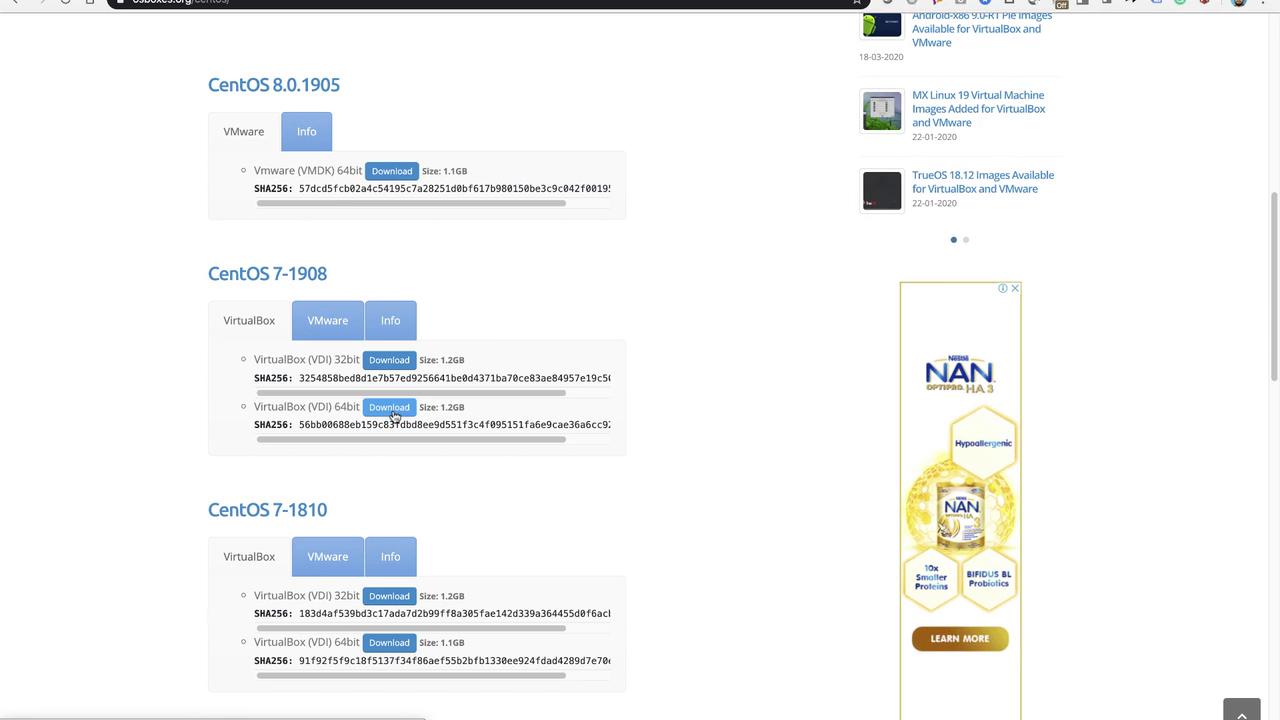
Option B: Use pre-configured VM images available online, which can save time if you need to deploy multiple VMs. One reliable source is osboxes.org. Simply click on the "VM images, VirtualBox images" link, then browse the available operating systems and select CentOS. You will be directed to a CentOS page containing download details.
─────────────────────────────
Step 3: Extracting the Virtual Disk
Download the VirtualBox image for CentOS 7 (64-bit version). The file is distributed as a .7z archive. Using your preferred extraction tool, uncompress the file. Once extraction is complete, locate the folder named "64-bit" and find the file with a .vdi extension—this is your virtual disk image.
─────────────────────────────
Step 4: Creating the Virtual Machine in VirtualBox
- Return to the Oracle VM VirtualBox interface.
- Click the New button to start creating a new virtual machine.
- Enter a name for your VM, select Linux as the type, and click Next.
On the next screen:
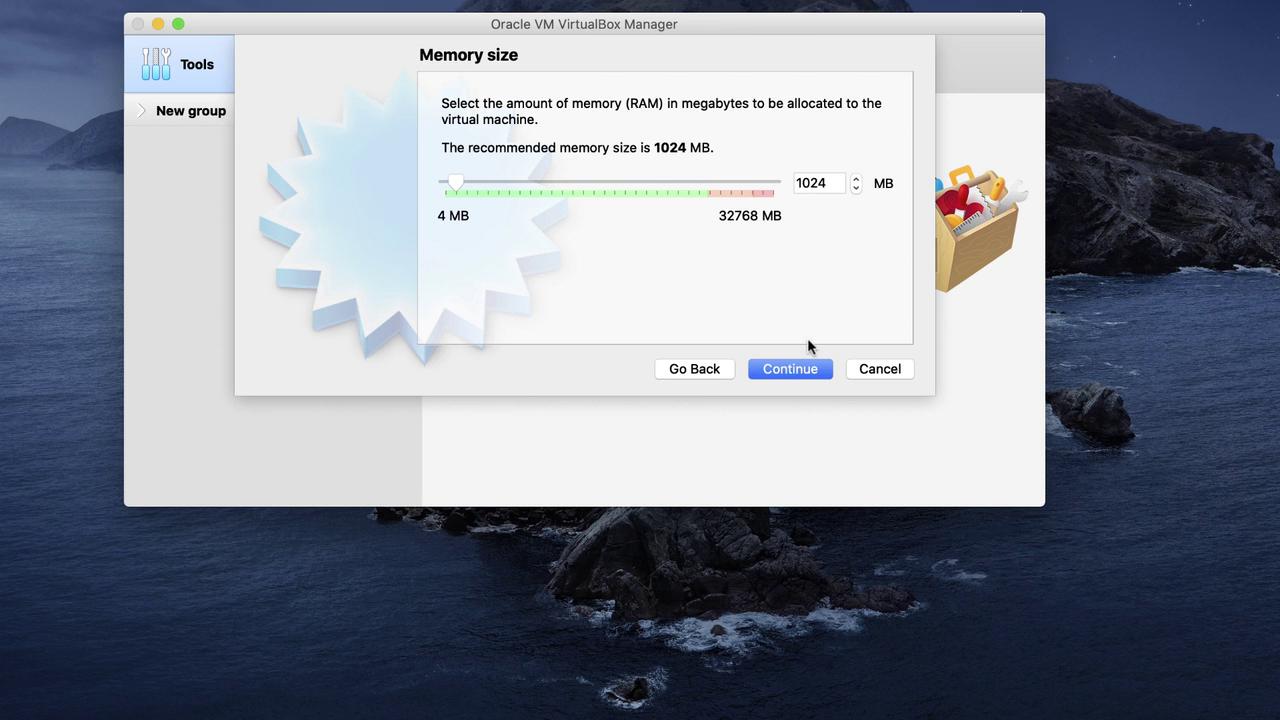
- Assign the desired memory (RAM) size (for example, 1024 MB).
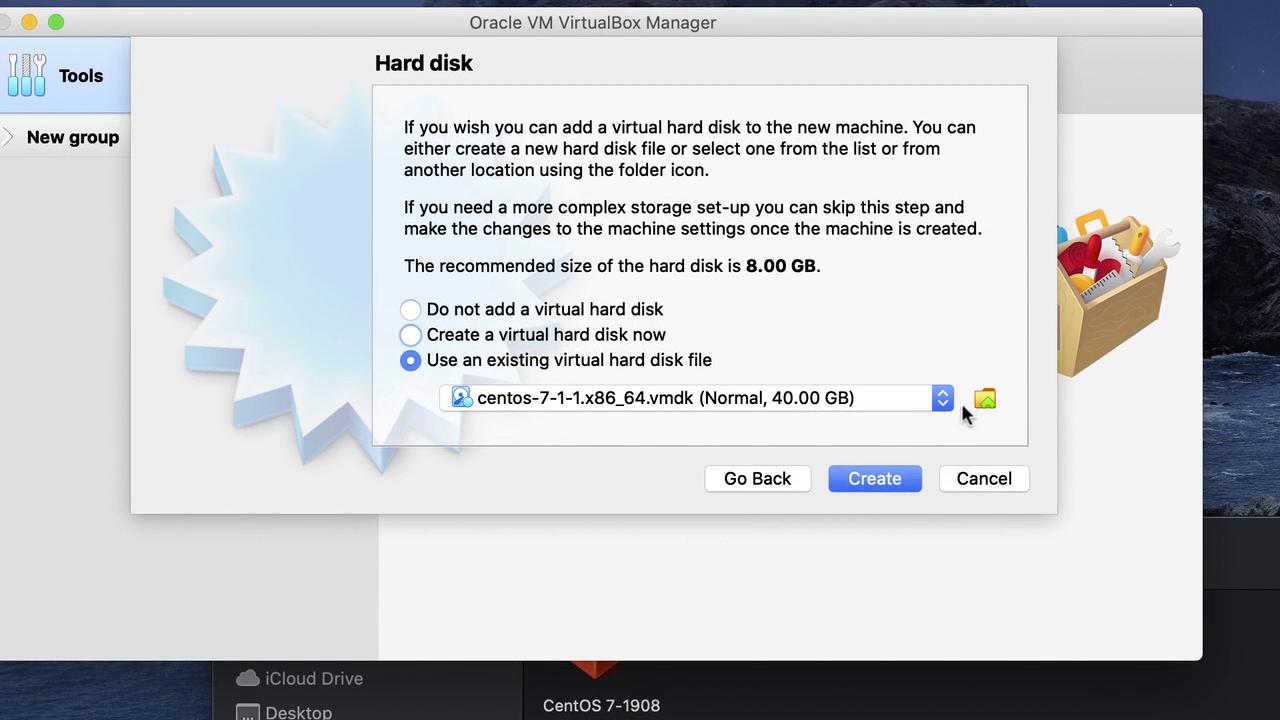
- When prompted to create a virtual hard disk, choose Use an existing virtual hard disk file instead of creating a new one. Click Browse and navigate to the extracted CentOS 7 .vdi file.
The following images illustrate key steps during VM creation:
─────────────────────────────
Step 5: Adjusting Settings and Starting the Virtual Machine
Before launching your virtual machine, click on Settings to fine-tune its configuration:
- Under the System tab, increase the CPU allocation to at least 2 cores (adjust as needed based on your hardware capabilities).
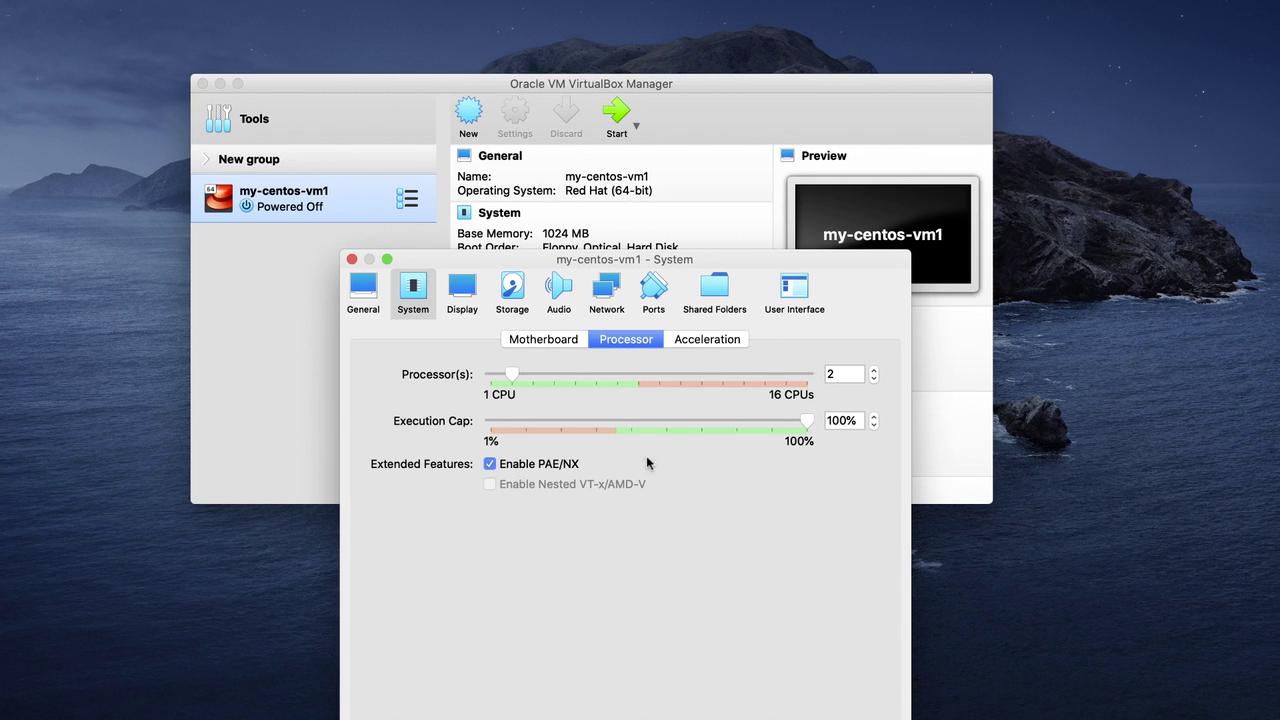
Once your settings are configured, power on the virtual machine to begin booting into CentOS.
─────────────────────────────
Note
Remember to adjust your VM settings according to your system's hardware specifications to ensure optimal performance.
This article has guided you through the process of downloading, installing, and configuring VirtualBox on macOS, as well as deploying a pre-configured CentOS virtual machine. Enjoy exploring and experimenting in your new lab environment!
For further information and troubleshooting, consider visiting the VirtualBox Documentation.
Watch Video
Watch video content