Docker Certified Associate Exam Course

Docker Engine Enterprise

Demo Deployment in Docker EE


title: Demo Deployment in Docker EE with UCP description: Step-by-step guide to deploy and manage a Swarm service in Docker EE using the Universal Control Plane (UCP) console.


Prerequisites

  • A running Docker EE UCP cluster
  • Access rights to create and manage services

Note

Ensure you are logged into the UCP console with an account that has the admin or cluster_admin role.

Step-by-Step: Deploying a Swarm Service

1. Access the UCP Console

Open your browser and navigate to:

https://<ucp-domain>/

From the left menu, click SwarmServices. If no services exist, you’ll see an empty list.

2. Create a New Service

Click Create and configure the Details tab:

SettingValue
NameKodeKloud
Imagenginx:latest

Leave all other options at their defaults.

The image shows a "Create Service" interface for Docker, with options for setting service mode, scale, constraints, and update configuration. The interface includes tabs for details, collection, scheduling, network, environment, resources, and logging.

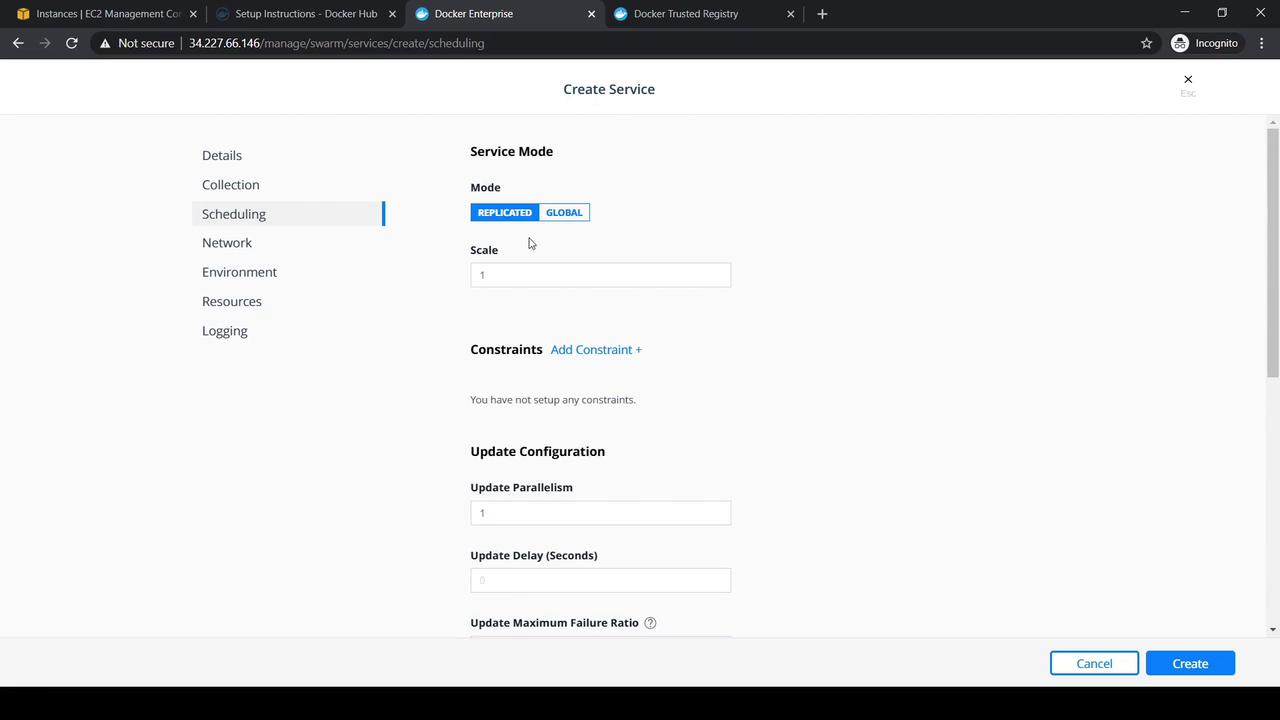
3. Adjust Scheduling Policies

Switch to the Scheduling tab to modify:

  • Service mode (replicated or global)
  • Replica count
  • Placement constraints
  • Update policy (parallelism, delay)

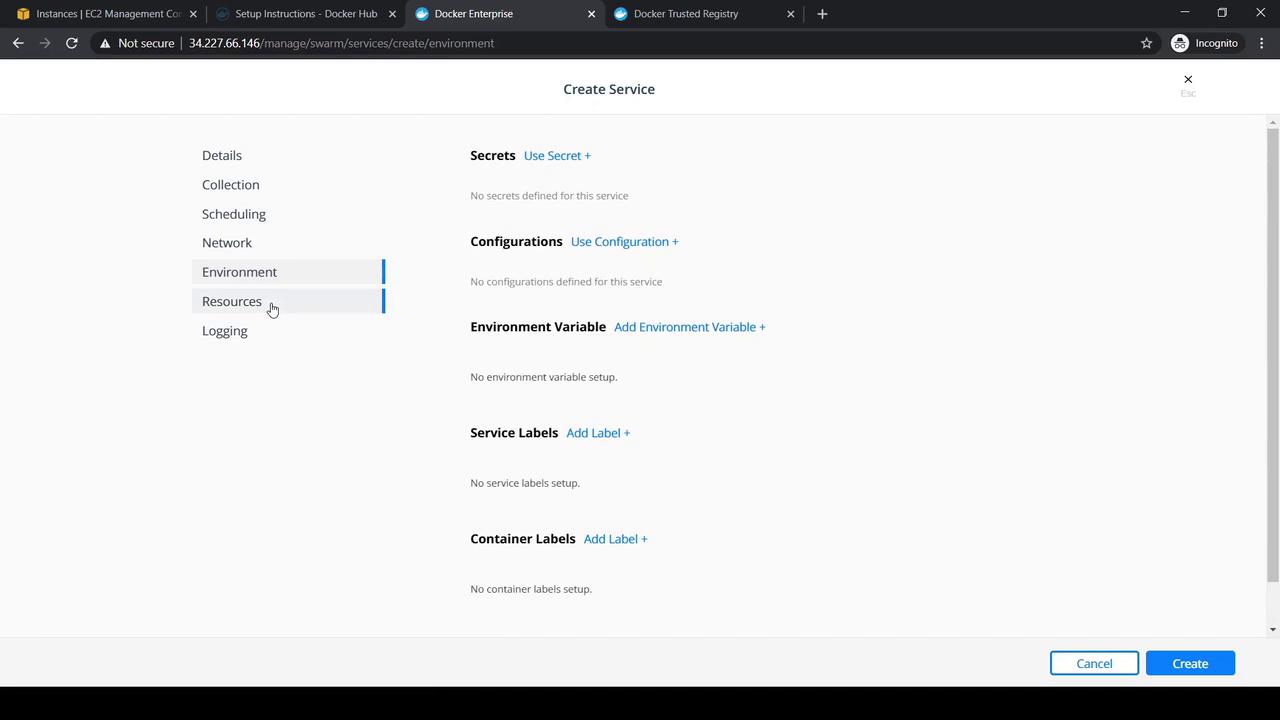
4. Define Environment Variables

On the Environment tab, you can:

  • Add Environment Variables
  • Attach Secrets and Configs
  • Assign service Labels

The image shows a "Create Service" interface in a Docker management console, with options to configure secrets, configurations, environment variables, and labels. The sidebar includes sections like Details, Collection, Scheduling, Network, Environment, Resources, and Logging.

5. Allocate Resources

Use the Resources tab to reserve or limit CPU and memory. Configure volume mounts if needed.

6. Configure Logging

Select a logging driver (e.g., json-file, syslog) and set driver options under the Logging tab.

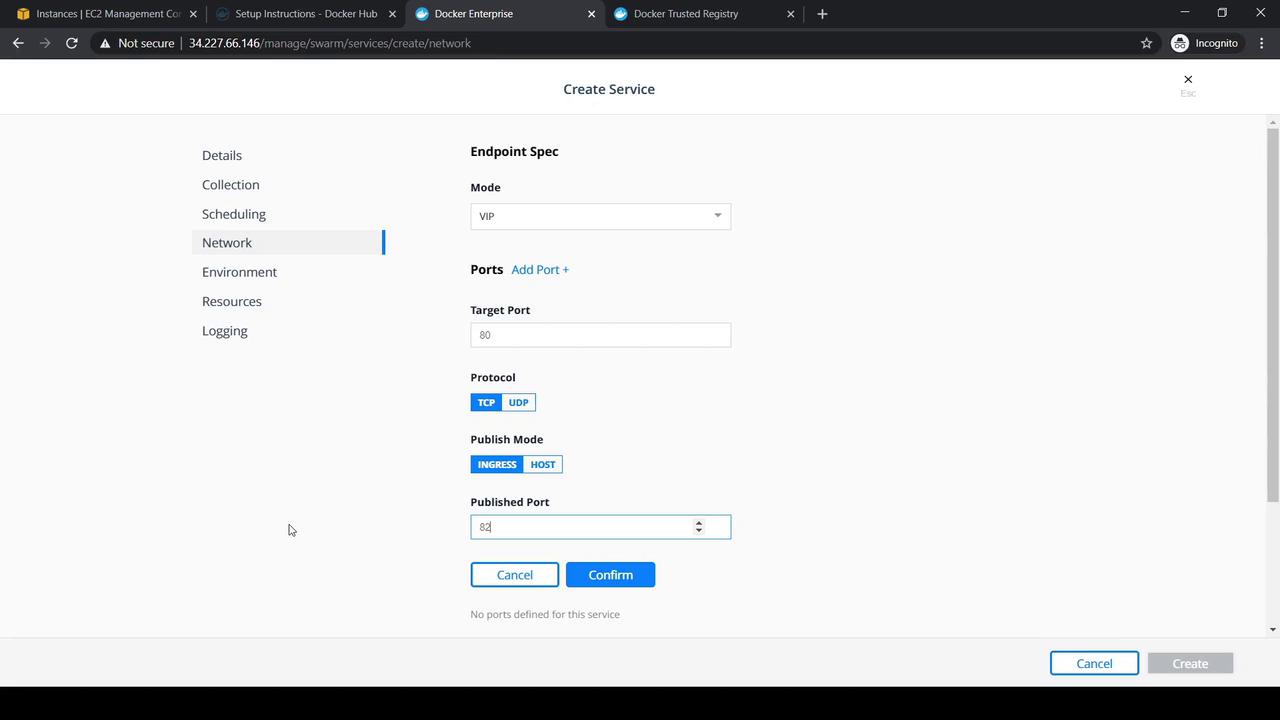
7. Publish Service Ports

Under Network, map the service ports for external access:

Port SettingValue
Modetcp
Target Port80
Published Port82

Click Confirm, review your settings, then Create.

The image shows a web interface for creating a service in Docker Enterprise, specifically focusing on network settings such as endpoint specifications, ports, and protocols. Options for mode, target port, protocol, and publish mode are visible, with buttons to cancel or confirm the configuration.

Verifying Deployment

After creation, the service appears in Pending (red) and then becomes Running (green). Click the service name to view details and endpoint information.

The image shows a Docker Enterprise interface displaying details of a service named "kodekloudtest," including its ID, image, creation time, and endpoint.

Copy and open the endpoint URL in your browser:

http://<ucp-node-address>:82

You’ll see the default NGINX welcome page, confirming external access is working.

Cleanup

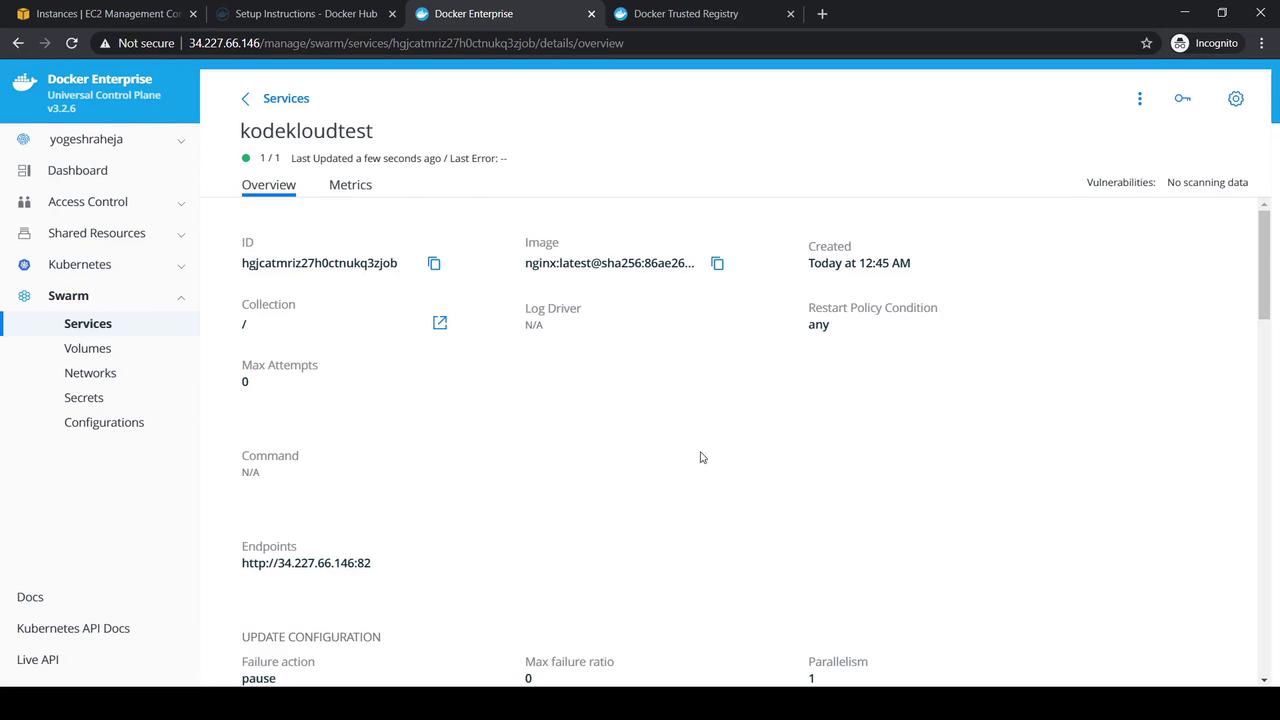
To remove the service, select it, choose ActionsDelete, and confirm the prompt.

The image shows a confirmation dialog for deleting a service named "kodekloudtest" with options to cancel or confirm the deletion.

References

Watch Video

Watch video content

Previous
Deployment in Docker EE