Docker Registry Recap
Docker Registry is the central store for container images. By default,docker pull and docker push interact with Docker Hub. To target a private registry or another namespace, include the full path:
Introducing Docker Trusted Registry
Docker Trusted Registry (DTR) is Docker’s on-premises, enterprise-grade image repository. It delivers:- Security Scanning
Automated vulnerability checks integrated into your CI/CD pipelines. - Image Signing
Enforce image provenance with Docker Content Trust. - Role-Based Access Control (RBAC)
Granular permissions to govern who can view, push, or pull each repository.
Deploying DTR on a UCP Cluster
DTR runs as a service on a UCP worker node. Follow these steps to install DTR:Prerequisites
| Requirement | Details |
|---|---|
| Worker Node | New node dedicated to DTR |
| Docker Engine – EE | Enterprise Edition installed |
| UCP Cluster | UCP 3.x or later, accessible over TLS/HTTPS |
Installation Steps
-
Provision a Worker Node
Spin up a new server (VM or bare metal) and install Docker Engine – Enterprise. -
Join the UCP Cluster
On the new node, run:UCP’s agent (ucp-agent) will install automatically. -
Retrieve the DTR Install Command
In the UCP Web UI, navigate to Settings > DTR, and copy the provideddocker run docker/dtr install ...command. -
Execute the Installer
Run the command on your worker node:
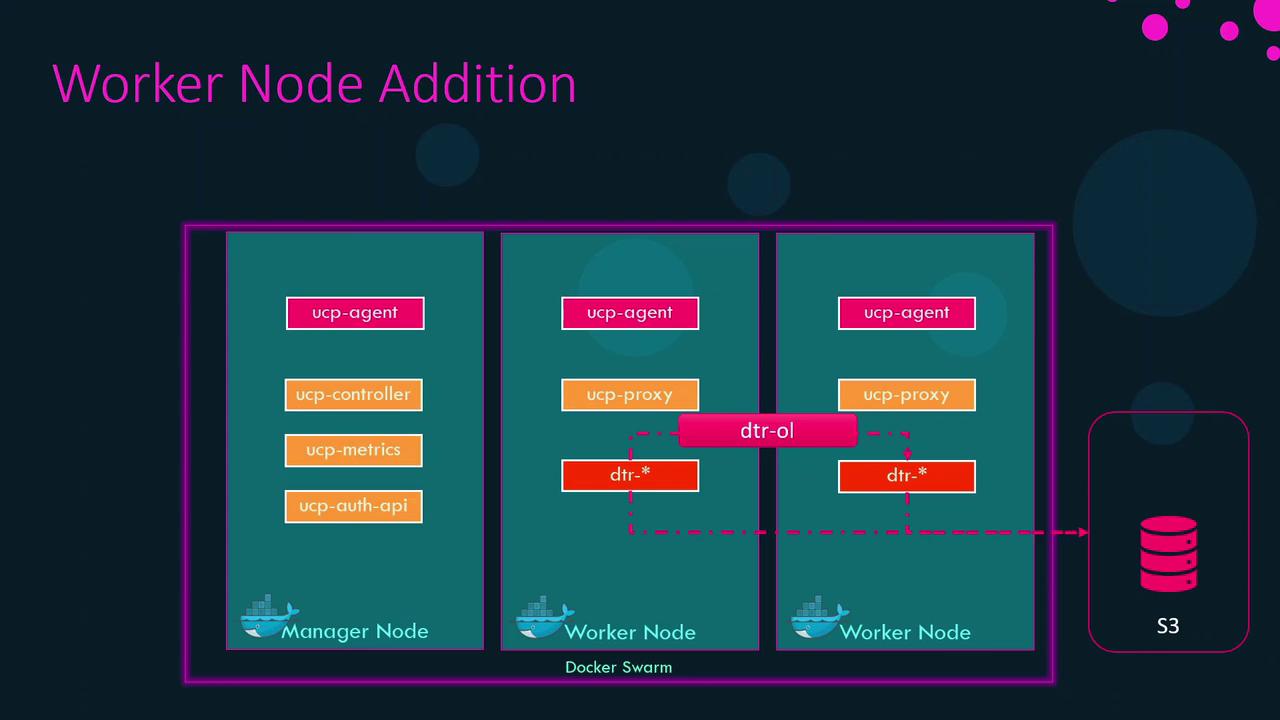
For production environments, deploy at least three DTR replicas to ensure high availability.
High Availability and Raft Consensus
DTR leverages the Raft algorithm to synchronize metadata and configuration across replicas—much like Docker Swarm ensures consistent cluster state.Overlay Network: dtr-ol
Upon installation, UCP creates an overlay network called dtr-ol. This network allows DTR replicas to communicate securely and replicate data.
External Storage for Images
By default, images are stored on each node’s local filesystem, which can risk data loss in multi-instance setups. Instead, configure an external store:| Storage Type | Description | URI Example |
|---|---|---|
| NFS | Network File System share | nfs://server/export |
| Amazon S3 | AWS object storage | s3://my-dtr-bucket |
| Google GCS | Google Cloud Storage | gs://my-dtr-bucket |
Ensure the DTR service account has read/write permissions to the external storage.
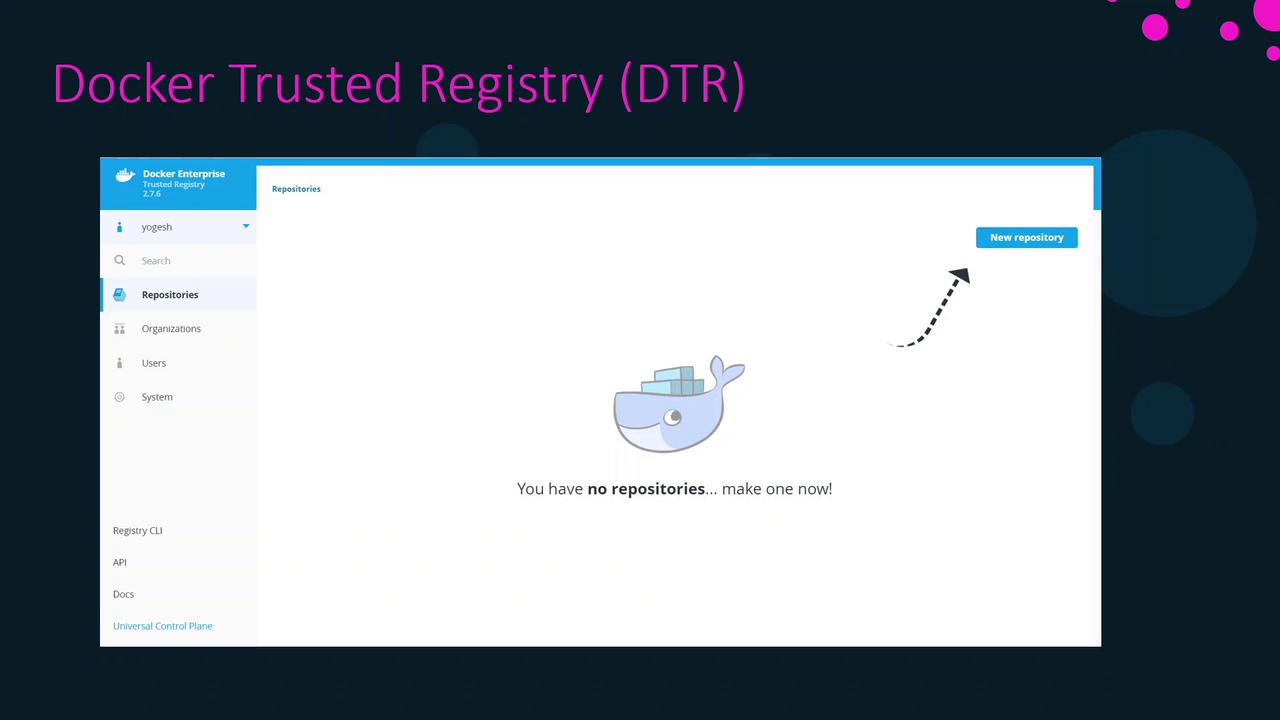
DTR Console After Installation
Once installation completes, open your browser athttps://dtr.example.com. You’ll see an interface similar to below—ready for you to create and manage repositories.
In the next section, we’ll walk through creating repositories, configuring webhooks, and integrating DTR with your CI/CD pipelines.