Table of Contents
- Accessing and Configuring DTR
- CLI Login to DTR
- Creating a Repository
- Pushing Images to DTR
- Scanning Images for Vulnerabilities
- Scanning an Older Image
- Adjusting Image Scan Settings
- Deleting Tags and Repositories
1. Accessing and Configuring DTR
- Open your browser and navigate to your DTR’s IP or DNS.
- Log in with your credentials.
If your DTR VM doesn’t have a persistent IP or DNS name, any change will break UI access. Always assign a static IP or DNS record.
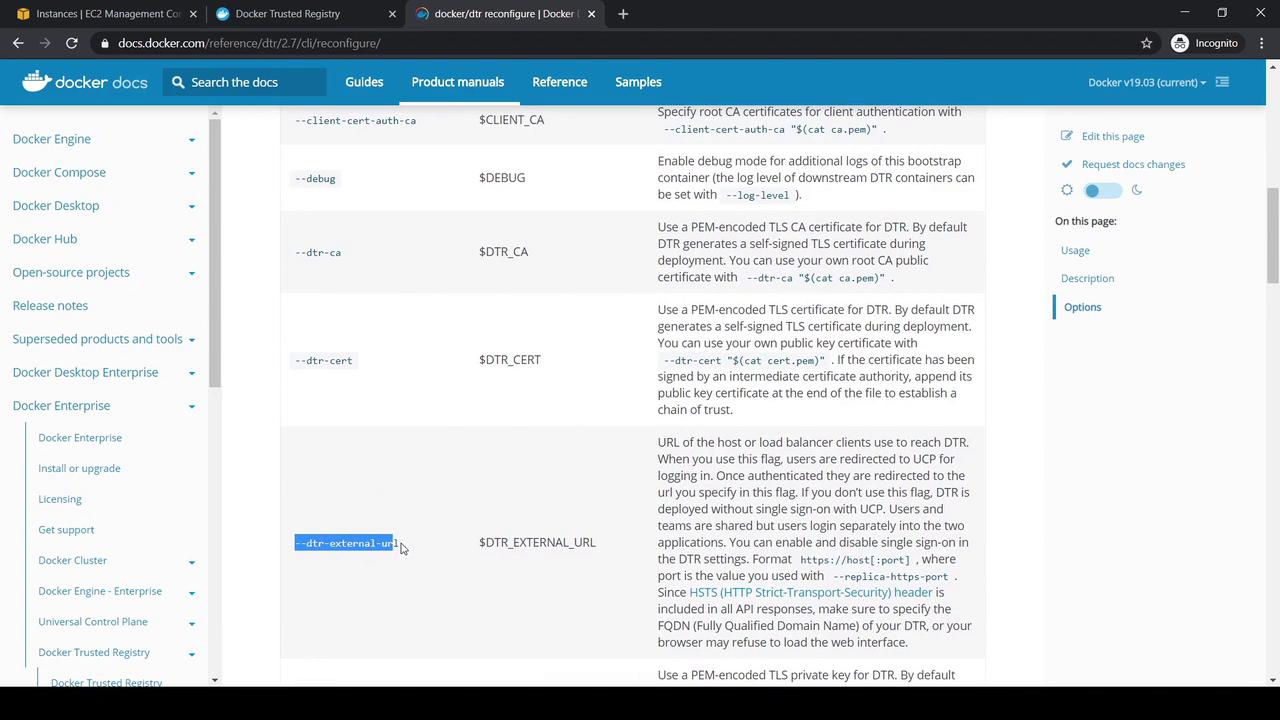
- To update the external URL for DTR, use the
dtr reconfigurecommand:
2. CLI Login to DTR
On a machine with the UCP client bundle:If you see
x509: certificate signed by unknown authority, add the DTR CA certificate to your Docker daemon trust store. See the Configuring your Docker Daemon section in the DTR User Guide.3. Creating a Repository
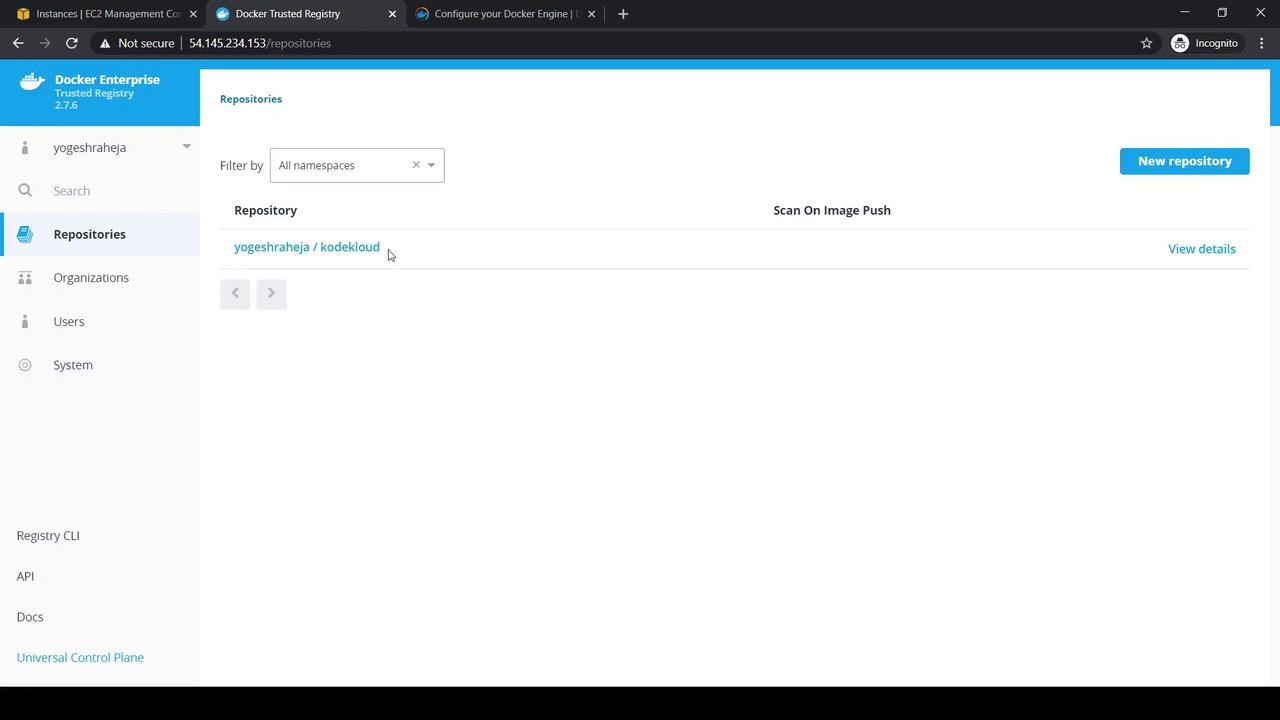
- In the DTR UI, click New Repository.
- Select Public, enter your namespace (e.g.,
yogeshraheja/kodekloud), and create.
- Info, Tags, Promotions views
- Edit description
- Permissions to manage access
- Settings → Delete Repository
4. Pushing Images to DTR
-
Pull a base image:
-
Tag for your registry (default tag is
latest): -
Add a version tag:
-
Push the image:
-
Verify locally:
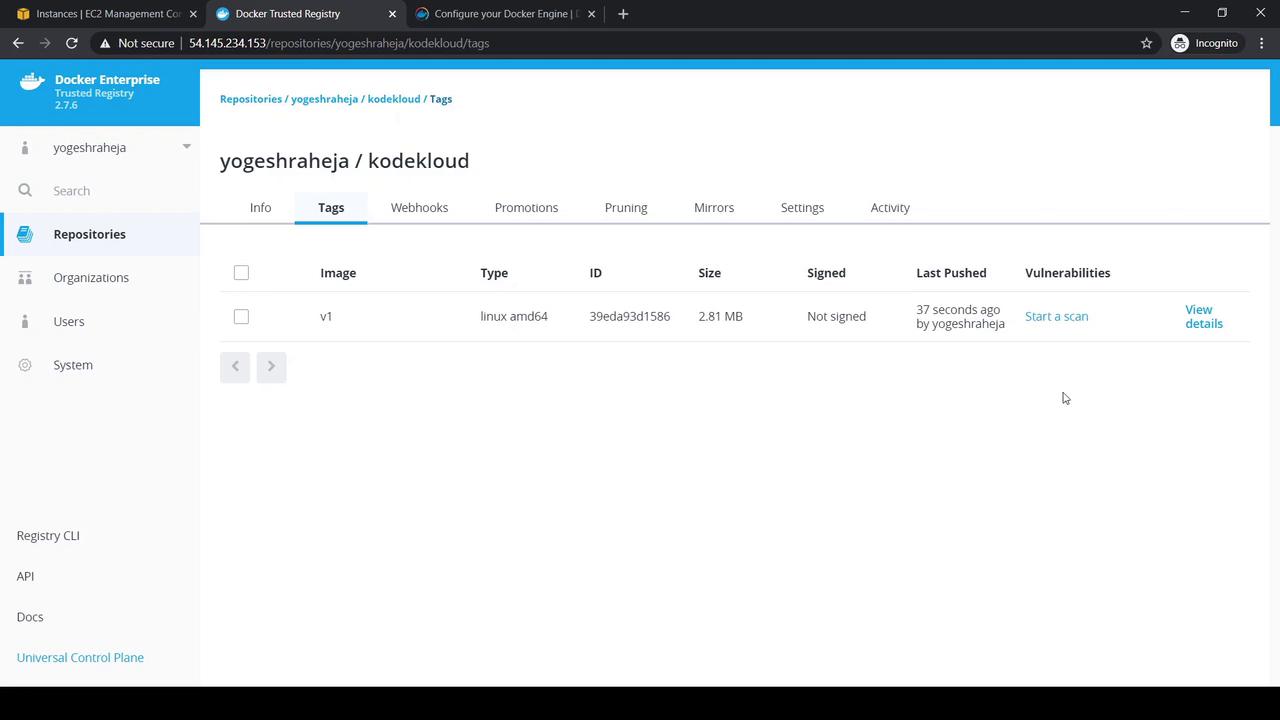
5. Scanning Images for Vulnerabilities
- In the Tags tab, select your
v1tag. - Click Start a Scan or View Details:
-
View Layers and Components before scanning:
- After the scan completes, Components lists all packages:
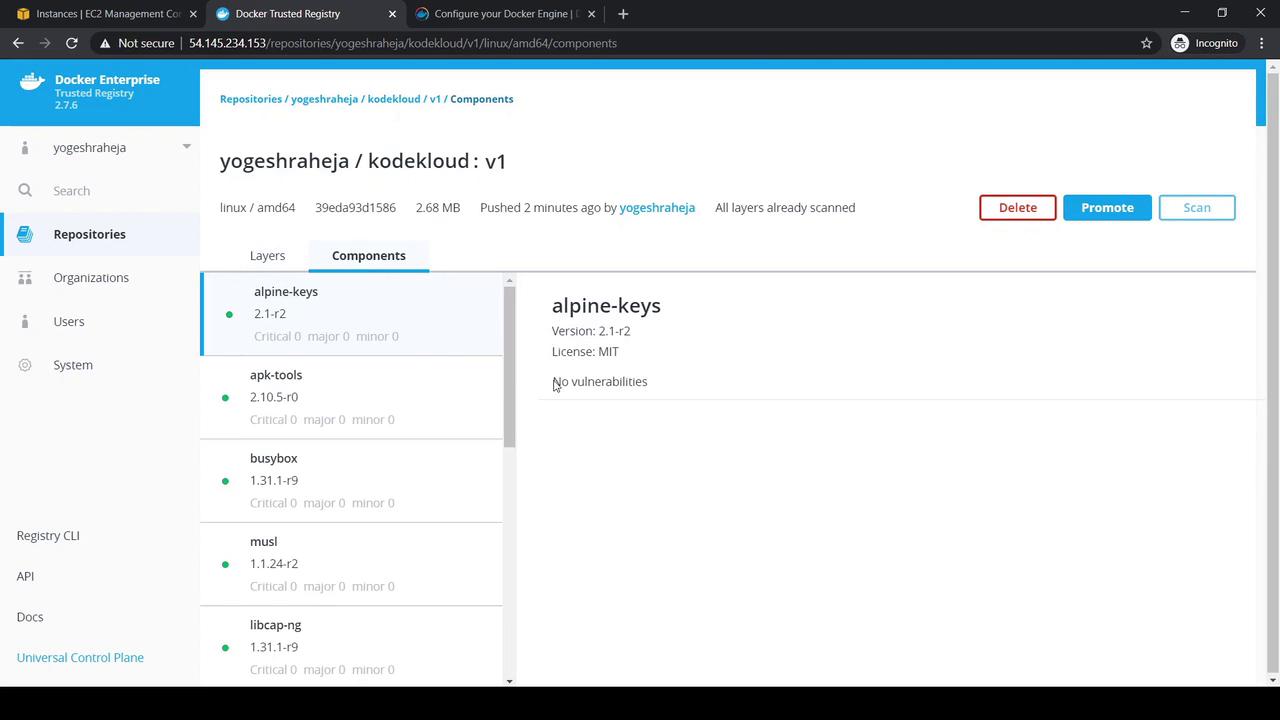
- The Vulnerabilities tab should report zero issues.
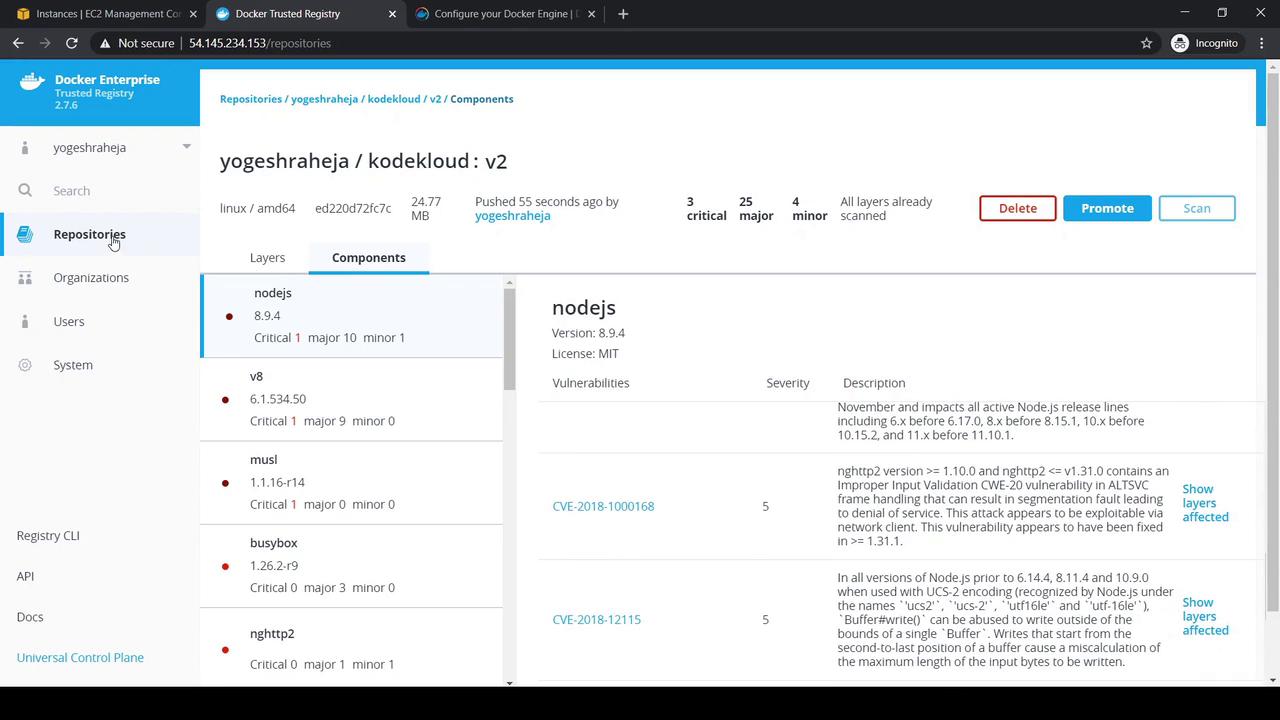
6. Scanning an Older Image
Demonstrate vulnerabilities by pushing an older image:v2 tag. You may see multiple vulnerabilities:
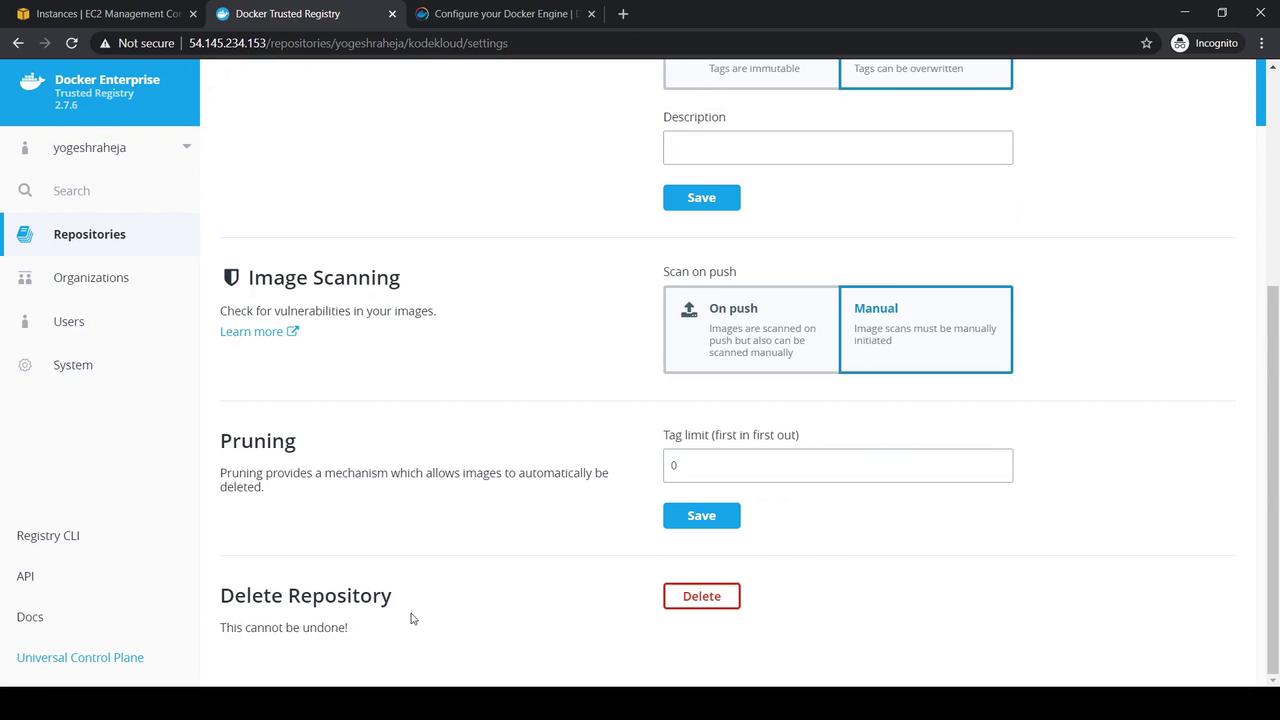
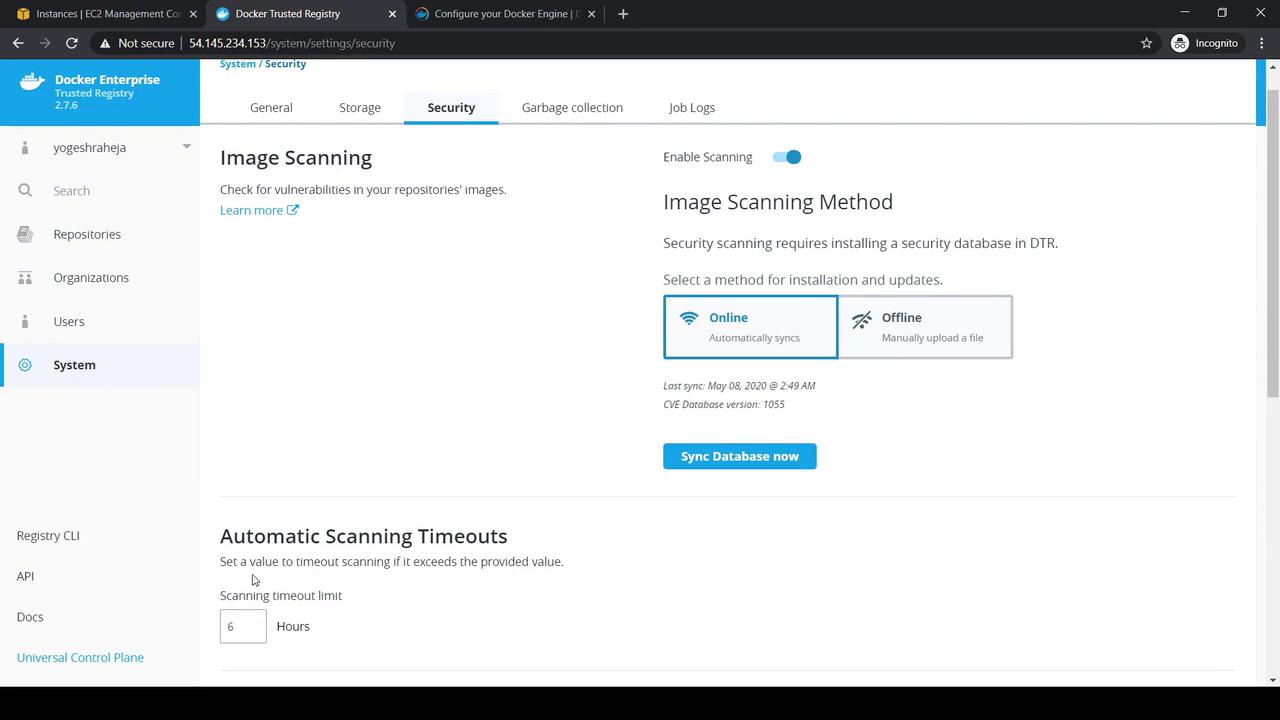
7. Adjusting Image Scan Settings
- In DTR UI, go to System → Security.
- Enable image scanning and choose Online or Offline CVE mode.
- Adjust scan timeout and review last CVE sync date:
8. Deleting Tags and Repositories
- Delete a Tag: In Tags, select the tag (e.g.,
v2) → Delete → confirm by typingDelete. - Delete a Repository: In Settings, find Delete Repository, enter the repository name, and confirm.
Quick Reference Table
| Operation | CLI Command | UI Location |
|---|---|---|
| Update External URL | docker/dtr reconfigure --dtr-external-url <URL> | N/A |
| Login to DTR | docker login <DTR_IP_OR_URL> | N/A |
| Create Repository | N/A | New Repository |
| Push Image | docker tag, docker push | Tags |
| Scan for Vulnerabilities | N/A | Tags → Start a Scan |
| Configure Scan Settings | N/A | System → Security |
| Delete Tag | N/A | Tags → Delete |
| Delete Repository | N/A | Settings → Delete Repository |