1. Open the Google Cloud Console
- In a new browser tab, go to
https://console.cloud.google.com. - Sign in with your Google account:
- Enter your Gmail address and click Next.
- Type your password and click Next again.
2. Activate Your Free Trial
If the “Start your free trial” banner is not visible, click the gift-box icon in the blue header bar to display the activation prompt.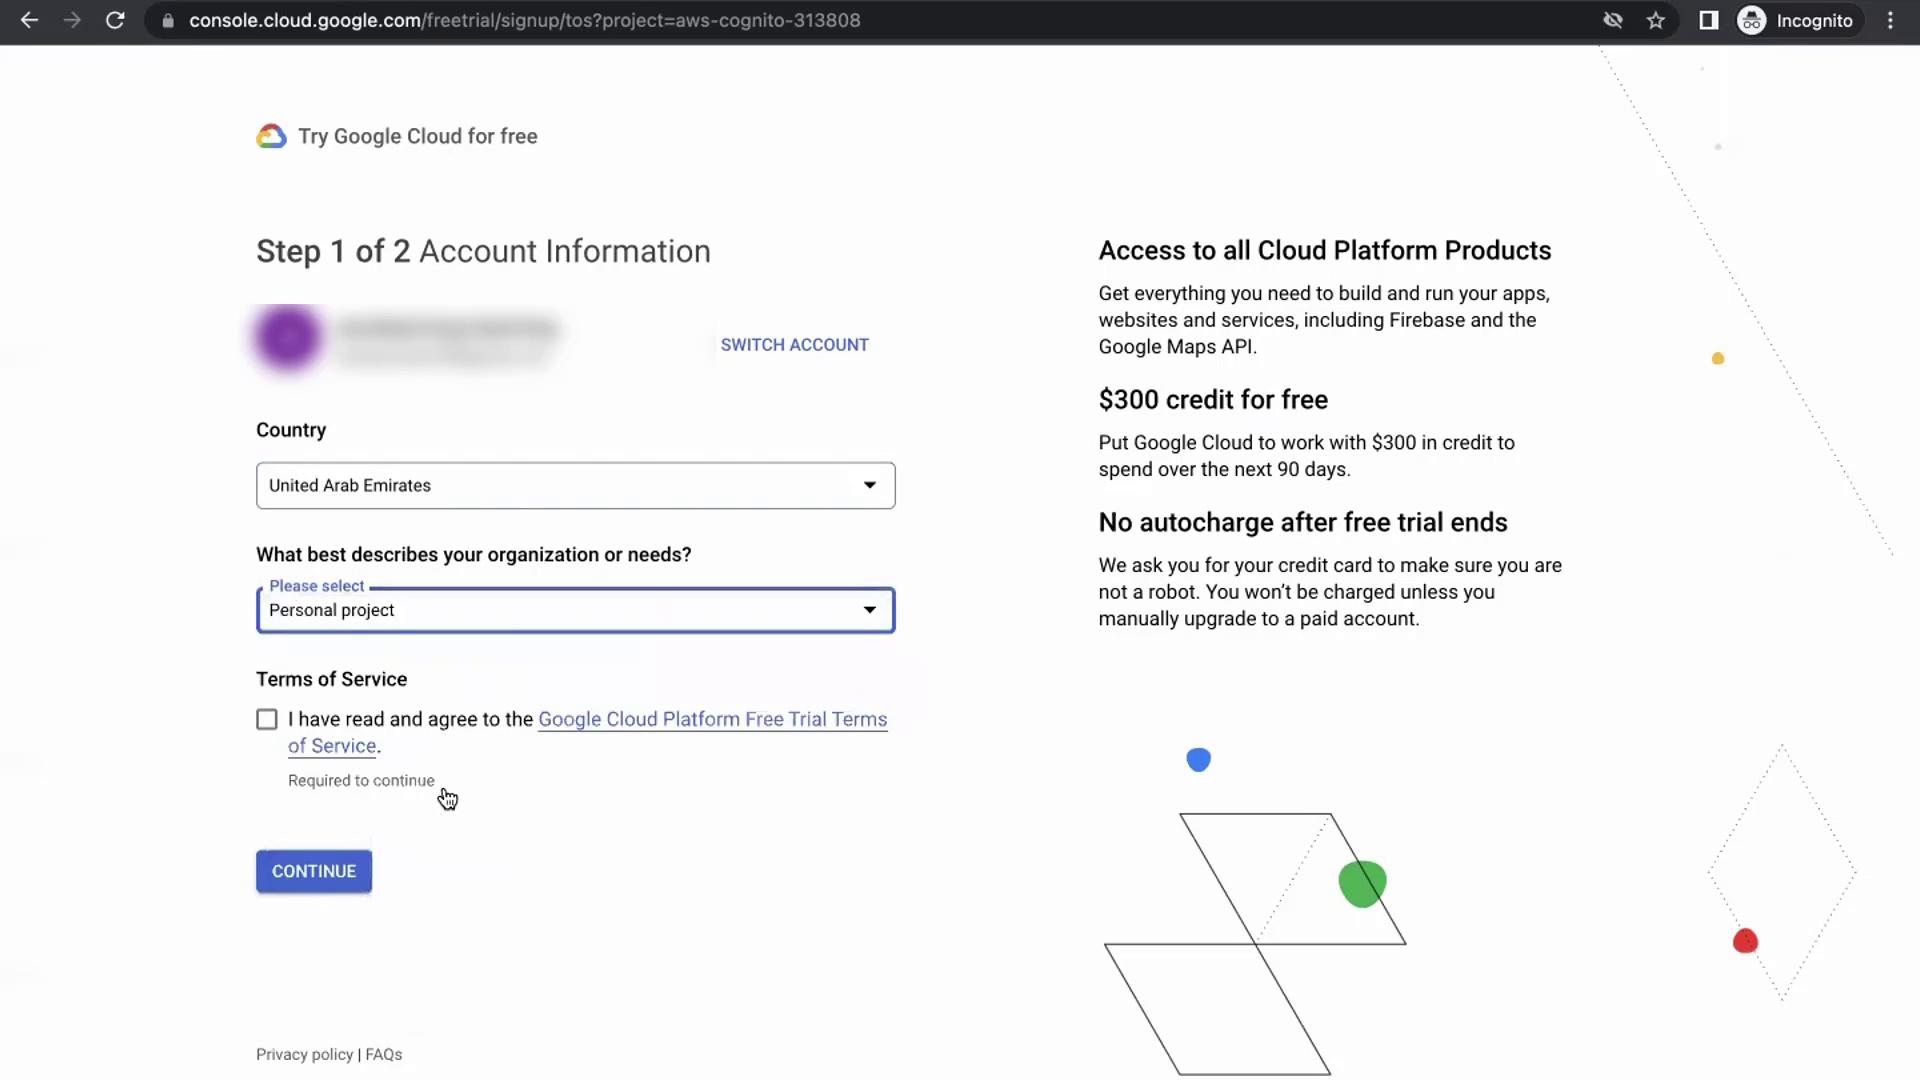
- Click Activate.
- Select your Country of residence.
- Choose Personal project (or another relevant option) for your trial.
- Read and accept the Terms of Service.
- Business information
- Primary contact details
- Credit card information (for identity verification only)
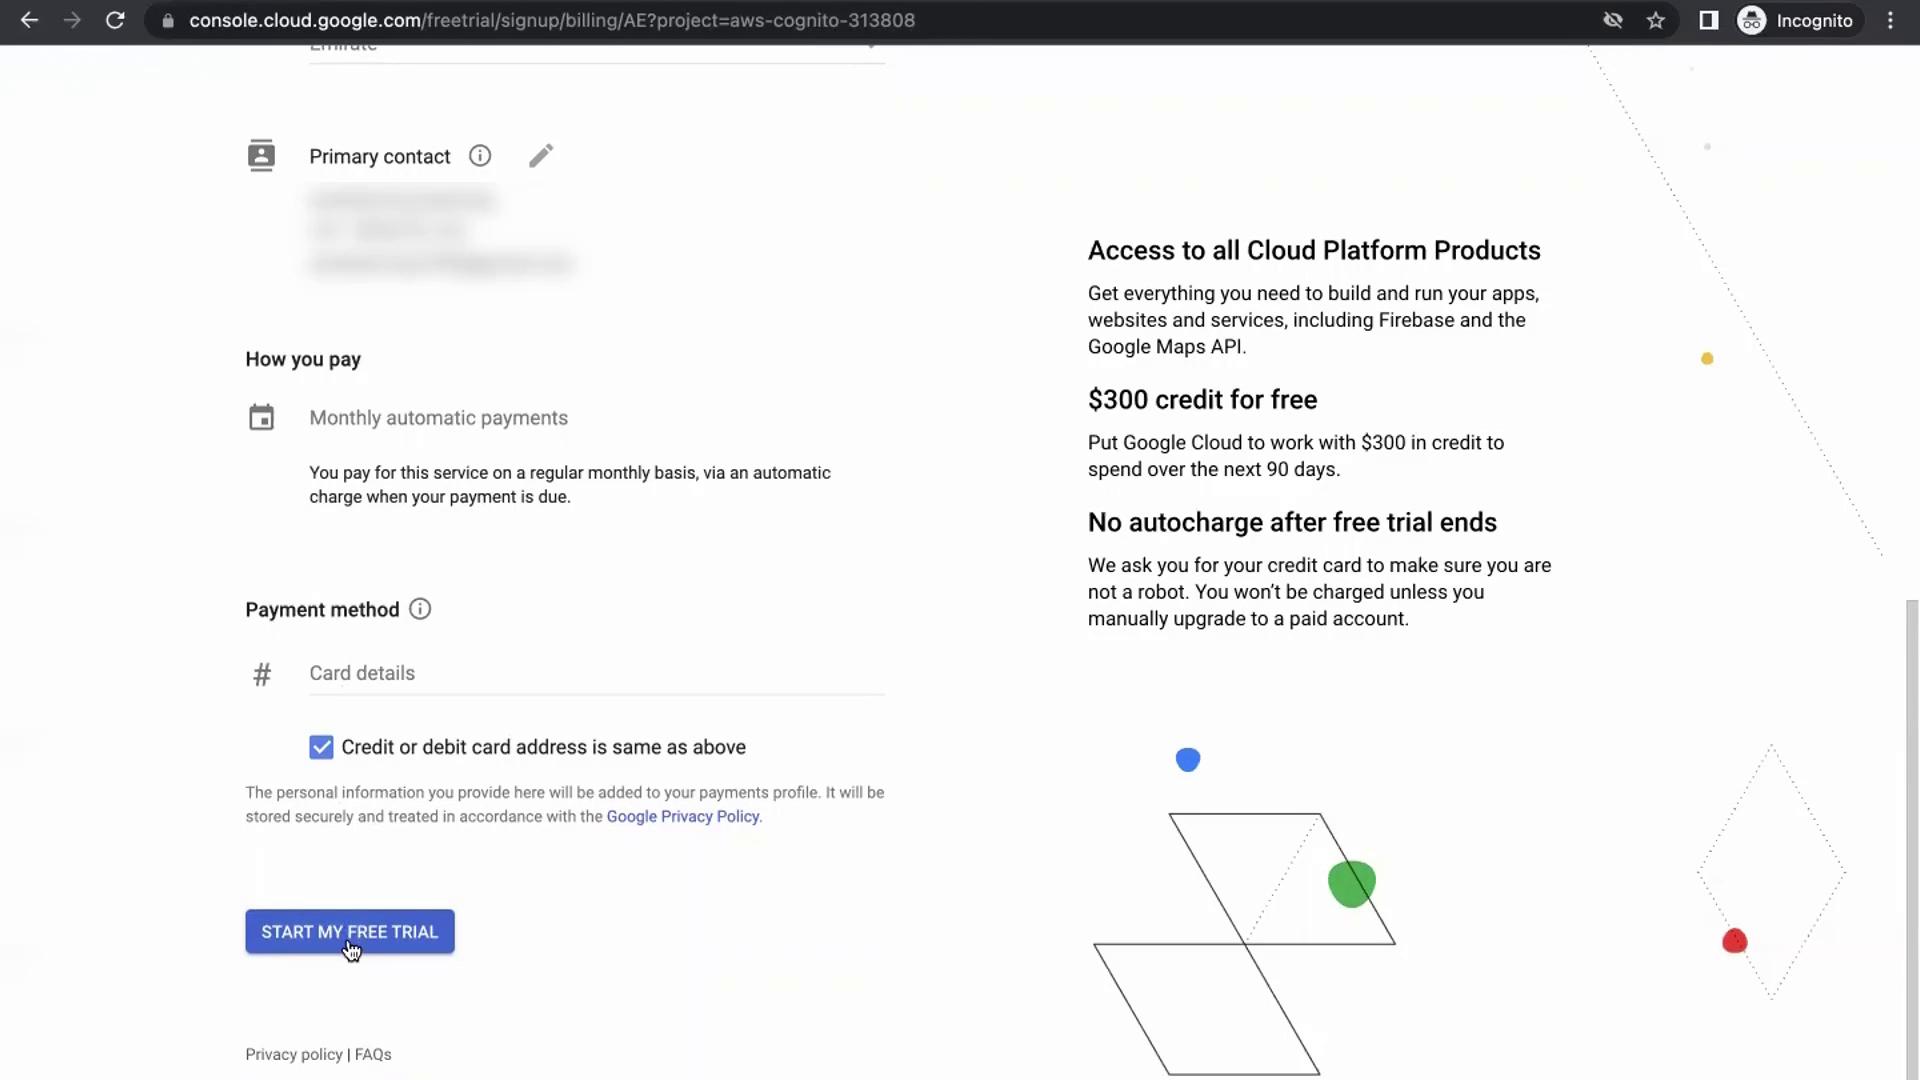
- Click Start My Free Trial.
Your credit card is used only for verification. You won’t be charged unless you exceed the $300 free credit or continue using paid services after 90 days. To avoid any unexpected charges, disable billing or close your billing account before the trial ends.
Congratulations! You’ve successfully activated your GCP free trial and can now explore core services, create projects, and manage resources from the Google Cloud Console.
Next Steps
- Learn how to create and manage projects in GCP
- Explore essential GCP services: Compute Engine, Cloud Storage, and IAM
- Review GCP Free Trial FAQ for more details