HashiCorp Certified: Vault Operations Professional 2022
Create a working Vault server configuration given a scenario
Demo PKI Secrets Engine
This guide walks through issuing TLS certificates with the Vault PKI Secrets Engine. We assume you already have a root and intermediate CA configured. For a complete PKI setup, refer to the HashiCorp Learn Portal.
Preconfigured PKI Setup
In this demo environment:
- A root CA is mounted at
pki-root. - An intermediate CA is mounted at
pki.- We generated a CSR on
pki, signed it withpki-root, and then imported the signed certificate back intopki.
- We generated a CSR on
Now that the intermediate CA is ready to issue certificates, let’s proceed.
Note
This tutorial skips the initial CA bootstrap. Every organization’s PKI topology differs.
If you need to configure a root or intermediate CA, see the Vault PKI Quickstart.
1. Retrieve the Issuer ID
The intermediate CA’s issuer ID (UUID) is required when creating roles:
vault read -field=default pki/config/issuers
Example output:
330c1480-6be3-3312-93f9-1ef2e4e28429
Save this UUID for your role definition.
2. Create a Role
Define a role named webapp that issues certificates for hcvop.com and its subdomains, with a maximum TTL of 24 hours:
vault write pki/roles/webapp \
  issuer_ref="330c1480-6be3-3312-93f9-1ef2e4e28429" \
  allowed_domains="hcvop.com" \
  allow_subdomains=true \
  max_ttl="24h"
If successful, Vault returns:
Success! Data written to: pki/roles/webapp
CLI Commands Summary
| Action | Command | Description |
|---|---|---|
| Read issuer ID | vault read -field=default pki/config/issuers | Retrieve your intermediate CA’s UUID |
| Create issuance role | vault write pki/roles/webapp … | Configure webapp role for SANs |
3. Issue a Certificate
Request a certificate for training.hcvop.com using the webapp role:
vault write pki/issue/webapp common_name="training.hcvop.com"
Vault responds with the certificate bundle:
Key              Value
---              -----
certificate      -----BEGIN CERTIFICATE-----
                 MIIDnjCCAoagAwIBAgIUbgbDr7a5Mq...
                 -----END CERTIFICATE-----
issuing_ca       -----BEGIN CERTIFICATE-----
                 MIIDnjCCoAgAwIBAgIUbgrD7a5Mq...
                 -----END CERTIFICATE-----
ca_chain         -----BEGIN CERTIFICATE-----
                 MIIDMjCCAhKgAwIBAgIUfns1tob...
                 -----END CERTIFICATE-----
private_key      -----BEGIN RSA PRIVATE KEY-----
                 MIICXQIBAAKCAQEA/3FLC3UyH47G1tG...
                 -----END RSA PRIVATE KEY-----
private_key_type rsa
serial_number    16:6b:25:b5:6c:07:d3:38...
Warning
This is the only time Vault returns the private key.
Ensure you store private_key securely—Vault will not expose it again.
4. Using the Vault UI
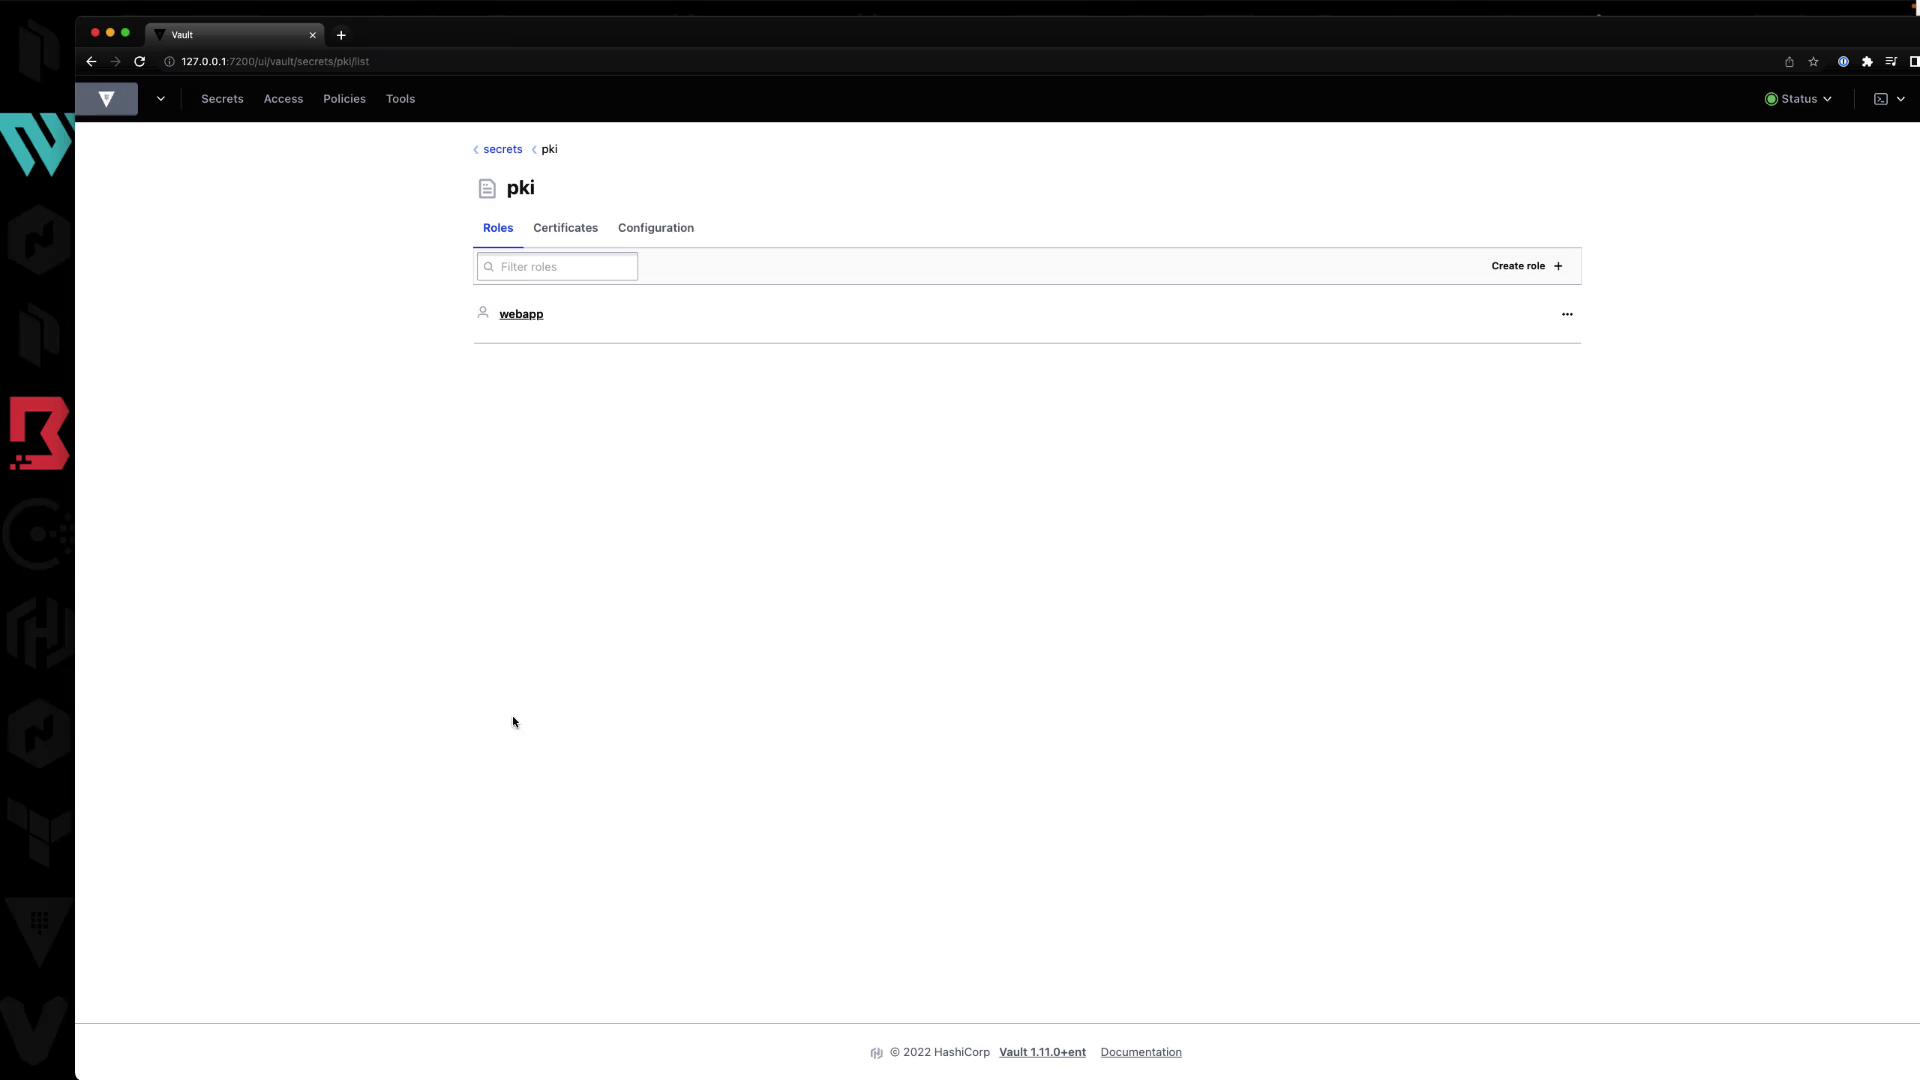
All of the above operations can also be performed in the Vault web interface.
4.1 Roles List

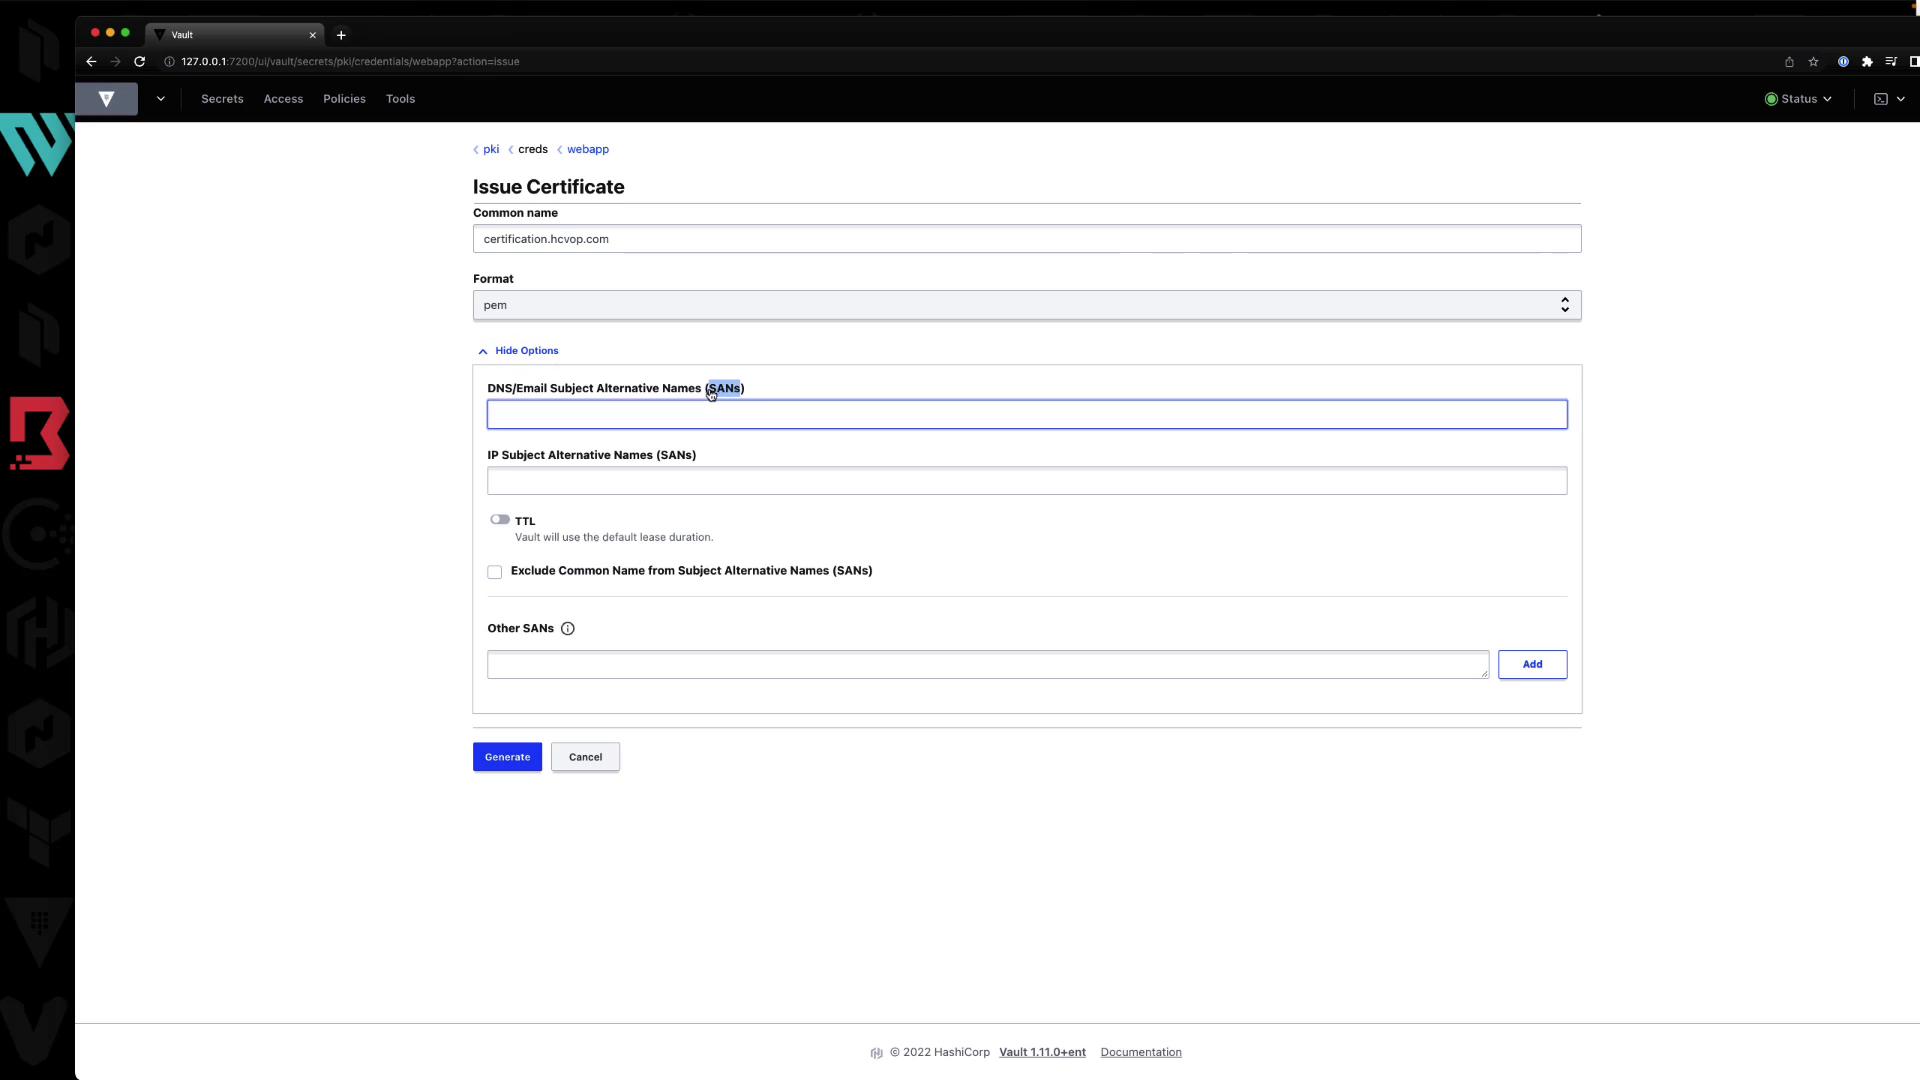
4.2 Issue a Certificate
In the UI form:
- Common Name: e.g.,
certification.hcvop.com - Format: PEM, DER, or PEM bundle
- Subject Alternative Names: DNS SANs, IP SANs
- TTL: e.g.,
72h

After clicking Generate, the UI displays your certificate and warns you to copy the private key immediately.
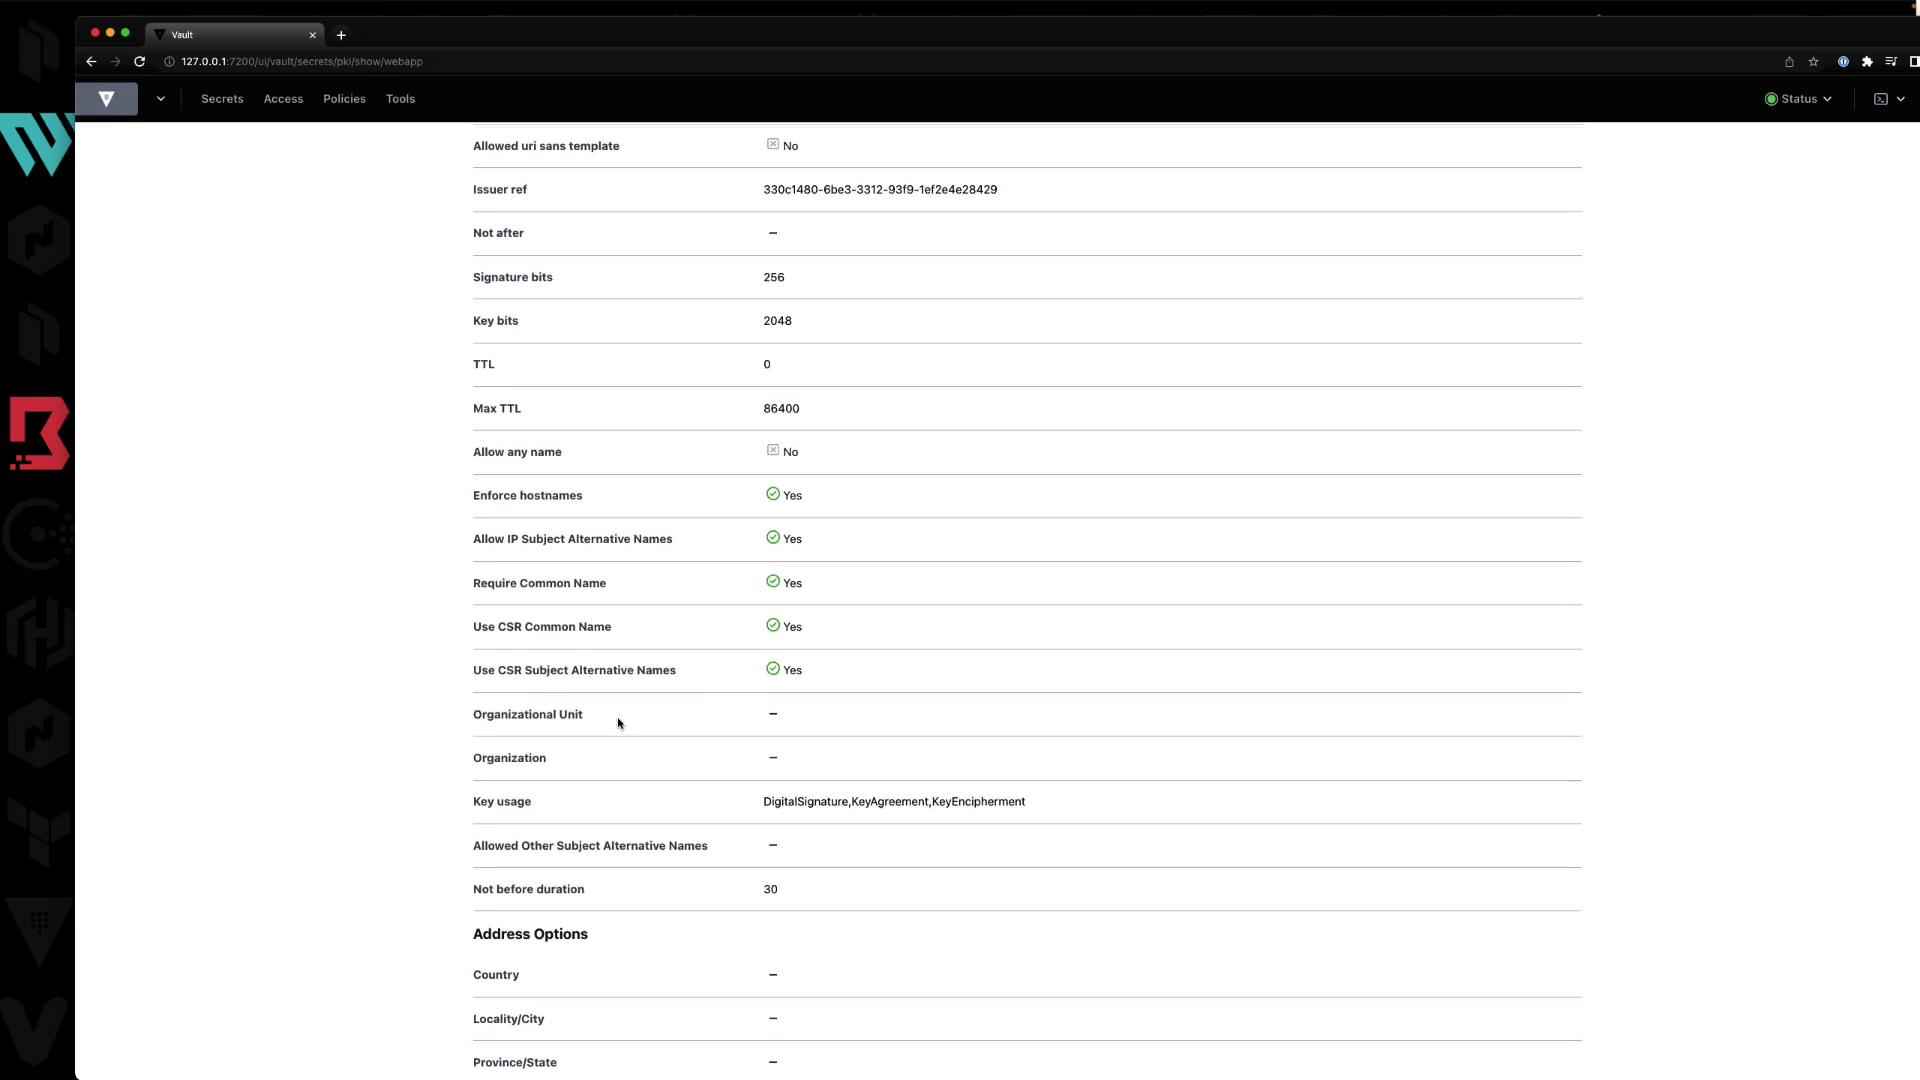
4.3 Role Configuration Details
You can view or edit the role’s settings:

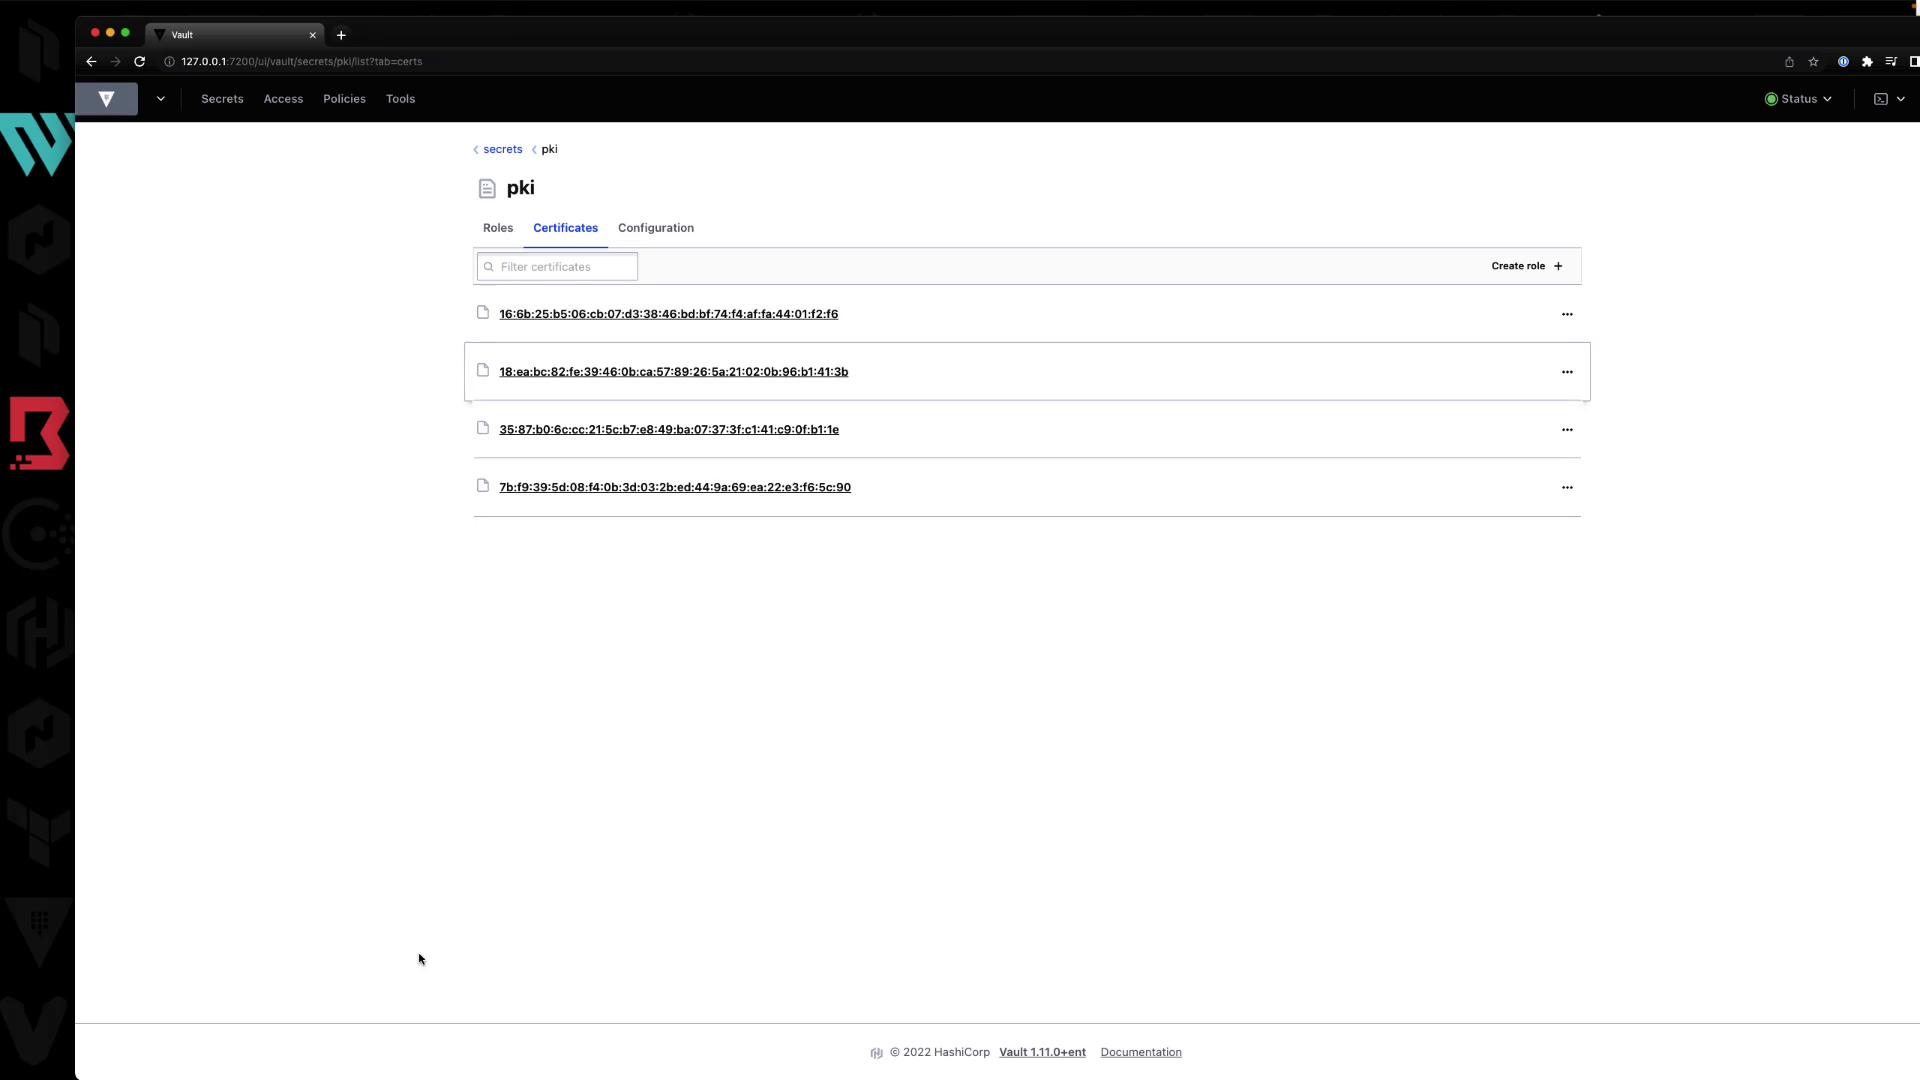
4.4 Certificate Listings
Under Certificates, Vault lists all issued certs with their serial numbers. You can inspect or revoke them here.

Summary
- Define roles with
vault write pki/roles/...to control domain scope and TTL. - Issue certs with
vault write pki/issue/..., capturing the private key immediately. - You can perform all tasks via the CLI or the Vault UI.
Further Reading
Watch Video
Watch video content