HashiCorp : Terraform Cloud

Advanced Topics

Lab Solution State Isolation and Run Triggers

In this guide, we’ll demonstrate how to isolate Terraform state across multiple Terraform Cloud workspaces and configure run triggers to automate downstream applies. Workspace boundaries reduce risk and help teams maintain clear separation between services.

The image shows a KodeKloud lab interface for Terraform Cloud, featuring a task description on the left and a Visual Studio Code editor on the right with instructions for using the terminal.

1. Workspace Isolation

Terraform Cloud workspaces each manage their own state, ensuring changes in one environment don’t affect another. In our example, HashiCat and Clumsy Bird are deployed in separate workspaces.

The image shows a Terraform Cloud interface displaying a list of workspaces with their names, run statuses, repositories, and latest change timestamps. All workspaces have a status of "Applied."

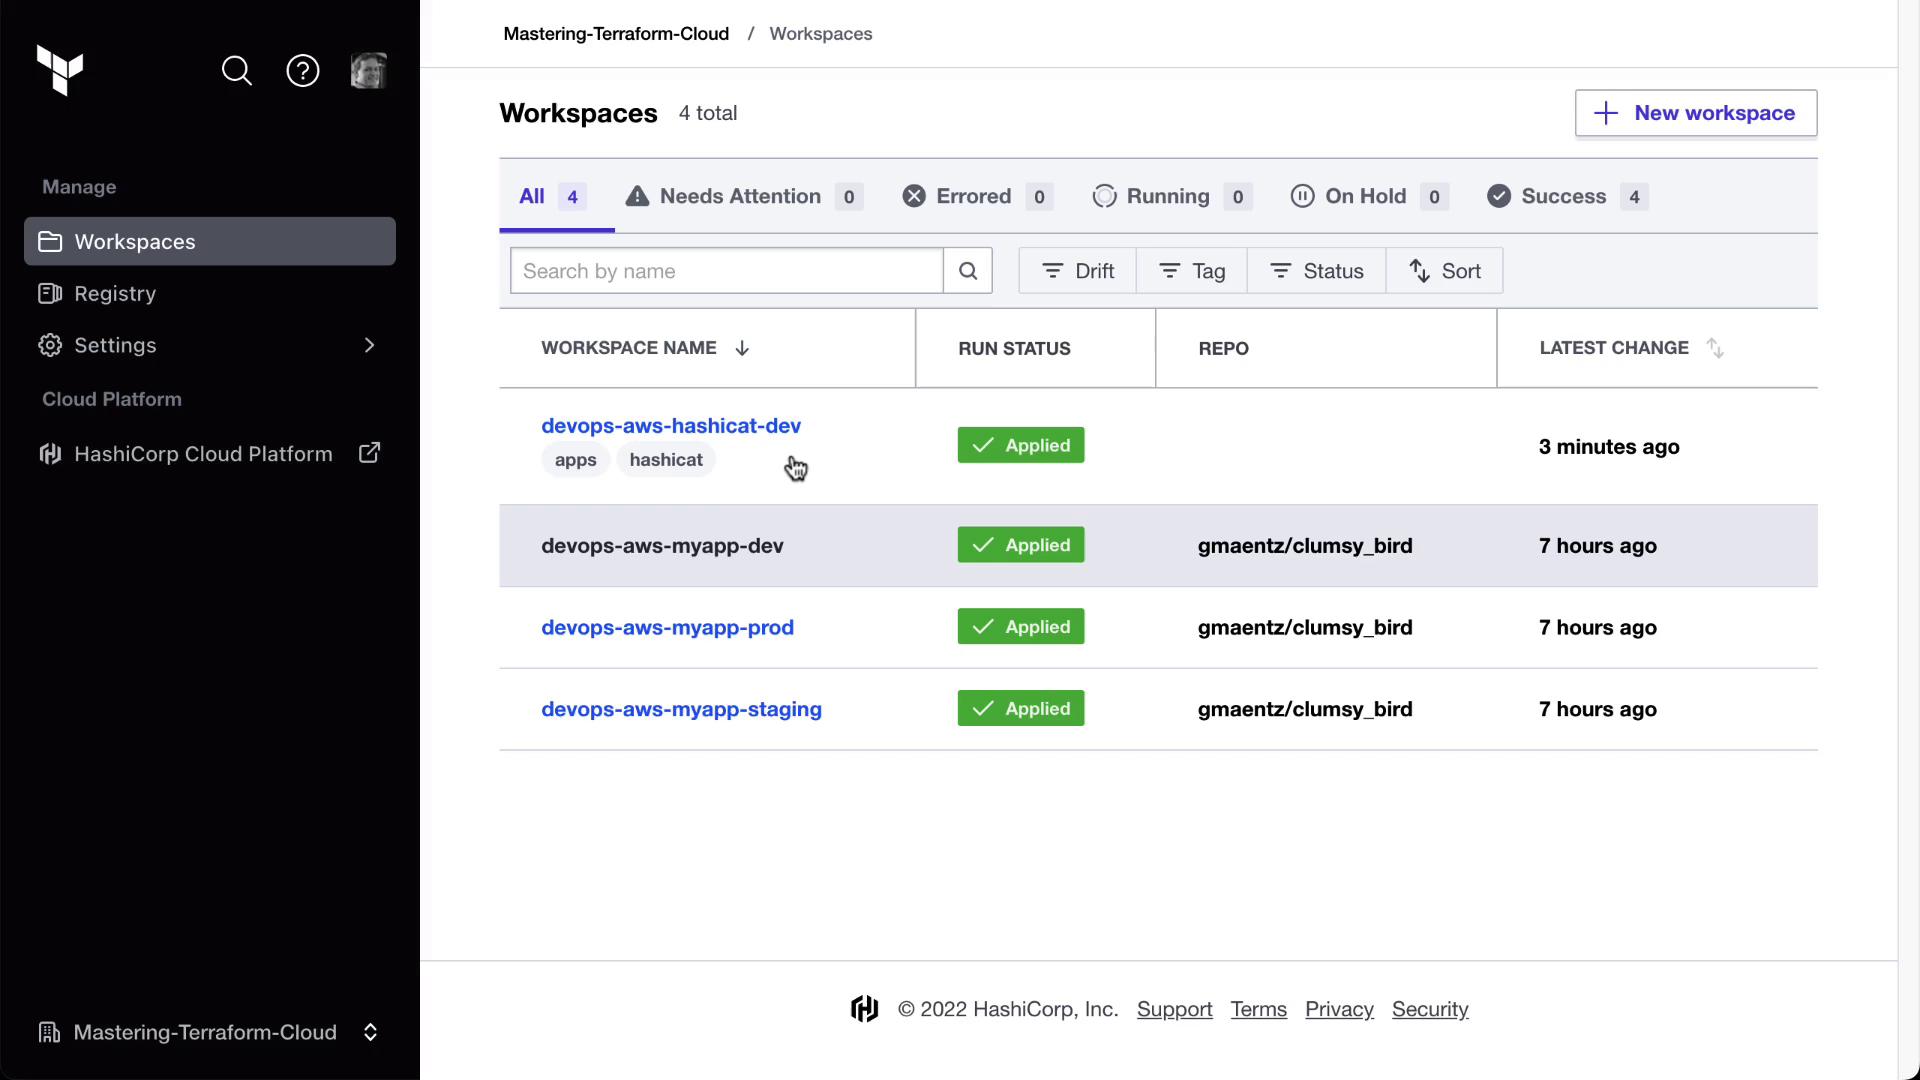
1.1 Sharing Outputs with tfe_outputs

To consume outputs from one workspace in another, use the tfe_outputs data source. Below is an example of pulling the Clumsy Bird URL into the HashiCat workspace.

locals {
  private_key_filename = "${var.prefix}-ssh-key.pem"
}

resource "aws_key_pair" "hashicat" {
  key_name   = local.private_key_filename
  public_key = tls_private_key.hashicat.public_key_openssh
}

data "tfe_outputs" "clumsy_bird_dev" {
  organization = "Mastering-Terraform-Cloud"
  workspace    = "devops-aws-myapp-dev"
}

output "clumsy_bird_dev_url" {
  value = nonsensitive(data.tfe_outputs.clumsy_bird_dev.outputs["clumsy_bird_url"])
}

Next, configure Terraform Cloud as your backend in backend.tf:

terraform {
  cloud {
    organization = "Mastering-Terraform-Cloud"
    workspaces {
      tags = ["hashicat", "apps"]
    }
  }
}

2. Authenticate and Setup

First, log in to Terraform Cloud from your CLI:

terraform login

Terraform will request an API token for app.terraform.io using your browser.
Enter a value: yes

Open the following URL to access the tokens page for app.terraform.io:
https://app.terraform.io/app/settings/tokens?source=terraform-login

Generate a token and paste it when prompted.
Token for app.terraform.io:
> [YOUR_TOKEN]

The image shows a dialog box for creating an API token, with a field for entering a description labeled "State Isolat."

Clone the sample repository and run the setup script:

git clone https://github.com/hashicorp/tfc-getting-started.git
cd tfc-getting-started
scripts/setup.sh

3. Enabling Remote State Sharing

Allow downstream workspaces to read the state of an upstream workspace by enabling Remote State Sharing:

  1. Navigate to the devops-aws-myapp-dev (Clumsy Bird) workspace.
  2. Go to SettingsGeneral.
  3. Toggle Remote State Sharing on.
  4. Specify which workspaces (e.g., HashiCat) can access the state.

The image shows the general settings page of a Terraform Cloud workspace named "devops-aws-myapp-dev," with details like ID, name, and description. The sidebar includes options like Locking, Notifications, and Version Control.

The image shows a Terraform Cloud workspace settings page with options for remote state sharing and user interface preferences. The sidebar includes various settings categories like General, Locking, and Notifications.

Note

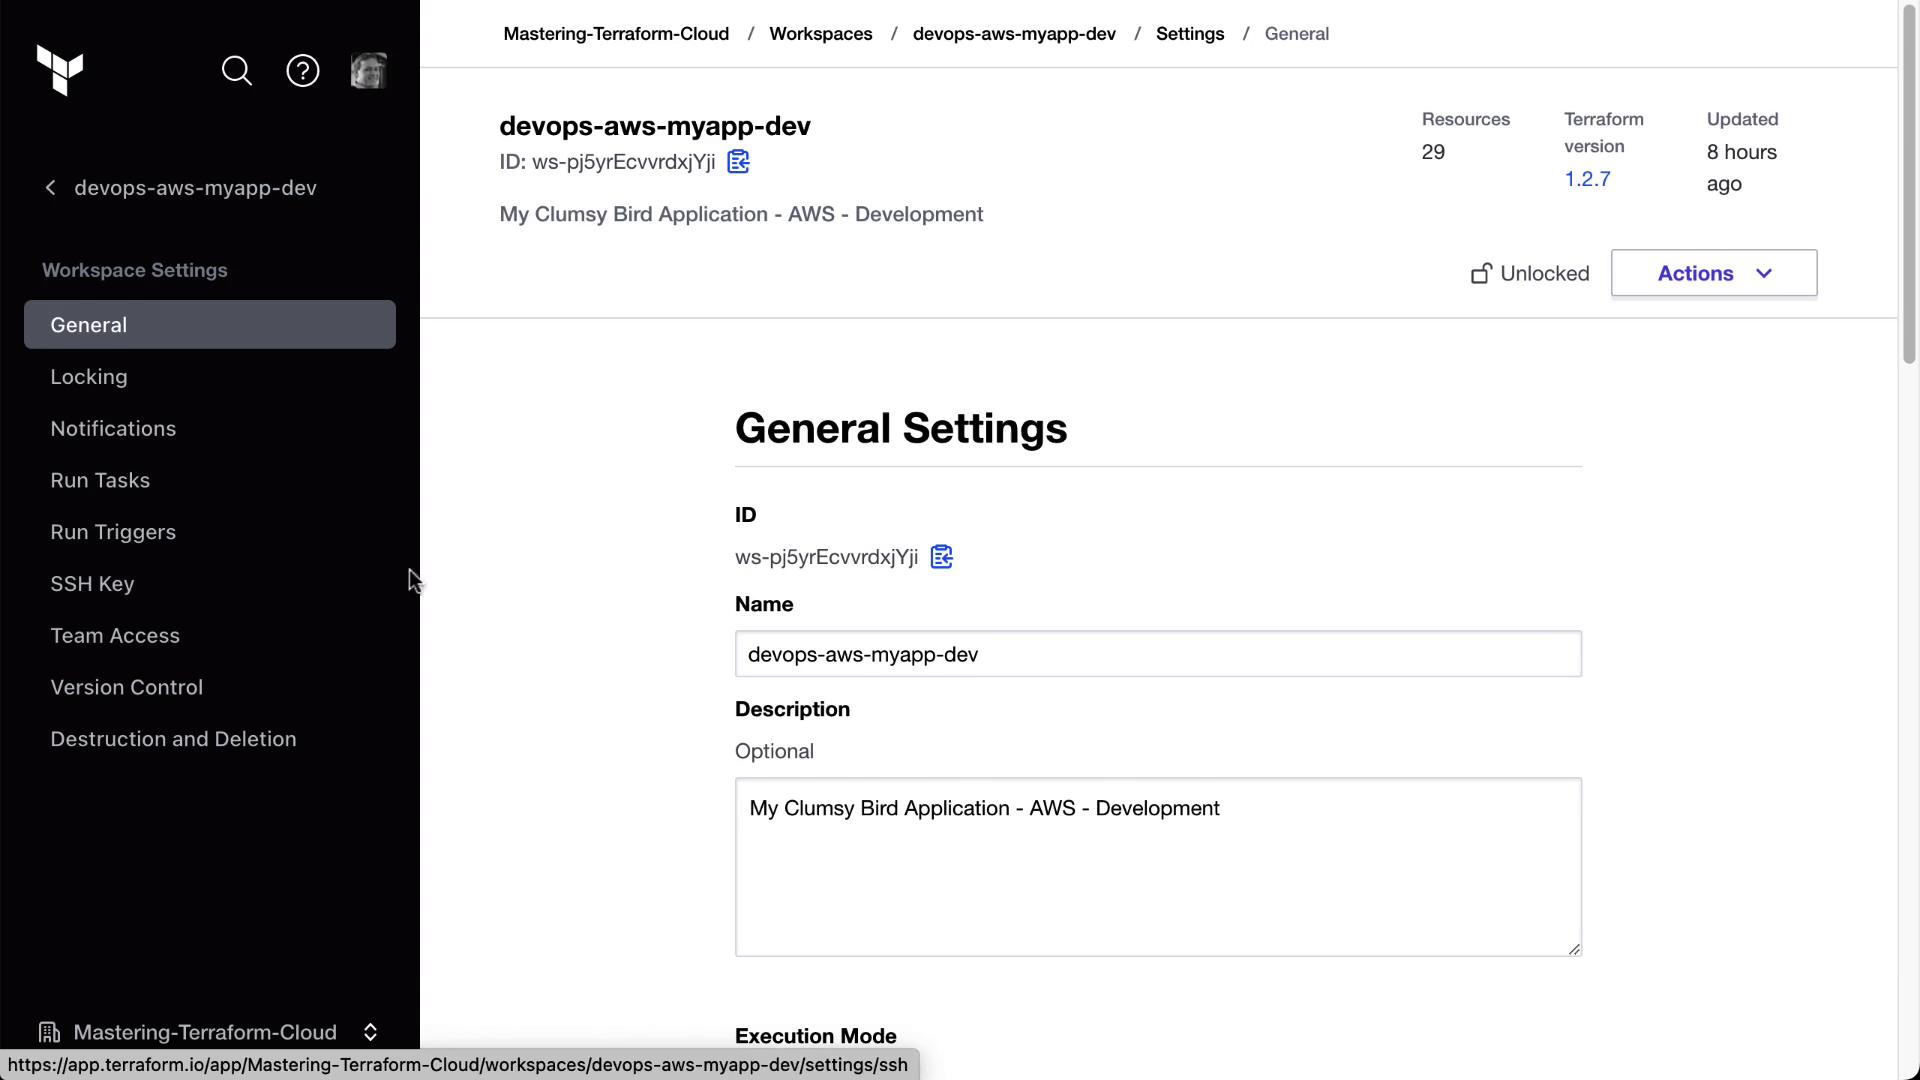
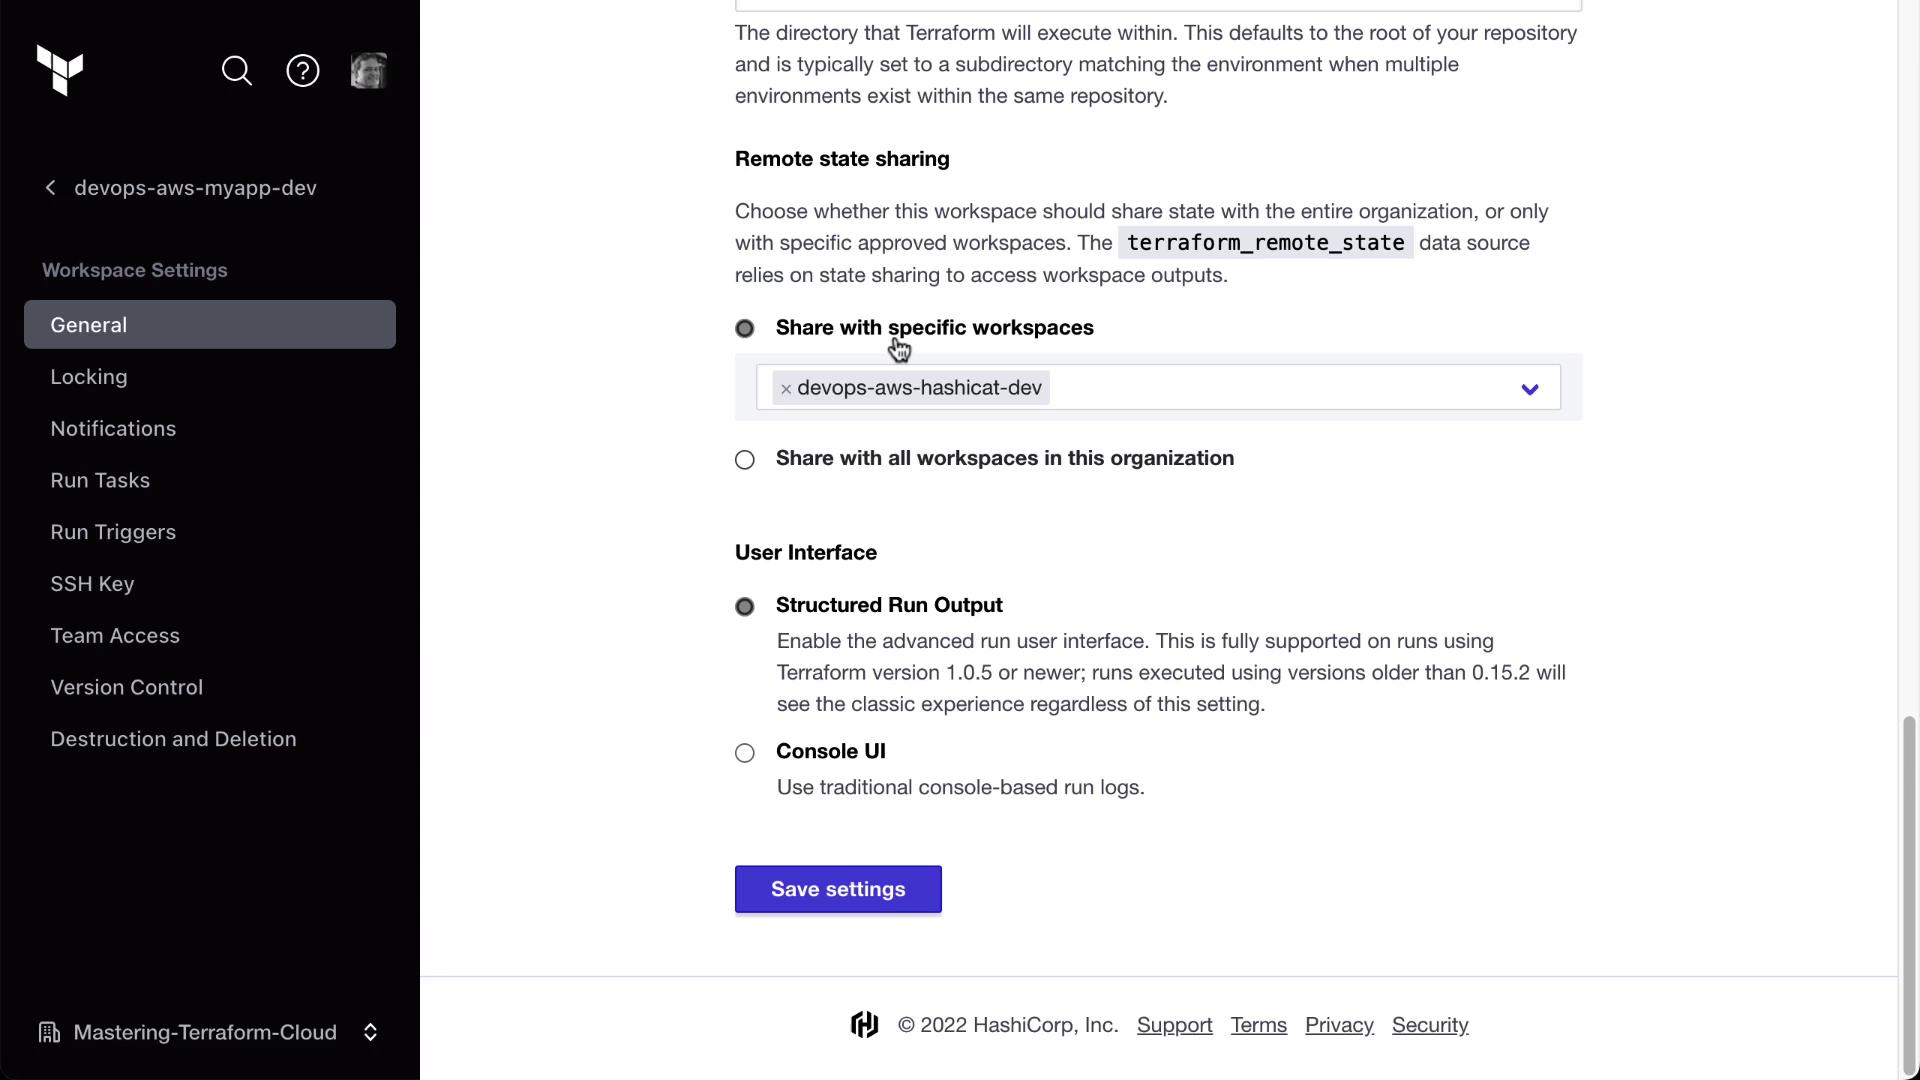
Only workspaces with Remote State Sharing enabled can be referenced by tfe_outputs. Ensure you have the right permissions before sharing state.

4. Configuring Run Triggers

Run triggers automatically queue a run in a downstream workspace after a successful apply in an upstream workspace.

  1. In the HashiCat workspace, go to SettingsRun Triggers.
  2. Click Add Trigger, then select the devops-aws-myapp-dev workspace.
Upstream WorkspaceDownstream WorkspaceTrigger Type
devops-aws-myapp-devHashiCatOn successful apply

Now, any time Clumsy Bird’s workspace finishes an apply, Terraform Cloud will auto-queue a plan in HashiCat.

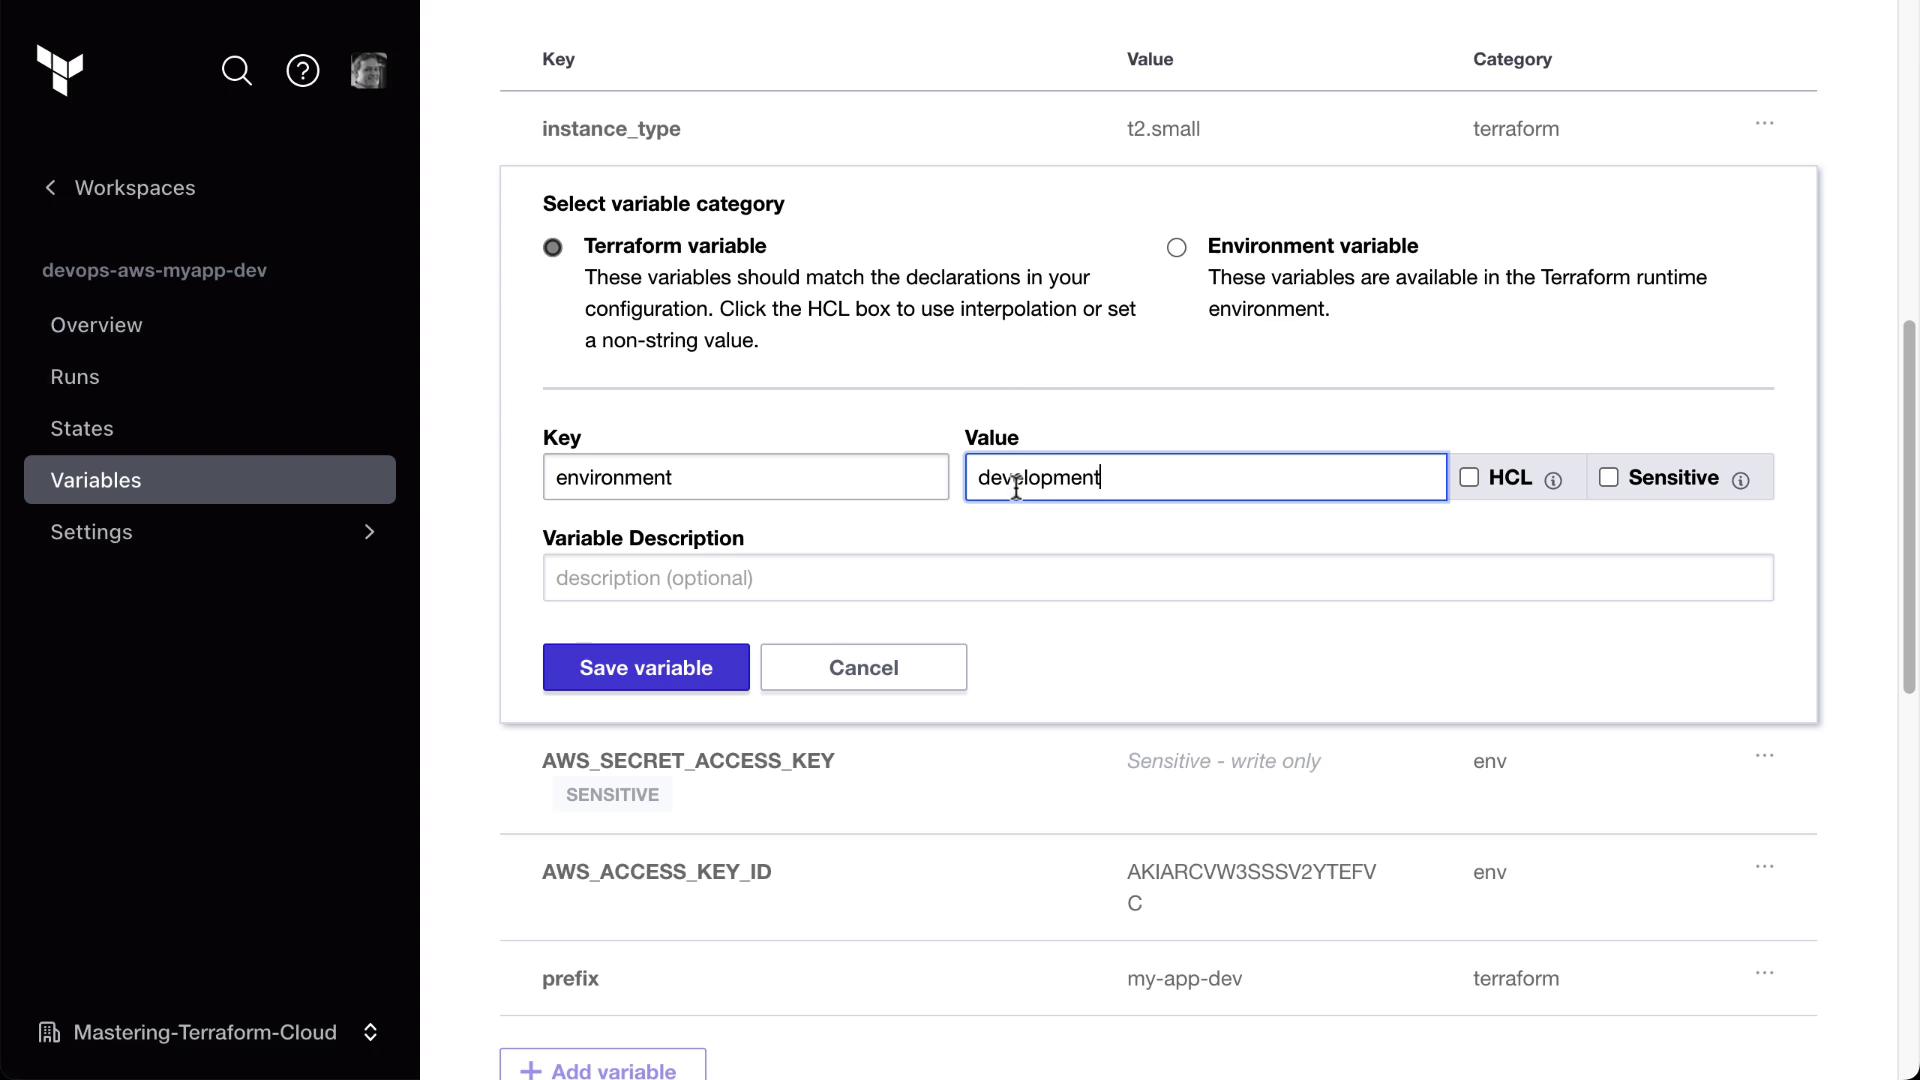
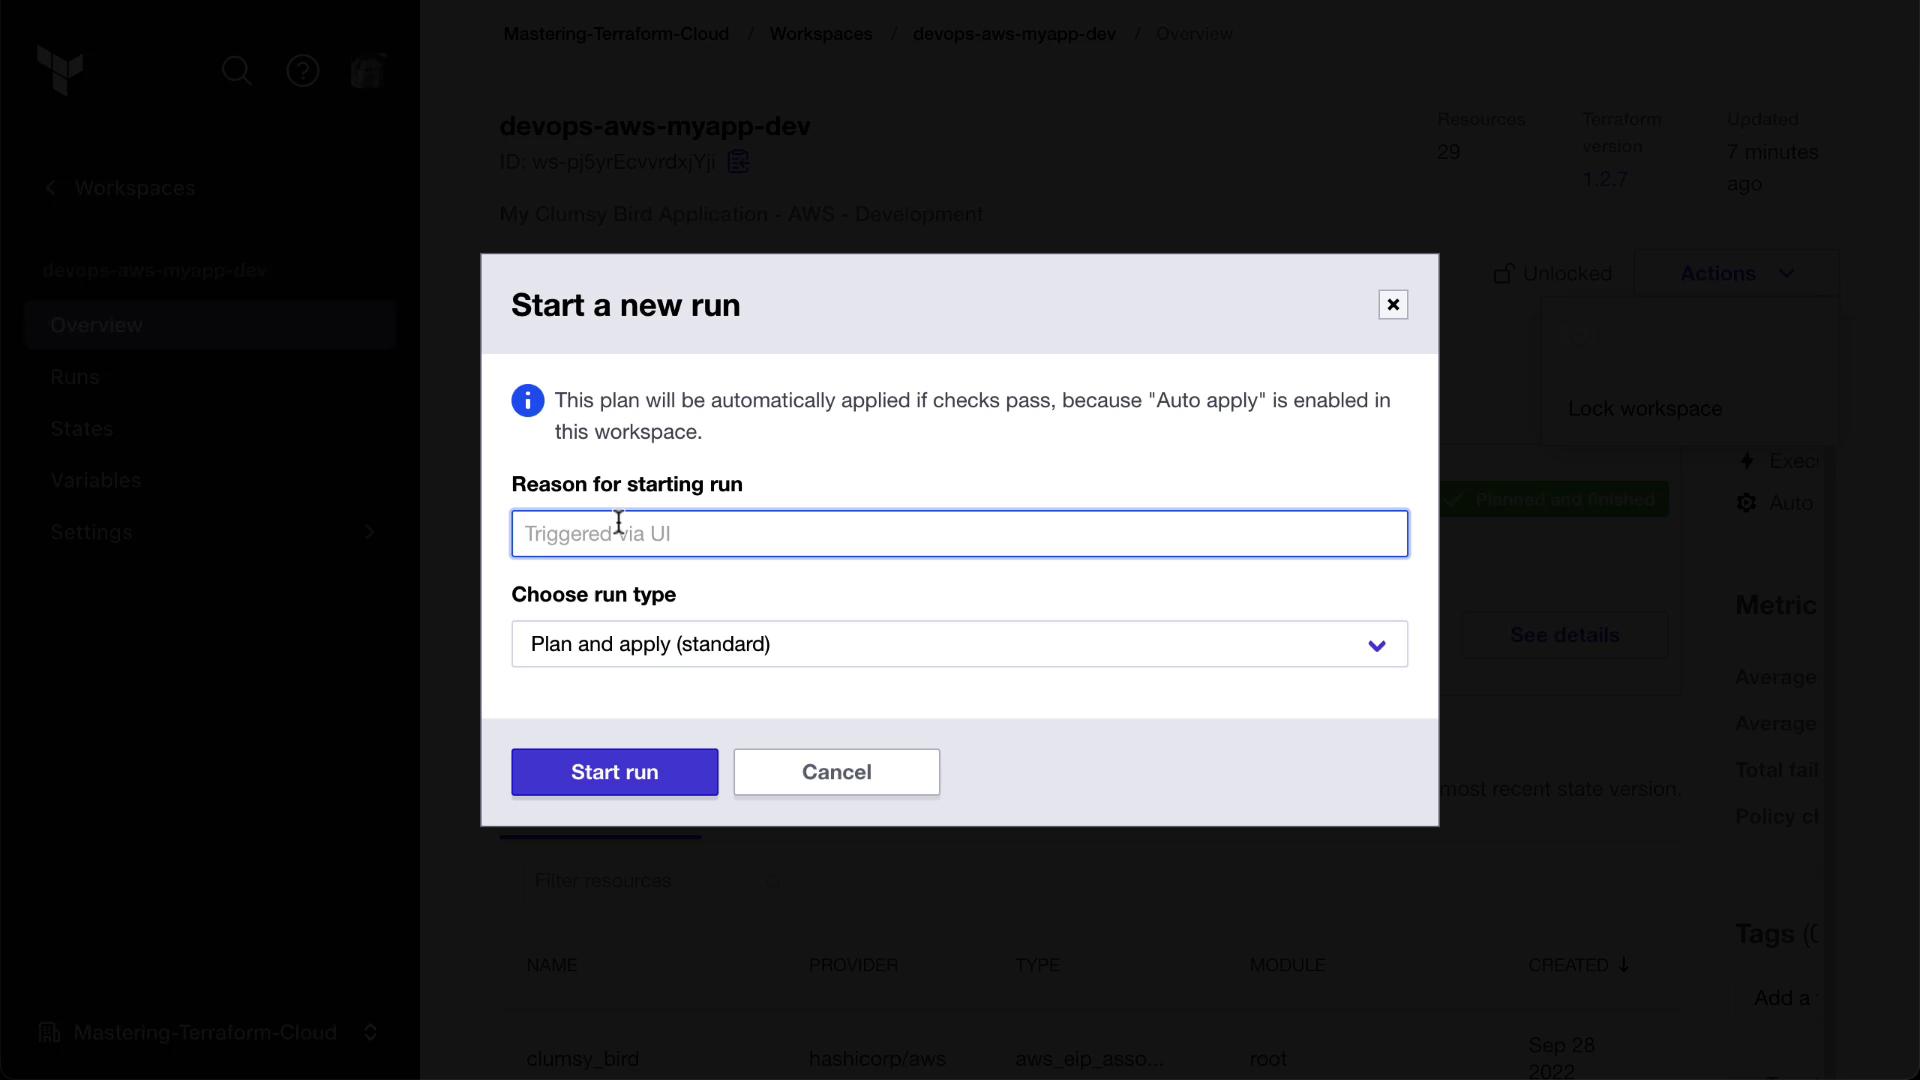
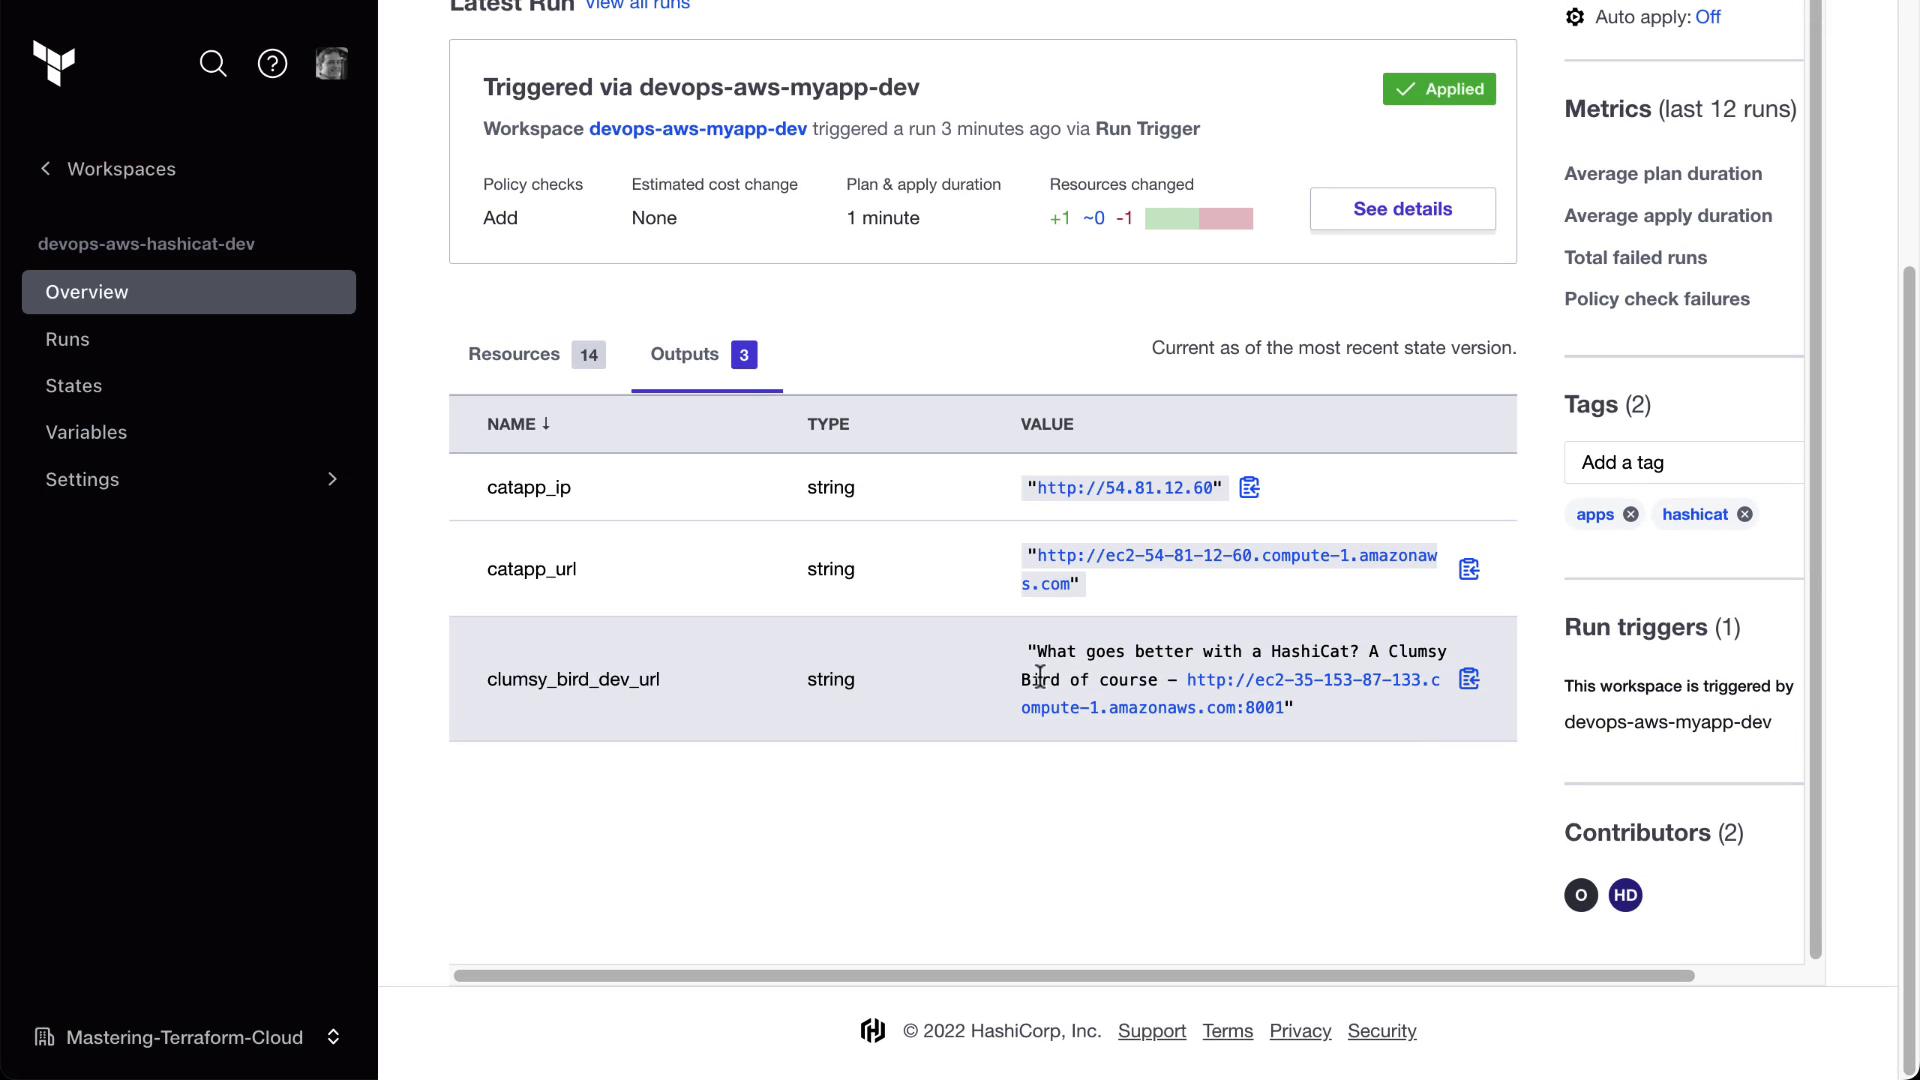
5. Demonstrating a Triggered Run

Follow these steps to see run triggers in action:

  1. Update a Variable in Clumsy Bird
    Modify any environment variable (e.g., environment = "development-hashiCat2").

    The image shows a Terraform Cloud interface where a user is adding a variable with the key "environment" and the value "development" in the Variables section of a workspace.

  2. Start a New Run Manually
    Trigger the change in Clumsy Bird.

    # In the Clumsy Bird workspace:
    terraform plan
    terraform apply
    

    The image shows a dialog box titled "Start a new run" in a software interface, with options to enter a reason for starting the run and to choose the run type.

  3. Observe the Triggered Plan in HashiCat
    After Clumsy Bird applies, HashiCat will queue a run automatically. Check the Runs tab for a trigger entry.

    The image shows a Terraform Cloud interface with a run triggered for the workspace "devops-aws-myapp-dev." It displays the run details, including configuration, trigger, execution mode, and status updates like "Plan finished" and "Cost estimation finished."

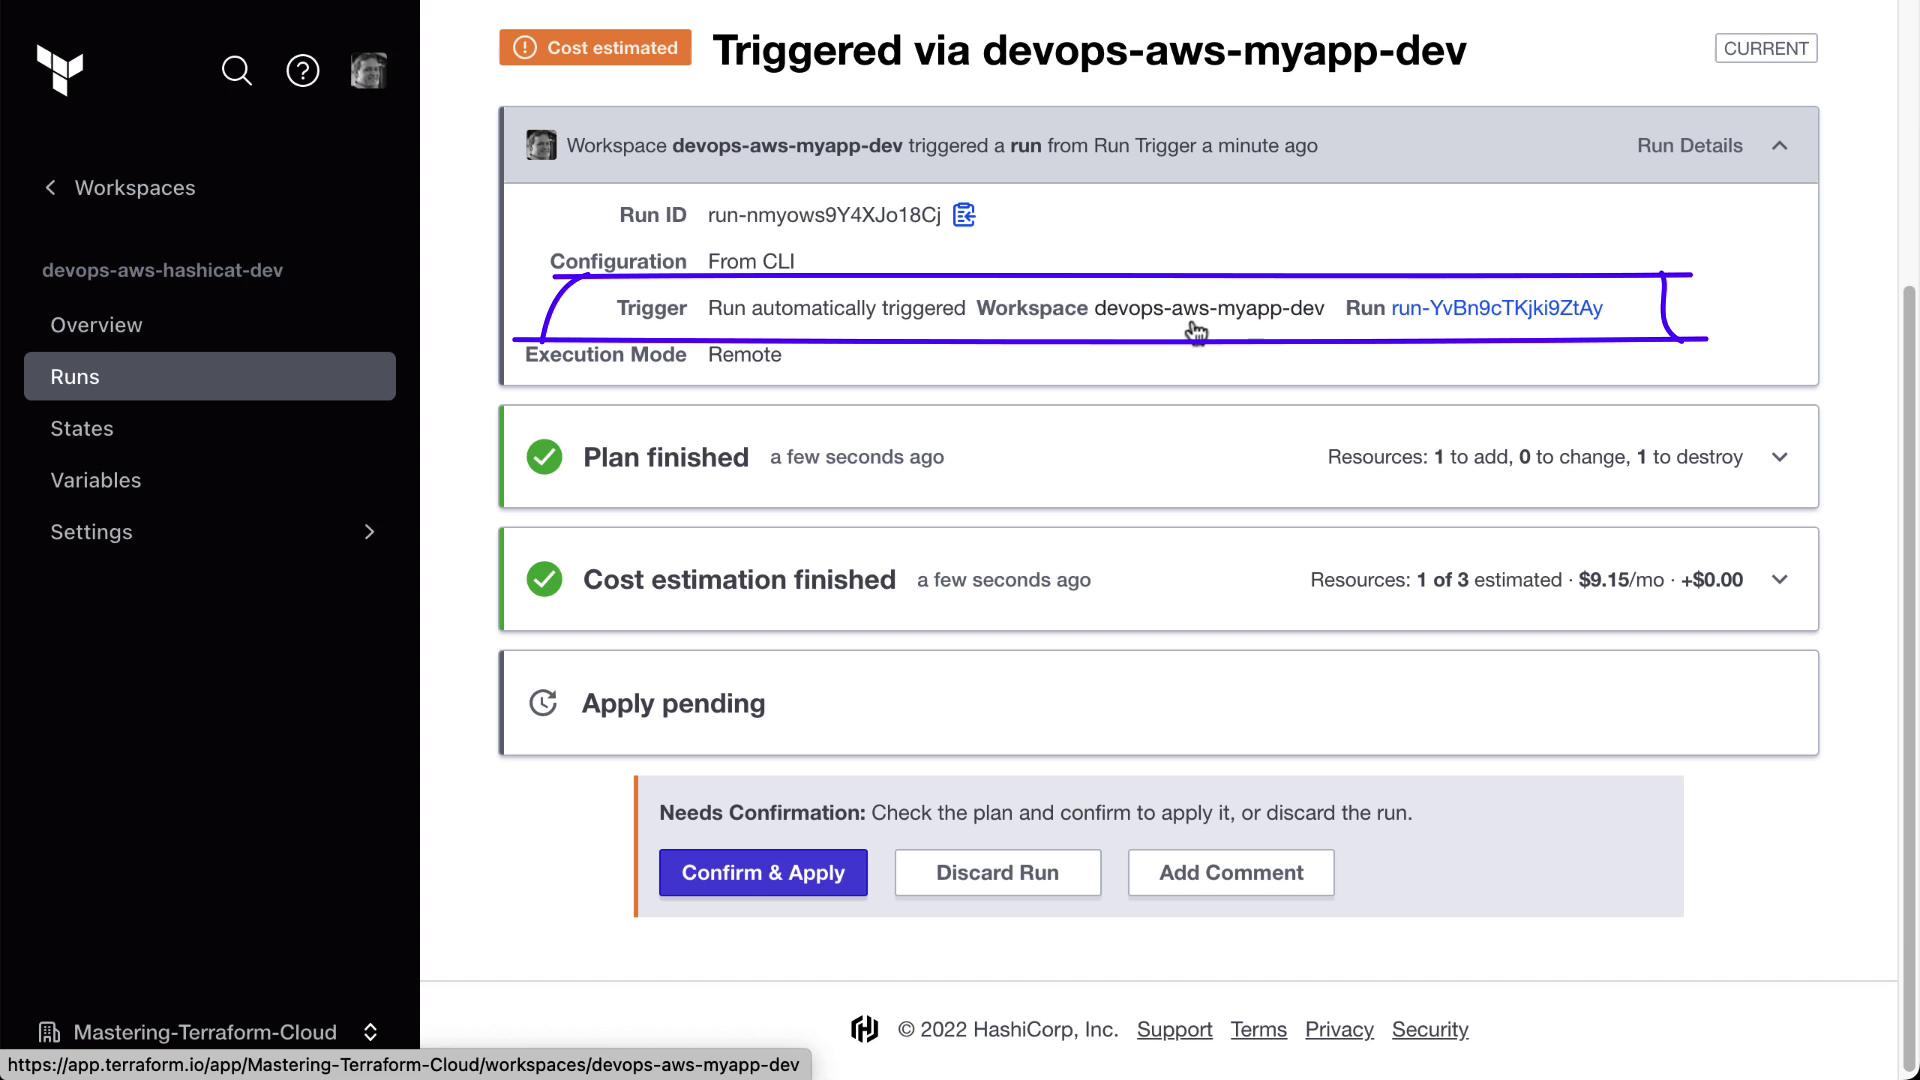
  4. Approve and Review Outputs
    Approve the plan in HashiCat. You’ll now see the Clumsy Bird URL retrieved from the other workspace.

    The image shows a Terraform Cloud interface displaying the outputs of a recent run, including IP addresses and URLs for different resources. It also includes workspace details and metrics on the right side.


By isolating state and chaining workspaces with run triggers, you can build modular, resilient infrastructure pipelines in Terraform Cloud.

Watch Video

Watch video content

Previous
Lab Solution Automating Terraform Cloud