Jenkins Pipelines
Kubernetes and GitOps
Kubernetes Deploy Raise PR
In this guide, you'll learn how to automate raising a pull request (PR) in GitHub by integrating the process into a Jenkins pipeline. Instead of manually clicking on “New Pull Request” in the GitHub UI, this approach uses GitHub’s REST API to automate the creation of a PR.
Below, find a step-by-step explanation, enriched with diagrams and code snippets.
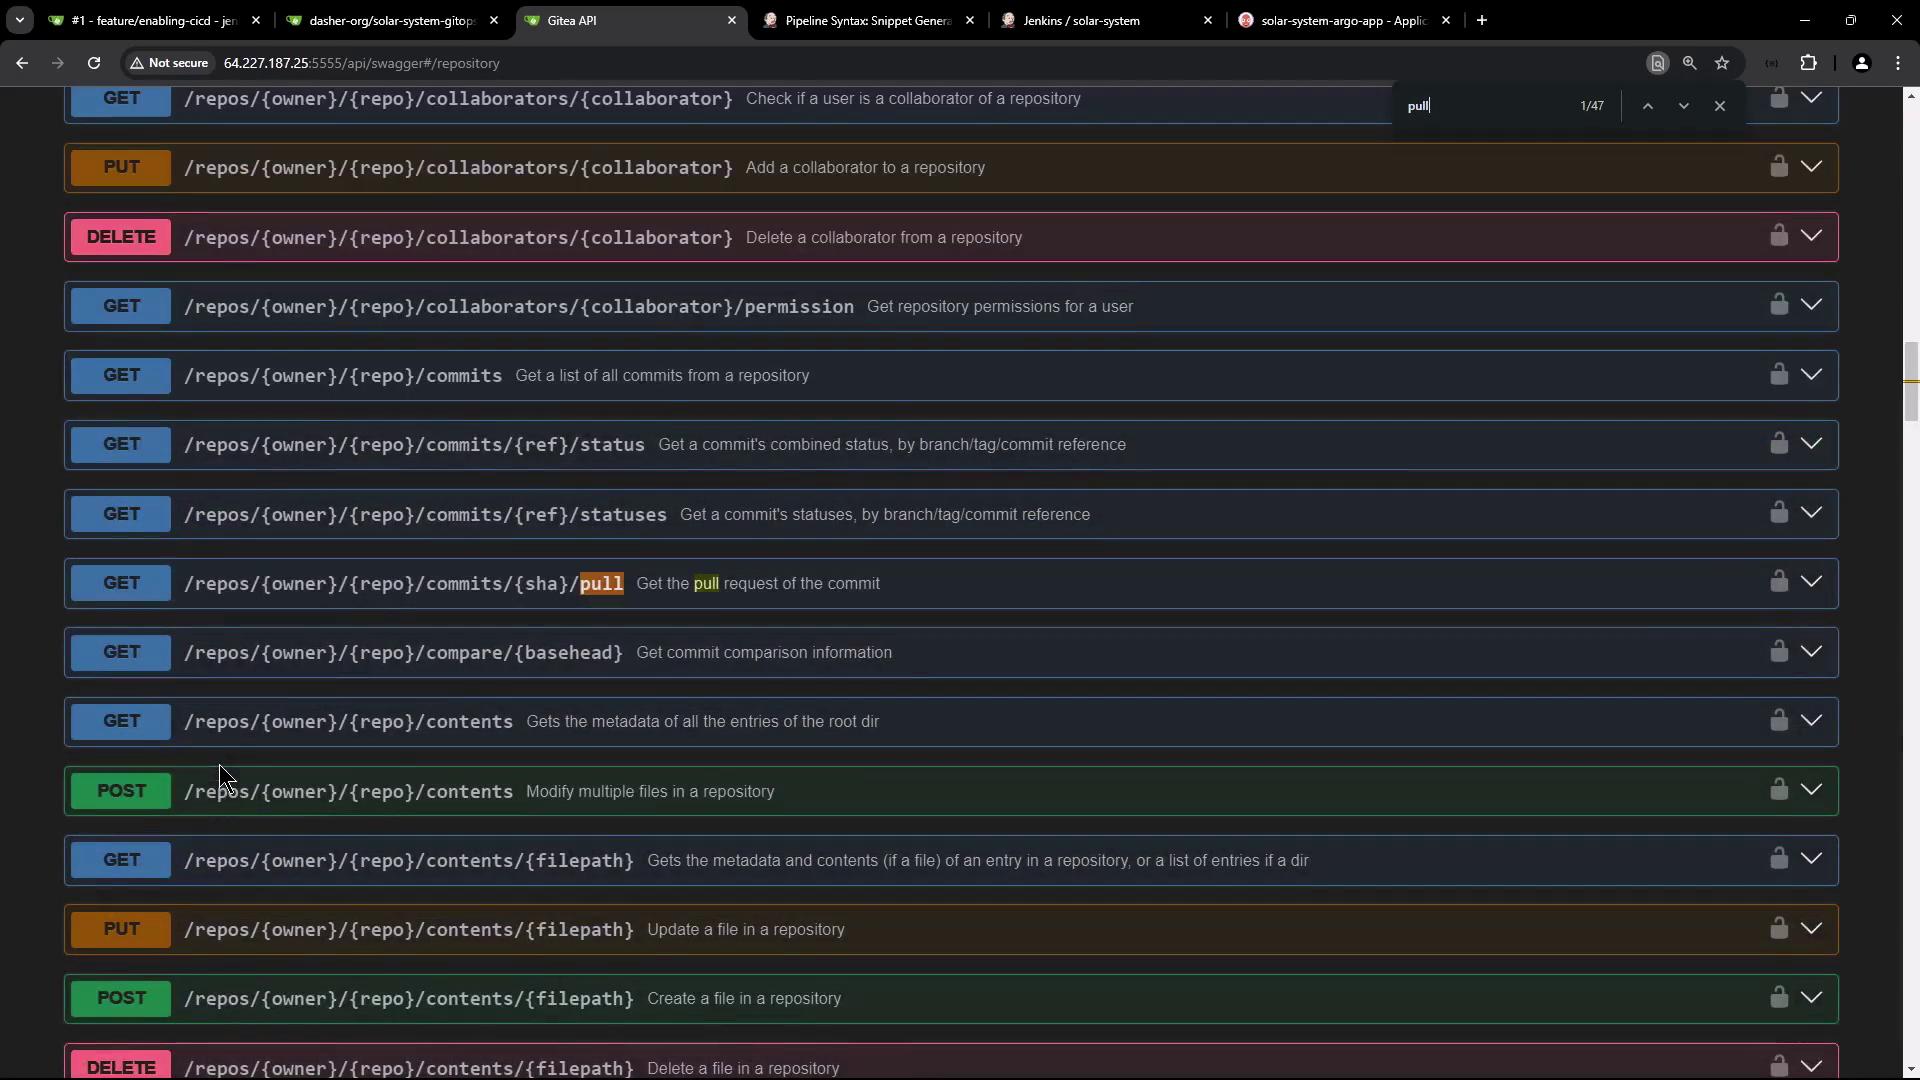
Using GitHub's REST API to Create a Pull Request
GitHub's REST API allows you to perform almost any action available in the GitHub UI. To discover the available endpoints, navigate to the API section (usually at the bottom right of your repository page) where you can view a Swagger-based specification.
Exploring the API Endpoints
- Open your repository's API interface and search for "pull".
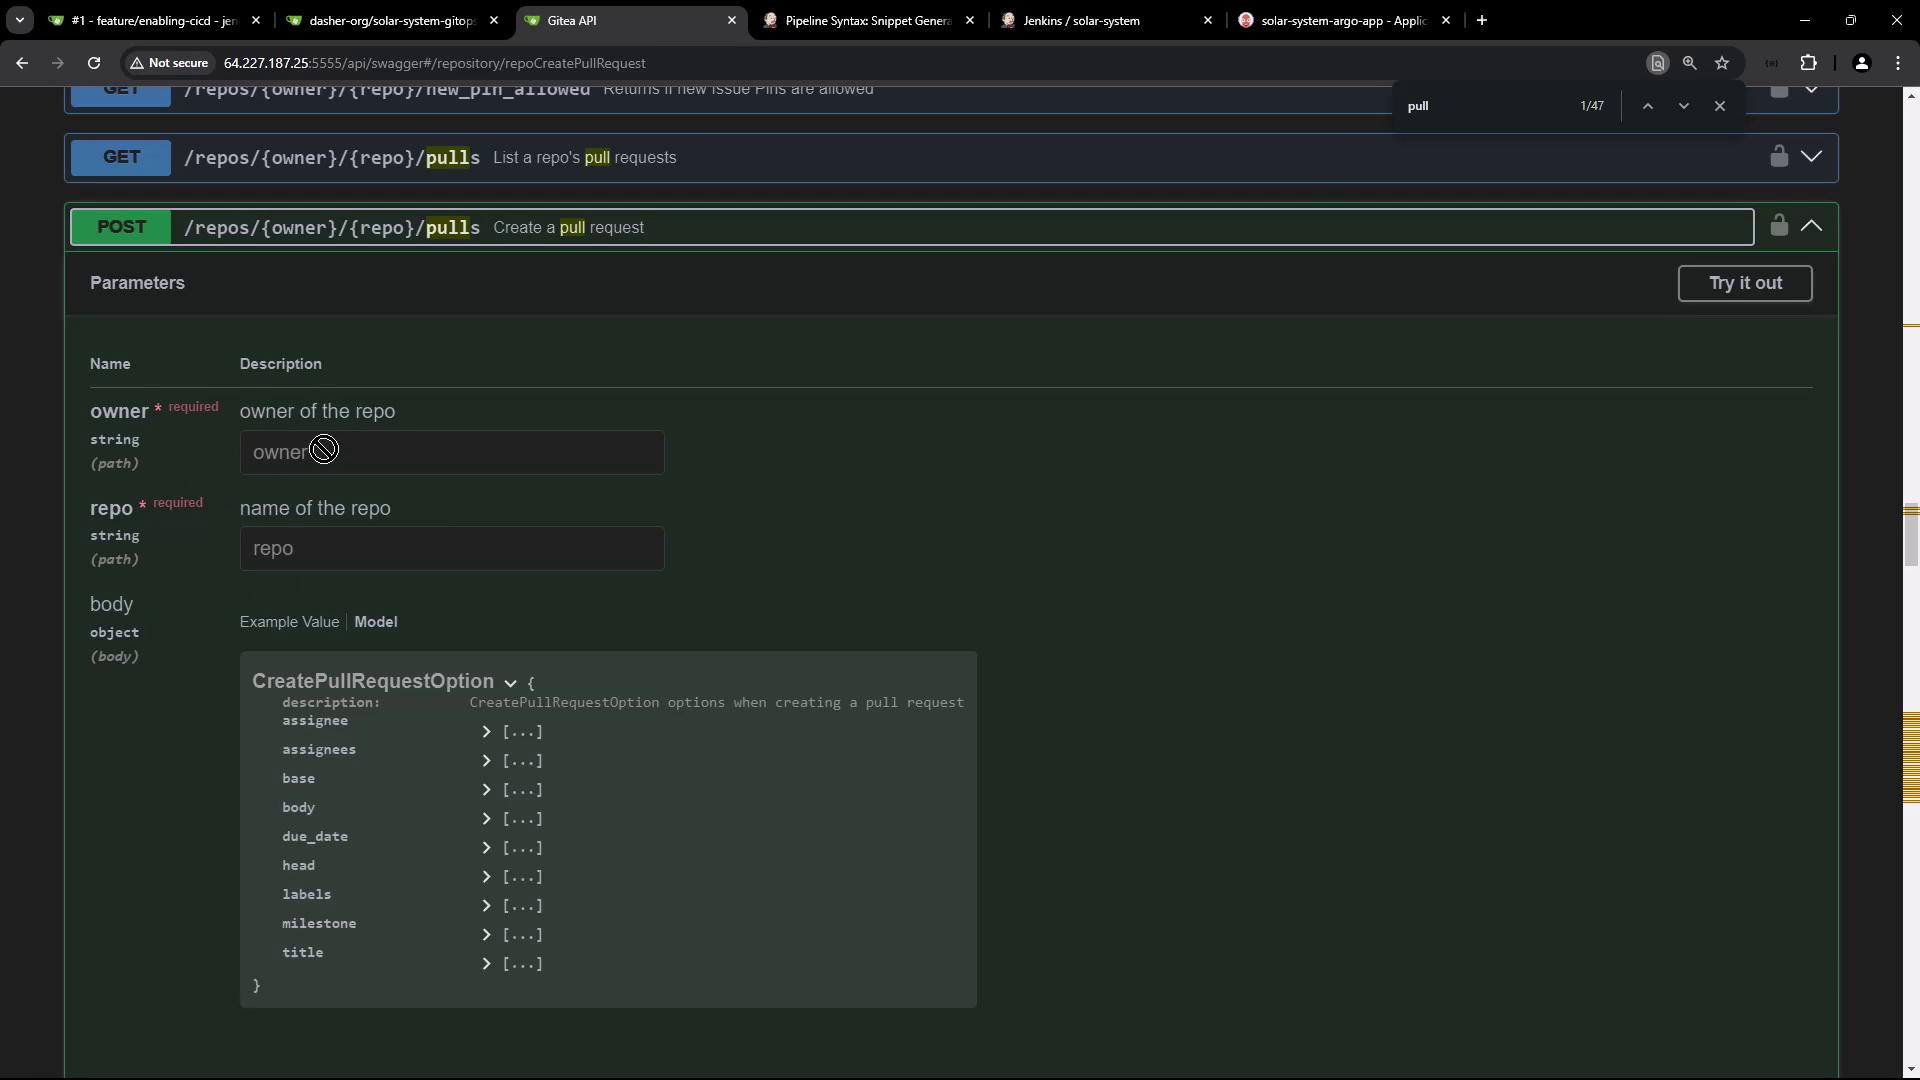
You will find that the endpoint for creating a pull request uses the POST method. Expanding this endpoint reveals the required parameters including repository owner, repository name, base branch, head branch, title, body, labels, and milestones.
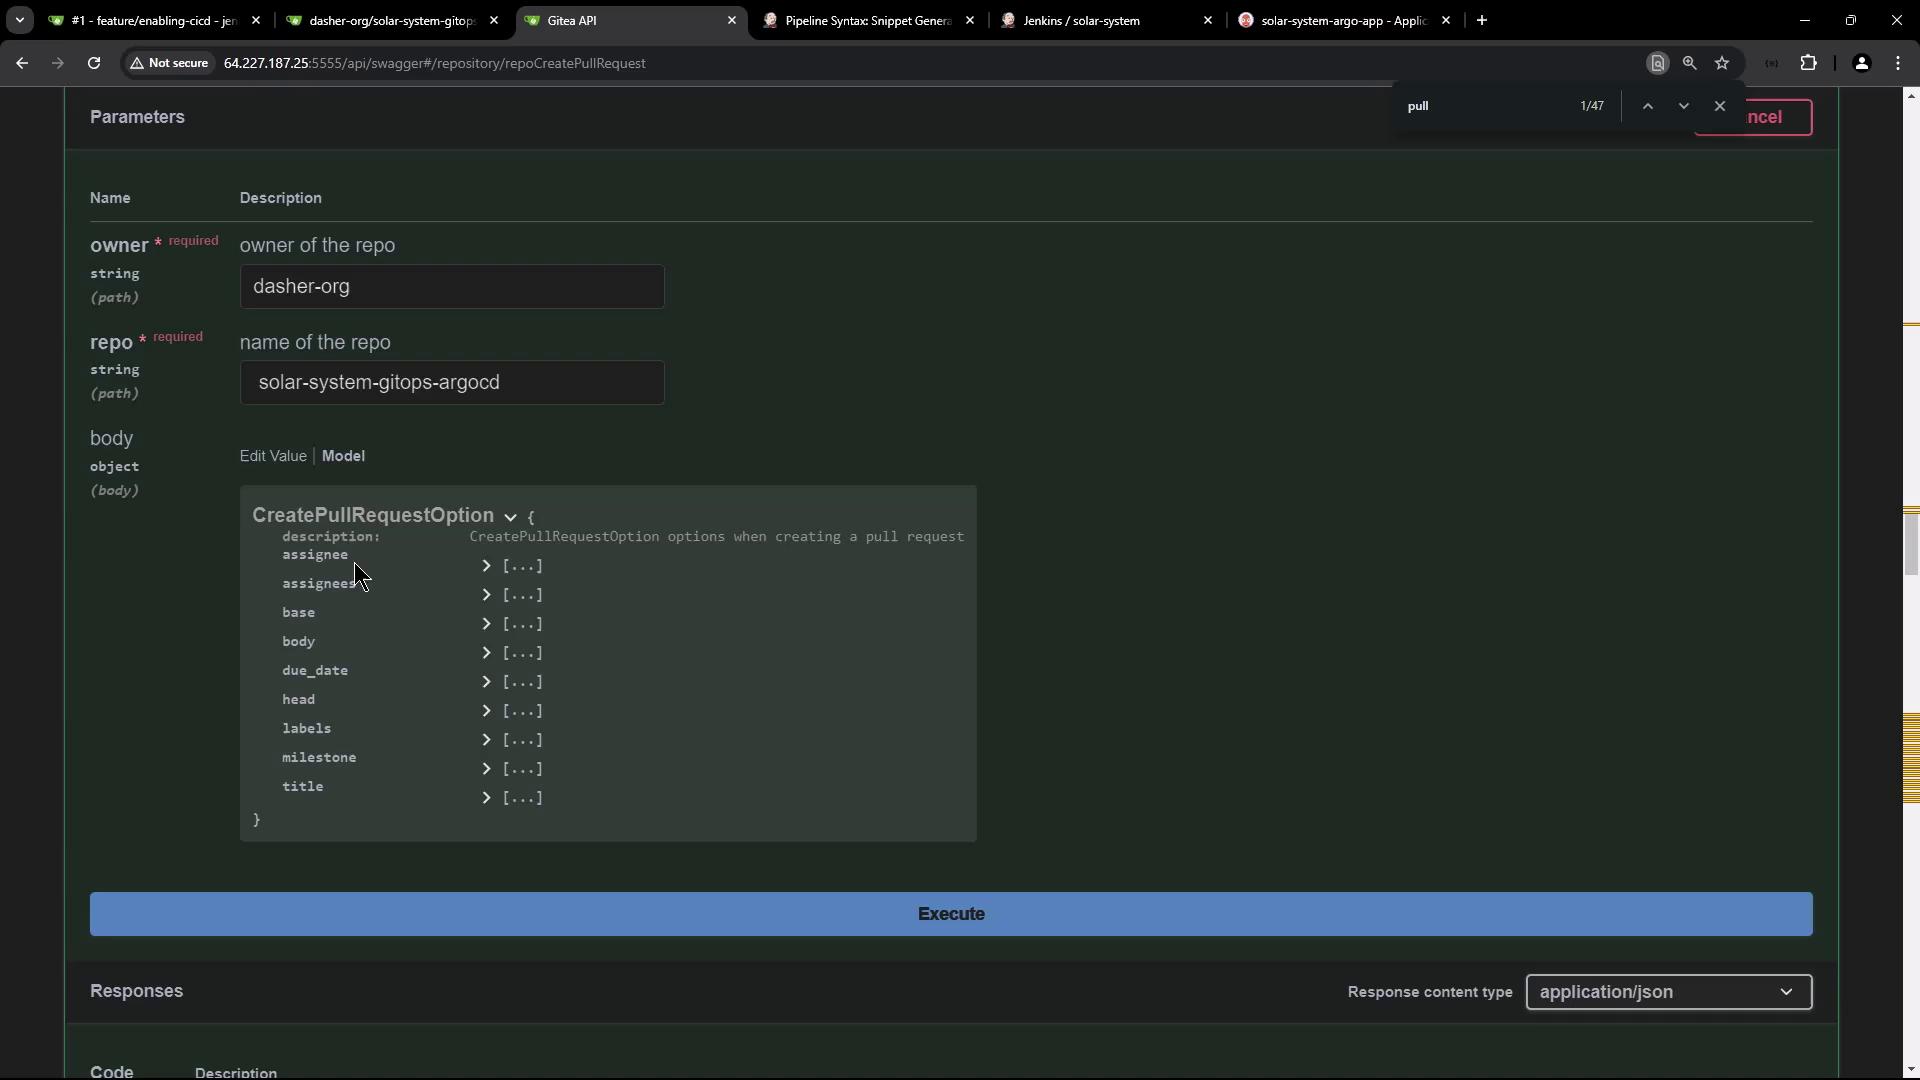
- Next, open the API interface for creating a pull request and fill in the required fields (for example, owner: "Dasher-org" and repository: "Solar System GitOps Agostini").
- Click “Try it out” and enter the repository name along with a JSON body containing the PR details.
The JSON payload generally resembles:
{
"assignee": "string",
"assignees": [
"string"
],
"base": "string",
"body": "string",
"due_date": "2024-09-24T17:50:33.424Z",
"head": "string",
"labels": [
0
],
"milestone": 0,
"title": "string"
}
After clicking “Execute,” a cURL command is generated that mirrors the endpoint, headers, and payload provided.
If you encounter a 404 error, verify that the endpoint URL and parameters are correctly formatted (e.g., no extra spaces).
Note
A missing token will result in a 401 Unauthorized response.
For instance, a missing token response might look like:
curl -X 'POST' \
'http://64.227.187.25:5555/api/v1/repos/dasher-org/solar-system-gitops-argocd/pulls' \
-H 'accept: application/json' \
-H 'Content-Type: application/json' \
-d '{
"assignee": "string",
"assignees": [
"string"
],
"base": "string",
"body": "string",
"due_date": "2024-09-24T17:51:10.434Z",
"labels": [
"string"
],
"milestone": 0,
"title": "string"
}'
{
"message": "token is required",
"url": "http://64.227.187.25:5555/api/swagger"
}
The response header confirms that a token is necessary:
cache-control: max-age=0,private,must-revalidate,no-transform
content-length: 78
content-type: application/json;charset=utf-8
date: Tue, 24 Sep 2024 17:51:10 GMT
x-content-type-options: nosniff
x-frame-options: SAMEORIGIN
Passing the Token for Authorization
To authenticate the API call, include your token in the header prefixed with "token "
followed by the token value. For example:
curl -X 'POST' \
'http://64.227.187.25:5555/api/v1/repos/dasher-org/solar-system-gitops-argocd/pulls' \
-H 'accept: application/json' \
-H 'Authorization: token $GITEA_TOKEN' \
-H 'Content-Type: application/json' \
-d '{
"assignee": "string",
"assignees": [
"string"
],
"base": "string",
"body": "string",
"due_date": "2020-09-24T17:50:33.424Z",
"head": "string",
"labels": [],
"milestone": null,
"title": "string"
}'
The API documentation specifies that the token can be passed as either a header or a query parameter. In our example, we use the Authorization header.
Another example with token authorization:
curl -X 'POST' "http://64.227.187.25:5555/api/v1/repos/dasher-org/solar-system-gitops-argocd/pulls" \
-H 'accept: application/json' \
-H 'Content-Type: application/json' \
-d '{
"assignee": "string",
"body": "string",
"done_date": "2020-09-24T17:51:33.432Z",
"head": "string",
"label": [
{
"milestone": 0,
"title": "string"
}
]
}'
If you invoke the call without valid token data, you will receive a 401 error:
curl -X POST \
'http://64.227.187.25:5555/api/v1/repos/dasher-org/solar-system-gitops-argocd/pulls' \
-H 'accept: application/json' \
-H 'Authorization: token sample-value' \
-H 'Content-Type: application/json' \
-d '{
"assignee": "string",
"assignees": [
"string"
],
"base": "string",
"body": "string",
"due_date": "2020-09-24T17:50:33.424Z",
"head": "string",
"labels": [],
"milestone": null,
"title": "string"
}'
{
"message": "user does not exist [uid: [], name: ]",
"url": "http://64.227.187.25:5555/api/swagger"
}
This cURL command will later be incorporated into the Jenkins pipeline to automate the PR creation process.
Integrating the cURL Command into a Jenkins Pipeline
To integrate the automated PR creation, add a new stage in your Jenkins file titled "K8S - Raise PR". This stage should follow the image tag update stage. Below is an excerpt from a sample Jenkins file illustrating the available stages:
stage('Build Docker Image') {
}
stage('Trivy Vulnerability Scanner') {
}
stage('Push Docker Image') {
}
stage('Deploy - AWS EC2') {
}
stage('Integration Testing - AWS EC2') {
}
stage('K8S - Update Image Tag') {
}
stage('K8S - Raise PR') {
}
post {
always {
// ...
}
}
Within the K8S - Raise PR stage, use a shell script to execute the tested cURL command. This command makes a POST request to the API endpoint with the proper headers and payload, utilizing an environment variable (e.g., GITEA_TOKEN) for authorization.
Below is the cURL command used in the Jenkins pipeline:
curl -X 'POST' \
'http://64.227.187.25:5555/api/v1/repos/dasher-org/solar-system-gitops-argocd/pulls' \
-H 'accept: application/json' \
-H 'Authorization: token $GITEA_TOKEN' \
-H 'Content-Type: application/json' \
-d '{
"assignee": "gitea-admin",
"assignees": [
"gitea-admin"
],
"base": "main",
"body": "Updated docker image in deployment manifest",
"head": "feature-$BUILD_ID",
"title": "Updated Docker Image"
}'
Key aspects of the command:
- The "assignee" and "assignees" are set to the receiving admin (e.g., gitea-admin).
- The "base" refers to the main branch.
- The "head" dynamically uses the Jenkins BUILD_ID to create a feature branch.
- Both the title and the body of the pull request are provided.
Upon executing this stage, the feature branch (e.g., feature-2) will be created and a new PR will automatically appear in GitHub with the specified details. After the commit, a new Jenkins pipeline triggers on the PR branch, runs subsequent builds, and updates the PR status with direct build details. Additionally, you can enforce branch protection rules that require passing status checks before merging.
Merging the Pull Request Using GitOps
After the pipeline successfully creates the PR, merging the branch into main triggers several automated actions:
- The main branch is updated with a new commit (reflecting the updated Docker image tag).
- A GitOps tool (such as Argo CD) picks up the changes automatically.
- A manual or automated sync in Argo CD applies the new deployment manifest to the Kubernetes cluster.
For example, the update in the deployment manifest might appear as:
- image: siddharth67/solar-system:3e906e3be95342b1916f20e0c03444fb267dda
+ image: siddharth67/solar-system:946c303939e779390c902a6fabe782e4c353d27
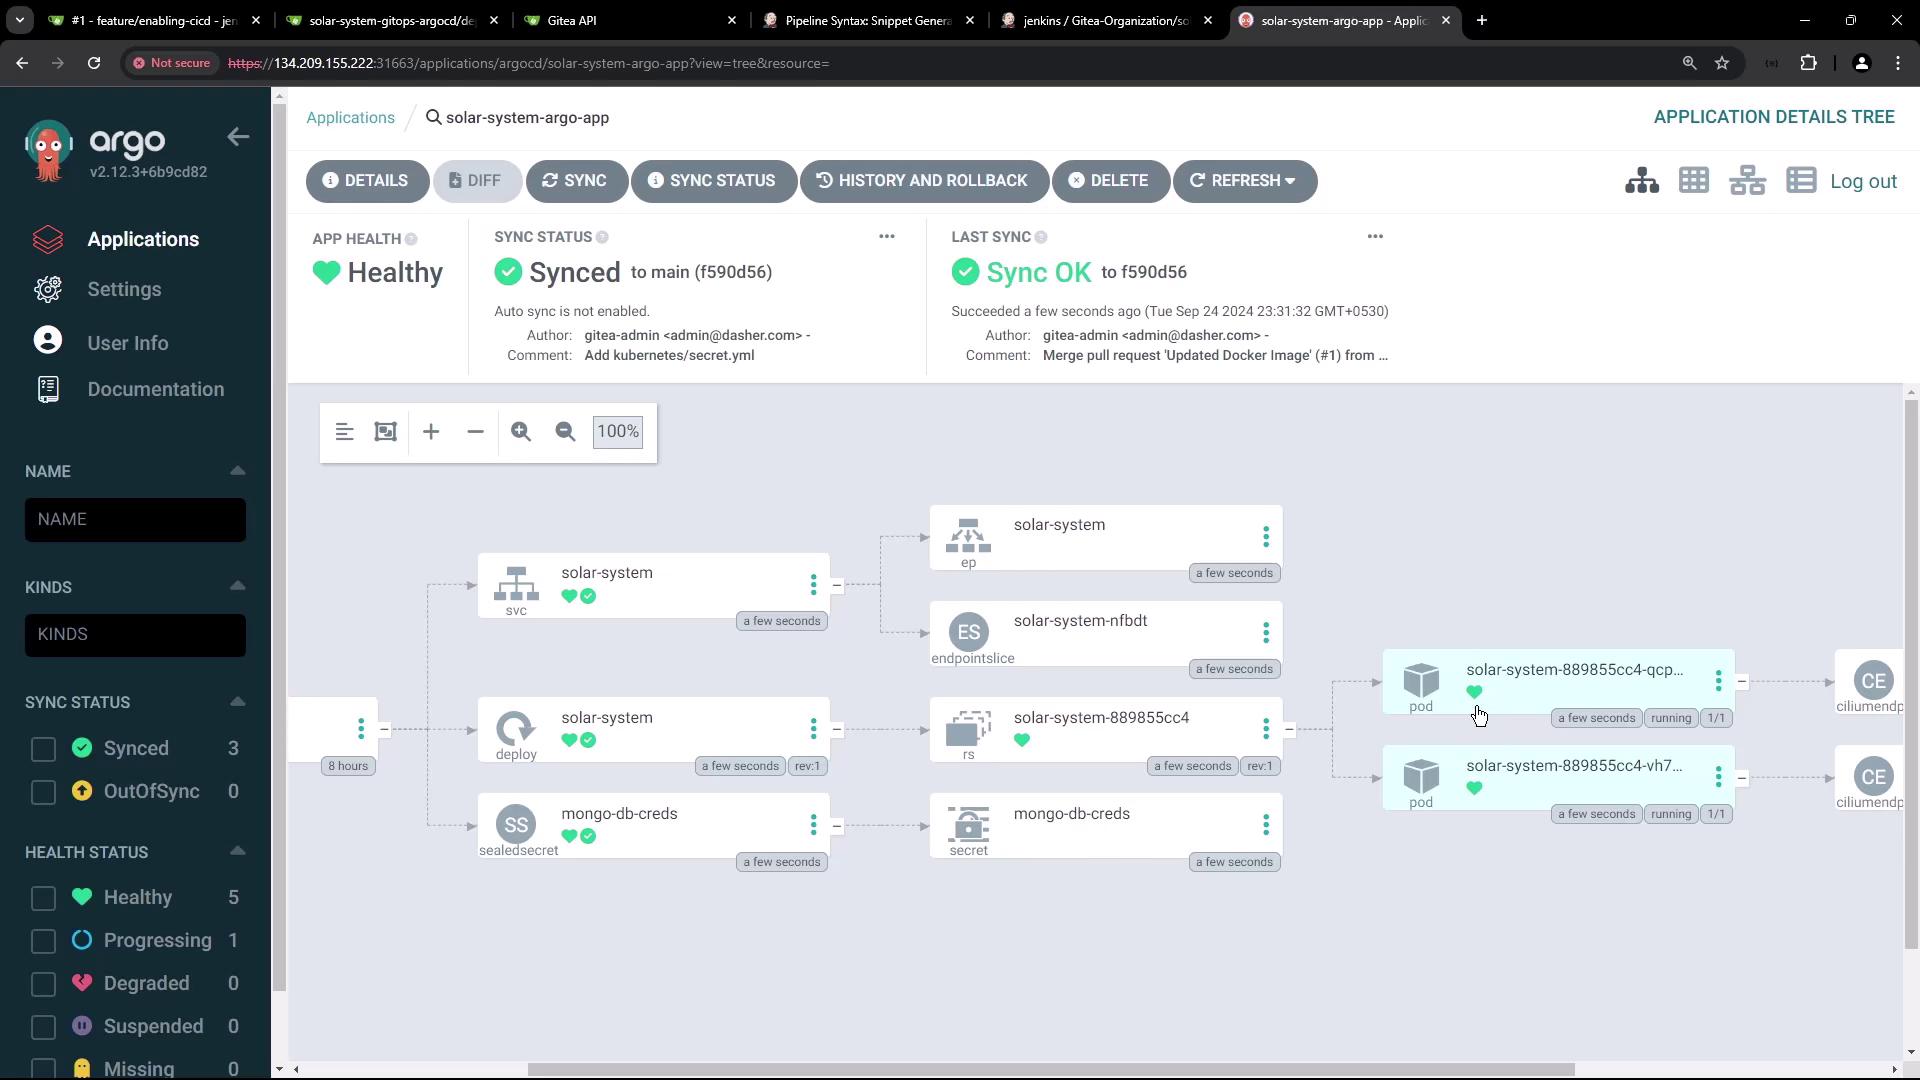
Post merge, the repository shows the updated commit ID and the Argo CD dashboard reflects the health and sync status of your application.
On your Kubernetes cluster (within the solar-system namespace), verify the creation of the pods, service, deployment, and replica set:
k -n solar-system get all
pod/solar-system-889855cc4-qcpwt 1/1 Running 0 31s
pod/solar-system-889855cc4-vh75q 1/1 Running 0 37s
NAME TYPE CLUSTER-IP EXTERNAL-IP PORT(S) AGE
service/solar-system NodePort 10.245.223.95 <none> 3000:30000/TCP 37s
NAME READY UP-TO-DATE AVAILABLE AGE
deployment.apps/solar-system 2/2 2 2 37s
NAME DESIRED CURRENT READY AGE
replicaset.apps/solar-system-889855cc4 2 2 2 37s
Access the application on port 30000 using the appropriate NodePort endpoint. This verifies both HTTP accessibility and the connection to your MongoDB backend via Kubernetes secrets.
Verifying Kubernetes Secrets with Sealed Secrets
The application secret (e.g., mongo-db-creds) is managed using Bitnami Sealed Secrets. When the Sealed Secrets controller decrypts the sealed secret, it converts it into a standard Kubernetes secret.
Below is an example of the Kubernetes secret after decryption:
apiVersion: v1
data:
MONGO_PASSWORD: U3VxZXJYQXNmd29yZA==
MONGO_URI: bW9uZ29kYjYtY2l0Z2F6moubW9uZ29kYi5uZXQvc3VwZXJYUh
MONGO_USERNAME: c3VwZXI2Y
kind: Secret
metadata:
annotations:
sealedsecrets.bitnami.com/cluster-wide: "true"
creationTimestamp: "2024-09-24T18:01:33Z"
name: mongo-db-creds
namespace: solar-system
ownerReferences:
- apiVersion: bitnami.com/v1alpha1
controller: true
kind: SealedSecret
name: mongo-db-creds
uid: 90488c31-db21-462a-af72-c45581e32e9b
To confirm the application of the secret, run:
k -n solar-system get secrets mongo-db-creds -o yaml
This ensures your Kubernetes secrets have been properly decrypted and deployed.
Conclusion
By integrating the steps above into your Jenkins pipeline, you can fully automate updating Kubernetes deployments using GitOps. The pipeline not only updates the Docker image tag in your repository but also automates the PR creation via a cURL command. Once merged, Argo CD synchronizes the changes in your Kubernetes cluster, ensuring that your deployments are efficient, consistent, and secure.
Happy automating!
Watch Video
Watch video content