Jenkins Project: Building CI/CD Pipeline for Scalable Web Applications

Single Server Deployment

Configuring Pipeline

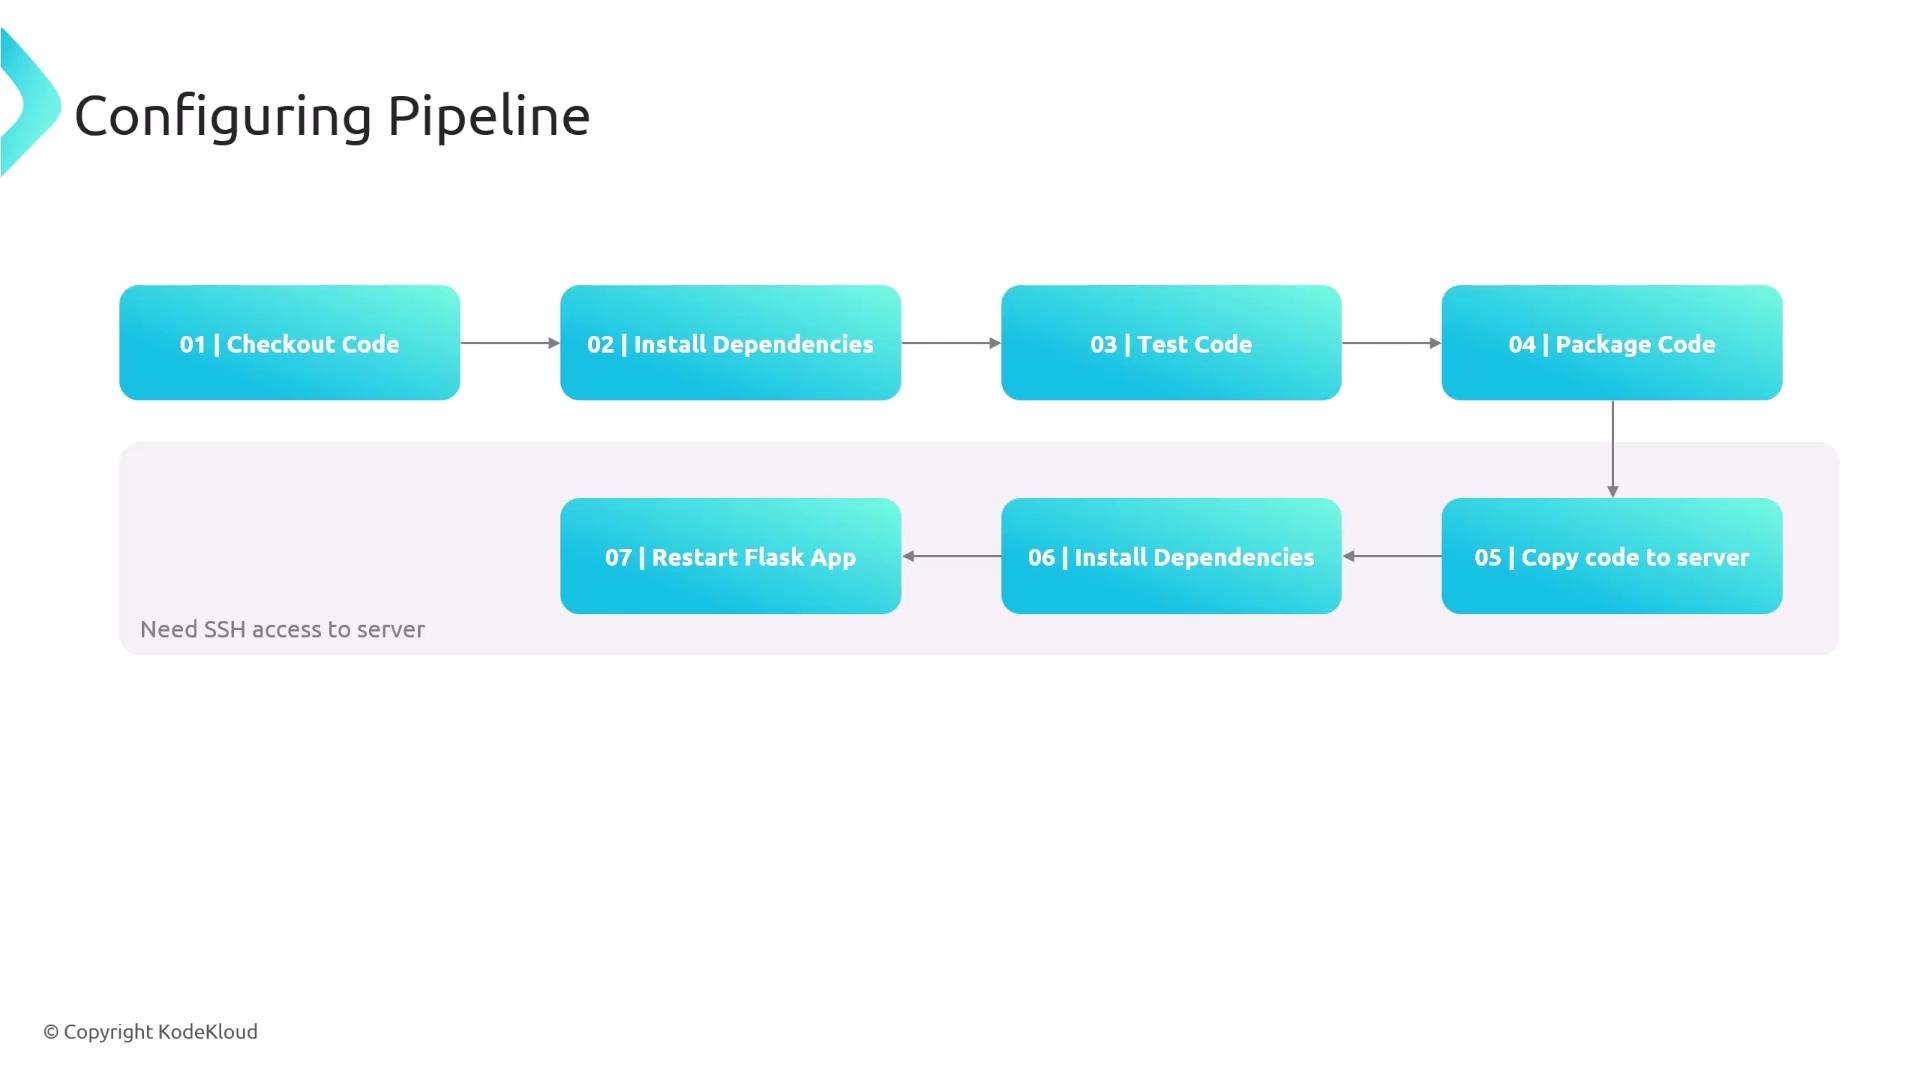
In this guide, we set up a Jenkins pipeline for continuous integration and deployment (CI/CD). The pipeline performs essential tasks such as testing, packaging, transferring the package to a production server, installing necessary dependencies, and restarting the Flask application. Before diving into the Jenkinsfile configuration, review the overall pipeline workflow.

The pipeline consists of the following steps:

  1. Check out the code from Git.
  2. Install all required dependencies.
  3. Run tests using pytest.
  4. Package the application into a ZIP file.
  5. Transfer the packaged code to the production server.
  6. Connect to the production server to install dependencies.
  7. Restart the Flask application with a command like systemctl restart flaskapp.service.

Note

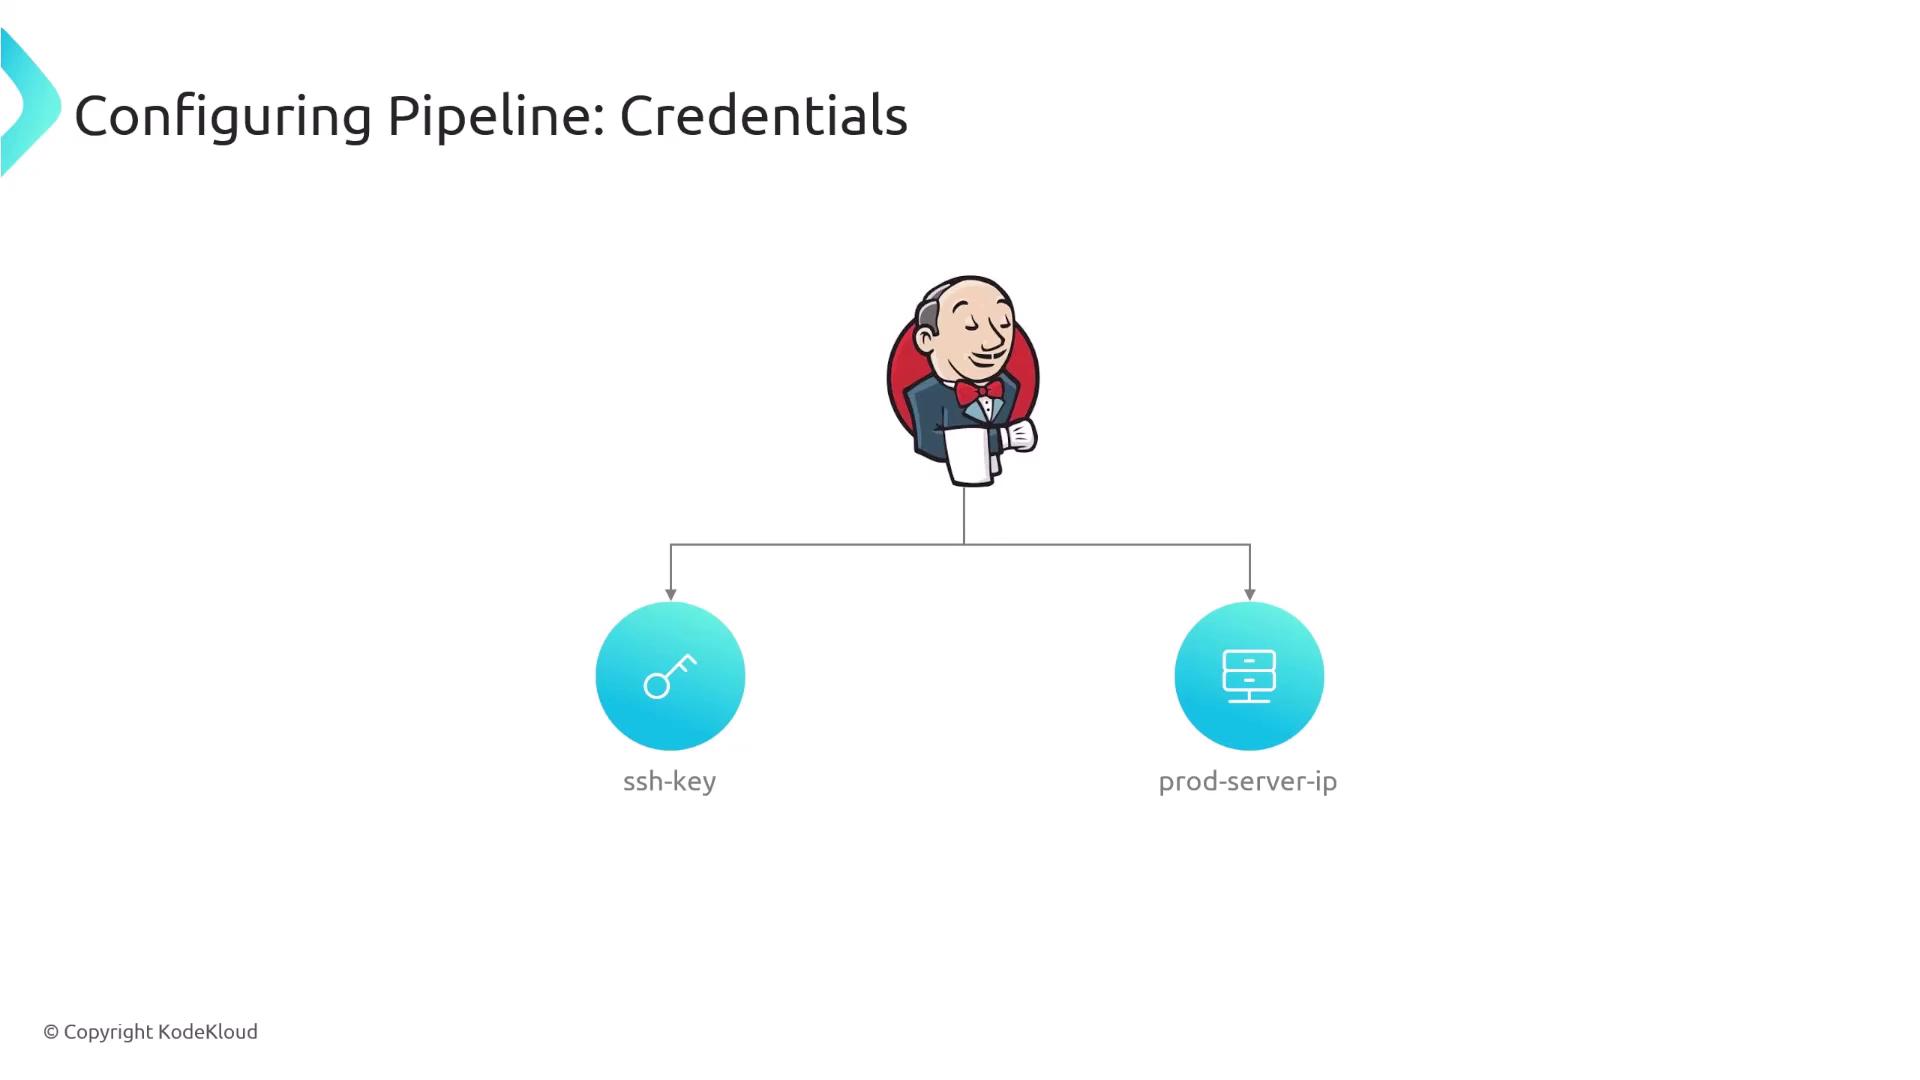
Ensure SSH access to the production server is available. The Jenkins server must be configured with the appropriate SSH credentials for secure connectivity.

The image shows a pipeline configuration flowchart with steps for code checkout, dependency installation, code testing, packaging, server copying, and restarting a Flask app. It notes the need for SSH access to the server.

Configuring Jenkins Credentials

To securely connect to the production server, set up two Jenkins credentials:

  • An SSH key (e.g., the main.pem file from a previous demonstration).
  • The production server IP address stored as a credential (this avoids hard-coding in the Jenkinsfile).

This configuration enables the Jenkinsfile to dynamically include these credentials.

The image shows a diagram for configuring pipeline credentials, featuring a central character icon connected to two nodes labeled "ssh-key" and "prod-server-ip."

The Jenkinsfile Configuration

Below is a complete example of a Jenkinsfile that sets up the environment, defines stages for building, testing, packaging, and deploying the application, and utilizes credentials safely. The production server IP is stored in an environment variable and used together with separate SSH credentials to copy files and execute remote commands.

Environment Variable Setup

The following snippet demonstrates how to store the production server IP as an environment variable using Jenkins credentials:

pipeline {
    agent any
    environment {
        SERVER_IP = credentials('prod-server-ip')
    }
    // Additional stages will follow
}

Build, Test, and Package Stages

The next section installs dependencies, runs tests, and packages the code into a ZIP file, excluding unnecessary files such as the Git directory:

pipeline {
    agent any
    environment {
        SERVER_IP = credentials('prod-server-ip')
    }
    stages {
        stage('Setup') {
            steps {
                sh "pip install -r requirements.txt"
            }
        }
        stage('Test') {
            steps {
                sh "pytest"
            }
        }
        stage('Package Code') {
            steps {
                sh "zip -r myapp.zip ./* -x '*.git*'"
                sh "ls -lart"
            }
        }
        // The deployment stage will be defined next
    }
}

Deployment Stage

In the deployment stage, the pipeline securely transfers the packaged code to the production server and executes commands remotely via SSH. The commands unzip the package, activate the Python virtual environment, install production dependencies, and restart the Flask application.

pipeline {
    agent any
    environment {
        SERVER_IP = credentials('prod-server-ip')
    }
    stages {
        // Setup, Test, and Package Code stages are defined above...
        stage('Deploy to Prod') {
            steps {
                withCredentials([sshUserPrivateKey(credentialsId: 'ssh-key', keyFileVariable: 'MY_SSH_KEY', usernameVariable: 'username')]) {
                    sh '''
                        scp -i $MY_SSH_KEY -o StrictHostKeyChecking=no myapp.zip ${username}@${SERVER_IP}:/home/ec2-user/
                        ssh -i $MY_SSH_KEY -o StrictHostKeyChecking=no ${username}@${SERVER_IP} << EOF
                        unzip -o /home/ec2-user/myapp.zip -d /home/ec2-user/app/
                        source /home/ec2-user/app/venv/bin/activate
                        cd /home/ec2-user/app/
                        pip install -r requirements.txt
                        sudo systemctl restart flaskapp.service
                        EOF
                    '''
                }
            }
        }
    }
}

Key Points

  • The scp command securely transfers the myapp.zip file to the production server.
  • The ssh command logs into the production server using the same SSH key and executes a sequence of commands separated by a heredoc (<< EOF).
  • Ensure that spacing and indentation between EOF markers are consistent to prevent issues.

This example highlights a straightforward approach to deploying your code with a Jenkins pipeline. Depending on your production environment, you may choose to store these commands in a separate script on the production server and execute that script via Jenkins for enhanced maintainability.

By following this structured methodology, you can build a robust and secure CI/CD pipeline while keeping your Jenkinsfile clean and manageable.

Further Reading

Happy coding!

Watch Video

Watch video content

Previous
Demo Deploying App