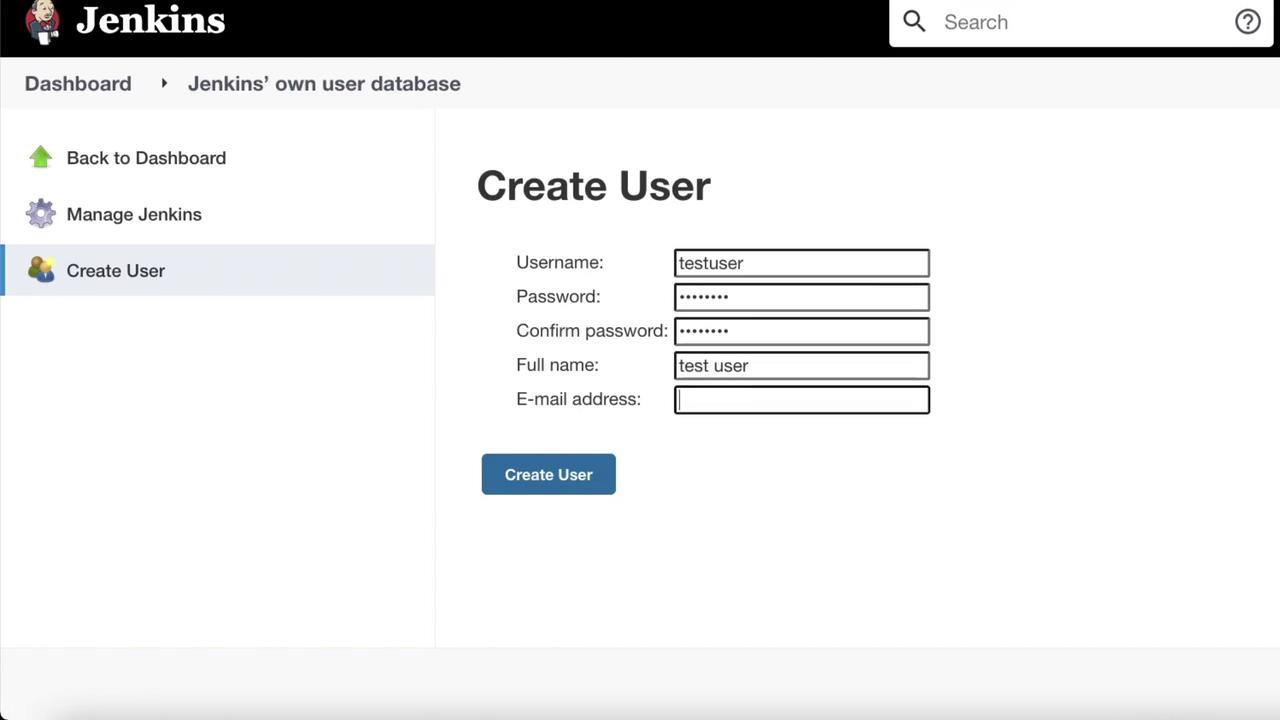
Jenkins

Exploring the Jenkins UI

Managing users and teams

In this article, we explore how to manage users and teams in Jenkins, a critical process for ensuring proper access control. By following these step-by-step instructions, you can efficiently set up and update user roles, access permissions, and security settings.

Creating a New User

To add a new user:

  1. Navigate to Manage Jenkins and scroll down to the security section.
  2. Click on Global Security to view options for managing user access, configuring credentials providers, and handling user accounts.
  3. Select Manage Users, then enter the user details. For example, use a username like testuser along with a password, full name, and email address.
  4. Once all required fields are complete, click Create User.

The image shows a Jenkins interface for creating a user, with fields for username, password, full name, and email address, and a "Create User" button.

After creating the user, click the settings icon (often represented by a gear) next to the user's name. Here, you can update the name, add descriptions (e.g., “Works in the front-end dev department”), generate API tokens, modify email settings, configure notification URLs, change passwords, and manage public keys.

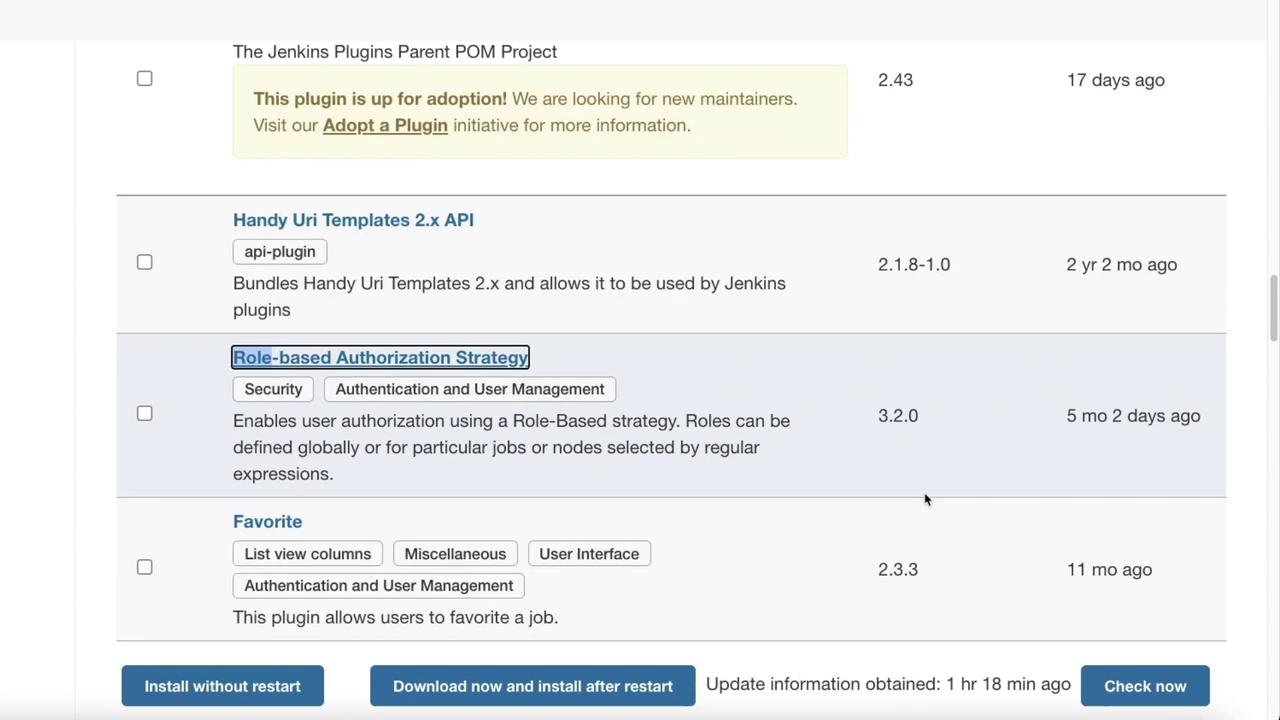
Installing a Role-Based Authorization Plugin

Jenkins does not include role-based access control by default. To implement role-based strategies:

  1. Go to Manage Plugins and click on the Available tab.
  2. Use the search field to locate the plugin by entering “role.” This plugin facilitates user authorization based on a role-based strategy.
  3. Click on the desired plugin and select Install without restart to complete the installation process.

The image shows a list of Jenkins plugins with details like version, description, and update information, including options to install or download them.

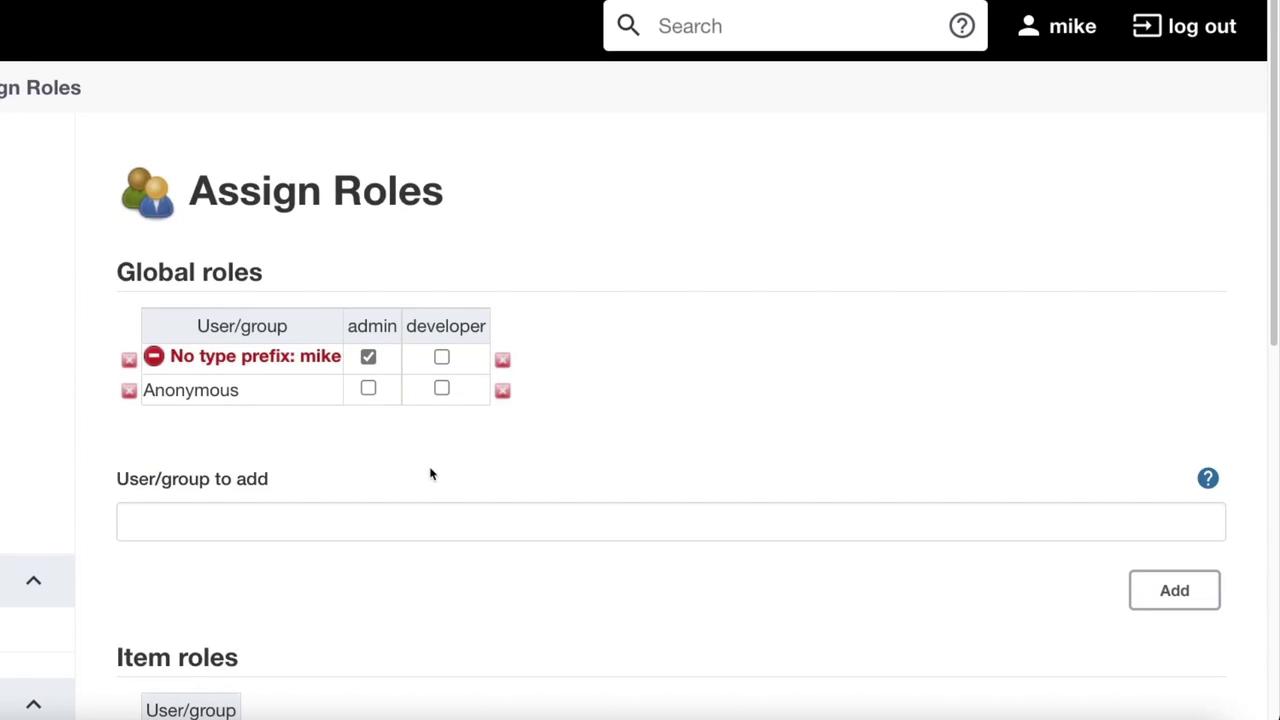
Managing and Assigning Roles

With the plugin installed, you can now manage and assign user roles.

  1. Return to Manage Jenkins and scroll down to Manage and Assign Roles.
  2. First, click on Assign Roles to view the available role assignment options.

The image shows a user interface for assigning global and item roles, with an "admin" role having various permissions checked.

The interface includes guidance on Role Strategy Macros for extending user access control.

The image is a webpage detailing "Role-Strategy Macros Info," explaining macro usage, format, and examples for extending user access analysis.

To add a new role:

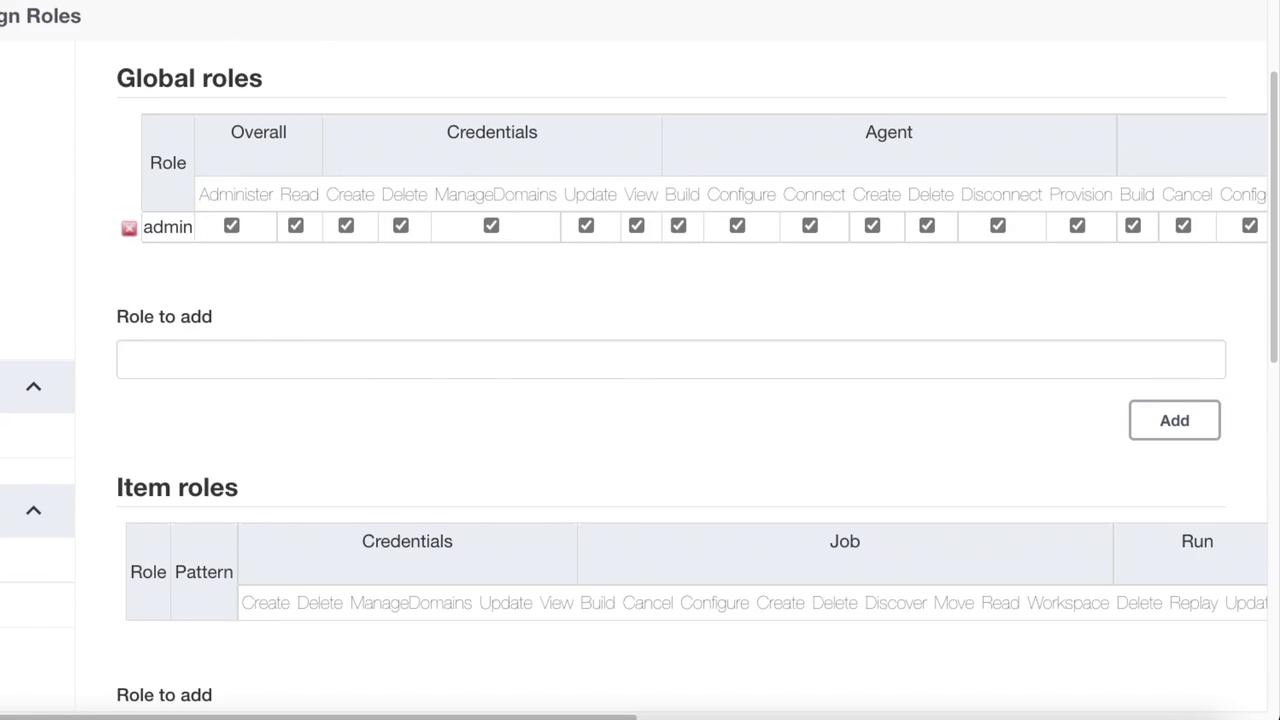
  • Navigate to Manage Roles.
  • Define a new role, such as developer, and customize its permissions as needed.
  • Click Save to preserve the new role configuration.

Then, go back to Assign Roles and assign the appropriate roles to users or groups. For instance, you might assign the developer role to an anonymous user for limited access.

The image shows a user interface for assigning roles, with "mike" assigned as an admin and options to add more users or groups.

Finally, click Save to apply these changes, completing the role assignment process.

Note

Remember, keeping your role assignments up-to-date is vital for maintaining a secure Jenkins environment.

This concludes our guide on managing users and teams in Jenkins. We hope you found this tutorial useful. Stay tuned for more insights and best practices in managing your Jenkins environment.

Watch Video

Watch video content

Previous
Signing in and seeing the visuals