Mastering Generative AI with OpenAI

Understanding Tokens and API Parameters

Configuring the Development Environment

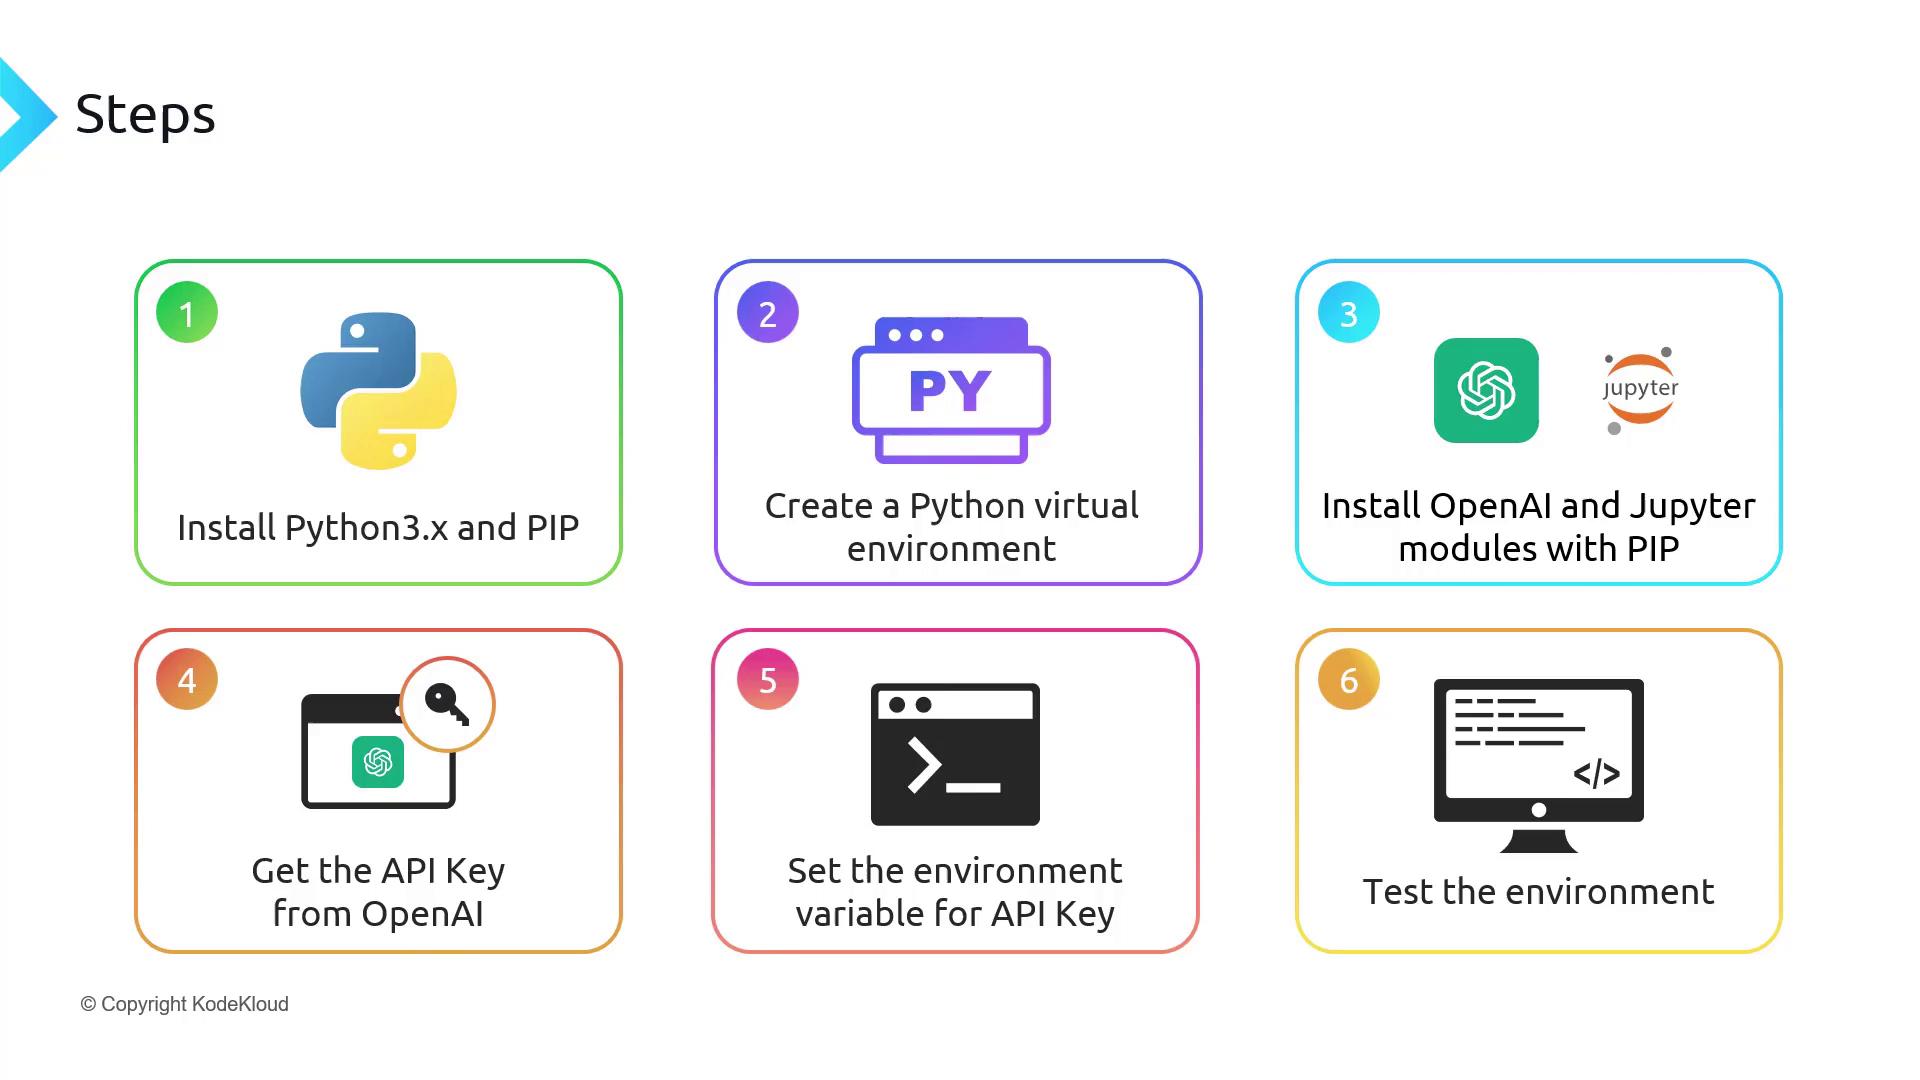
Prepare your local machine to experiment with the OpenAI API. We’ll cover installing Python, setting up a virtual environment, installing required packages, obtaining your API key, exporting it as an environment variable, and verifying everything with curl and Jupyter Notebook.

Workflow Overview

  1. Install Python & pip
  2. Create and activate a Python virtual environment
  3. Install the OpenAI and Jupyter packages
  4. Obtain your OpenAI API key
  5. Export OPENAI_API_KEY
  6. Verify with curl and in Jupyter

The image outlines six steps for setting up a Python environment with OpenAI and Jupyter, including installing Python, creating a virtual environment, installing modules, obtaining an API key, setting an environment variable, and testing the setup.


1. Install Python

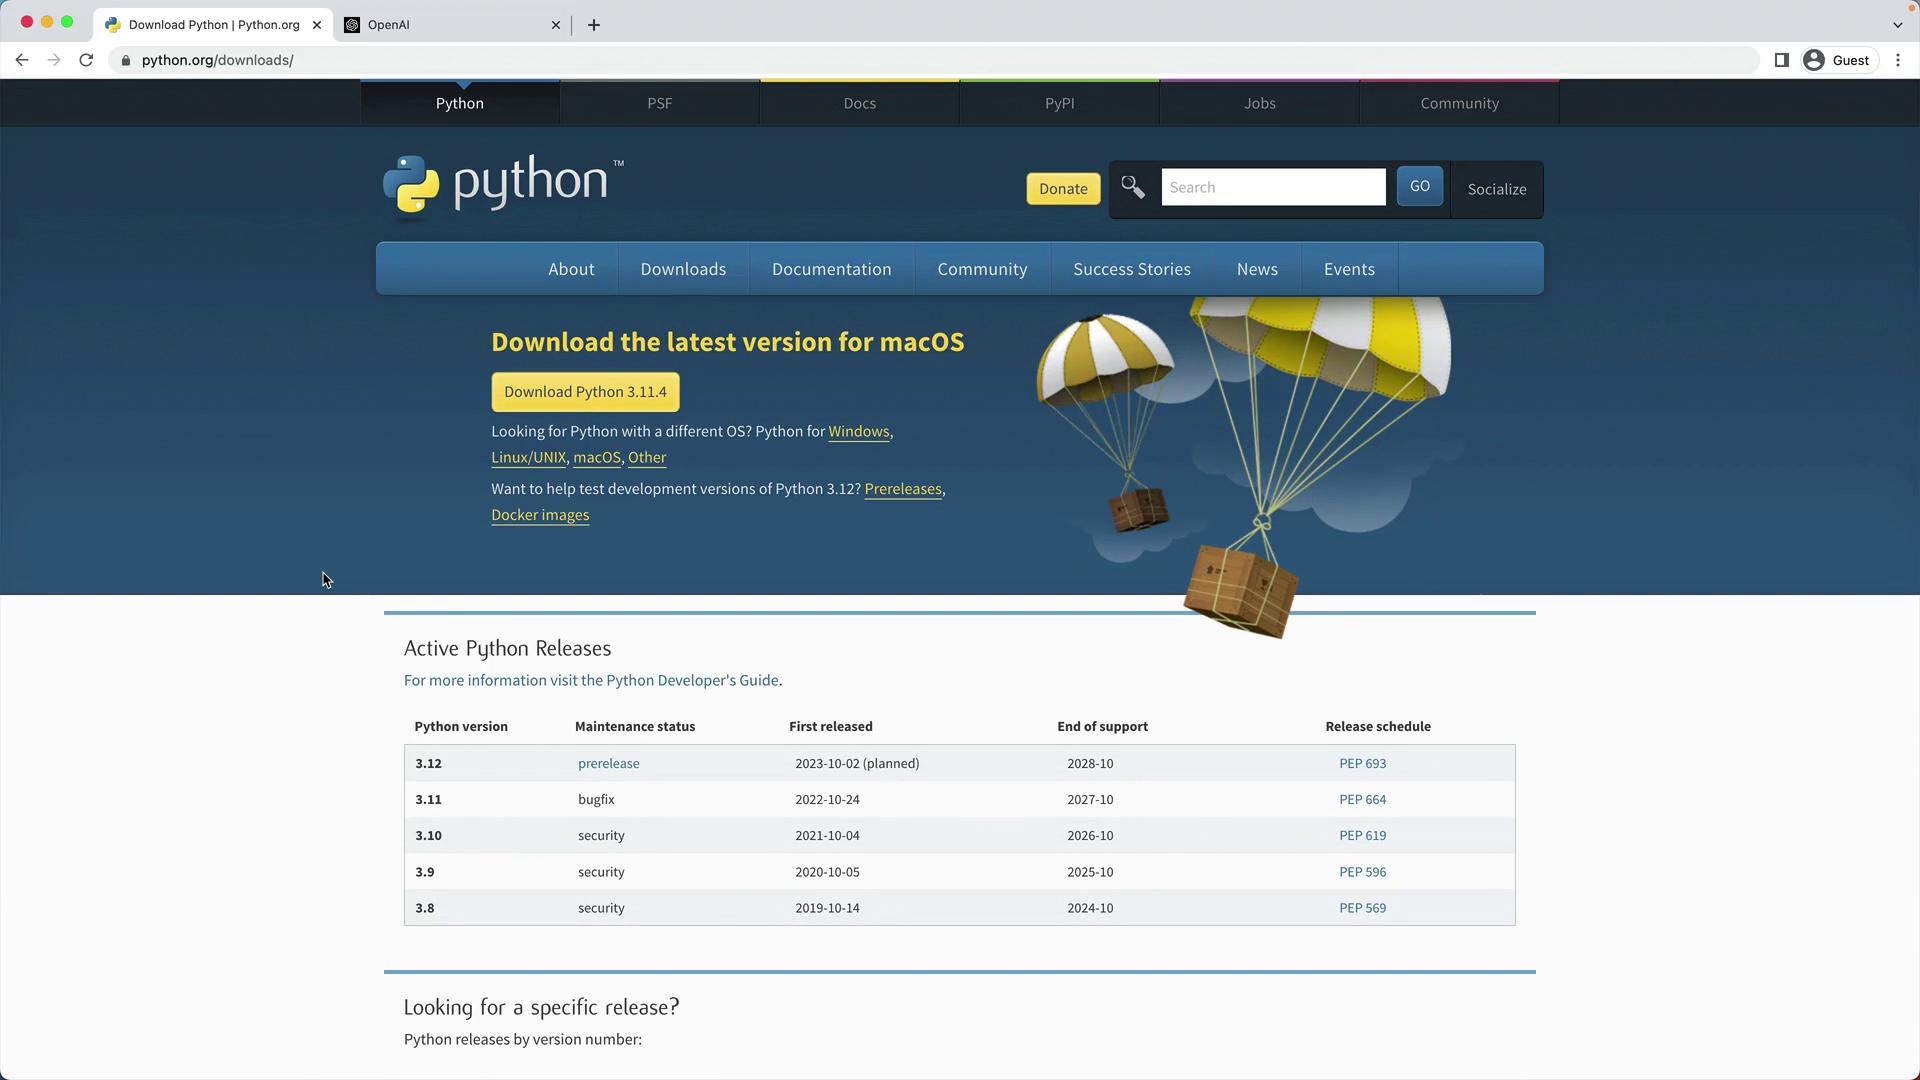
Download and install Python 3.10+ for your operating system from python.org/downloads. After installation, verify your setup:

python -V
# Expected output:
# Python 3.11.4

Launch the REPL to confirm everything works:

>>> print("Hello, I'm Python!")
Hello, I'm Python!
>>> name = input("What is your name?\n")
# What is your name?
# Alice
>>> print(f"Hi, {name}.")
Hi, Alice.

The image shows the Python.org downloads page, highlighting the latest Python version for macOS and listing active Python releases with their maintenance status and support timelines.

Note

Using Python 3.10 or later ensures compatibility with the latest OpenAI Python client.


2. Create and Activate a Virtual Environment

Isolate your project dependencies:

python -m venv venv

Activate the environment:

# macOS/Linux
source venv/bin/activate

# Windows (PowerShell)
venv\Scripts\Activate.ps1

Your shell prompt should now include (venv).


3. Install OpenAI and Jupyter

With the virtual environment active, install the required packages:

pip install openai jupyter
PackagePurposeDocumentation
openaiOpenAI API client for Pythonhttps://github.com/openai/openai-python
jupyterInteractive notebook environmenthttps://jupyter.org/documentation

4. Obtain an OpenAI API Key

  1. Sign in at the OpenAI Dashboard.
  2. Navigate to API Keys.
  3. Generate a new secret key (e.g., “KodeKloud”) and copy it immediately.

The image shows a webpage from OpenAI's platform displaying API key management, including options to create a new secret key and set a default organization.

Warning

Your API key grants access to your account—never expose it in public repositories or share it.


5. Export the OPENAI_API_KEY Environment Variable

Avoid hardcoding your key by exporting it:

# macOS/Linux
export OPENAI_API_KEY="sk-..."

# Windows (PowerShell)
setx OPENAI_API_KEY "sk-..."

To persist this on macOS/Linux, add the export line to ~/.bashrc or ~/.zshrc.


6. Verify Your Setup

6.1 Test with curl

Send a sample request to the Chat Completions endpoint:

curl https://api.openai.com/v1/chat/completions \
  -H "Content-Type: application/json" \
  -H "Authorization: Bearer $OPENAI_API_KEY" \
  -d '{
    "model": "gpt-3.5-turbo",
    "messages": [
      {"role": "system", "content": "You are an AI assistant for timezones."},
      {"role": "user",   "content": "If it is 9AM in London, what time is it in Hyderabad?"}
    ]
  }'

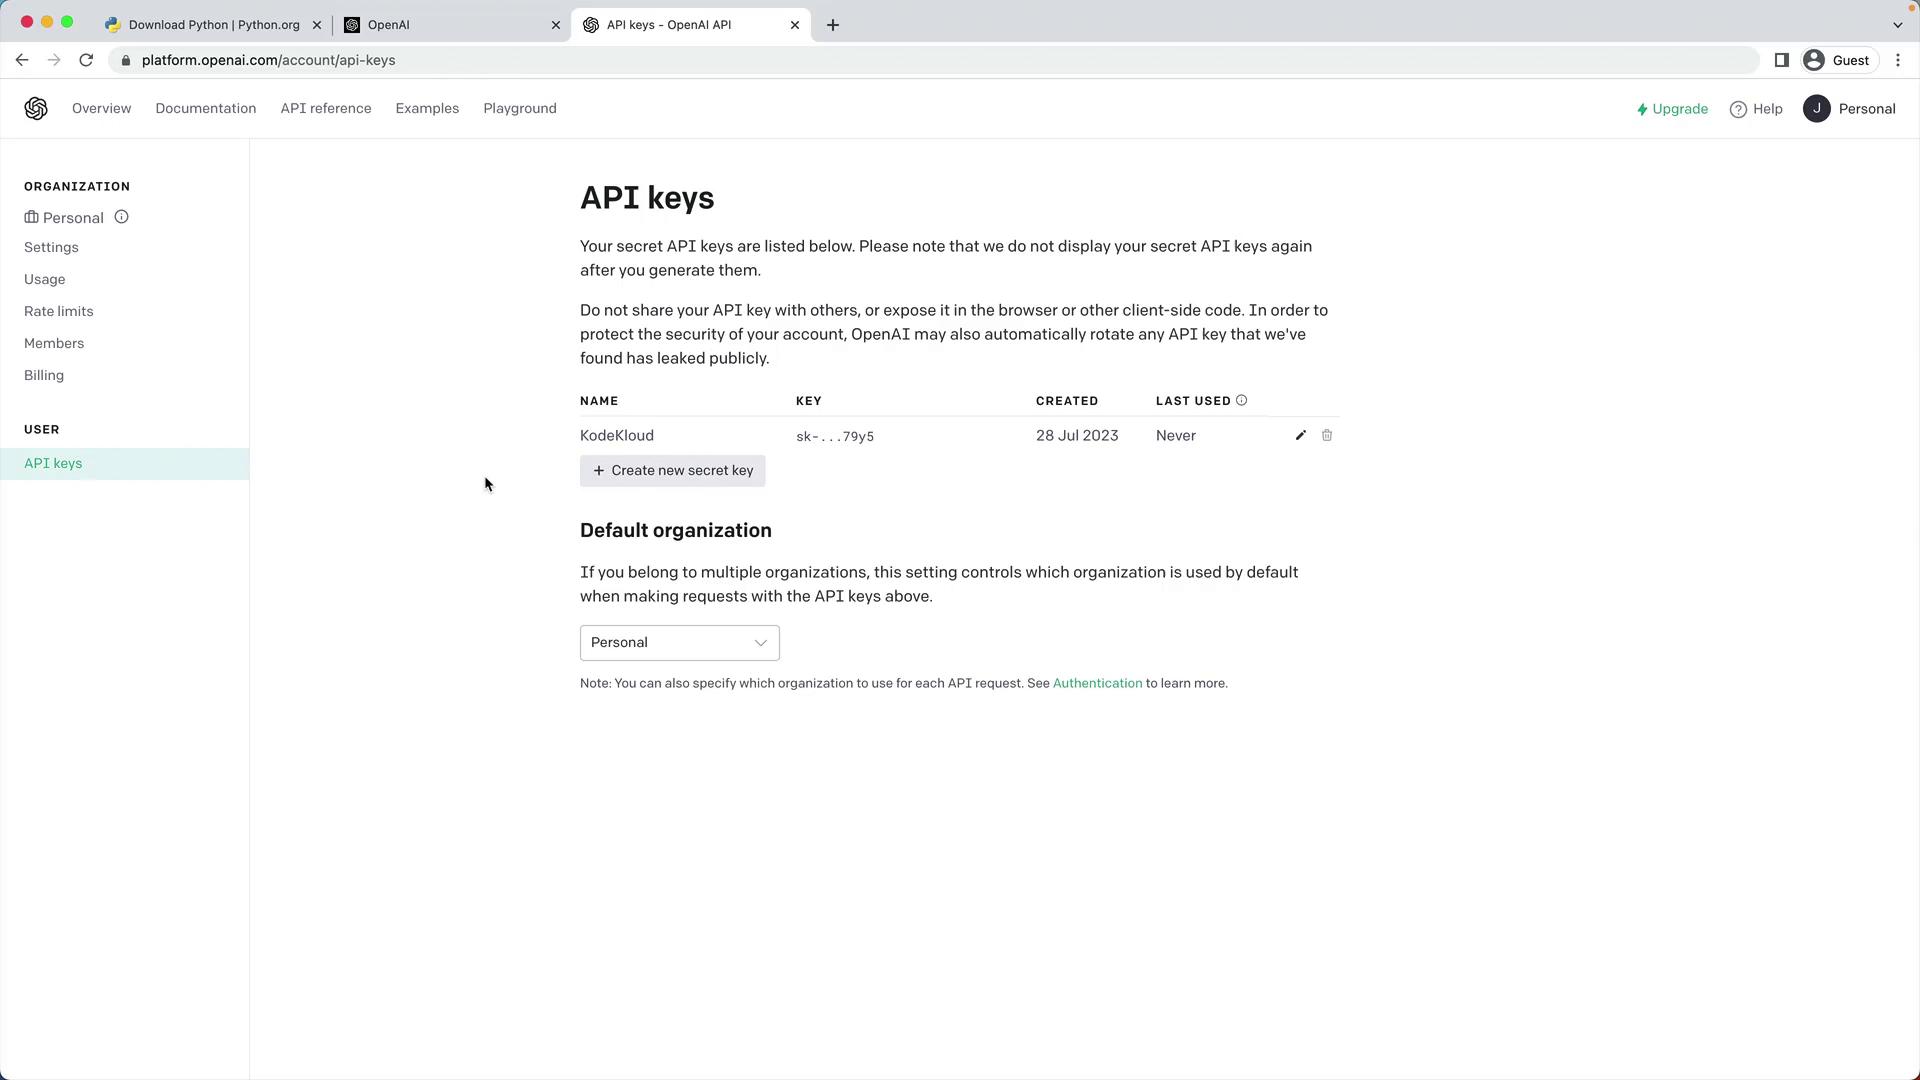
A successful JSON response will include fields like id, choices, and usage.

6.2 Test in a Jupyter Notebook

  1. Launch Jupyter:

    jupyter notebook
    
  2. Create a new notebook (for example, test_openai.ipynb) and enter:

    import os
    import openai
    
    openai.api_key = os.getenv("OPENAI_API_KEY")
    
    response = openai.ChatCompletion.create(
        model="gpt-3.5-turbo",
        messages=[
            {"role": "system", "content": "You are an AI assistant for timezones."},
            {"role": "user",   "content": "If it is 9AM in London, what time is it in Hyderabad?"}
        ]
    )
    
    print(response.choices[0].message.content)
    

If the notebook returns the expected answer, your development environment is correctly configured!


Watch Video

Watch video content

Previous
A Closer Look at OpenAI API