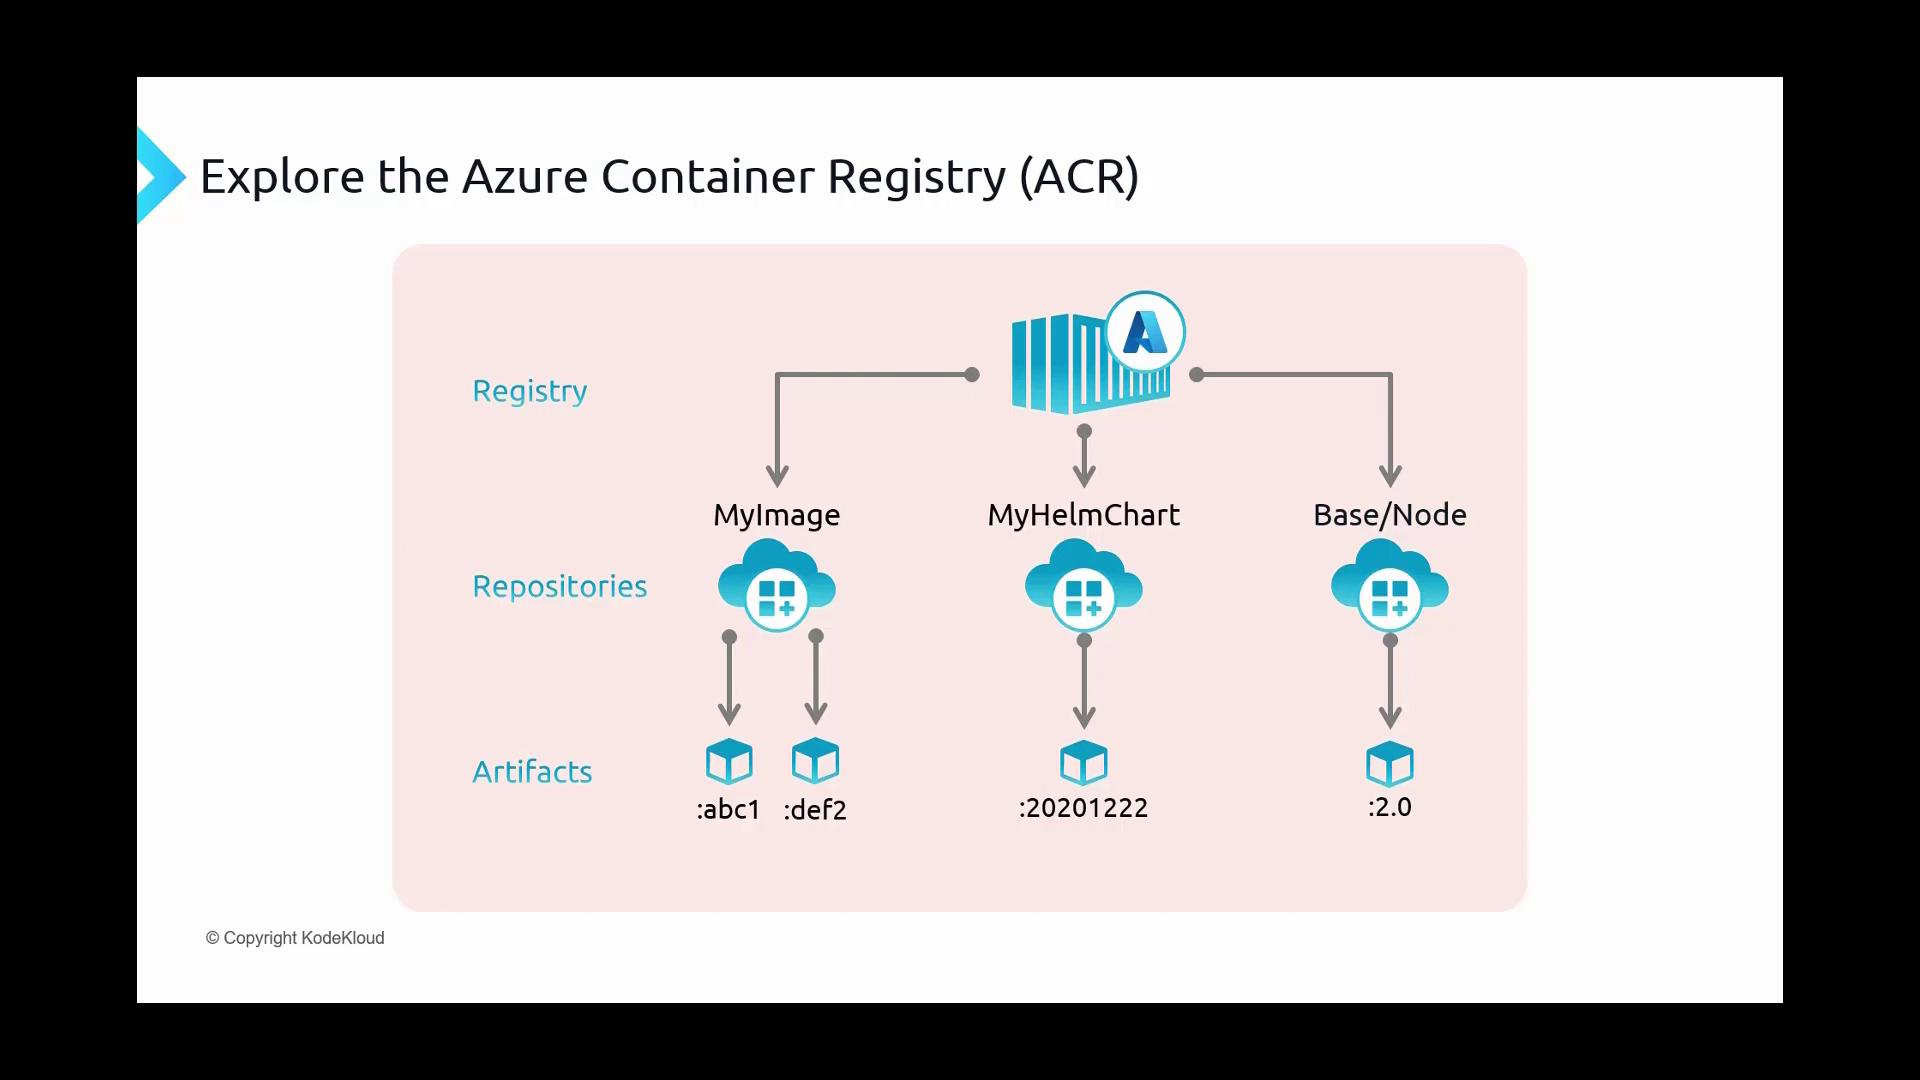
Structure of Azure Container Registry
The structure of ACR is designed for simplicity and efficiency:- Registry: The top-level storage solution that houses all containerized images.
- Repositories: Nested within the registry, repositories act as dedicated shelves for specific container images. They can include namespaces indicated by forward-slash-delimited names (for example, “base/node”). Although repository names might appear hierarchical, each repository is managed independently by the registry.
- Artifacts: Within each repository, artifacts represent specific versions or builds of container images or Helm charts that are uniquely identified by tags. These tags (such as “ABC1”, “DEF2”, or “20201222”) correspond to different stages of your application or varying versions of a Kubernetes deployment package.
Building and Pushing a Docker Image to ACR
This section explains how to build a Docker image using a Dockerfile and push it to ACR.Dockerfile Breakdown
The process starts with a Dockerfile that defines the blueprint for creating your Docker container image. Consider the following example:- FROM: Specifies the base image from the Microsoft repository, here using the .NET Core ASP.NET 3.0 image.
- WORKDIR: Sets the working directory inside the container to
/app. - COPY: Transfers the compiled
aspnetapp.dllfrom the published folder into the container. - ENTRYPOINT: Declares the command to run when the container starts (
dotnet aspnetapp.dll), launching the ASP.NET application.
docker build command with this file, Docker processes each instruction sequentially. Each command creates a distinct layer in the image, identified by a unique 256-character hash, which optimizes storage and version management.
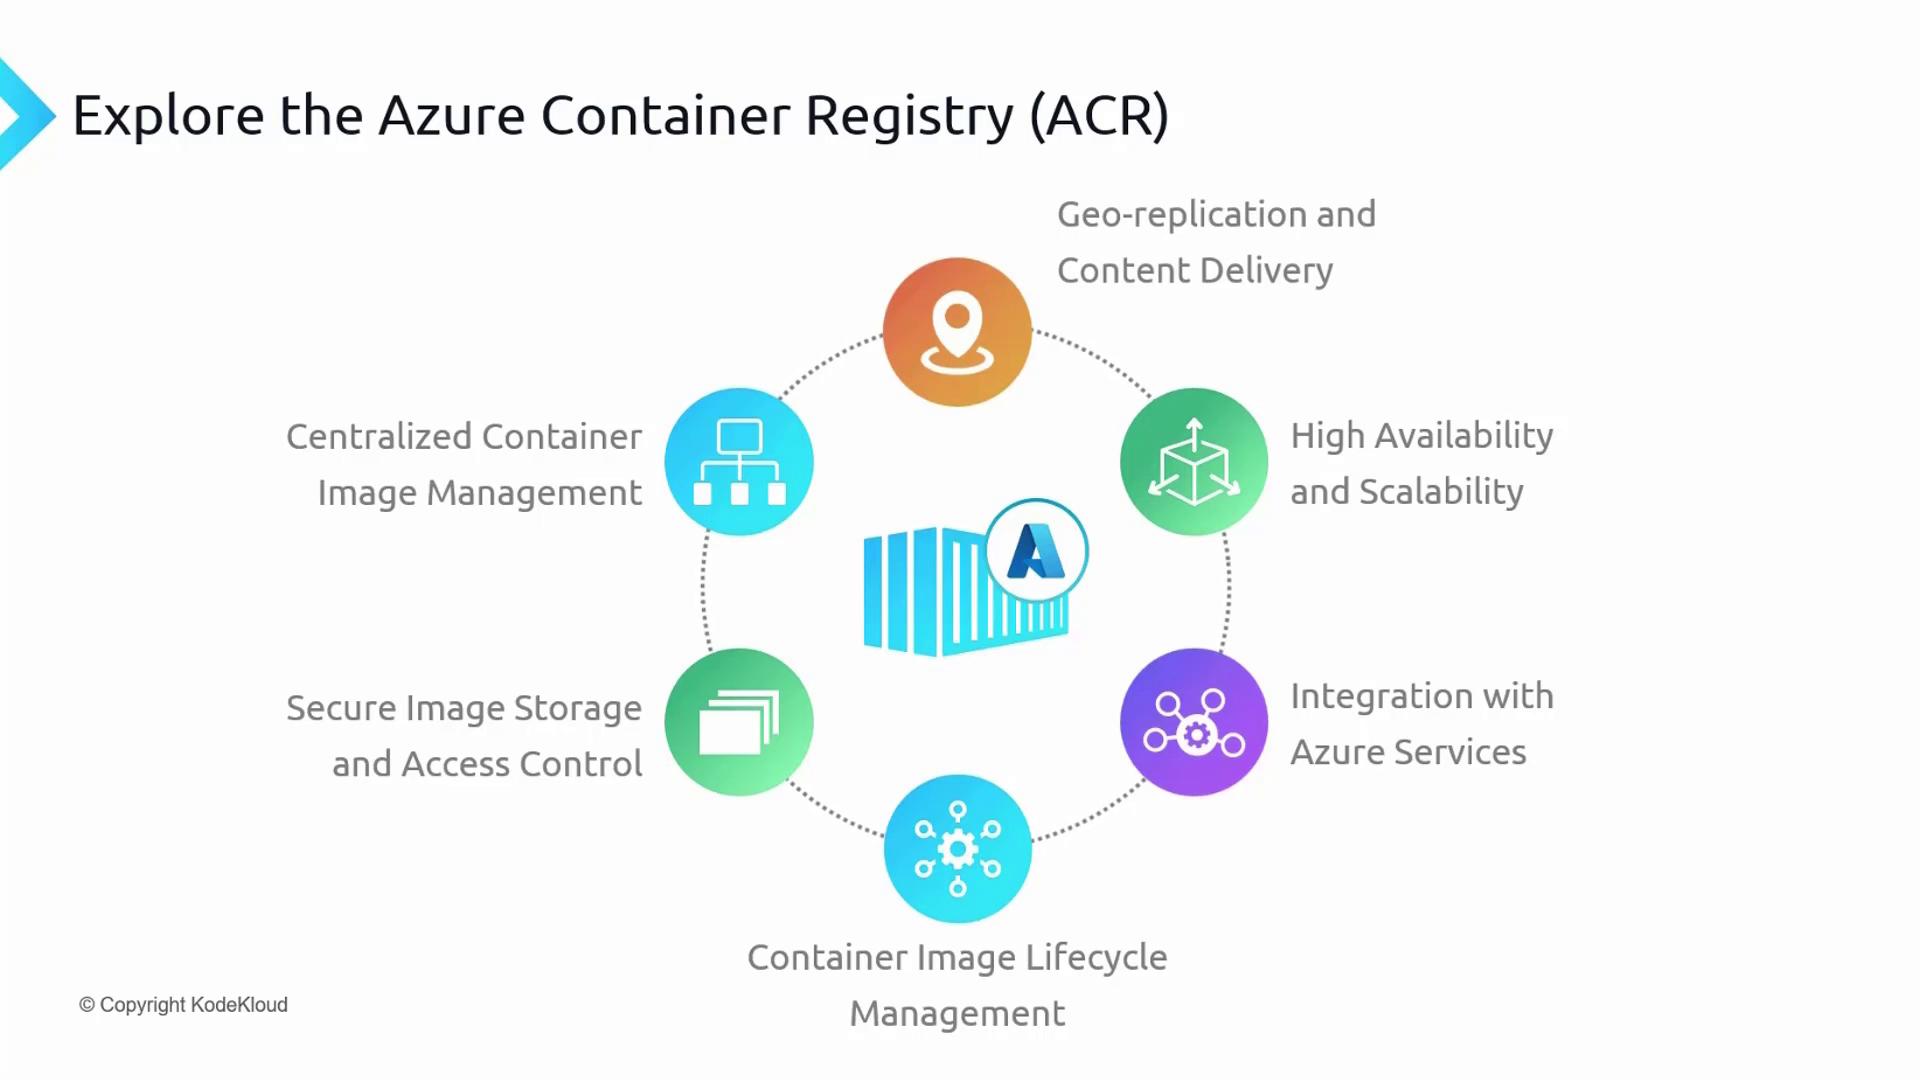
Features of Azure Container Registry
ACR comes packed with several features that are crucial for efficient container management:Centralized Container Image Management
ACR acts as a central hub for storing and managing your container images. It offers a secure environment equipped for organization and version-control, ensuring that your images are readily accessible for deployment across your infrastructure.Secure Image and Access Control
Images in ACR are safeguarded with industry-standard encryption. Access is rigorously managed through Azure Active Directory, role-based access control, and fine-grained permissions, ensuring that your container images are protected from unauthorized access.Container Image Lifecycle Management
ACR streamlines the management of container image lifecycles with features like versioning, environmental promotion, vulnerability scanning, and automated builds. These tools assist in maintaining a secure and efficient image management workflow.Integration with Azure Services
ACR’s deep integration with Azure Kubernetes Service and Azure DevOps simplifies the deployment of containerized applications. This seamless integration supports efficient CI/CD pipelines and smooth operations within your existing workflows.High Availability and Scalability
Leveraging Azure’s robust global infrastructure, ACR offers high availability and scalability. It replicates images across multiple regions, reducing latency and ensuring fast image retrieval.Geo-replication and Content Delivery
Creating an ACR and Pushing an Image
Follow these steps to create an ACR instance and push your image:-
Create Your Dockerfile
Develop a Dockerfile that, for example, pulls the official Nginx image, installs necessary packages, downloads a Bootstrap template, and exposes port 80. See the sample Dockerfile below: -
Prepare Your Environment
Open the Azure Portal and start the Cloud Shell. Upload your Dockerfile to your home directory. -
Create a Container Registry
Run the following command in the Azure CLI to create a new container registry (replace<uniqueID>with your unique identifier): -
Build and Push the Image
Use the command below to build the Docker image from your local Dockerfile and push it to the newly created ACR. The image is tagged as “bootstrap:v1”:You’ll see a build output similar to:After the build completes successfully, verify the image in your ACR via the Azure Portal under the “Repositories” section. You can also pull the image locally with:
Running the Container
Once you have confirmed the image is stored in ACR, deploy it as a container instance. For example, use the following command to pull the image:ACR Service Tiers
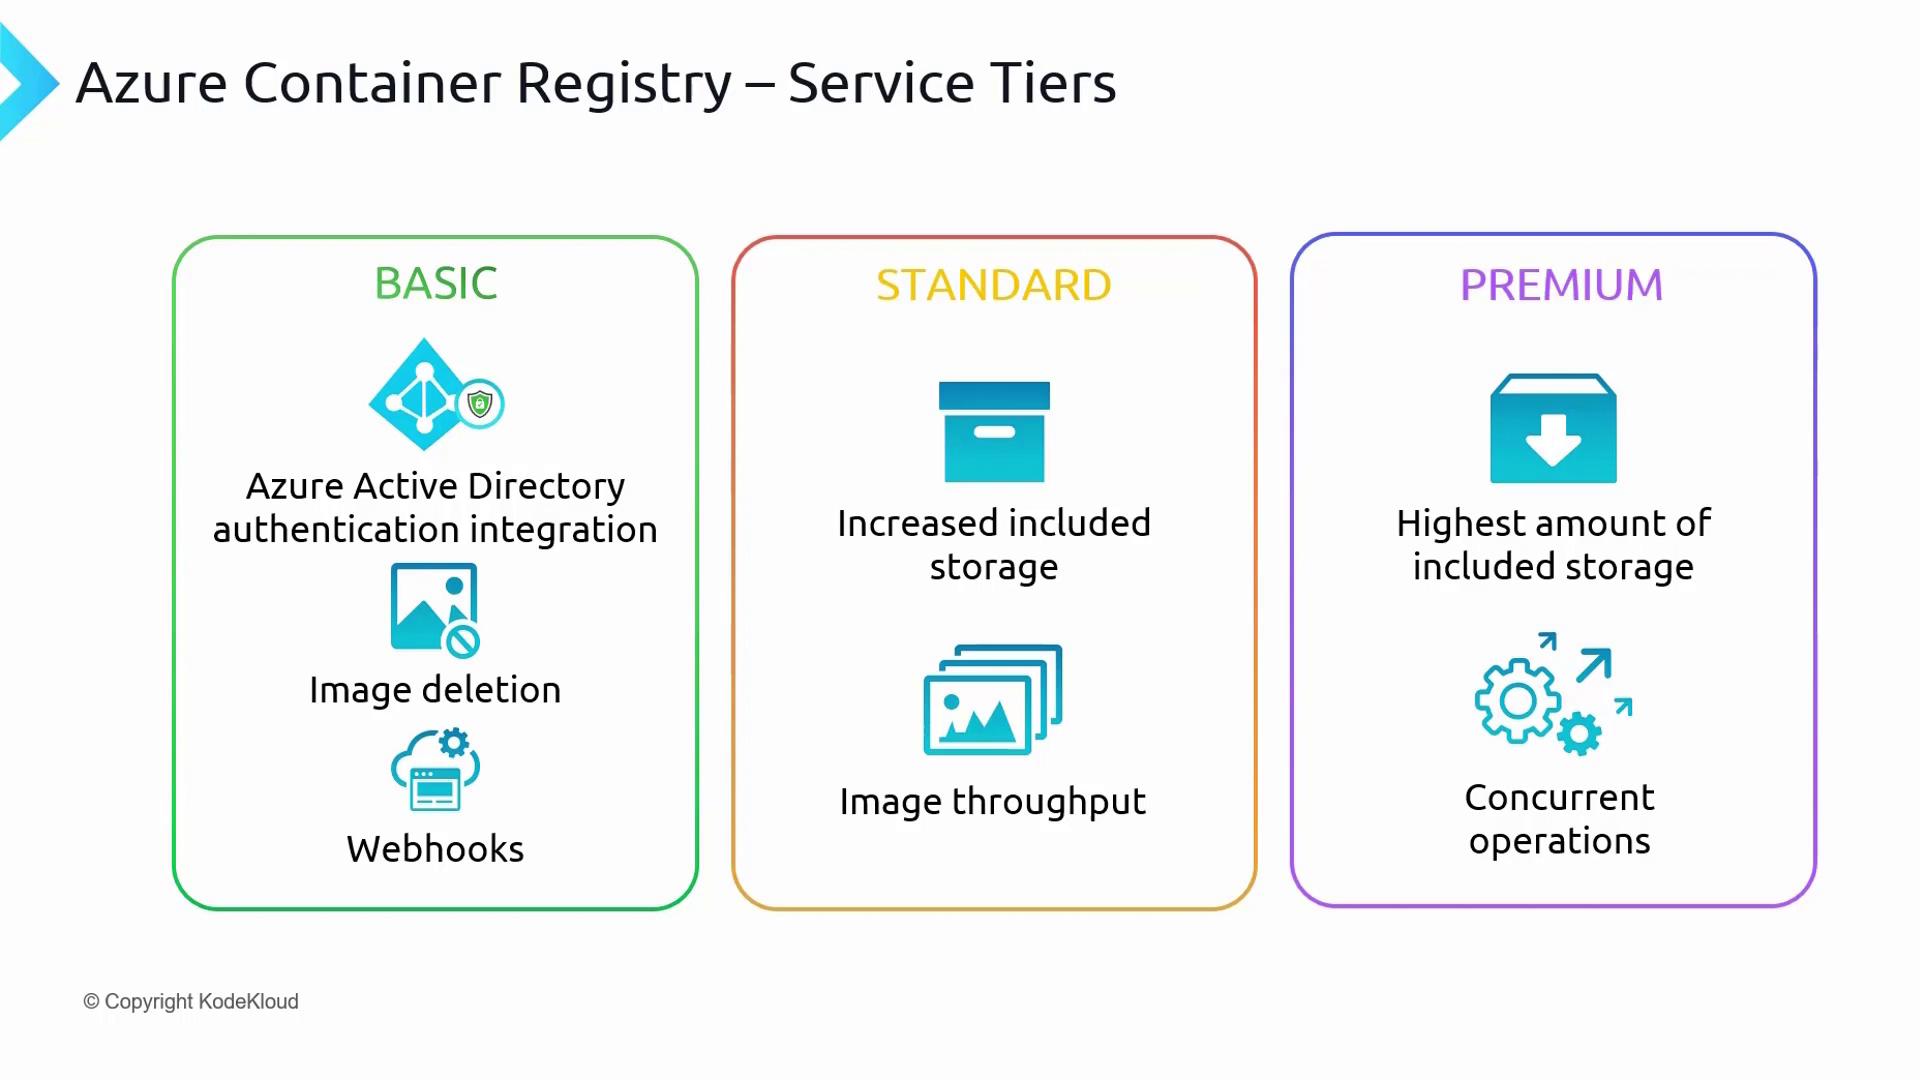
Before diving into ACR authentication, it’s important to understand the service tiers available for Azure Container Registry. The three primary tiers are:| Service Tier | Description | Use Case |
|---|---|---|
| Basic | Provides core features for image storage, deletion, and webhook integration. | Suitable for development and low usage. |
| Standard | Offers increased storage and throughput over Basic, meeting most production requirements. | Ideal for most production workloads. |
| Premium | Delivers the highest storage capacity and throughput, plus additional features like geo-replication, content trust (image tag signing), and private link support. | Best for high scale, security, and redundancy needs. |