This guide explores managing users and groups in Azure Active Directory, focusing on user accounts, creation, deletion, and types of accounts available.
Welcome back! In this comprehensive guide, we explore how to manage users and groups in Azure Active Directory (Azure AD). Users and groups form the backbone of any robust identity and access management solution, and in this lesson, we’ll start by focusing on users.
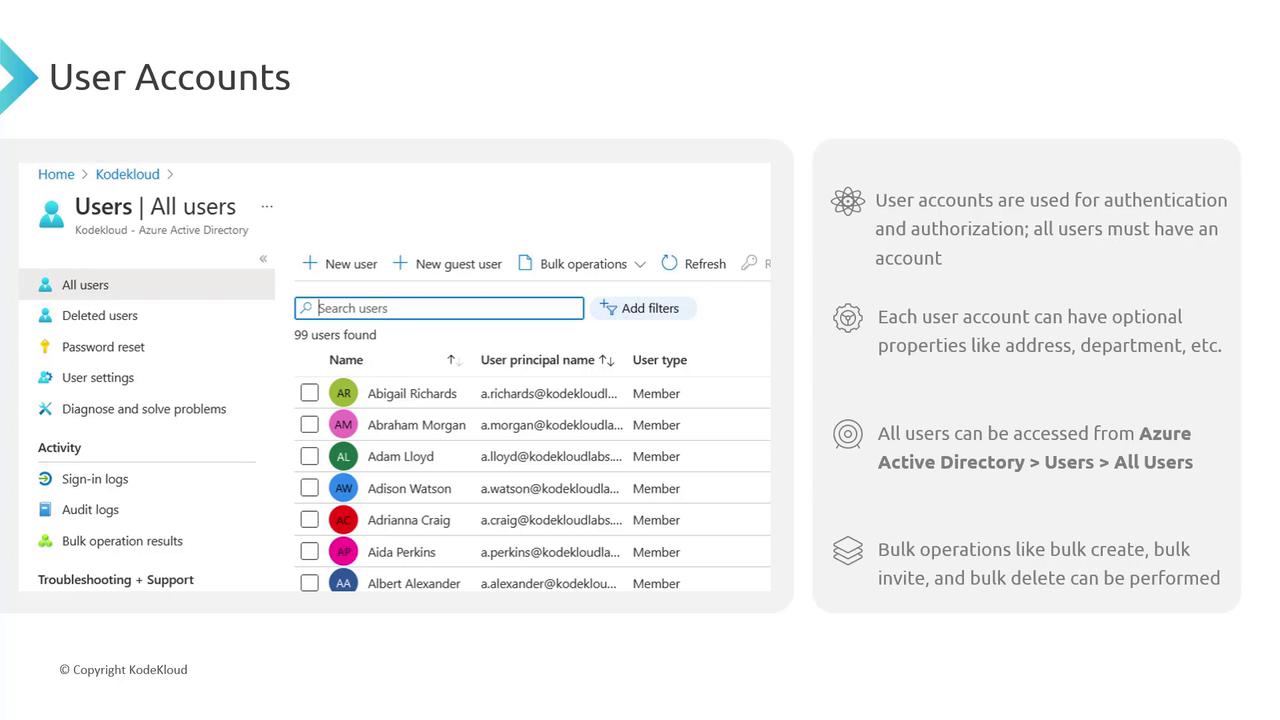
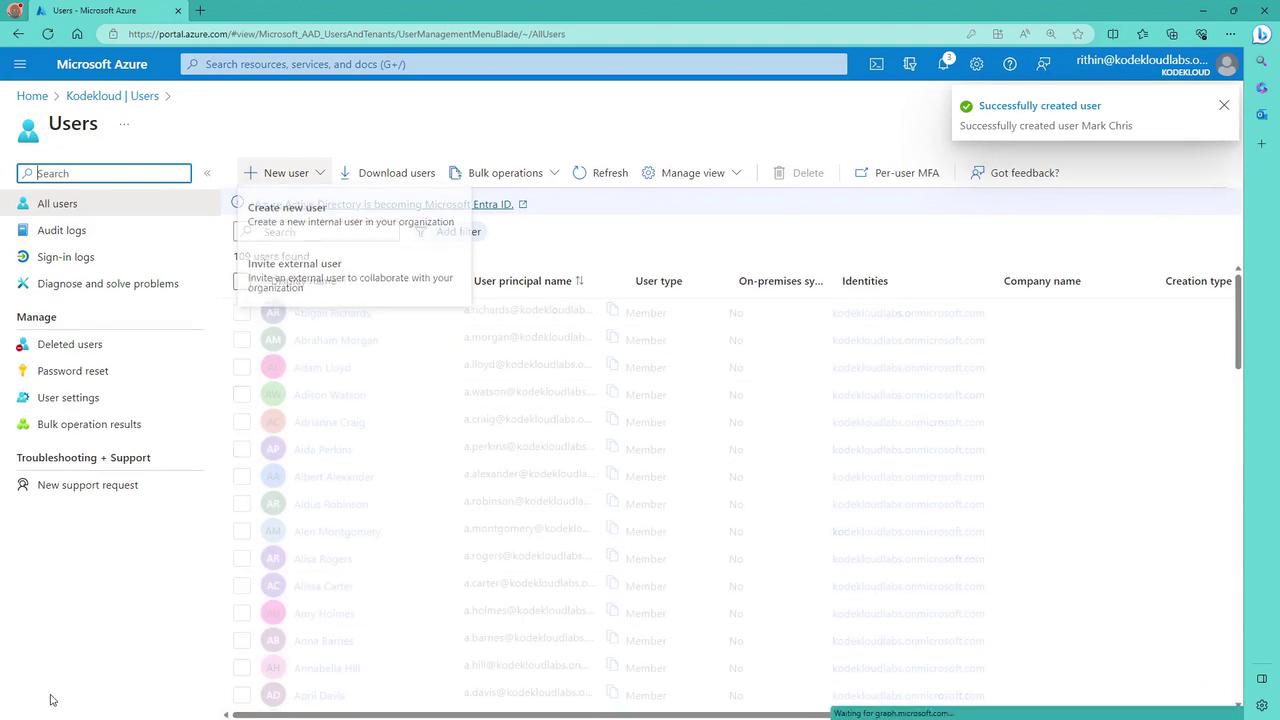
User accounts in Azure AD are vital for both authentication and authorization, functioning as digital keys that secure access to resources. Whether you’re accessing a virtual machine, database, or network resource in Azure, a valid Azure AD account is required.Similar to on-premises Active Directory, each user account in Azure AD can include custom attributes—such as address, department, or employee ID—to better organize and manage users. To view all users in your organization, navigate to:Azure Active Directory → Users → All UsersThis centralized hub enables you to track and manage every user account. For bulk user management, Azure AD offers the capability to create, invite, and delete multiple accounts simultaneously using operations and sample CSV files.
For bulk operations, use the provided CSV template, fill in the mandatory fields, and upload it back to Azure AD. This greatly simplifies the process of creating a large number of user accounts.
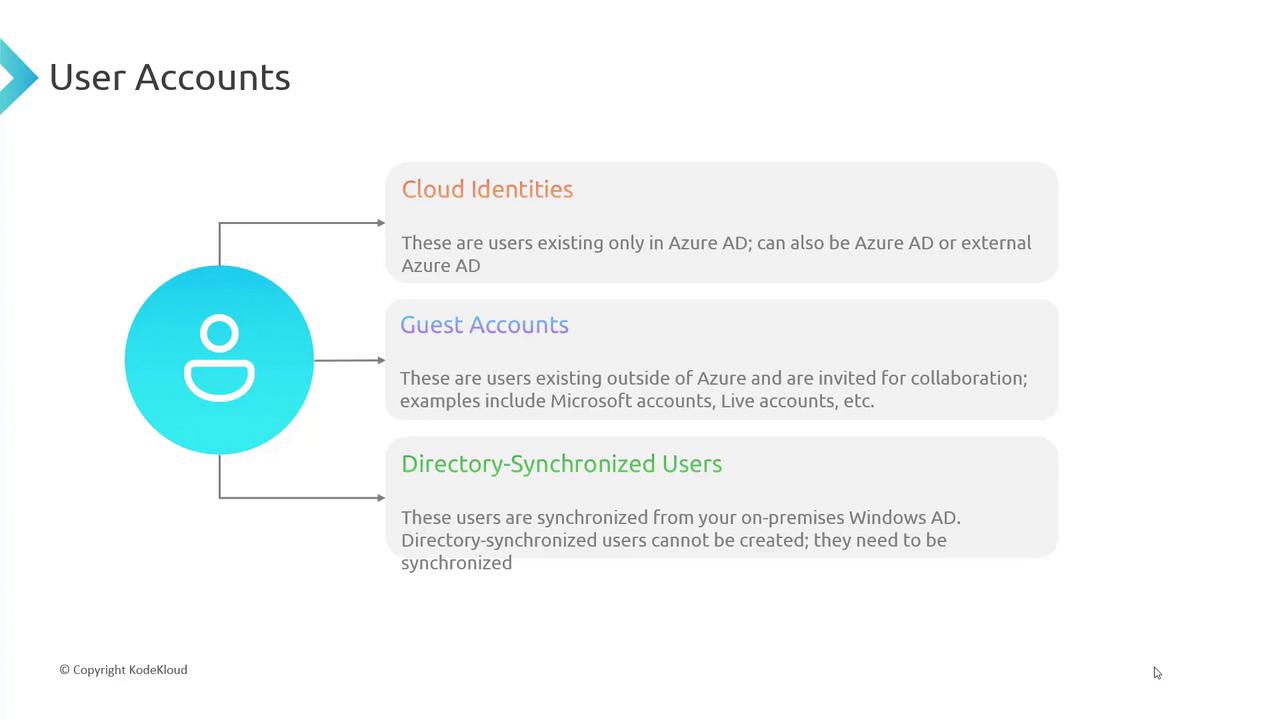
Azure AD supports three primary types of user accounts:
Cloud Identities
Native to Azure AD and exclusively used for cloud resources and services.
Guest Accounts
Designed for external collaborators. These accounts allow users from outside organizations to access specific resources. They can sign in using invitation links—even with personal email addresses.
Directory-Synchronized Accounts
Integrated with on-premises Active Directory via Azure AD Connect. This synchronization bridges your local directory and the Azure cloud.
To summarize, cloud identities reside natively in Azure AD, guest accounts facilitate external collaboration, and directory-synchronized accounts integrate with your local directory.
Azure AD offers two main methods for adding users:
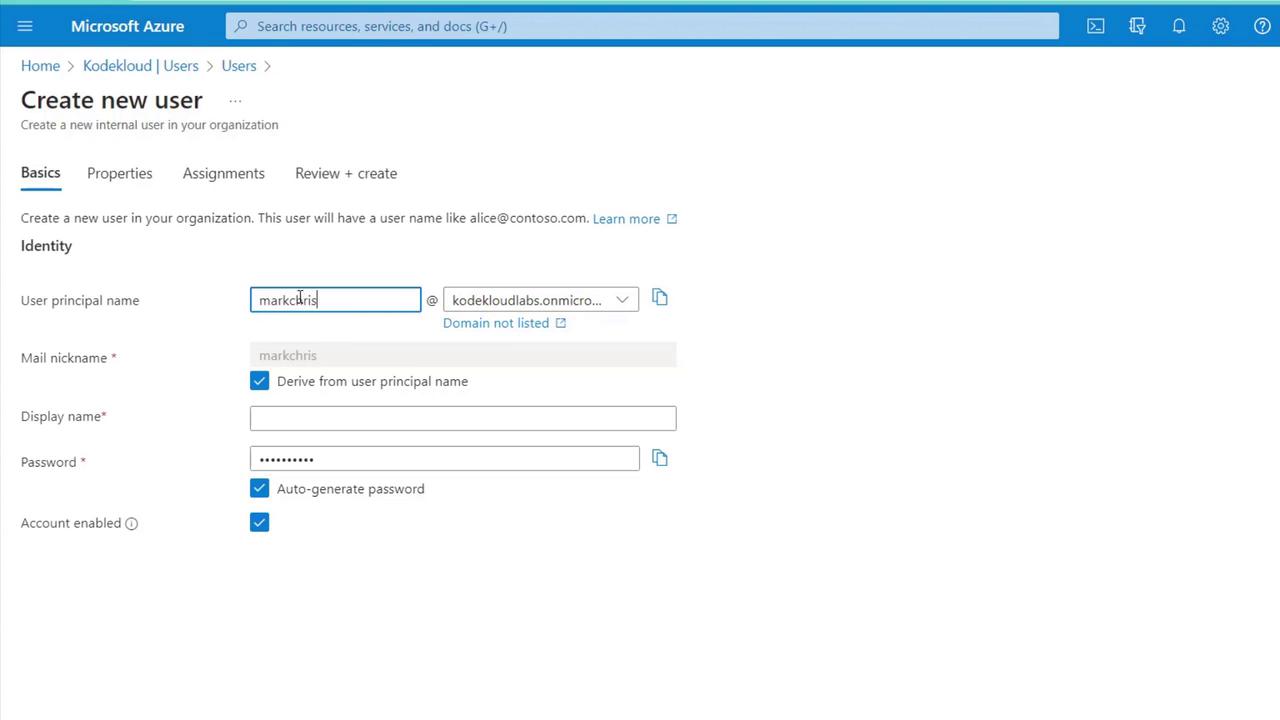
Create a New User (Cloud Identity)
Directly create a new user in Azure AD. For example, if your domain is cloudlabs.onmicrosoft.com, a new user might be created as alice@kodekloudlabs.onmicrosoft.com.
Invite a User (Guest Account)
Use this option to collaborate with external users. Invited users are designated as guests and can belong to different Azure AD tenants or use personal email accounts.
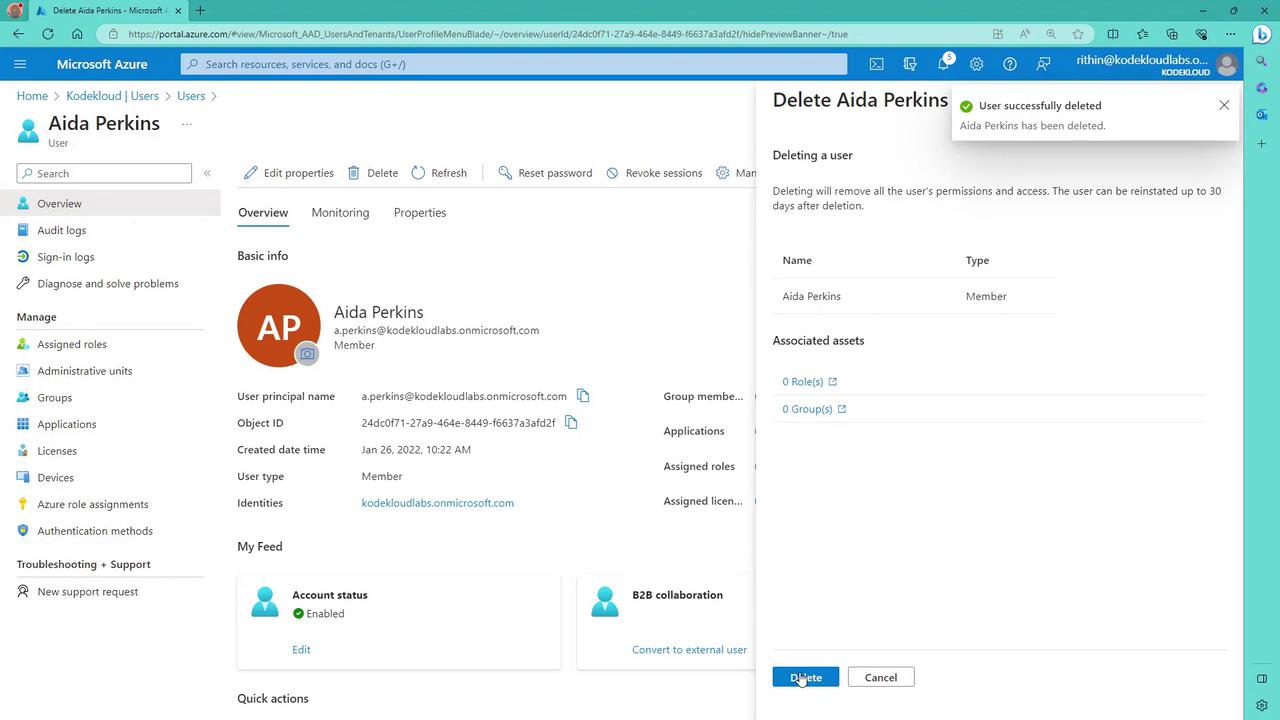
The deletion process is straightforward—deleted users are moved to a “Deleted Users” folder for 30 days, during which you can restore them if needed. Audit and sign-in logs capture detailed information such as IP address, location, and browser details.
Directory-synchronized accounts cannot be manually created in the Azure portal because they are automatically generated through Azure AD Connect synchronization with your on-premises directory.
Open the Azure portal and go to Azure Active Directory → Users.
Select the option to create a new user or invite an external user.
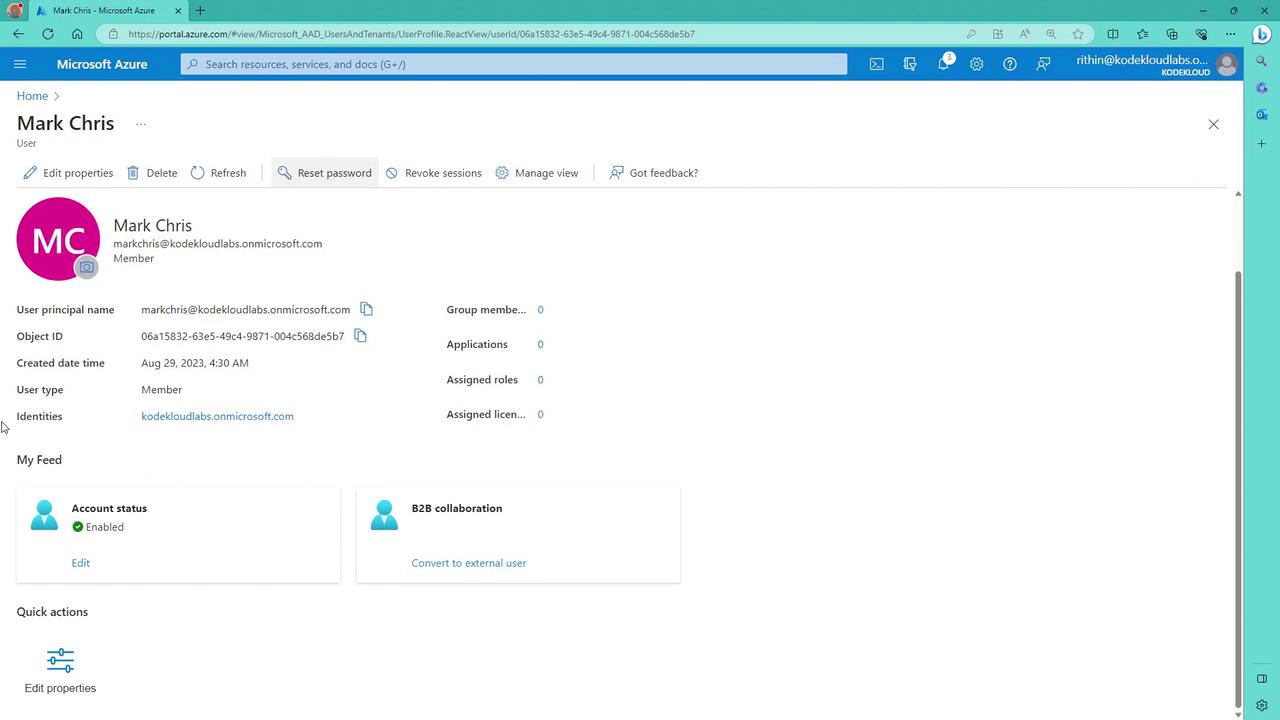
When creating a cloud user, the system automatically appends your tenant’s domain to the username. For instance, creating an account for Mark Chris might result in a user principal name like mark.chris@yourtenantdomain.com.
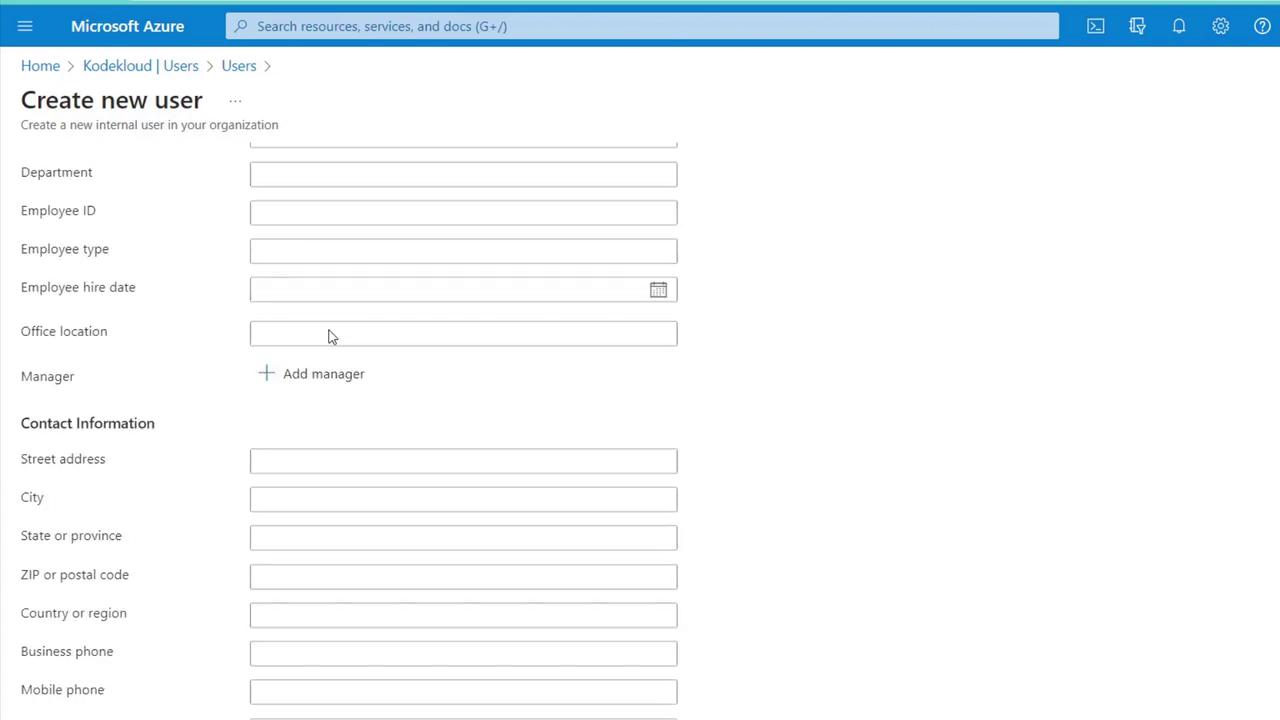
You can customize user details by updating the display name, auto-generating a password, and setting the account status (enabled/disabled). Custom attributes such as department or employee ID can also be added to further personalize the account.
After entering the required information, click “Review and Create.” Be sure to copy the system-generated password before finalizing the creation process, as it is necessary for the initial sign-in. You can later reset the password if needed, provided you have global administrator or user administrator permissions.On successful creation, you will receive a notification and can view the user profile.
To view further details, click on the user’s name to open their profile. If you ever miss copying the generated password, simply use the “Reset Password” option, assuming your permissions allow it.For modifications such as updating a manager’s name or changing the department, simply edit the relevant fields and hit “Save.” Any changes, like updating the department to HR, will be immediately reflected in the user’s profile.
To delete a user, select the user account you wish to remove. Azure AD provides a summary of the user’s information—including name, type, and related assets like roles and groups—prior to confirming the deletion.
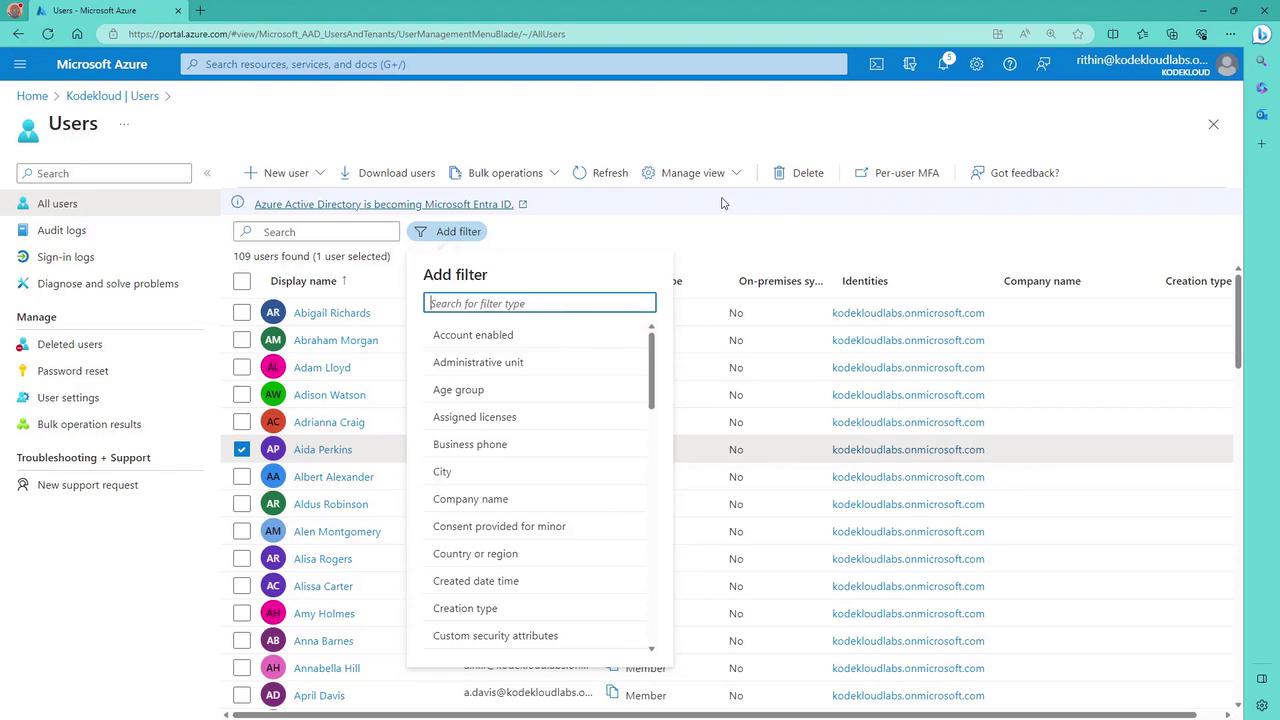
After deletion, you can filter the user list by user type. For example, filtering by “guest” displays all guest accounts, while filtering for “on-premises sync enabled” equals true reveals directory-synchronized accounts.
Audit and sign-in logs provide detailed insights into user activity, including IP addresses and location data. Additionally, deleted users remain in the “Deleted Users” folder for 30 days, enabling individual or bulk restoration using a bulk restore template that requires details such as email address or service object ID.
With a solid understanding of user management complete, the next step is to manage groups in Azure AD. In the upcoming section, we will cover how to create, manage, and configure groups—an essential strategy for organizing users and assigning roles efficiently.Happy managing!