- Deploying applications in separate regions (for instance, an existing plan in North Europe versus a new app in West Europe).
- Switching operating systems (e.g., moving from Linux to Windows).
- Meeting high-performance demands when your application requires more memory or processing power than your current plan supports.
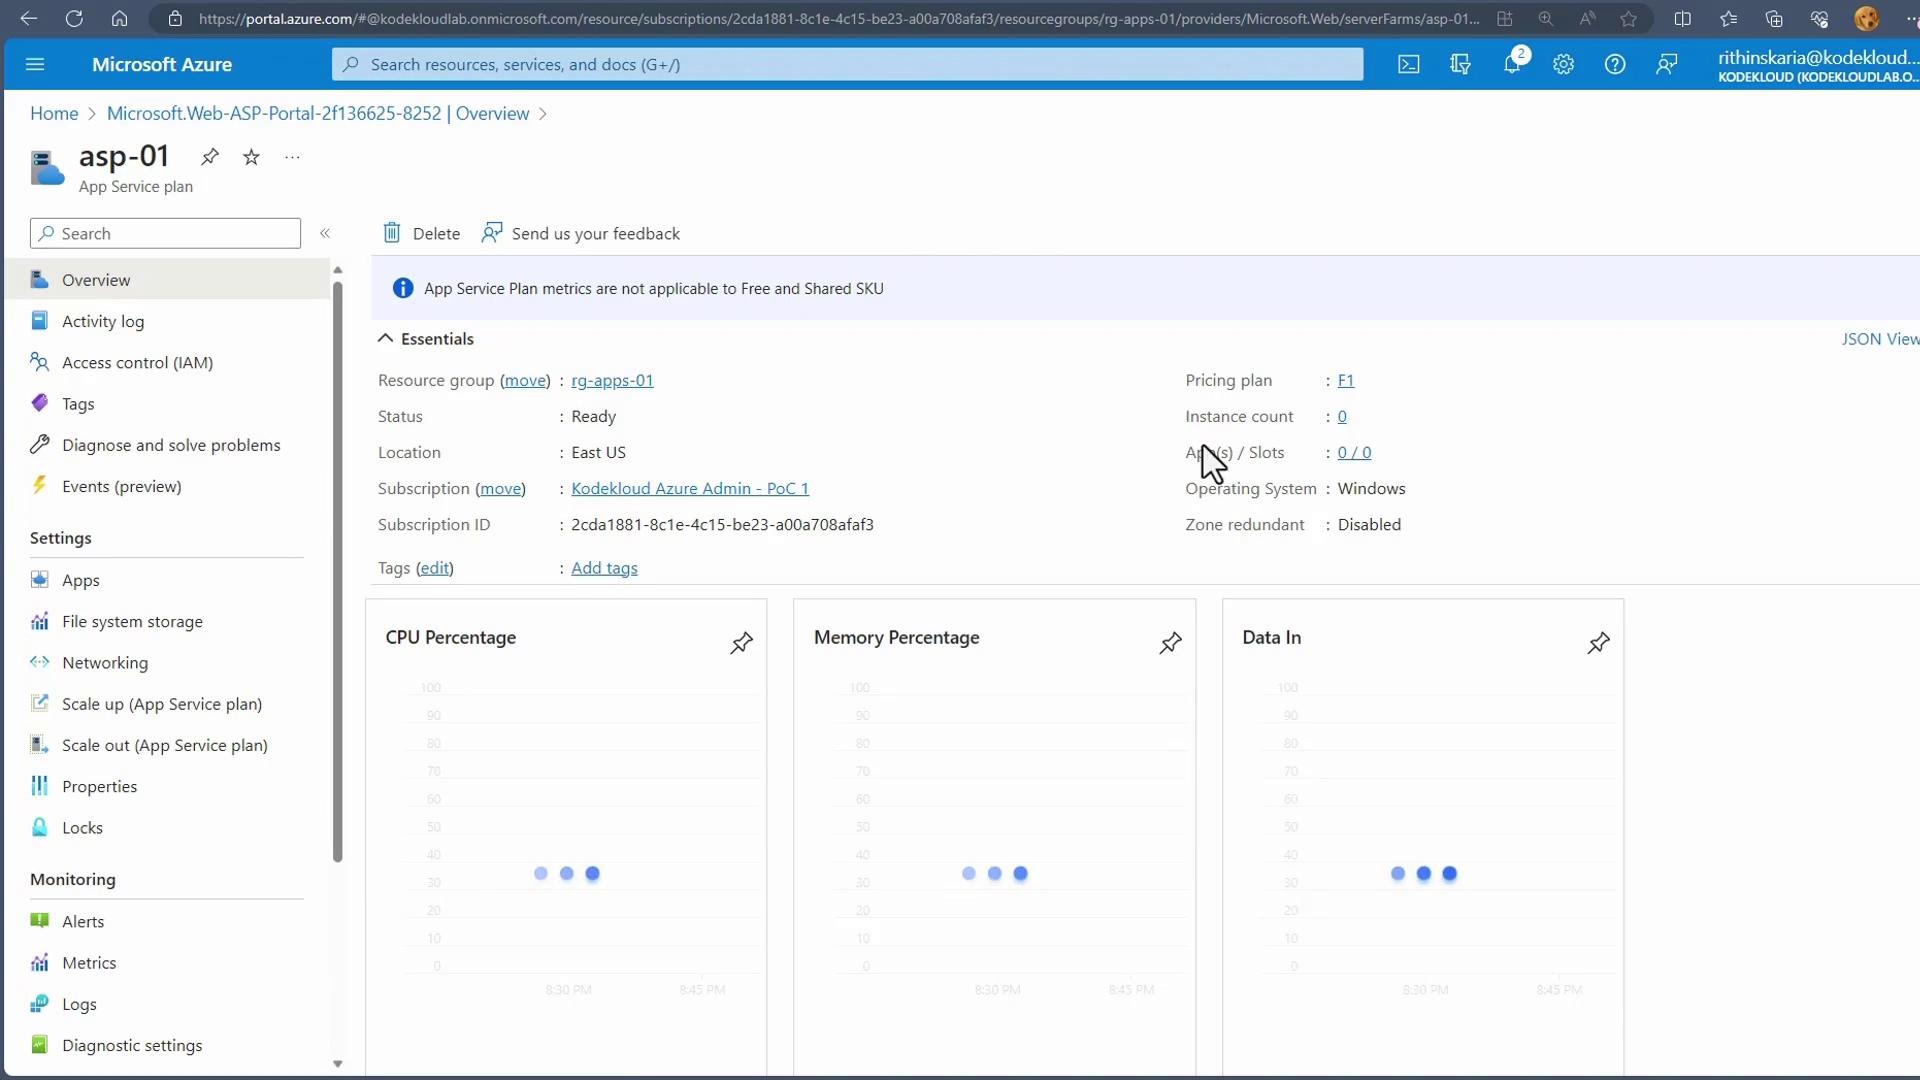
Even if no applications are deployed, you are billed for the App Service Plan. Unlike VMs, stopping the service does not stop billing, so choosing the right plan is critical for cost optimization.
App Service Plan Tiers
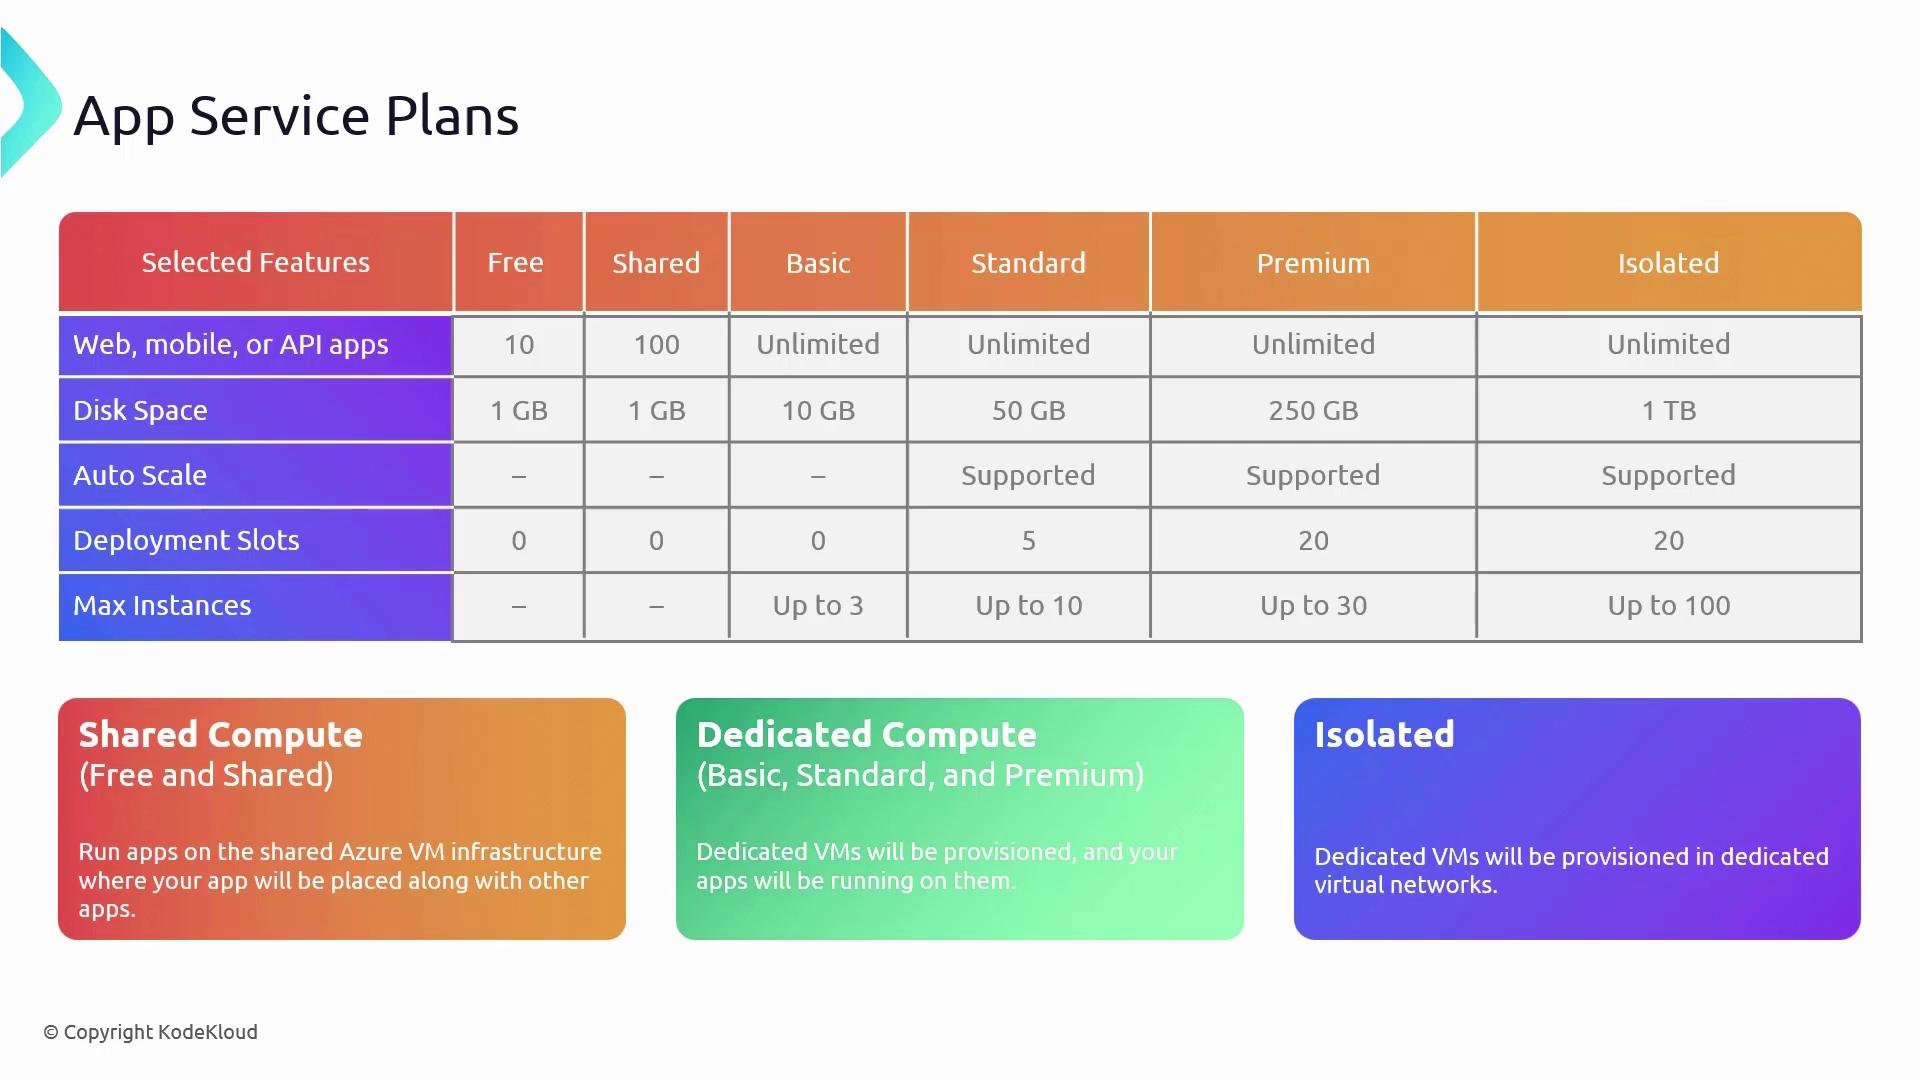
Azure provides multiple tiers of App Service Plans to accommodate projects ranging from small experiments to large-scale enterprise applications. Each tier offers varying levels of performance, features, capacity, and pricing:-
Free Tier:
Ideal for learning and small-scale projects.
• 1 GB of disk space
• Up to 10 web apps, mobile apps, or APIs
• No autoscaling, deployment slots, or scale-out capability
• Limited to 60 minutes of runtime per day -
Shared Tier:
Similar to the Free tier, but runs on shared Azure VM infrastructure, making it suitable for small websites with modest traffic.
• Limited runtime of 240 minutes per day -
Basic Tier:
Provides increased storage (10 GB) and supports up to 3 instances; however, autoscaling is not available. -
Standard Tier:
Designed for business-grade applications.
• 50 GB of disk space
• Autoscaling support
• 5 deployment slots
• Scale-out capability up to 10 instances -
Premium Tier:
Meant for more demanding applications.
• 250 GB of disk space
• 20 deployment slots
• Autoscaling support
• Scale-out capability up to 30 instances -
Isolated Tier:
The highest level for applications that require secure network access and complete isolation.
• 1 TB of disk space
• Autoscaling support
• 20 deployment slots
• Scale-out capability up to 100 instances
• Virtual Network support (deployed as an App Service Environment)
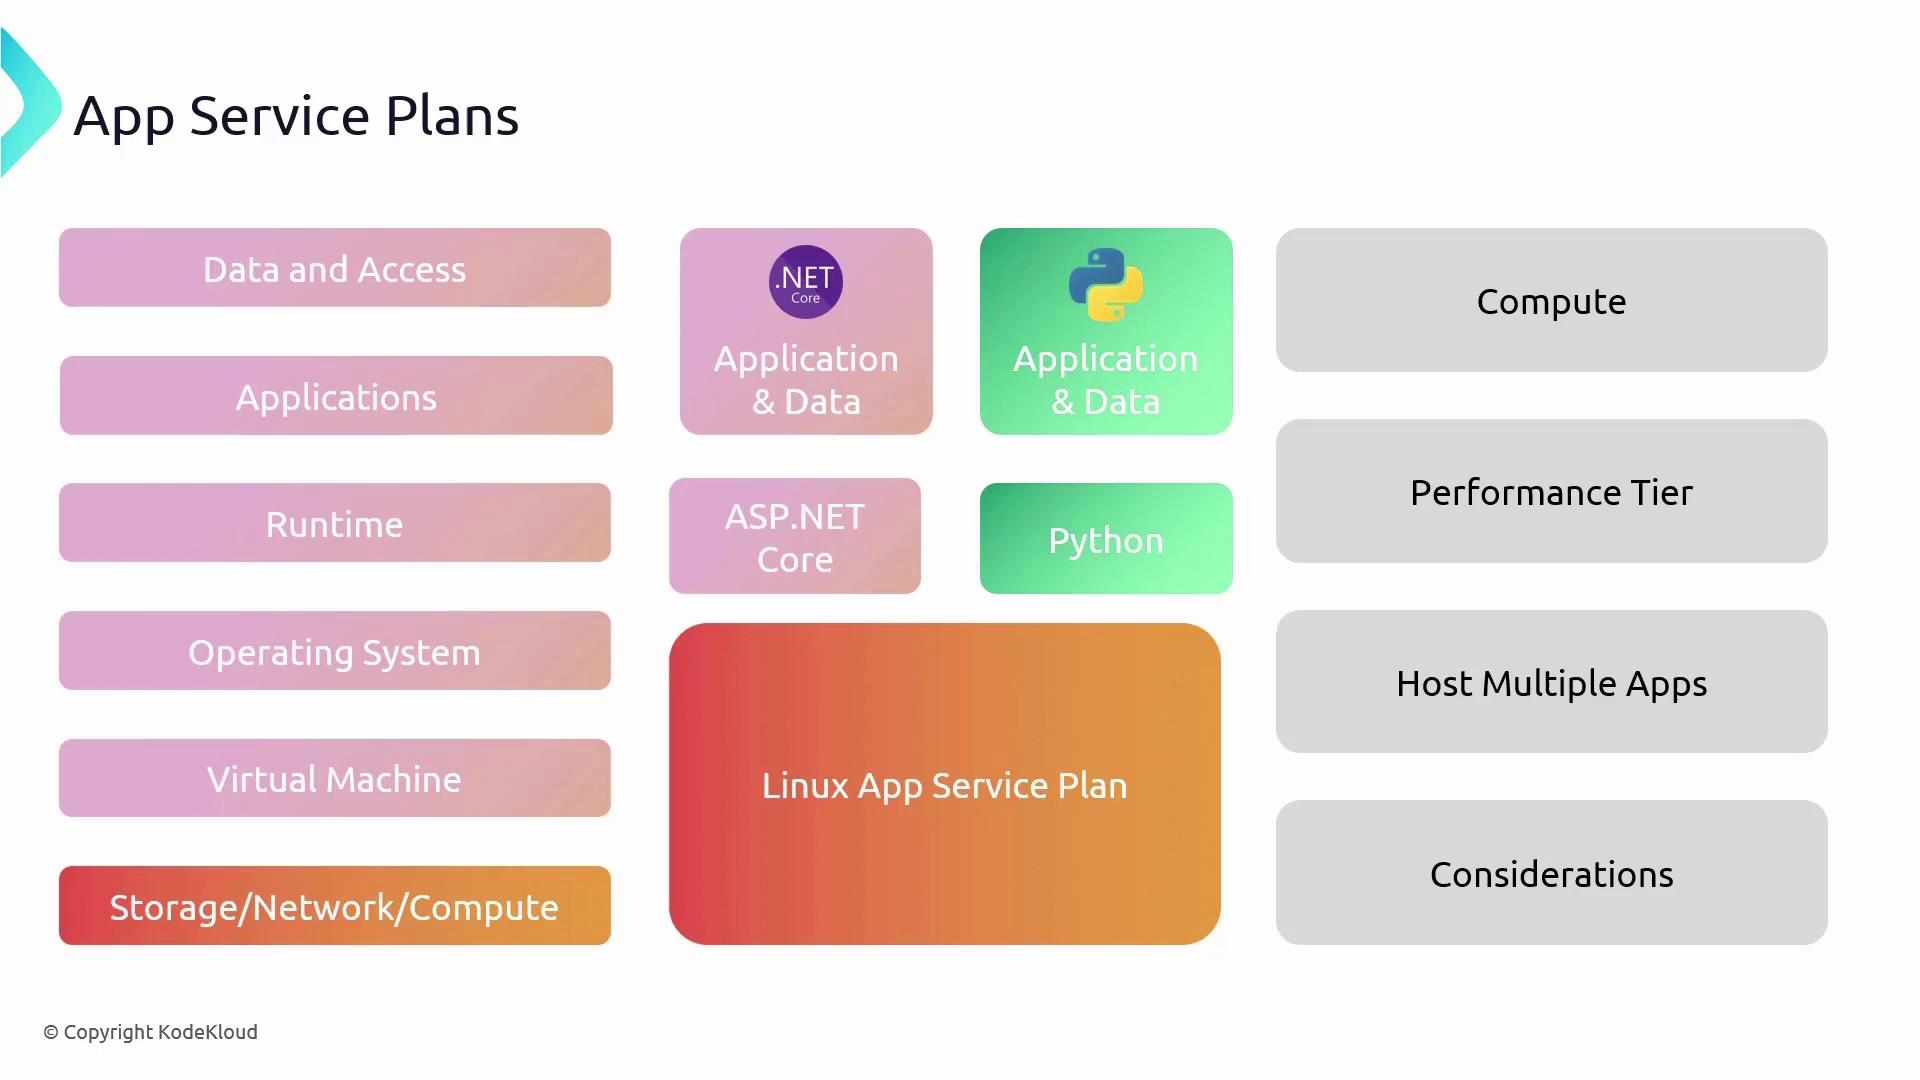
Compute Options in App Service Plans
Azure App Service Plans cater to diverse compute needs with three primary compute options:-
Shared Compute:
Utilized by the Free and Shared tiers, where resources are shared with other customers. -
Dedicated Compute:
Available in the Basic through Premium tiers, this option allocates dedicated VMs to your applications, ensuring that resources are not shared with others. -
Isolated Compute:
Exclusive to the Isolated tier, VMs run within a dedicated Virtual Network, providing the highest level of isolation and scaling.
Scaling in Azure App Service Plans
Azure App Service Plans support two types of scaling to ensure your application can handle variable workloads effectively:-
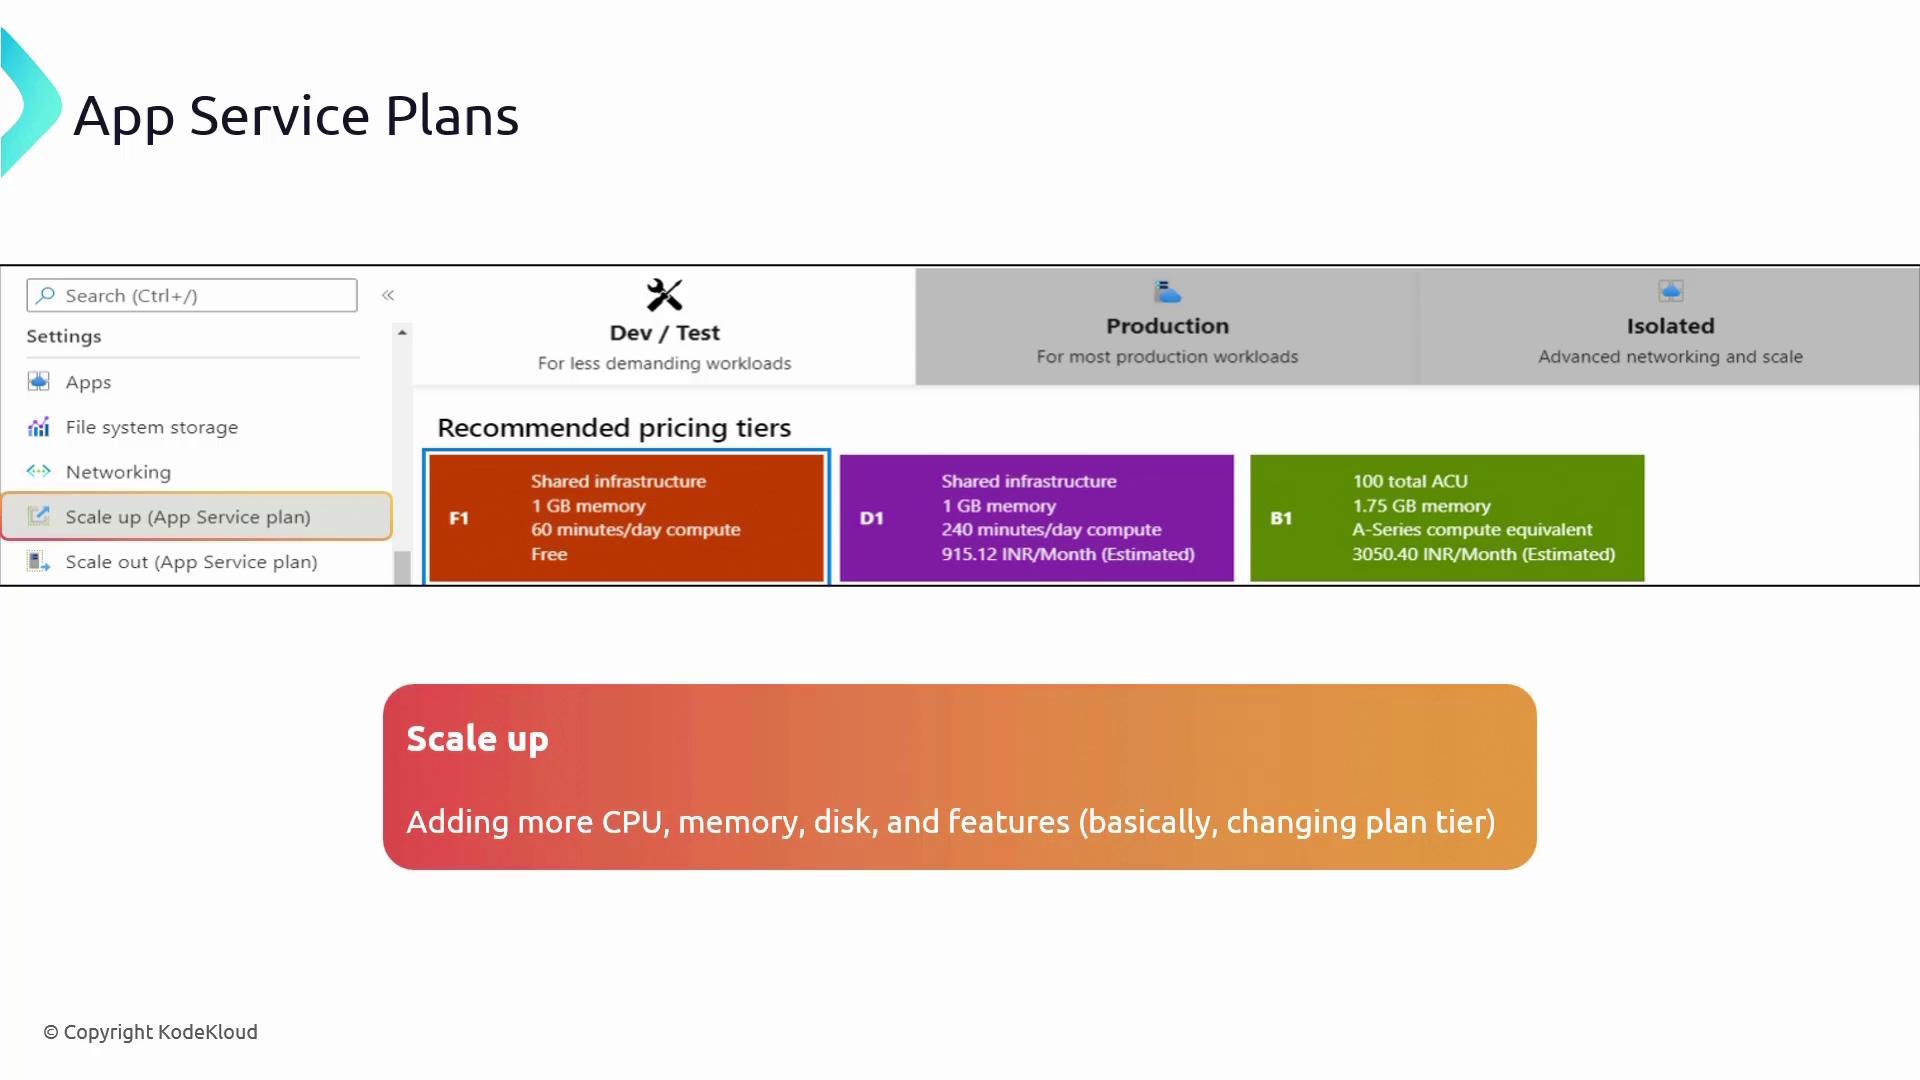
Scale Up (Vertical Scaling):
Upgrade your service plan to a higher tier with enhanced CPU, RAM, or disk resources without increasing the number of instances. This is ideal for applications that require more power on a single server. -
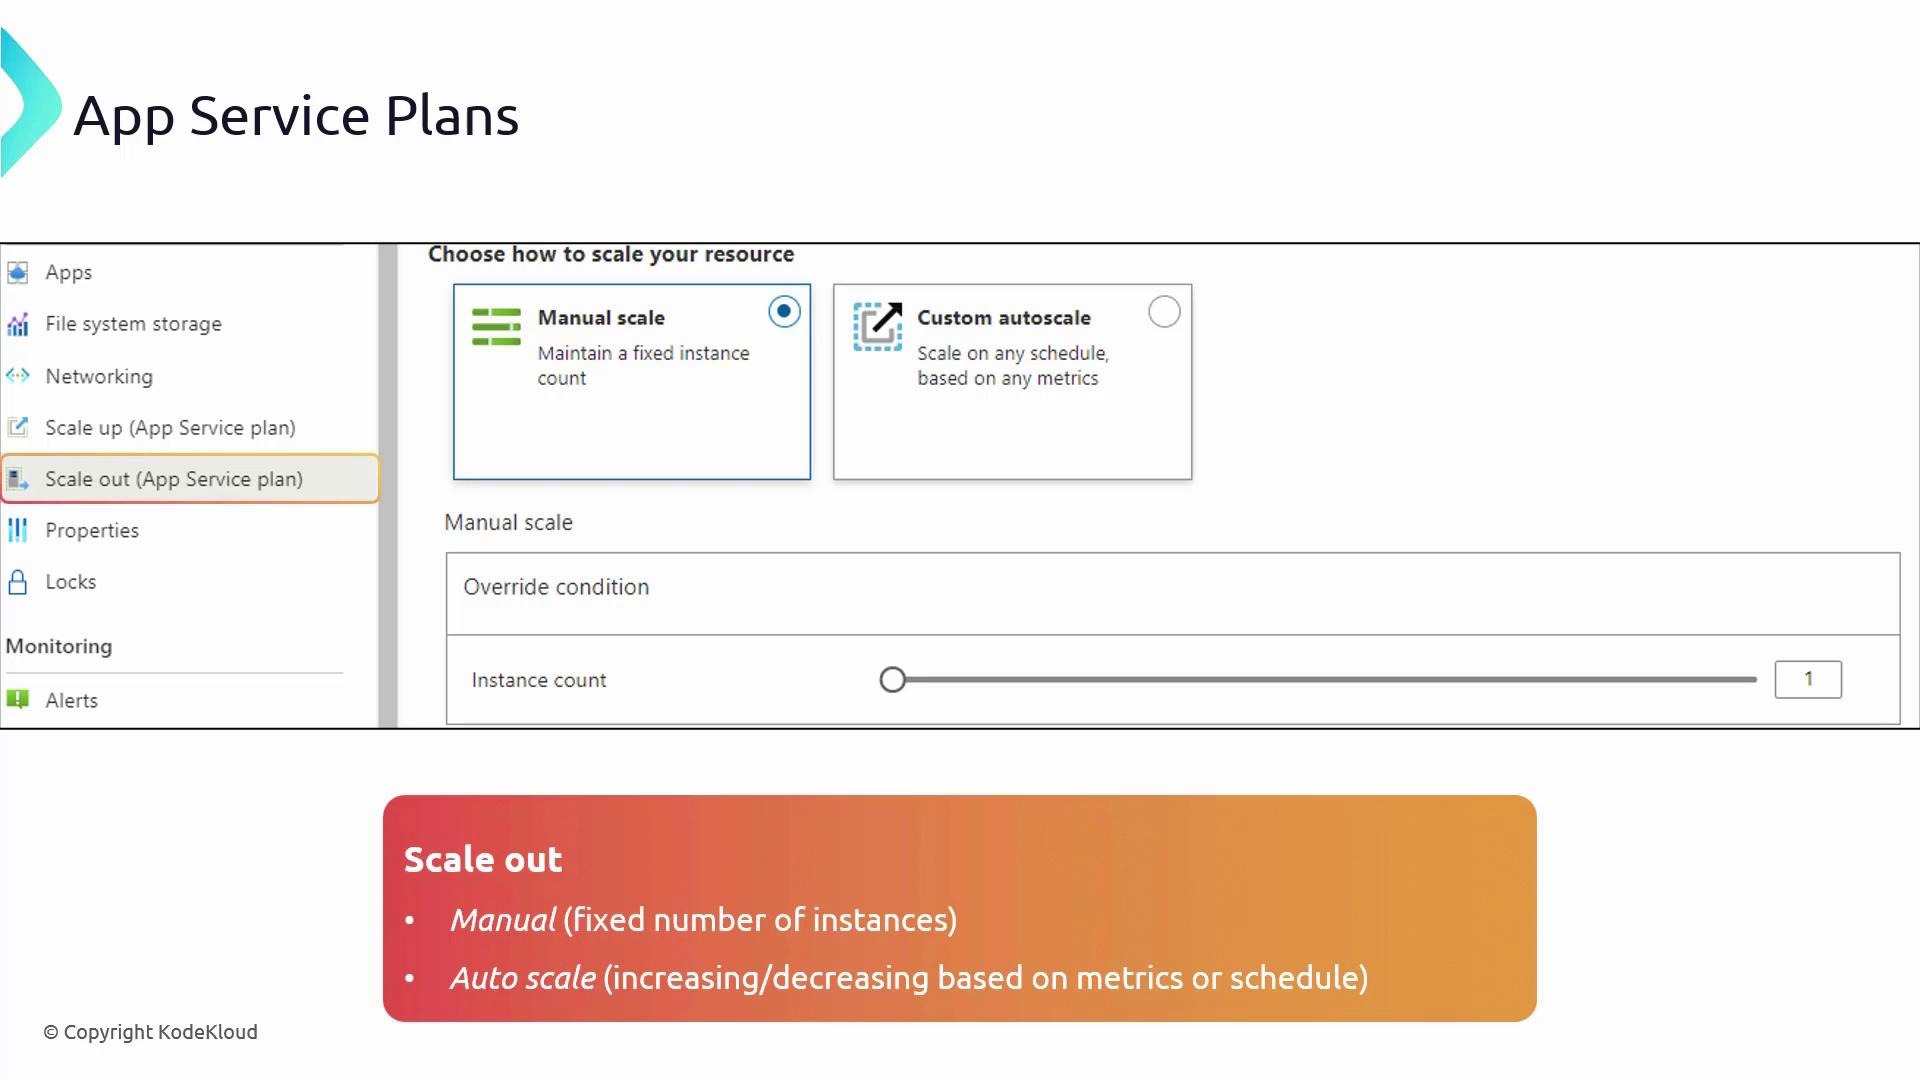
Scale Out (Horizontal Scaling):
Increase the number of running instances to distribute the load across multiple servers. Autoscaling—available from the Standard tier onward—automatically adjusts instances based on metrics like CPU usage or request queues, while manual scaling is an option in the Basic tier.
Deploying an App Service Plan in the Azure Portal
Follow these steps to deploy an App Service Plan using the Azure Portal:- In the Azure Portal, search for “App Service Plans.”
- Click on “Create a new App Service Plan.”
- Select your subscription and create a new resource group (for example, “RG apps 01”).
- Name your plan (e.g., “ASP 01 App Service Plan 01”).
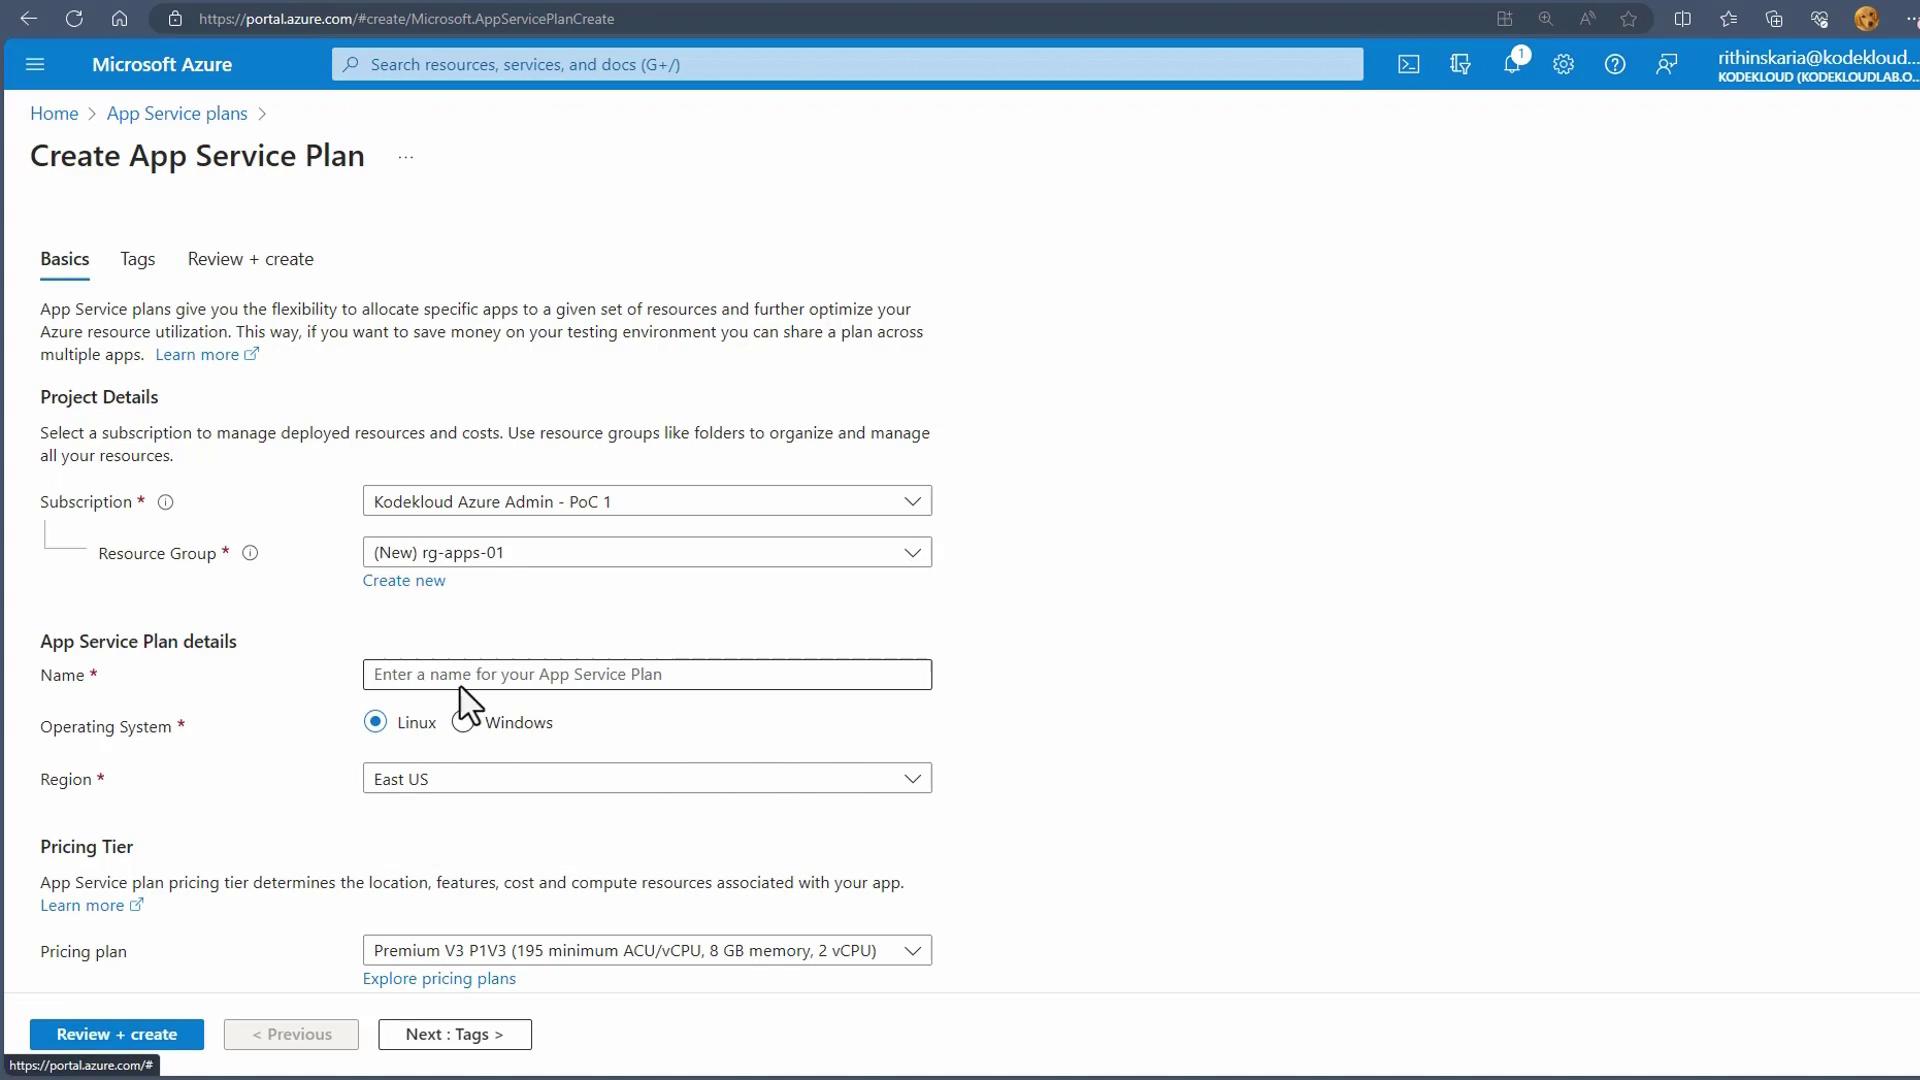
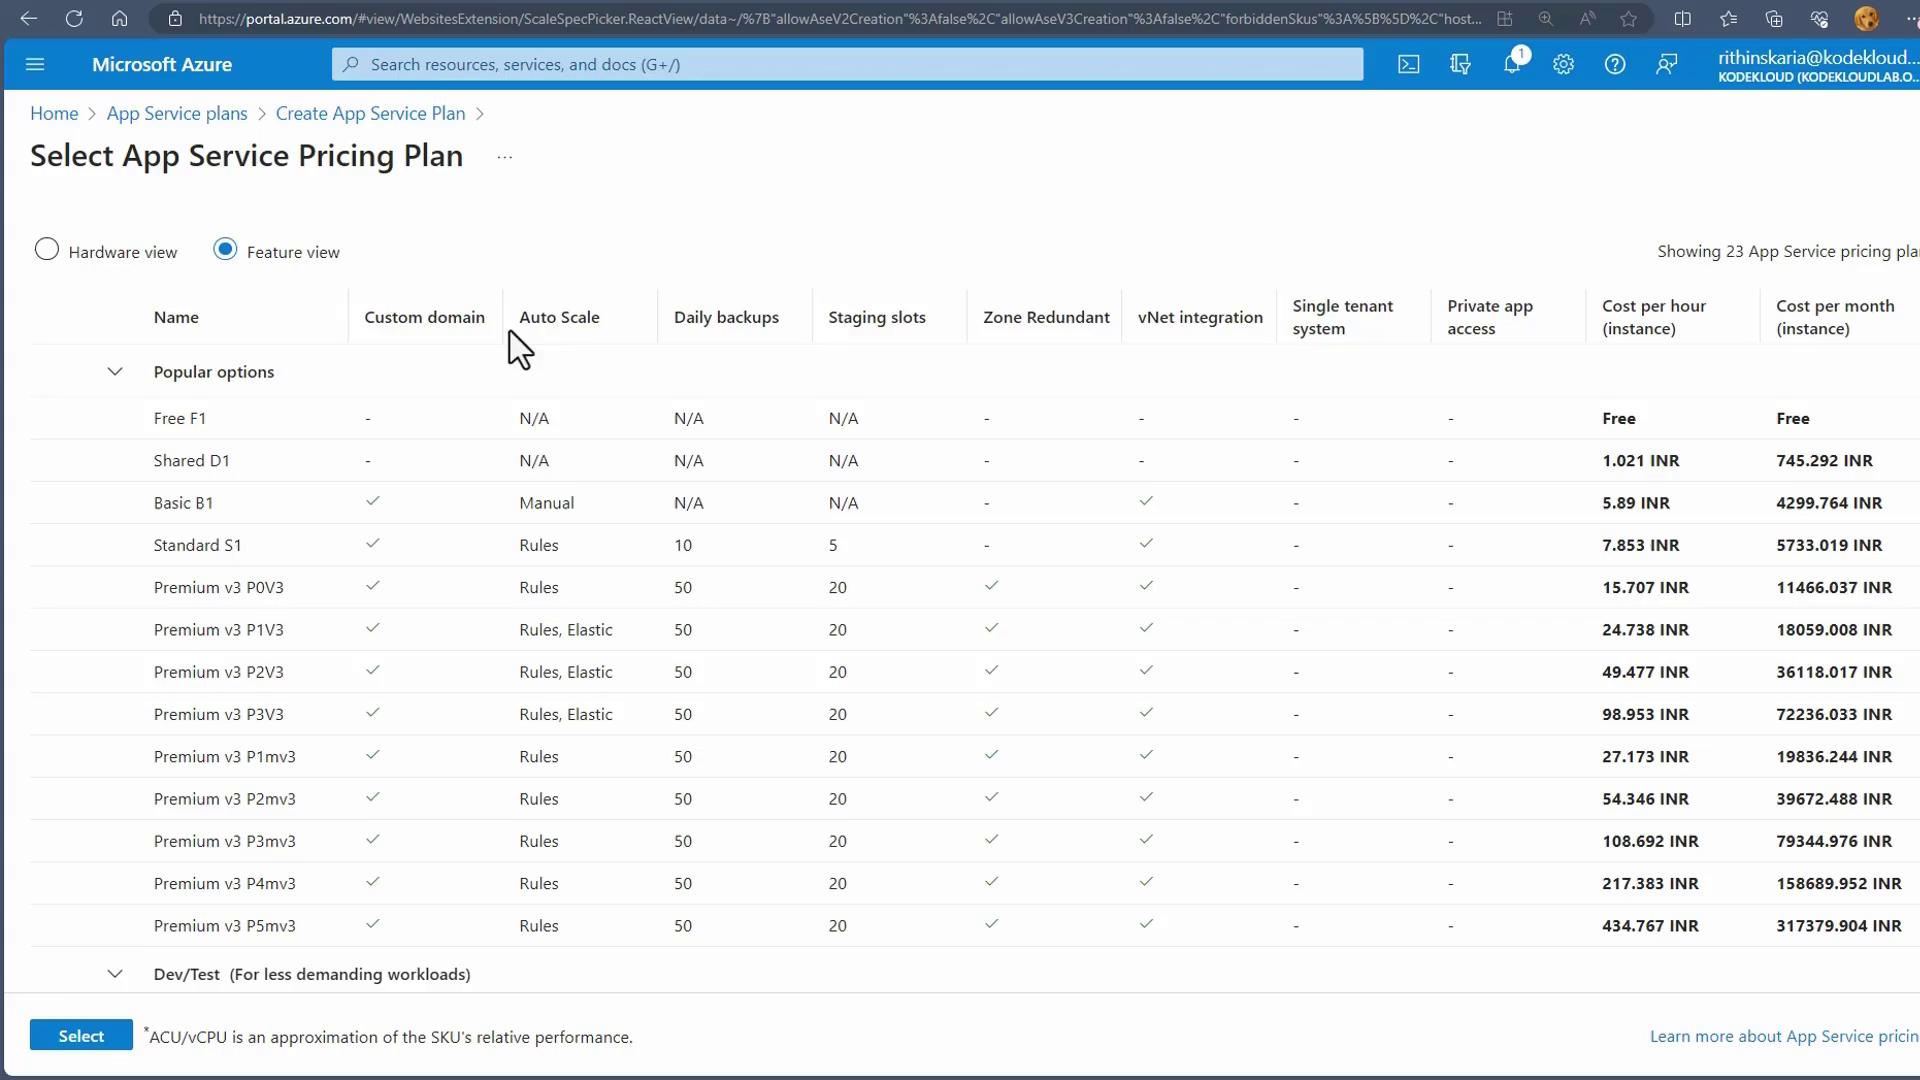
- Choose the operating system (select Windows in this example) and click on “Explore Pricing Plans” to view available options. Two views will be presented:
- A hardware view detailing the underlying infrastructure.
- A feature view listing capabilities such as custom domains, autoscaling, backups, staging slots, and zone redundancy.
- Select the Free tier (or another tier based on your requirements) and create the App Service Plan.
For the Isolated plan, note that it is deployed as an App Service Environment and requires native integration with a Virtual Network. During deployment, you must select a Virtual Network.