Overview
ASGs enable you to organize your VMs with similar security requirements into logical groups. For example:- VM1 and VM2, handling front-end duties, belong to an ASG named “web.”
- VM3, managing business logic, is grouped under “logic.”
- VM4, serving as the database, belongs to an ASG called “DB.”
Grouping VMs by application roles not only simplifies the creation of security rules but also enhances the overall manageability of your network security posture.
Practical Scenario
In a typical environment, all communication within the Virtual Network is allowed by default. Suppose you want to restrict internet access such that only the front-end VMs (VM1 and VM2) are accessible externally, while both the logic (VM3) and database (VM4) VMs remain protected from direct internet exposure. Additionally, you may need to ensure that the front-end VMs do not interact directly with the database — only the logic tier should have that privilege. Using ASGs, you can implement several NSG rules that reference these groups rather than managing each rule by individual IP addresses. This method simplifies rule creation and modification, especially as your network scales. Below is a network diagram illustrating this setup: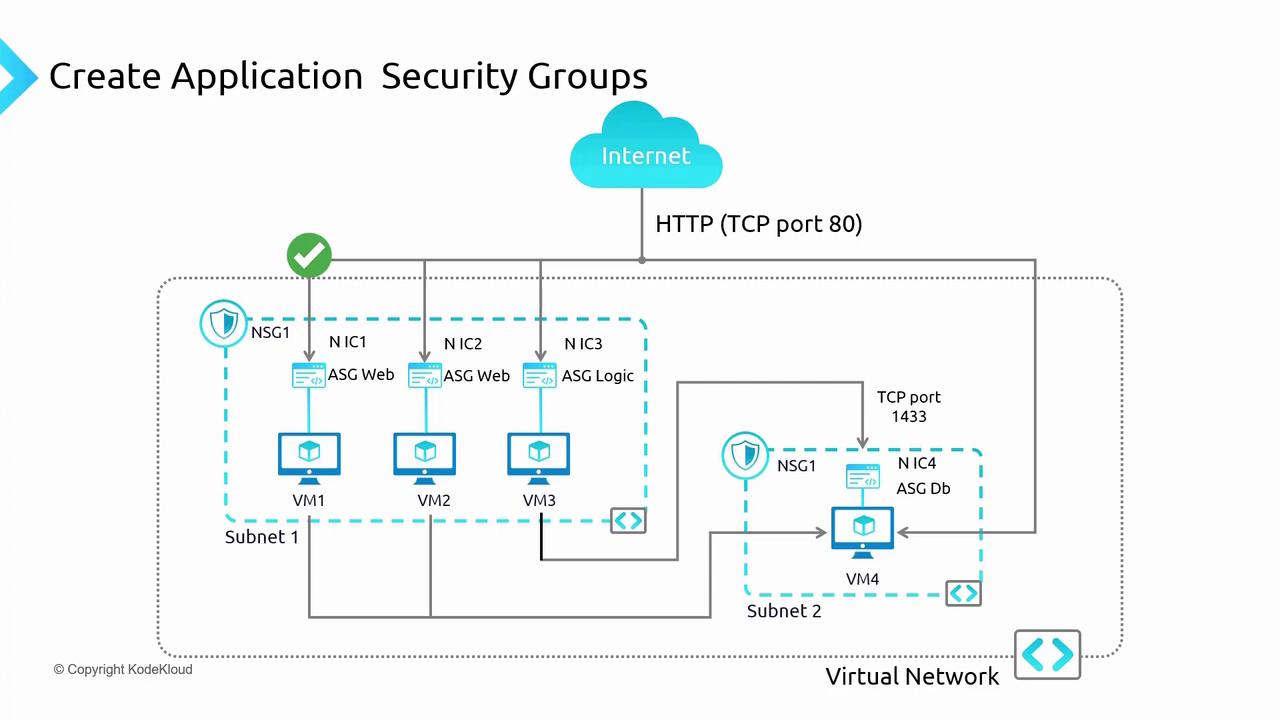
Configuring ASGs in the Azure Portal
The following steps outline how to configure ASGs using the Azure portal:-
Access the Virtual Machine Settings:
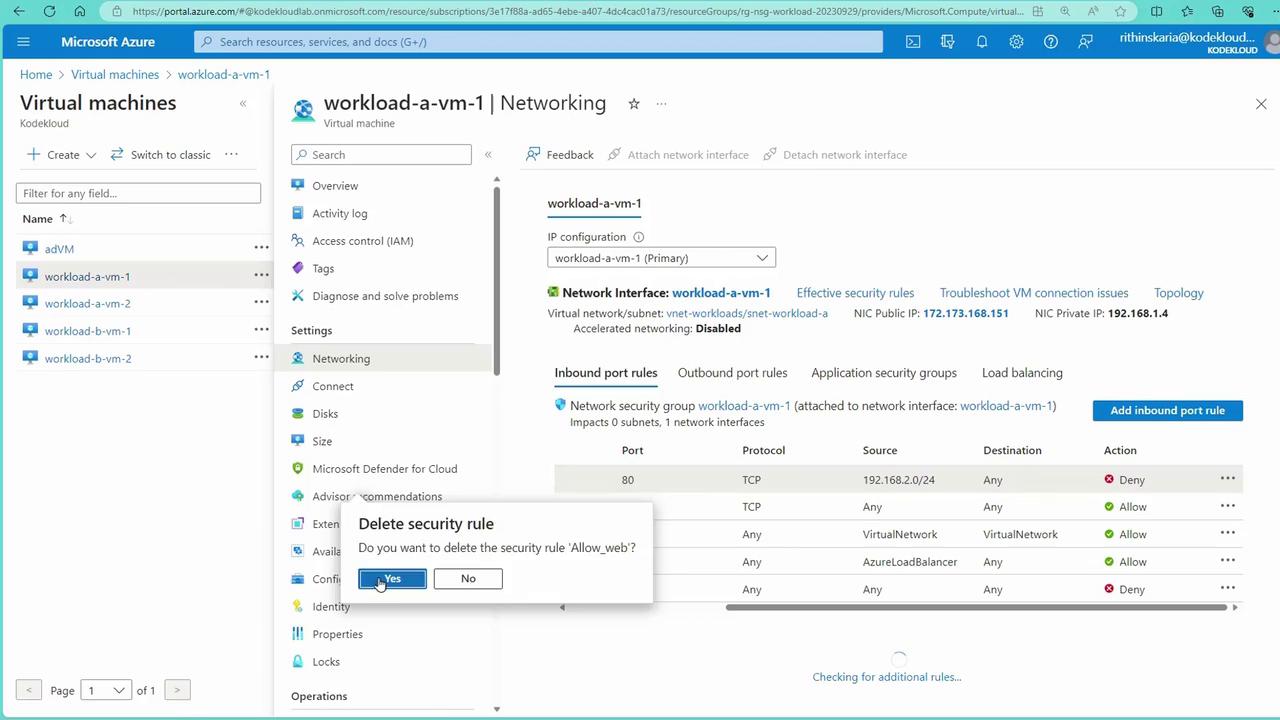
Begin by opening the networking settings for VM1. In this demonstration:
- Some predefined rules are temporarily removed to facilitate the setup.
- SSH is allowed from external sources on VM1.
-
Review Effective Security Rules:
ASGs work in harmony with NSGs applied at both the subnet and network interface controller (NIC) levels. When reviewing effective security rules:
- You may notice that a rule allowing SSH from one source could be overwritten by another that denies SSH at the subnet level.
- Ensure that conflicting NSG rules are disassociated from the subnet to maintain desired connectivity.
-
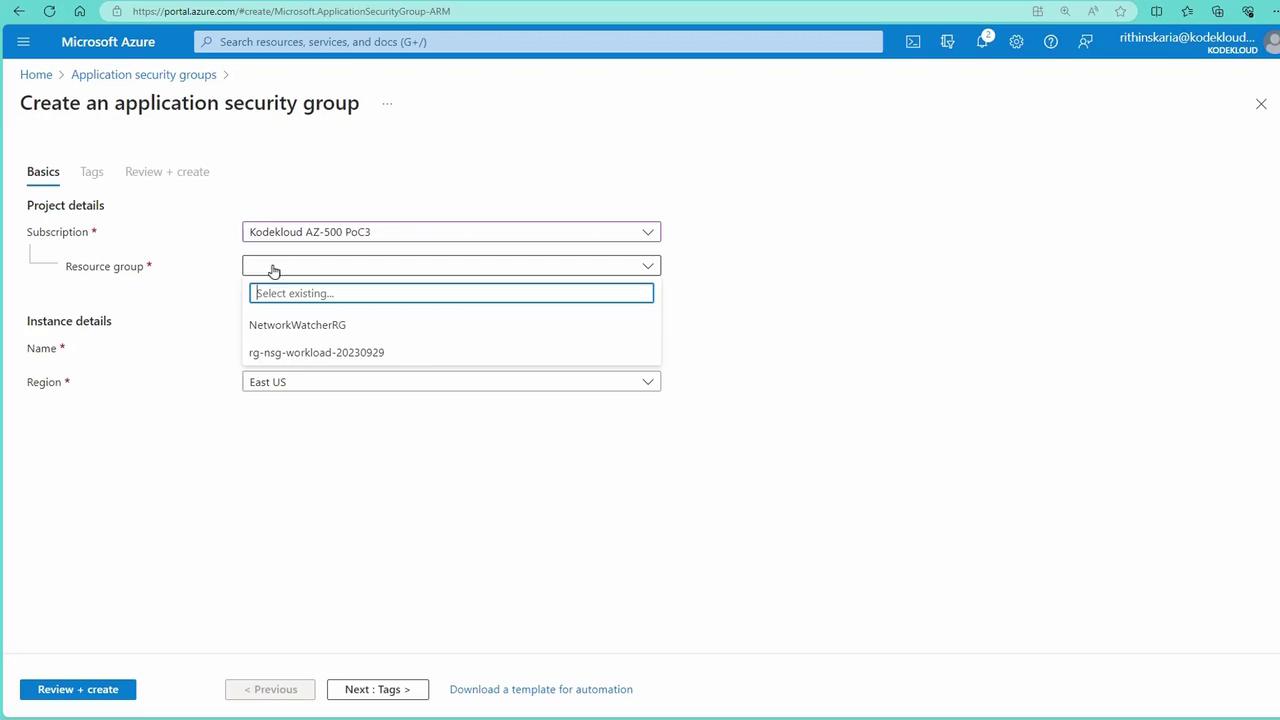
Creating Application Security Groups:
With your VMs already running web server workloads (from previous NSG configurations), create logical groups by following these steps:
- Navigate to the Application Security Groups section in the Azure portal.
- Create a new ASG — for instance, name it “VMs” for your web servers.
- Similarly, create another ASG for non-web VMs if required.
-
Assigning ASGs to Virtual Machines:
After creating the ASGs, assign them to the appropriate VMs by navigating to each VM’s networking settings. For example:
- In the “Networking” section of a non-web VM, locate the “Application Security Groups” area and assign the corresponding ASG.
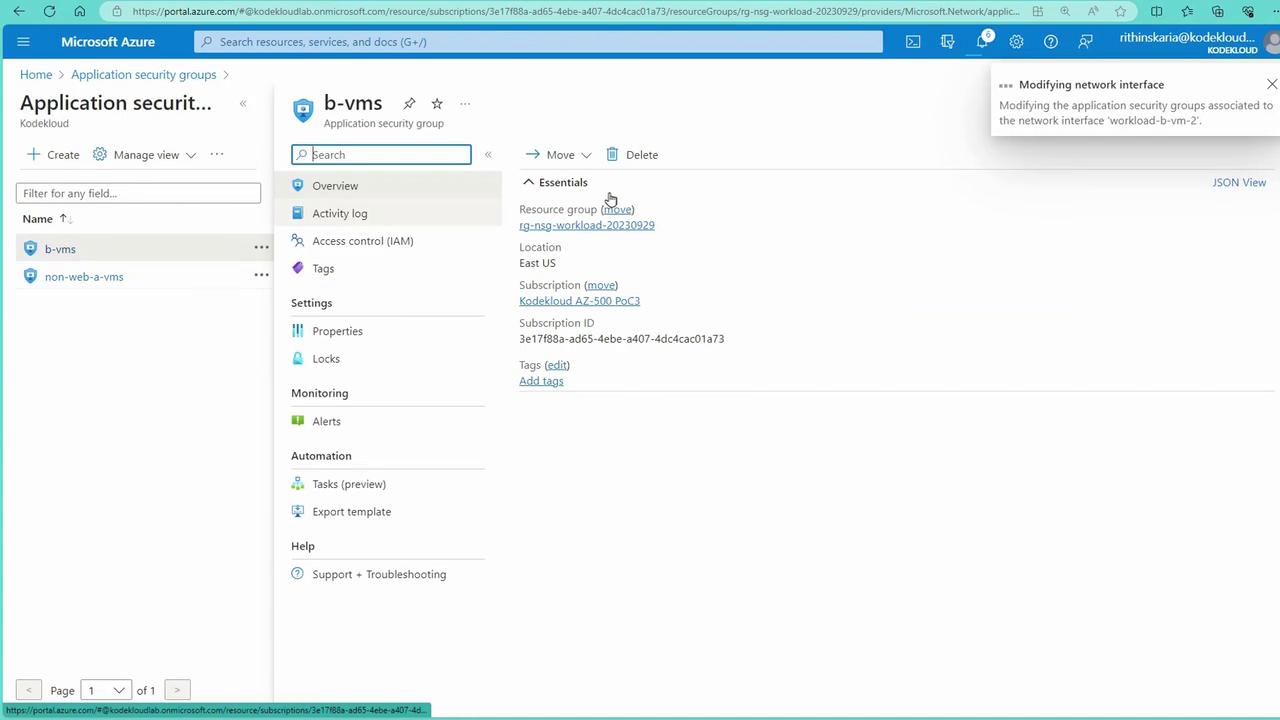
Although the Application Security Groups blade displays the groups, actual assignments and modifications occur from within each virtual machine’s configuration pane.
-
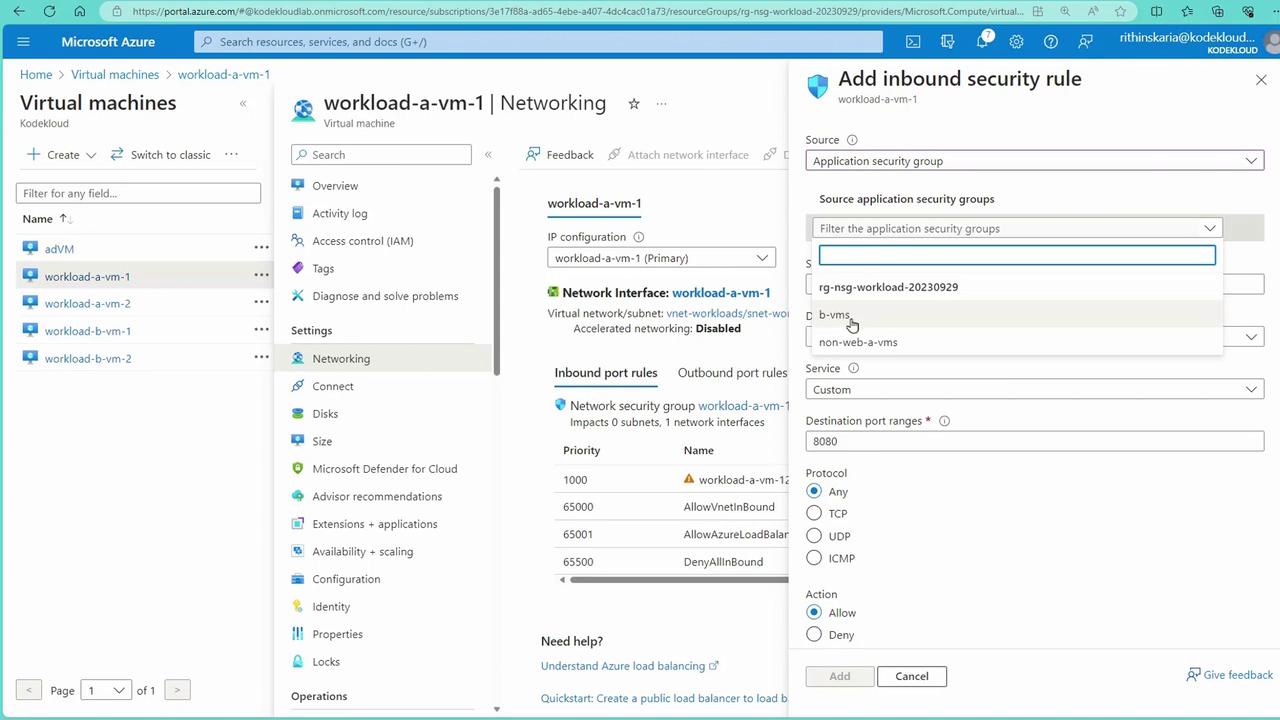
Creating Inbound NSG Rules Using ASGs:
To control traffic, create inbound NSG rules that reference your ASGs. For example, on VM1:
- Navigate to the networking settings and add an inbound security rule.
- Set the source to an Application Security Group (e.g., the ASG for front-end VMs).
- Specify the destination as a particular IP (e.g., 192.168.1.4) or any VM.
- Choose a service tag like HTTP or specify a custom port (e.g., port 80).
- Set the action to “Allow.”
Testing the Configuration
Once you have configured ASGs and NSG rules, testing the network setup is crucial to ensure proper security enforcement:- Establish an SSH connection into VM1.
-
Execute a connectivity test by using curl against the web server’s IP (e.g., 192.168.1.4):
- If VM1 is removed from the ASG that permits web server access, connectivity may still persist due to default virtual network allowances. To enforce a block, create a high-priority NSG rule (using a lower numerical priority value, such as 100) to deny the unwanted traffic. This ensures that once removed from the ASG, the VM will no longer access the web server.
Ensure that you test the connectivity after applying rule changes. Improper configurations might expose VMs to unintended access.
Benefits of Using ASGs with NSGs
Integrating ASGs with NSGs in Azure offers numerous advantages:-
Streamlined Management:
By referring to logical VM groups instead of individual IPs, rule management becomes more intuitive and less time-consuming. -
Enhanced Scalability:
ASGs allow you to manage a large number of VMs under common rules, supporting the growth and evolution of your network infrastructure. -
Simplified Security Administration:
The combined use of ASGs and NSGs reduces the complexity of managing network security, allowing for easier modifications and updates. -
Seamless Architecture Integration:
Whether your VMs span different subnets, virtual networks, or even subscriptions (connected via peering), ASGs and NSGs can be uniformly applied to maintain a cohesive security framework.