In this tutorial, you’ll learn how to create webhook subscriptions in Azure DevOps to automatically send build notifications to any HTTP endpoint. By the end, you’ll be able to trigger external workflows—such as custom dashboards, chat bots, or monitoring tools—whenever your pipeline completes.
What Is a Webhook? A webhook is an HTTP callback that enables one application to push real‐time event data to another service. Unlike polling, where you repeatedly check for updates, webhooks deliver payloads instantly when an event occurs.
Feature Polling Webhook Delivery Client-initiated fetch Server pushes data on events Latency Dependent on polling interval Near real-time Resource usage Higher network load Efficient, event-driven Configuration Requires scheduling logic Simple subscription in UI or API
Scenario Our project TestWeb hosts an ASP.NET Web API pipeline also named TestWeb . Whenever the pipeline succeeds, we want Azure DevOps to POST a JSON payload to a custom endpoint for further processing.
1. Open Service Hooks
In the lower-left, select Project Settings .
Click Service Hooks .
Choose + Create subscription .
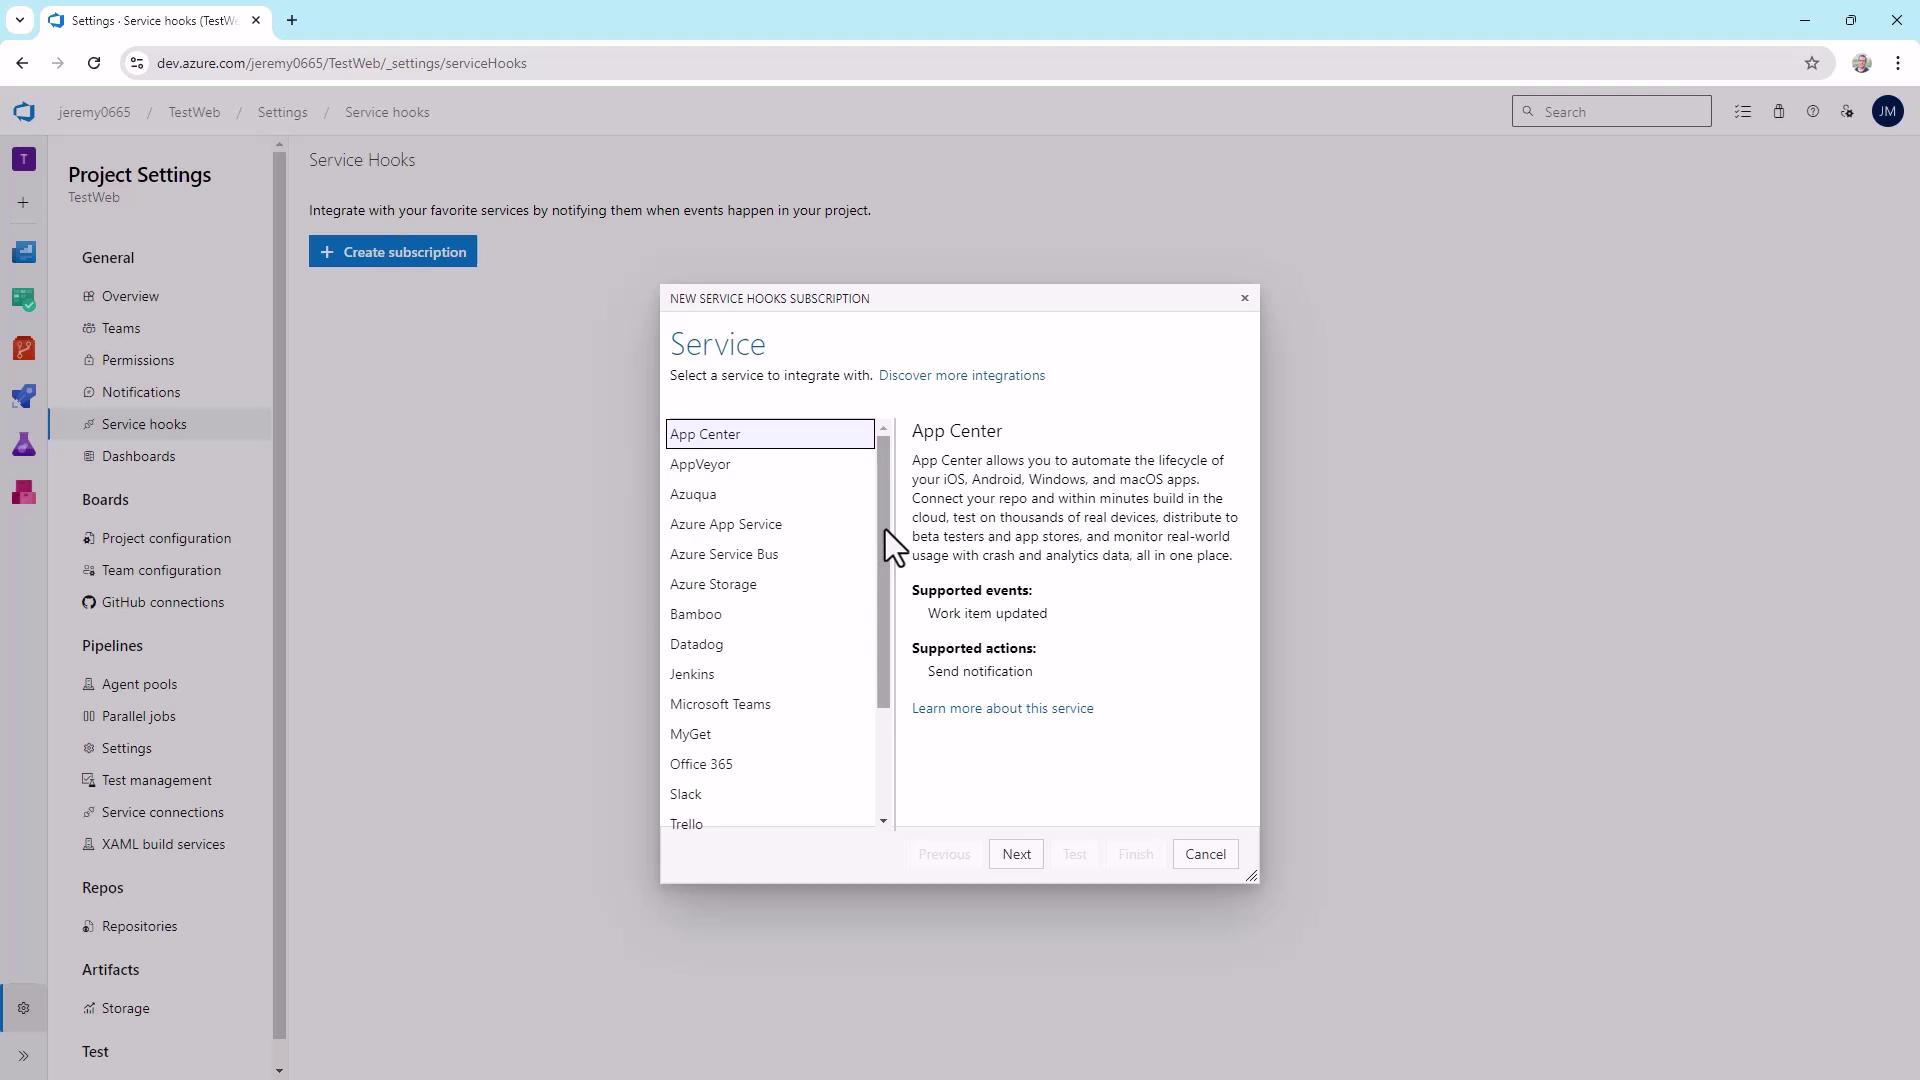
2. Choose the Webhooks Service
Scroll through the service list and select Webhooks .
Click Next .
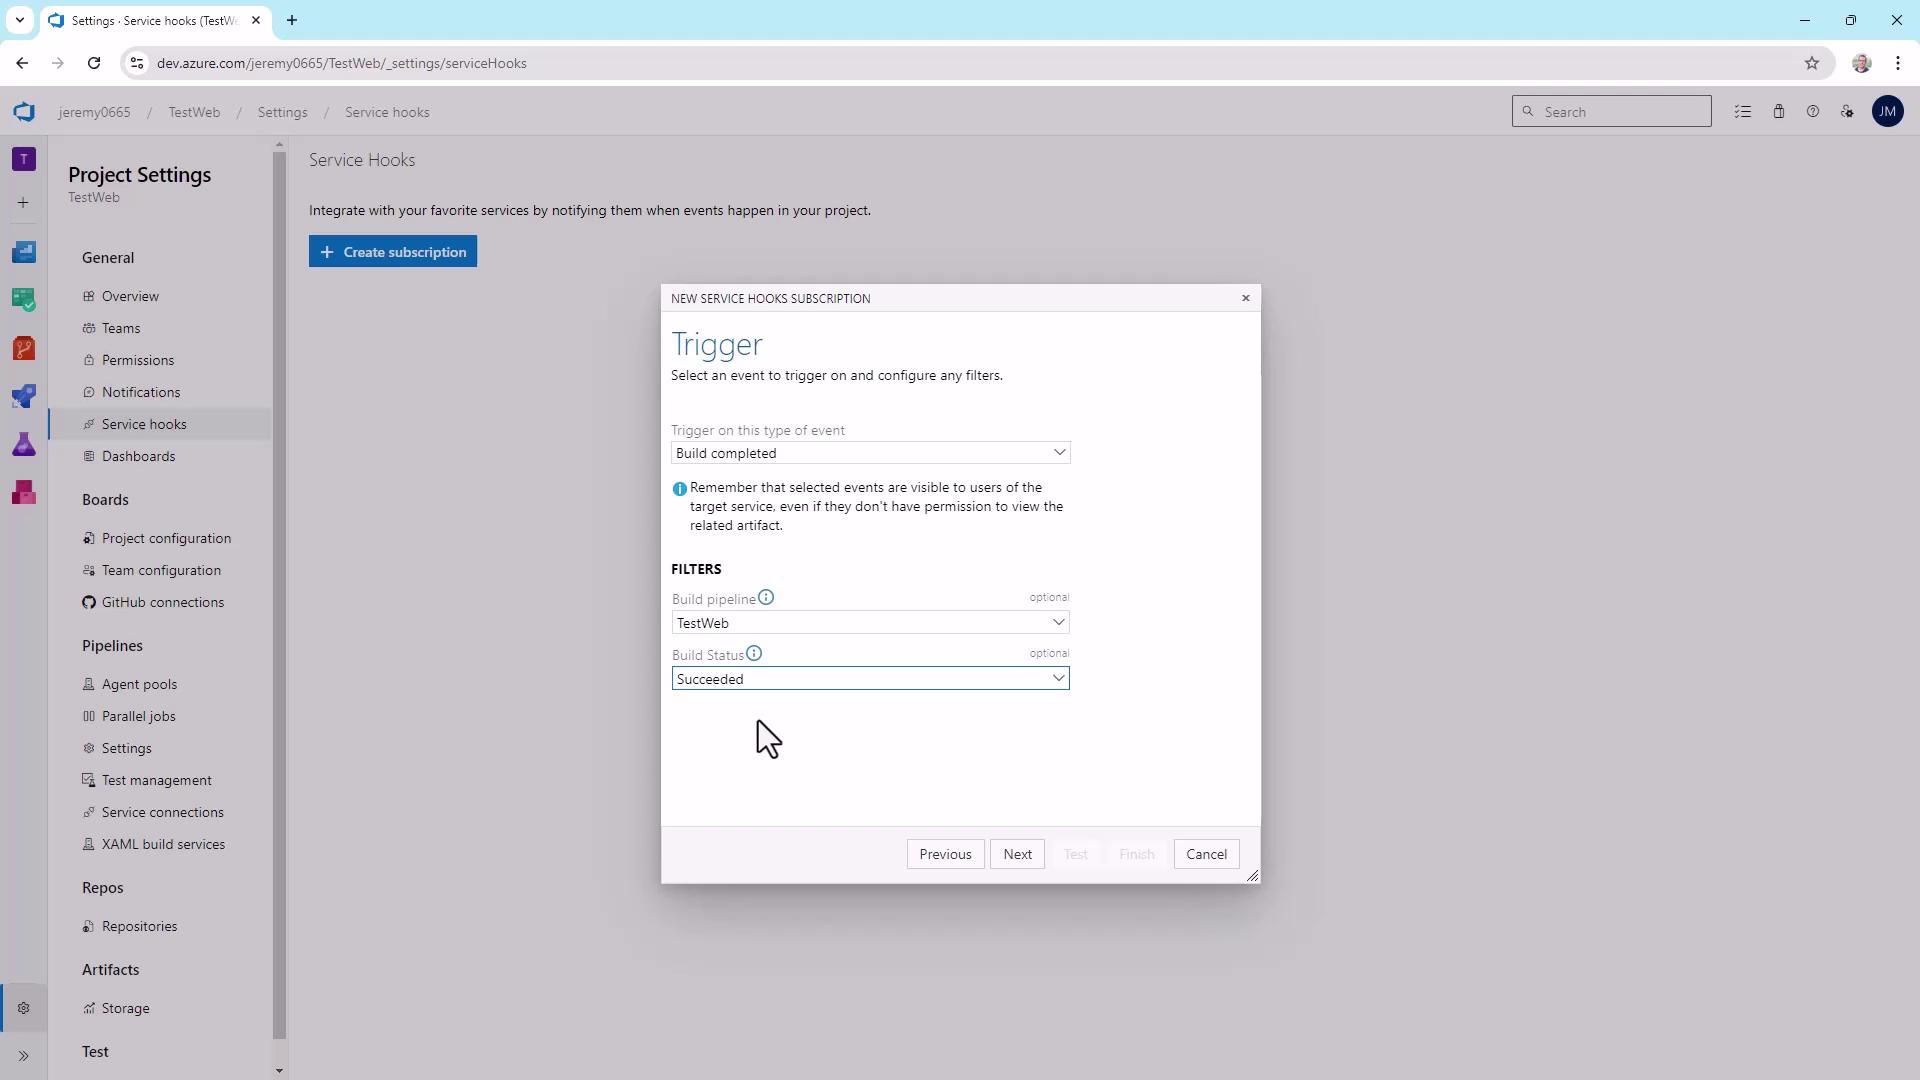
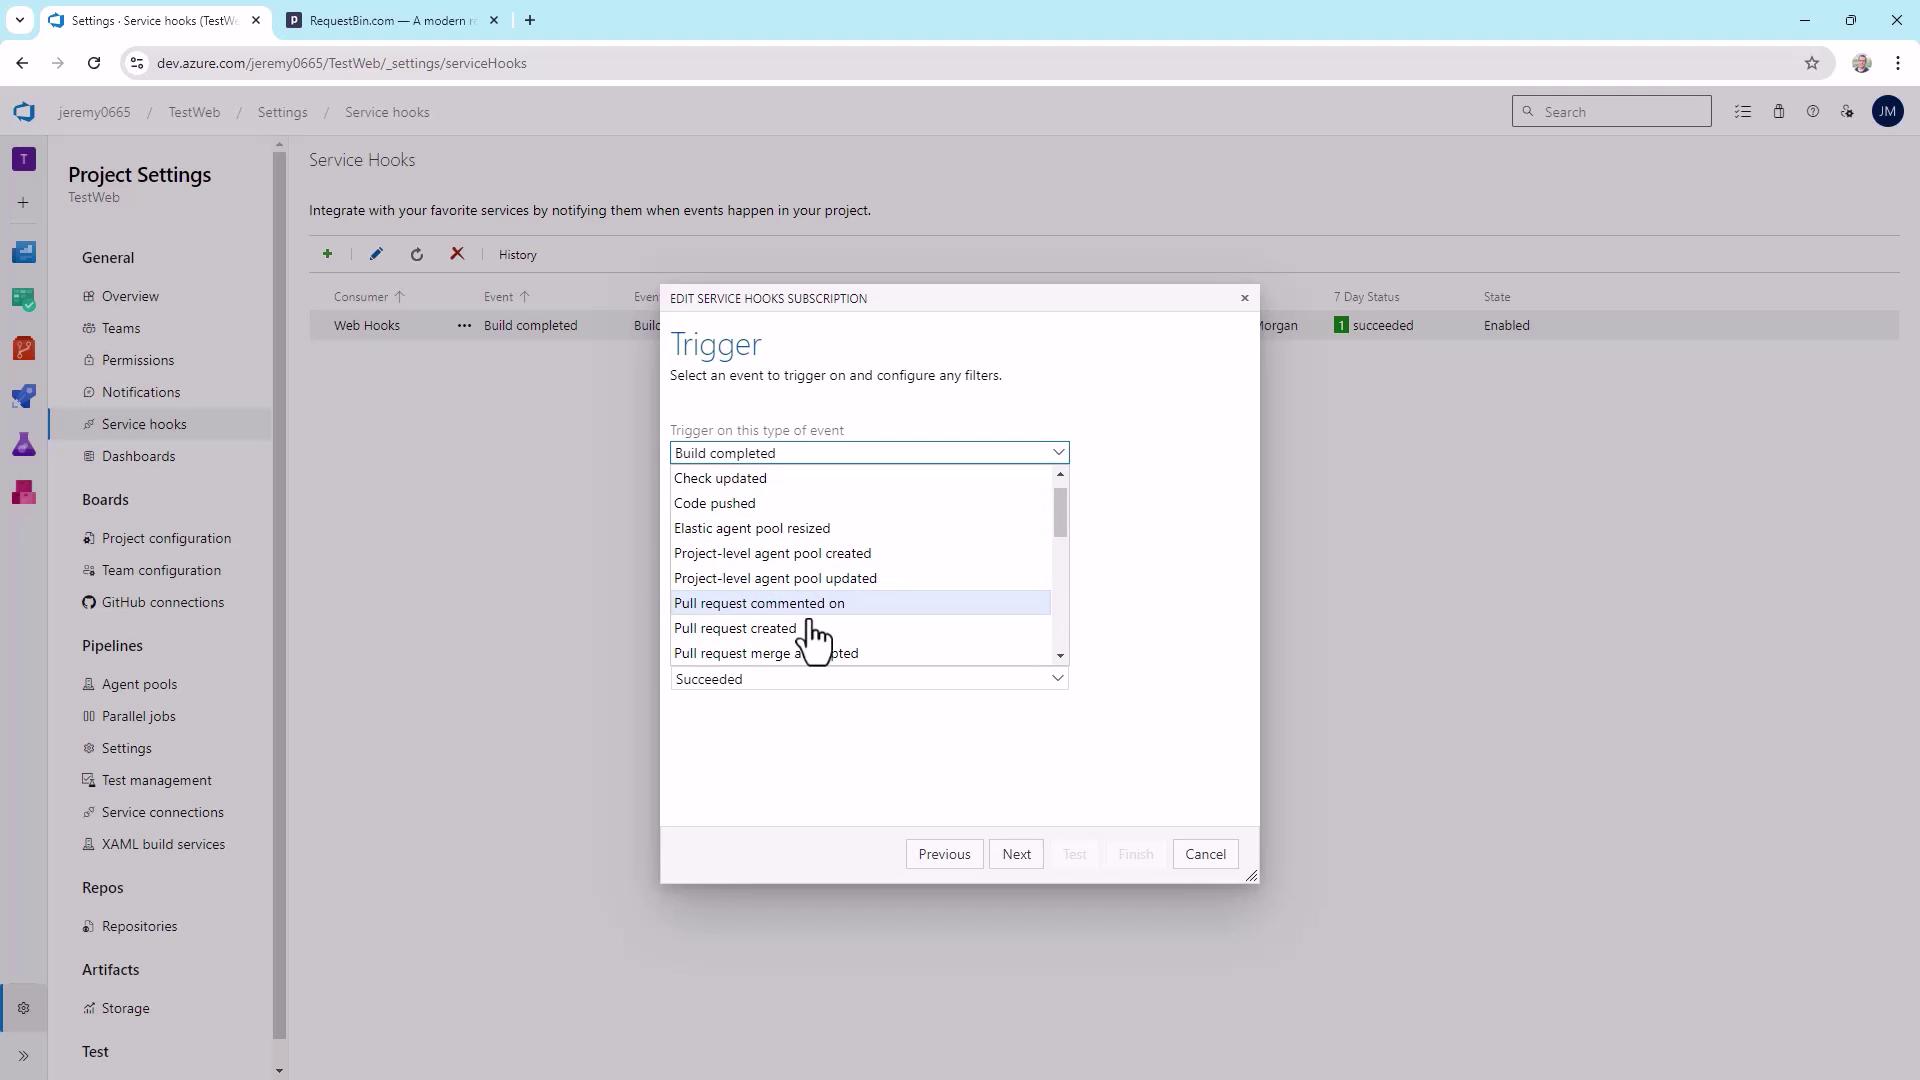
Under Trigger on this type of event , pick Build completed .
For Project , select TestWeb .
Restrict Build status to Succeeded .
Click Next .
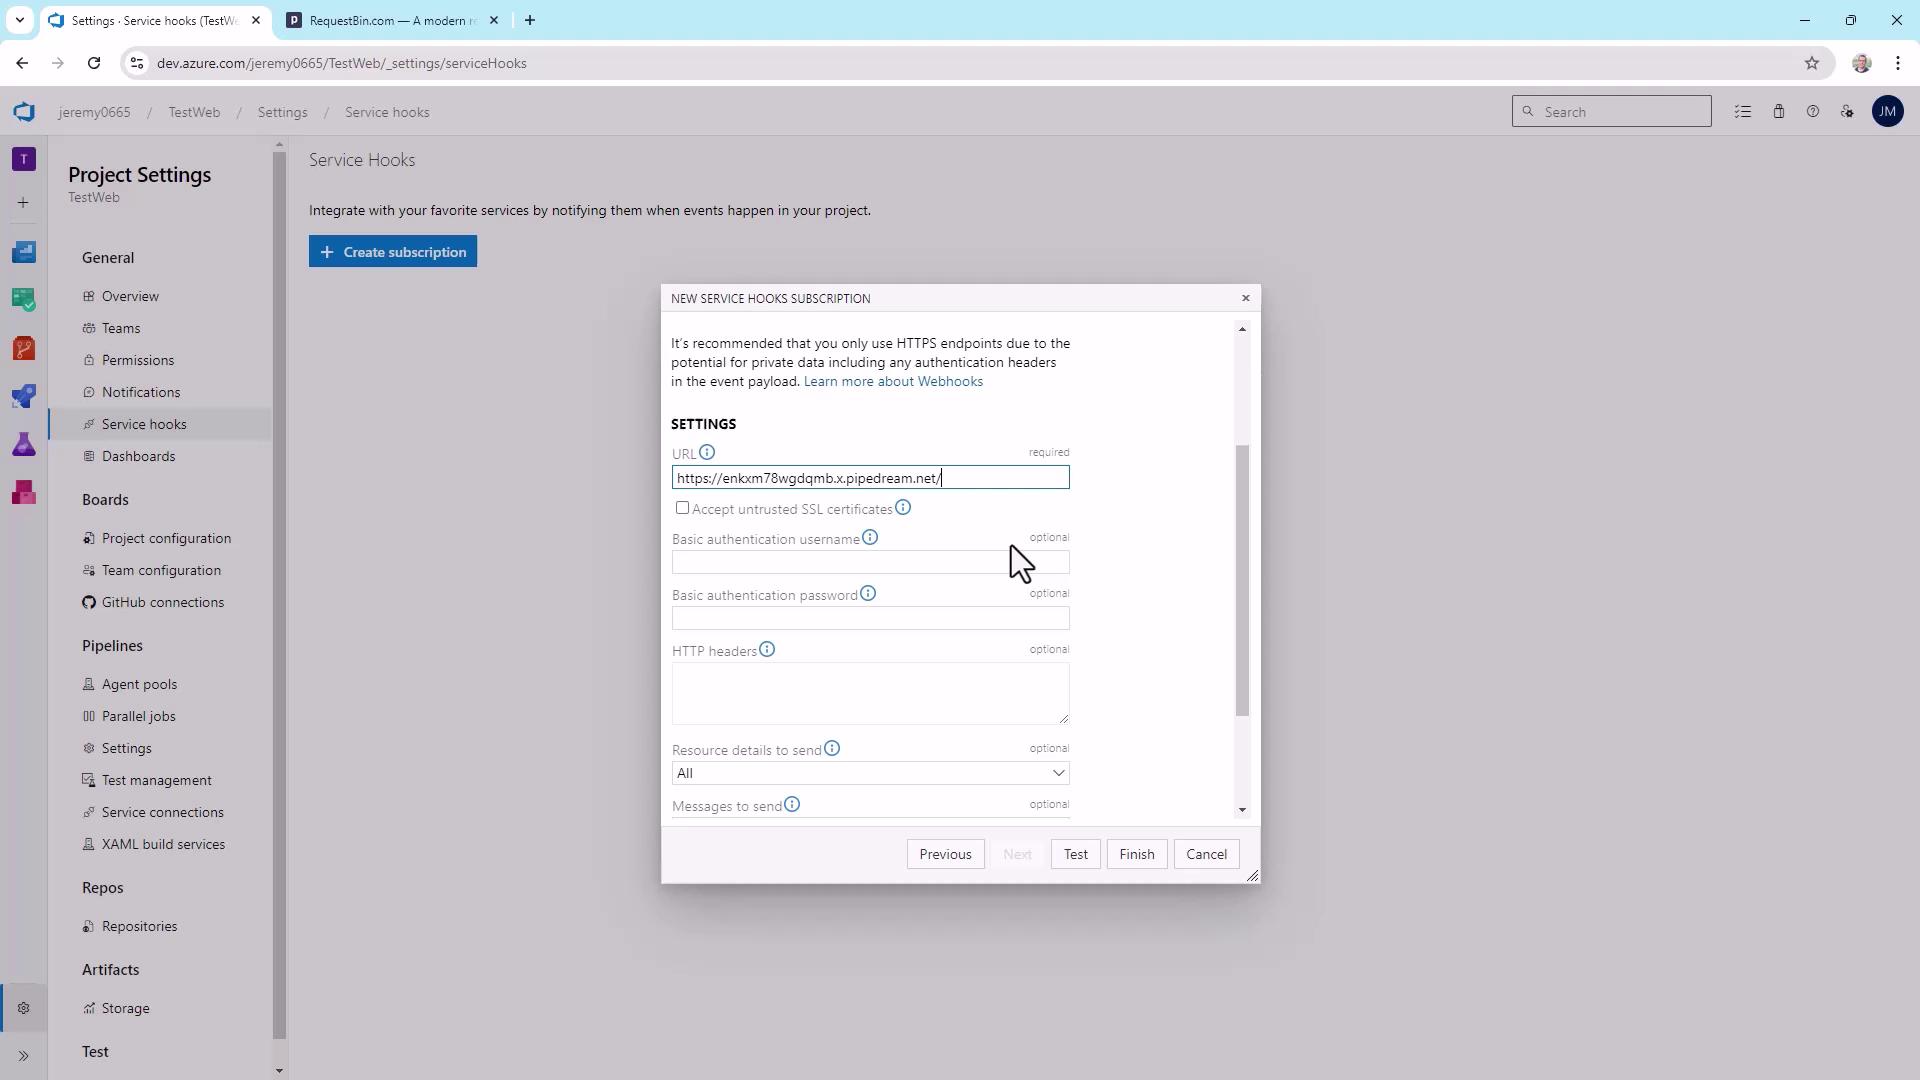
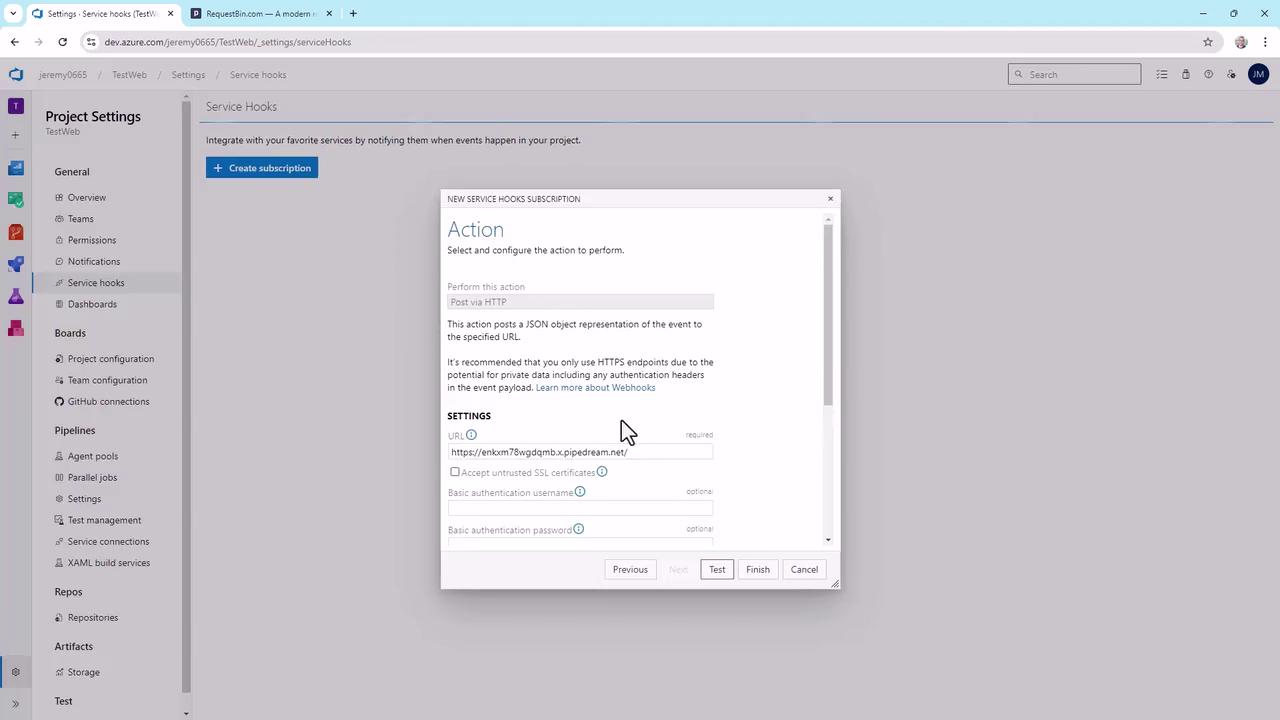
4. Define the Webhook Endpoint You can deliver to any HTTP(S) URL—public or private. For this demo, we’ll use RequestBin to capture and inspect the payload.
Option Description URL Endpoint to receive POST requests Accept untrusted SSL certificates Allow self-signed or on-prem certificates (use with caution) Authentication Basic auth credentials (visible to project users) HTTP Headers Custom headers (e.g., X-My-Header: value) Resource details Level of data: None, Minimal, All Message formats Payload formats: Text, HTML, Markdown
Enabling Accept untrusted SSL certificates is not recommended for public endpoints.
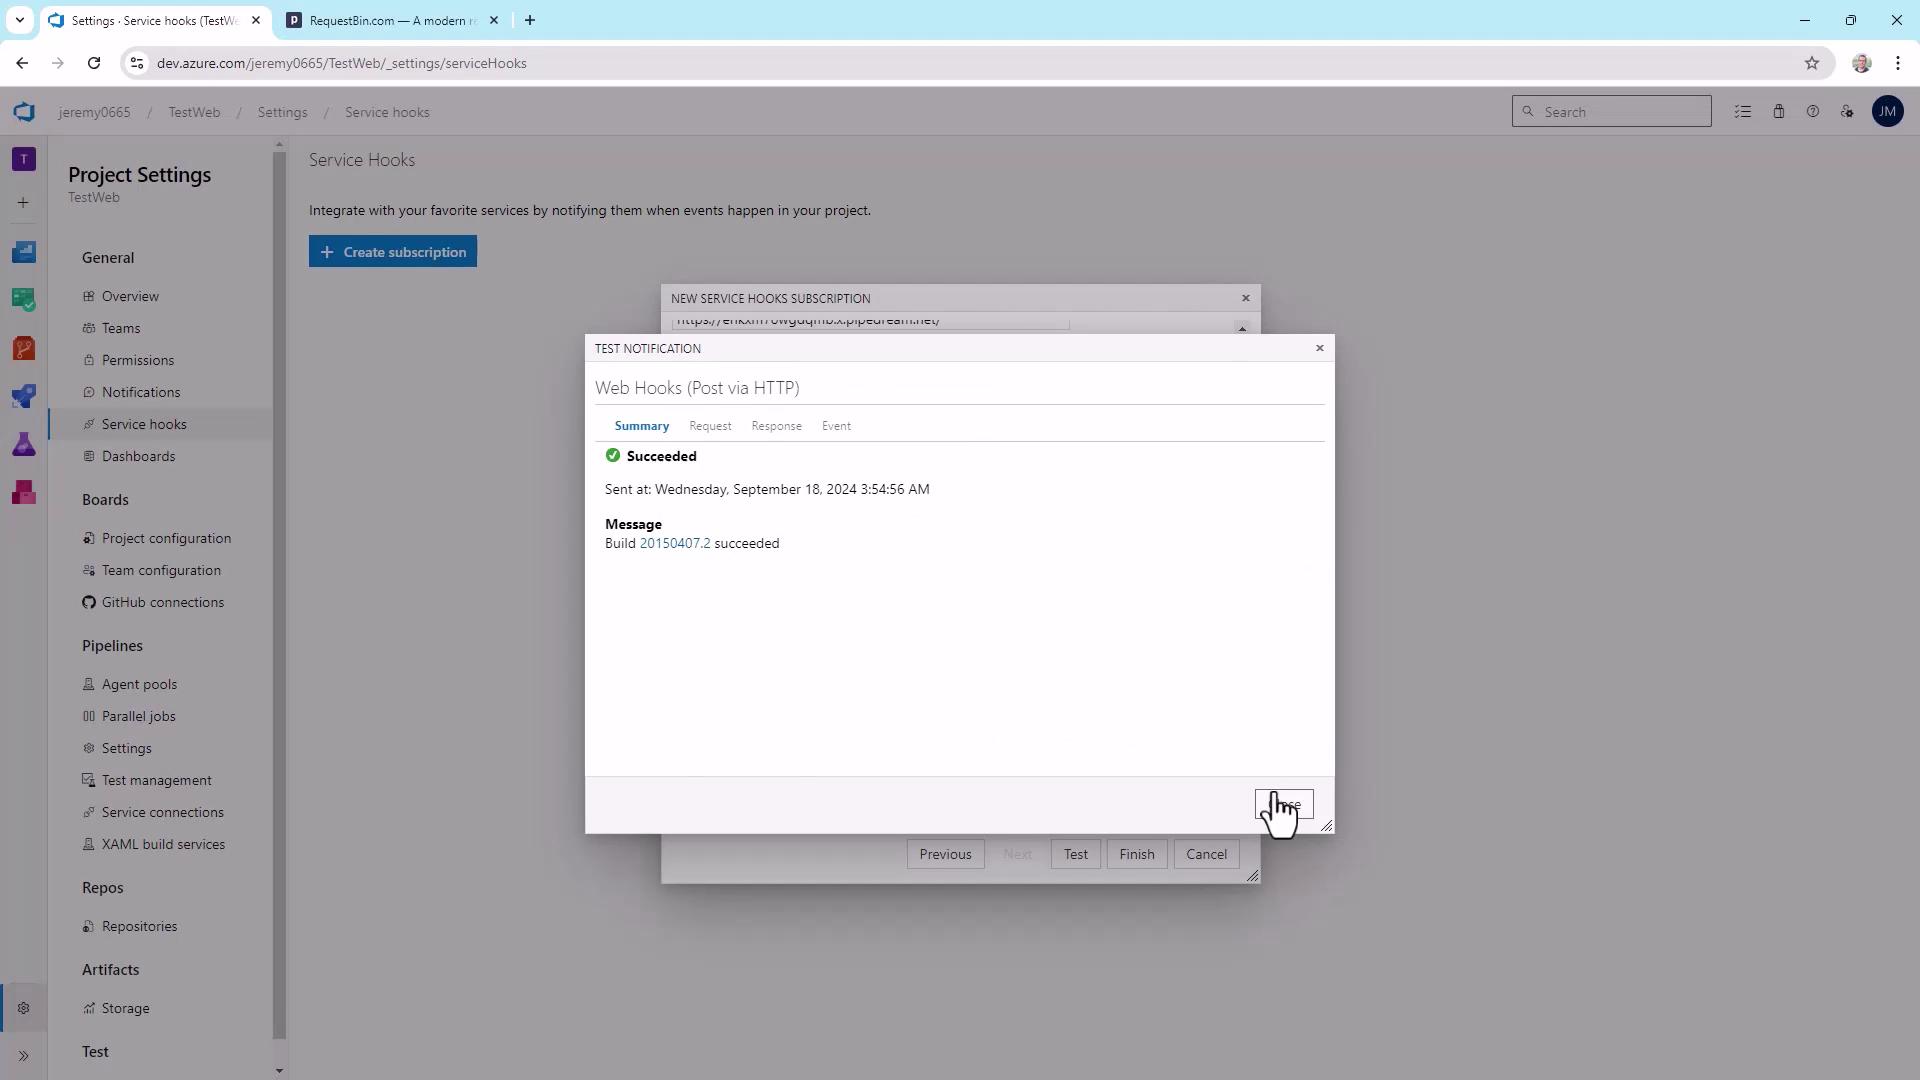
Once you enter your RequestBin URL and settings, click Test .
curl -d '{ "name": "Yoda" }' \ -H "Content-Type: application/json" \ https://enkmx78wgdqmb.x.pipedream.net/
A successful test displays a green checkmark:
5. Inspect the Sample Payload Choose All for resource details and message formats to see everything Azure DevOps sends:
{ "root" : { "subscriptionId" : "00000000-0000-0000-0000-000000000000" , "notificationId" : 7 , "eventType" : "build.complete" , "message" : { "text" : "Build 20150407.2 succeeded" , "html" : "Build <a href= \" https://fabrikam-fiber-inc.visualstudio.com/... \" >20150407.2</a>" , "markdown" : "Build [20150407.2](https://fabrikam-fiber-inc.visualstudio.com/...)" }, "resource" : { "id" : 1 , "buildNumber" : "20150407.2" , "status" : "completed" , "result" : "succeeded" , "definition" : { "id" : 1 , "name" : "CustomerAddressModule" } } } }
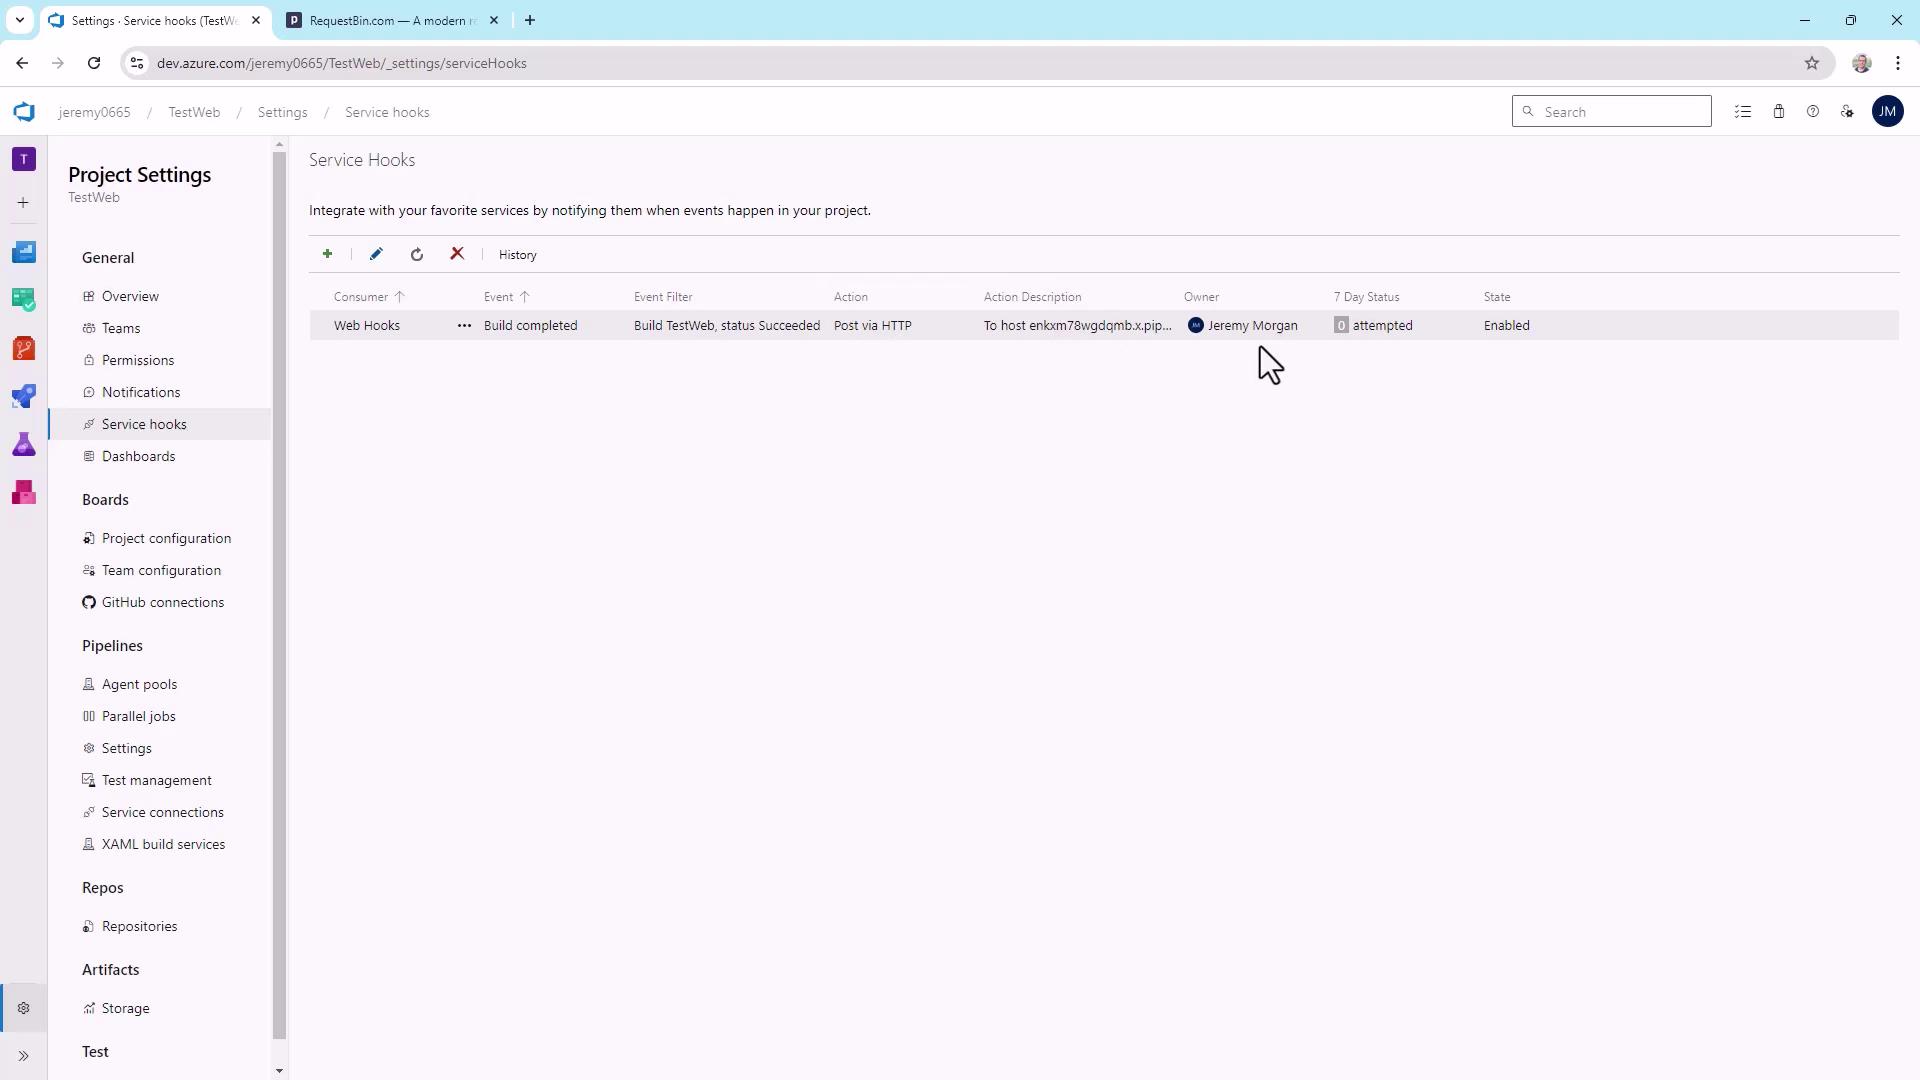
Click Finish to save your subscription.
Testing the Webhook in Real Time
Go to Pipelines > TestWeb .
Click Run pipeline (or Queue ).
After it succeeds, refresh your RequestBin URL to view the new POST payload.
Example of a real‐time payload:
{ "root" : { "notificationId" : 7 , "eventType" : "build_complete" , "message" : { "text" : "Build 20150407.2 succeeded" }, "resource" : { "id" : 1 , "status" : "completed" , "result" : "succeeded" } } }
In your pipeline logs, you’ll see:
Job Pool: KodeKloudCustomer Image: windows-latest Agent: KodeKloudAgent1 Started: Just now Duration: 22s
Editing or Creating Additional Subscriptions Return to Project Settings > Service Hooks at any time to:
Modify existing webhooks (e.g., trigger on pull requests).
Add integrations for Microsoft Teams , Slack , Trello , and more.
Build multiple subscriptions for custom apps.
Webhooks in Azure DevOps unlock powerful automation scenarios—experiment with different event types and endpoints to streamline your CI/CD workflows.
Links and References