1. Create a New Feed
- Navigate to your Azure DevOps project (e.g., Simple Converter).
- Click Artifacts in the left-hand menu.
- Select Create Feed.
- Enter a descriptive name (e.g., My Project Feed).
- Set visibility:
- Organization: Available across all projects.
- Project: Limited to the current project.
- (Optional) Add upstream sources such as public NuGet, npmjs.com, or crates.io.
- Click Create.
Tip: Use consistent naming conventions for feeds to simplify management and automation.
2. Configure Feed Settings
After creating the feed, click My Project Feed, then the gear icon to open Feed Settings.- Hide deleted package versions: Prevent re-use of deleted version numbers.
- Package sharing: Publish the latest version to a wiki or project homepage.
- Retention policies: Automatically remove old or unused packages.
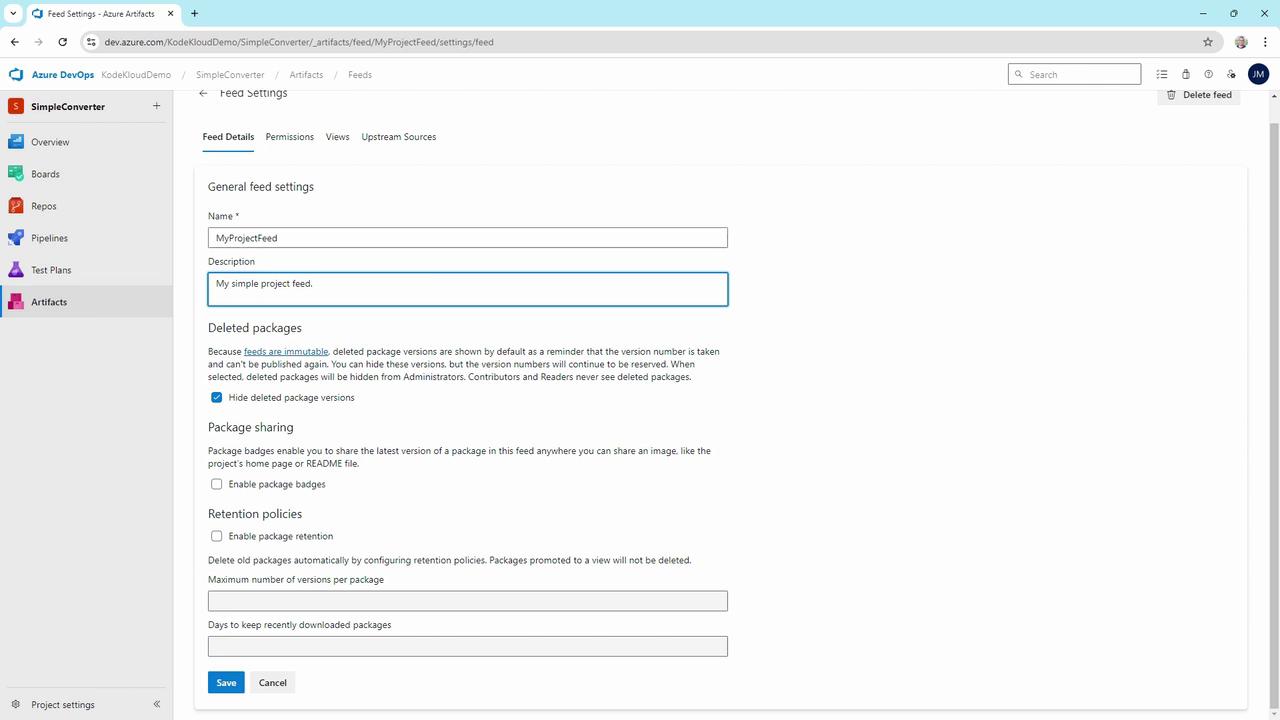
Once a package version is pushed to an immutable feed, its version number is permanently reserved. This ensures consistency for consumers who depend on that exact version.
3. Manage Permissions
Use the Permissions tab under Feed Settings to control who can view, publish, or manage the feed.| Role | Scope | Capabilities |
|---|---|---|
| Feed Owner | Project/Org | Full control: modify settings, upstream sources |
| Contributor | Project | Publish & consume packages |
| Collaborator | Project | Read-only access to consume packages |
| Reader | Project | Limited to listing and downloading |
- Click Permissions.
- Select Add users/groups.
- Assign the appropriate role (e.g., Contributor for package authors).
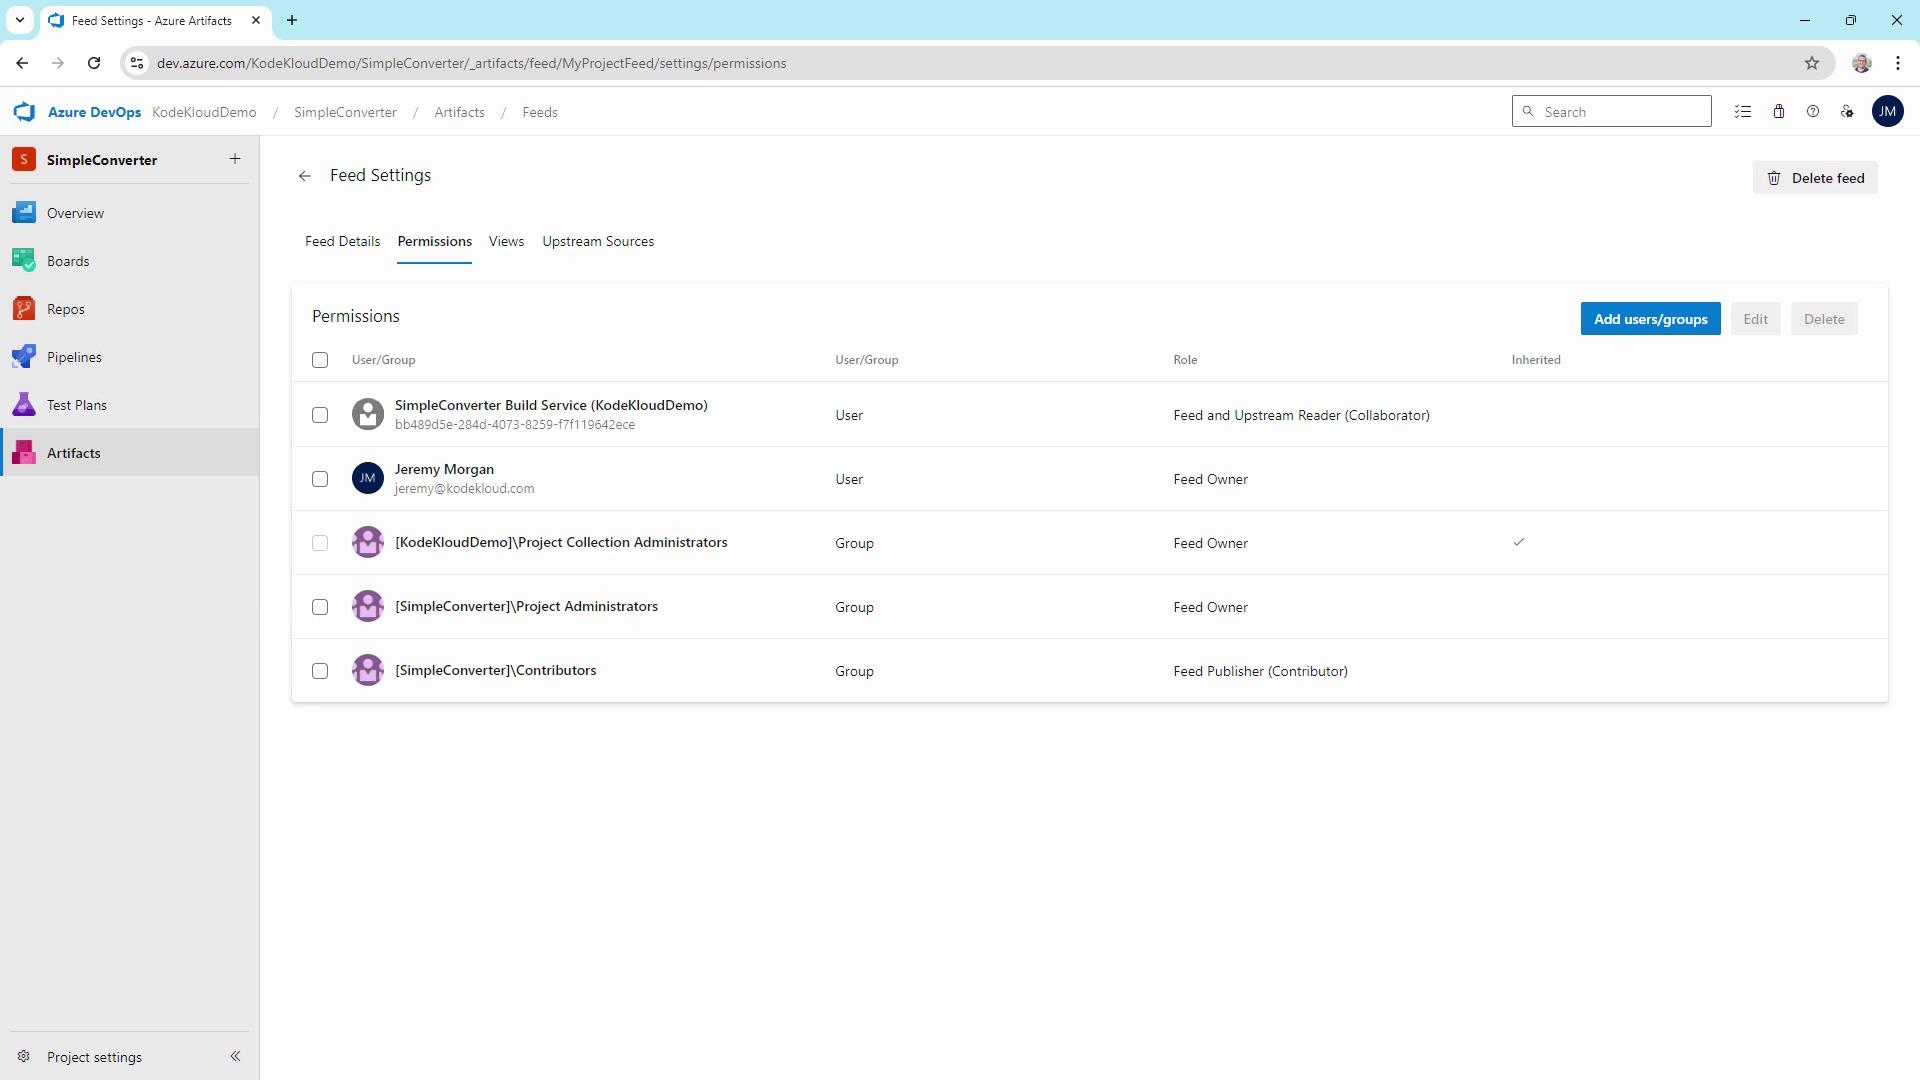
Grant the minimum required permissions. Avoid giving Feed Owner rights unless management tasks are necessary.
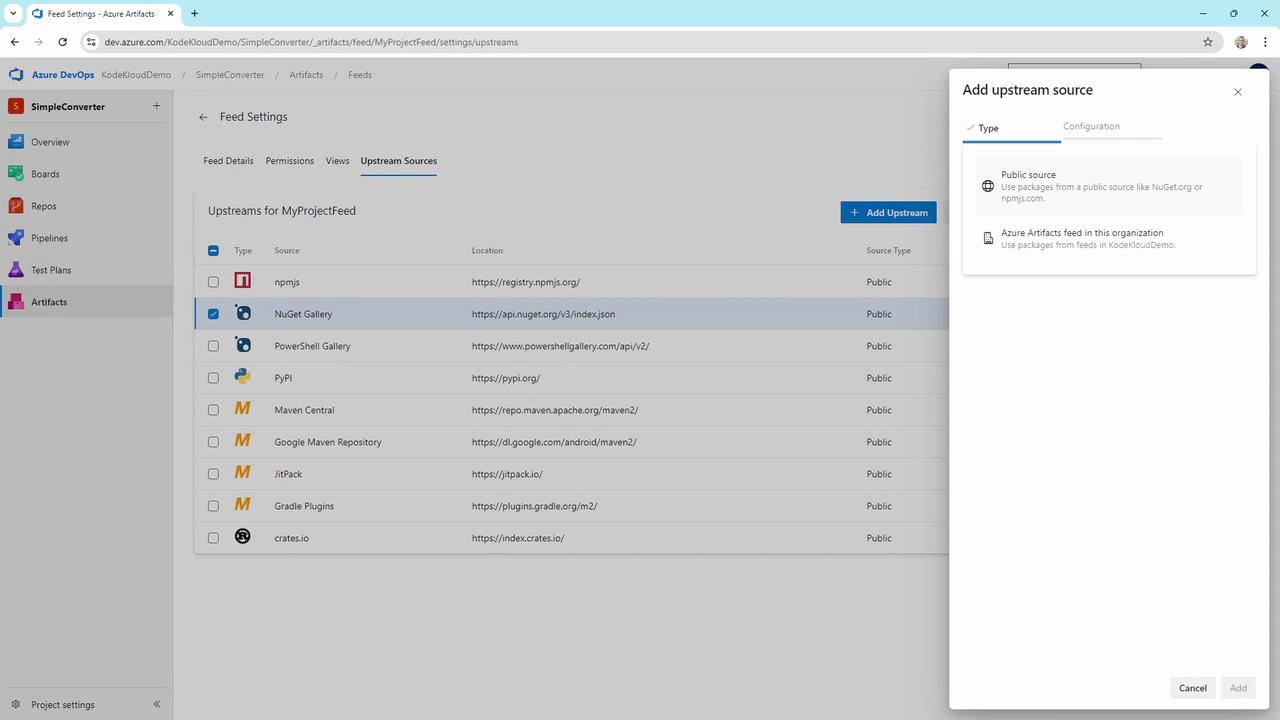
4. Add Upstream Sources
Upstream sources allow caching and proxying of public or internal feeds:- Go to Upstream Sources.
- Select built-in public feeds such as NuGet.org, npmjs.com, or crates.io.
- (Optional) Add other Azure Artifacts feeds or custom registry URLs.
- Click Add.
5. Publish a NuGet Package
a) Create and Pack the Library
In Visual Studio:- Create a new Class Library project.
- Add a calculator class:
- Right-click the project → Pack.
- Confirm
Kalculator.1.0.0.nupkgis generated inbin/Debug.
b) Connect Visual Studio to Your Feed
- In Azure DevOps, click Connect to feed and copy the NuGet source URL.
- In Visual Studio:
- Tools → Options → NuGet Package Manager → Package Sources
- Click +, name it My Project Feed, and paste the URL.
- Click Update and OK.
c) Push the Package
Use the NuGet CLI:Replace
<Your-PAT> with a valid Azure DevOps Personal Access Token that has Packaging (Read & write) scope.6. Publish a Universal Package via Azure CLI
Universal Packages are ideal for scripts, binaries, or any non-NuGet artifacts.- Install the Azure DevOps CLI extension.
-
Authenticate:
-
Publish the package:
7. Verify Your Feed
Return to Artifacts → My Project Feed. You should see:Kalculator1.0.0 (NuGet package)my-first-package0.0.1 (Universal Package)
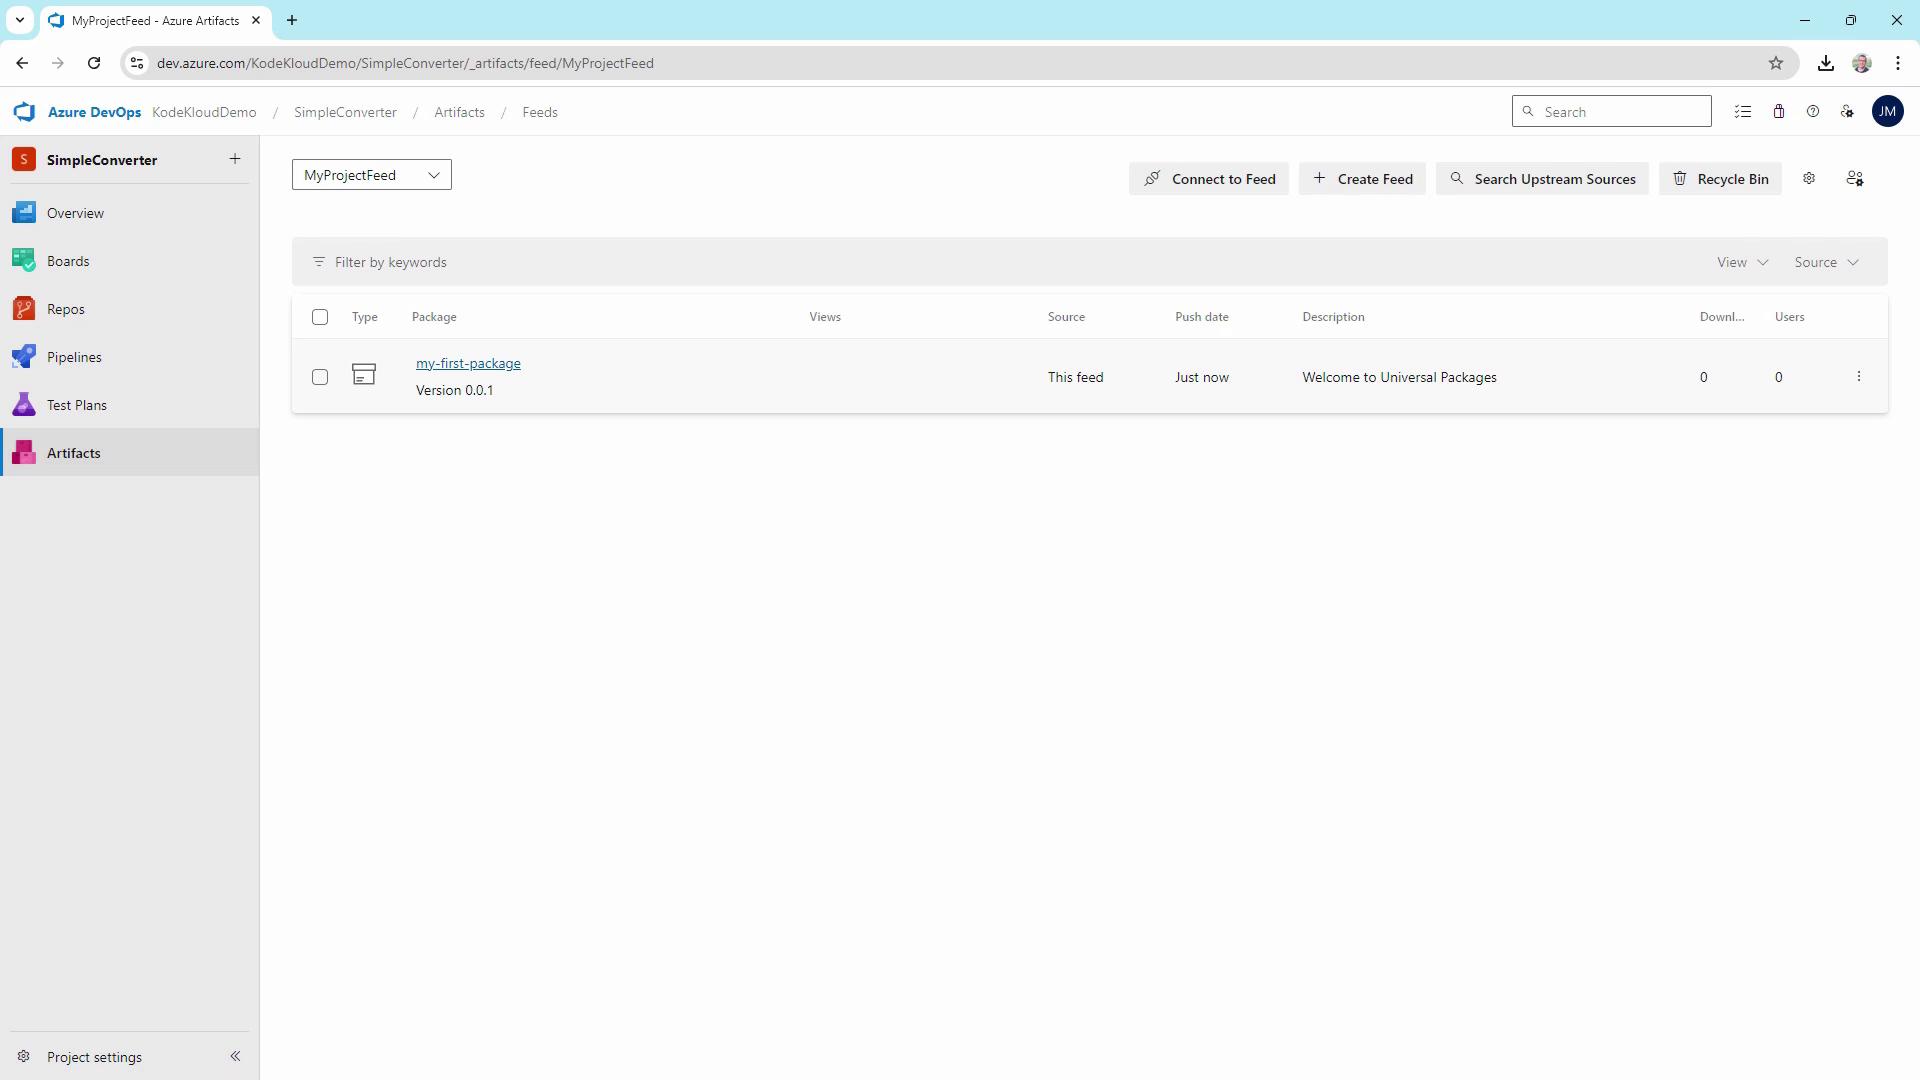
By following these steps, you now have a fully functional private feed in Azure DevOps Artifacts. Use it to securely share reusable libraries and assets across your teams.